Advertisement
Quick Links
SKU# 1008962820 1008926738 1008962368
Model #CF2003-W, CF2003-B, CF2003-N
USE AND CARE GUIDE
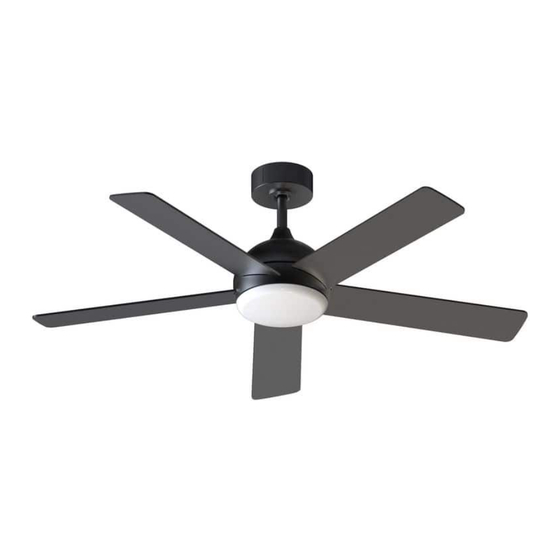
CARLEY 52-INCH SMART CEILING FAN
Questions, problems, missing parts? Before returning to the store,
call Home Decorators Collection Customer Service
8 a.m. - 7 p.m., EST, Monday-Friday, 9 a.m. - 6 p.m., EST, Saturday.
1-800-986-3460
HOMEDEPOT.COM/Hubspace
THANK YOU
to continually create quality products designed to enhance your home. Visit us online to see our full line of products available for your home
improvement needs. Thank you for choosing Home Decorators Collection!
Advertisement

Subscribe to Our Youtube Channel
Related Manuals for Home Decorators Collection CARLEY CF2003-W


Summary of Contents for Home Decorators Collection CARLEY CF2003-W
- Page 1 8 a.m. - 7 p.m., EST, Monday-Friday, 9 a.m. - 6 p.m., EST, Saturday. 1-800-986-3460 HOMEDEPOT.COM/Hubspace THANK YOU to continually create quality products designed to enhance your home. Visit us online to see our full line of products available for your home improvement needs. Thank you for choosing Home Decorators Collection!
-
Page 2: Table Of Contents
Table of Contents Table of Contents ..............2 Assembly................7 Safety Information ............... 2 Operation ................13 Warranty ................3 Care and Cleaning............. 16 Pre-Installation ..............5 Troubleshooting..............17 Installation................6 WARNING: To reduce the risk of personal injury, do not bend the blade brackets (also referred to as 1. -
Page 3: Safety Information
"wobble" is normal and should not be considered a defect. Servicing performed by unauthorized persons shall render the warranty invalid. There is no other express warranty. Home Decorators Collection hereby disclaims any and all warranties, including but not limited to those of merchantability and tness for a particular purpose to the extent permitted by law. -
Page 4: Pre-Installation
Pre-Installation SPECIFICATIONS Gross Size Speed Volts Amps Watts Cu. Ft. Weight Weight 1700 0.06 2300 0.08 3100 0.12 52 in. 14.77bs 20.06lbs 1.993 3700 0.17 (6.7kg) (9.1 kg) 4600 0.27 5500 NOTE These are approximate measures. They do not include the amps and wattage used by the light kit. TOOLS REQUIRED 5003280 Phillips... - Page 5 Pre-Installation (continued) ON / OFF ON / OFF 6 SPEED BRIGHTNESS BREEZE COLOR TEMP. TIMER SUMMER WINTER FAN DIRECTION HOLD 3 SEC. Part Description Quantity Part Description Quantity Mounting bracket LED module Plastic shade Canopy Canopy cover Blade Hanger ball (preassembled) Remote control receiver Remote control Downrod (preassembled)
-
Page 6: Installation
Installation MOUNTING OPTIONS Hanger Bar WARNING: personal inju ry, mount to outlet box marked “A cceptable for fan suppor t of 35 lbs. (15.9 kg) or less”, and use screws provided with the outlet box. An outlet box not be acceptabl e for fan supp ort and may need to be Outlet Box If your ceiling fan does not have an existing UL-listed outlet box, then install one using the following instructions:... - Page 7 Assembly - Hanging the Fan Install the mounting bracket to the Attaching the downrod to the fan outlet box motor assembly □ Loosen the two fan motor assembly coupling set screws To reduce the risk of fire, electric shock, or other WARNING: (QQ) from the fan motor assembly (G) coupling.
-
Page 8: Assembly
Assembly - Hanging the Fan (continued) Hanging the fan motor assembly to the Attaching the coupling cover, and canopy to the downrod mounting bracket □ Slip the coupling cover (F), canopy cover (C) and canopy (B) □ Lift the fan motor assembly (G) into position, and place onto the downrod (E). - Page 9 Assembly - Hanging the Fan (continued) This side up Making the electrical connections WARNING: To avoid possible electrical shock, ensure the electricity is turned off at the circuit breaker or main fuse box before wiring. Figur WARNING: Check to see that all connections are tight, including the ground, and that no bare wire is visible at the wire nuts, except for the ground wire.
- Page 10 Assembly - Hanging the Fan (continued) Securing the canopy to the mounting Install the blades bracket □ Remove all blade screws (GG) from the rotary plate (SS) of fan-motor □ Loosen two mounting bracket screws ( RR) away from the assembly (G).
- Page 11 Assembly - Hanging the Fan (continued) Install the light housing Install the LED module □ □ Remove 3pcs pre-installed screws from the inside of the light Remove one screw from the connecting plate (P) of fan-motor housing pan (H). Figure 12. assembly (G).
- Page 12 Assembly - Hanging the Fan (continued) Install the Plastic shade Mount the remote control cradle □ Install scenarios 1: Over Toggle Switch via screws Figure 16. Rotate the Plastic shade (J) clockwise until it is secure. Figure 15. □ Insert screws (JJ) through the remote cradle (O) into the Toggle Switch screw holes and tighten each screw.
-
Page 13: Operation
Remote Operation Remote control Warm weather Your fan is equipped with a remote control to operate the speed and lights of your new ceiling fan. effect. This allows you to set your air conditioner on a warmer setting without affecting your comfort. ceiling. - Page 14 Remote Operation Icon Button Name Action Notes Change the fan speed will light 6 Speed LED up different quantity of indicators Short press to turn the Fan and light All ON/OFF on/off Short press to turn the fan on/off ON / OFF ON / OFF Fan ON/OFF Long press for 5 seconds to reset factory...
- Page 15 Smart Setup Operation Download the Hubspace™ app from Create an account to sign in or log in the App Store or the Google Play if you already have an account. Store. For more information on the Hubspace app, visit hubspace.com/Hubspace . Connect your ceiling fan to power Tap the ‘+’...
-
Page 16: Care And Cleaning
Voice Commands The Ossa 52 in. LED Indoor Smart Color Changing Ceiling Fan works with Alexa and Google Assistant. This section lists some of the voice commands you can use. To view these and other commands, go to http://hubspaceconnect.com. Alexa Google When you want to... -
Page 17: Troubleshooting
Troubleshooting Problem Solution The fan will not start. 1. Check to make sure the wall switch is in the on position if applicable. 2. Check the main and branch circuit fuses or breakers. 3. Make sure your device is connected to a power source. 4. - Page 18 Troubleshooting Problem Solution My Hubspace device is not Make sure your device is connected to a power source. Your Internet connecting to Wi-Fi. connection or Wi-Fi network may be down. My device cannot nd any Make sure you have a 2.4GHz capable Wi-Fi network within range of the Wi-Fi networks.
- Page 19 Questions, problems, missing parts? Before returning to the store, call Home Decorators Collection Customer Service 8 a.m. - 7 p.m., EST, Monday-Friday, 9 a.m. - 6 p.m., EST, Saturday 1-800-986-3460 HOMEDEPOT.COM/Hubspace Retain this manual for future use.
Need help?
Do you have a question about the CARLEY CF2003-W and is the answer not in the manual?
Questions and answers