
Subscribe to Our Youtube Channel
Related Manuals for SICK LD-OEM15 Series


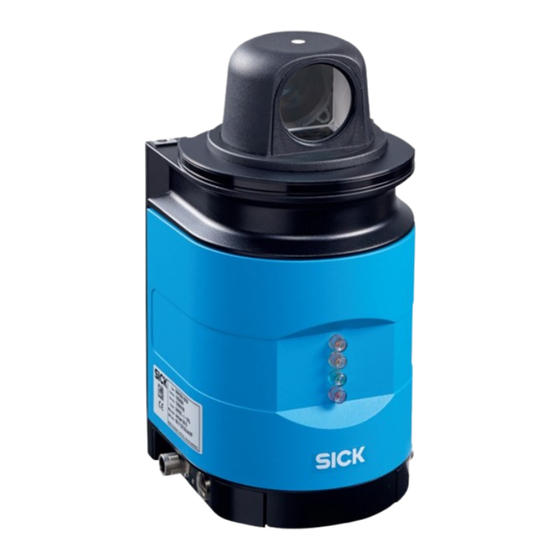
Summary of Contents for SICK LD-OEM15 Series
- Page 1 OPERATING INSTRUCTIONS Laser measurement sensor LD-OEM15xx Reliable Scanning with the Highest Level of Accuracy in Harsh Conditions...
- Page 2 Reader™ is a trademark of Adobe Systems Incorporated. Version of the operating instructions The latest version of these operating instructions can be obtained as PDF at www.sick.com. 8016263/1E7K/2023-02-24 © SICK AG · Germany · All rights reserved · Subject to change without notice...
-
Page 3: Table Of Contents
Troubleshooting and rectification ................64 Detailed error analysis ....................64 SICK support ......................65 Technical data ....................... 66 Data sheet LD-OEM ....................66 Dimensional drawings ....................68 8016263/1E7K/2023-02-24 © SICK AG · Germany · All rights reserved · Subject to change without notice... - Page 4 Appendix ........................69 10.1 Overview of the annexes ..................69 10.2 Glossary ........................69 10.3 Declarations of conformity and certificates ............71 10.4 Cybersecurity ......................71 8016263/1E7K/2023-02-24 © SICK AG · Germany · All rights reserved · Subject to change without notice...
- Page 5 SOPAS ET SICK OPEN PORTAL for APPLICATION and SYSTEMS ENGINEERING TOOL = configuration software for the configuration of the LD-OEM Protocol for user-programmed evaluation 8016263/1E7K/2023-02-24 © SICK AG · Germany · All rights reserved · Subject to change without notice...
- Page 6 Tab. 16: SOPAS ET default setting ..................54 Tab. 17: Password LD-OEM ....................58 Tab. 18: Troubleshooting and rectification .................64 Tab. 19: Data sheet LD-OEM ....................66 8016263/1E7K/2023-02-24 © SICK AG · Germany · All rights reserved · Subject to change without notice...
- Page 7 Configuring with AutoIP ..................57 Fig. 39: Principle of data storage ..................58 Fig. 40: Window in the scanner head on the LD-OEM ............61 8016263/1E7K/2023-02-24 © SICK AG · Germany · All rights reserved · Subject to change without notice...
- Page 8 Registers Operating Instructions Laser measurement system LD-OEM15xx Fig. 41: Dimensions LD-OEM ....................68 8016263/1E7K/2023-02-24 © SICK AG · Germany · All rights reserved · Subject to change without notice...
-
Page 9: About This Document
LD-OEM. Further information on the LD-OEM is available from SICK AG, Division Auto Ident, and in the Internet at www.sick.com. -
Page 10: Symbology Used
The safety symbol beside the warning indicates the nature of the risk of accident, e.g. due to electricity. The warning category (DANGER, WARNING, CAUTION) indicates the severity of the hazard. Read carefully and follow the warning notices! 8016263/1E7K/2023-02-24 © SICK AG · Germany · All rights reserved · Subject to change without notice... -
Page 11: For Your Safety
(e.g. crane, assembly system) • Basic knowledge of the Windows operating system • Basic knowledge of data transmission Tab. 2: Authorised personnel 8016263/1E7K/2023-02-24 © SICK AG · Germany · All rights reserved · Subject to change without notice... -
Page 12: Intended Use
SICK AG under the warranty will be rendered void. The LD-OEM is only allowed to be operated in the ambient temperature range allowed (see section 9.1 “Data sheet LD-OEM” on page 66). 8016263/1E7K/2023-02-24 © SICK AG · Germany · All rights reserved · Subject to change without notice... -
Page 13: General Safety Notes And Protective Measures
• The LD-OEM is not a device for the protection of people in the context of the related safety standards for machinery. 8016263/1E7K/2023-02-24 © SICK AG · Germany · All rights reserved · Subject to change without notice... -
Page 14: Fig. 1: Laser Output Aperture On The Ld-Oem
The laser operates at the wavelength = 905 nm (invisible infrared light). The radiation emitted in correct use is not harmful to the eyes and human skin. 8016263/1E7K/2023-02-24 © SICK AG · Germany · All rights reserved · Subject to change without notice... -
Page 15: Quick Stop And Quick Restart
Dispose of all electronic assemblies as hazardous waste. The electronic assemblies are straightforward to dismantle. Important SICK AG does not accept unusable or irreparable devices that are returned. 8016263/1E7K/2023-02-24 © SICK AG · Germany · All rights reserved · Subject to change without notice... -
Page 16: Product Description
Dimensional drawing and 3D CAD dimension models in various electronic formats • Declarations of conformity and certificates SOPAS configuration software updates Support is also available from your sales partner: www.sick.com/worldwide. 8016263/1E7K/2023-02-24 © SICK AG · Germany · All rights reserved · Subject to change without notice... -
Page 17: Construction Of The Ld-Oem
Device connections Alignment hole for locating (M12 plug connectors) yellow yellow green Ethernet RS-232 Supply voltage Bottom Fastening thread M6×12 Fig. 2: Views of device 8016263/1E7K/2023-02-24 © SICK AG · Germany · All rights reserved · Subject to change without notice... - Page 18 LEDs. • Intrusion and tech-in function are available for LD-OEM1500 only. • USP Command is available for LD-OEM1501 only. 8016263/1E7K/2023-02-24 © SICK AG · Germany · All rights reserved · Subject to change without notice...
-
Page 19: Tab. 4: Meaning Of The Led Status Indicators
1 Hz System errorin the device Troubleshooting section 8.3 “Troubleshooting and recti- fication” on page 64 Tab. 4: Meaning of the LED status indicators 8016263/1E7K/2023-02-24 © SICK AG · Germany · All rights reserved · Subject to change without notice... -
Page 20: Special Features Of The Ld-Oem
LD_OEM1500: 4x switch outputs (3x OUTPUT, 1x SYNC/OUTPUT) • LD-OEM1501: 1 x output signal switching device for synchronisa- tion Tab. 5: Special features of the LD-OEM 8016263/1E7K/2023-02-24 © SICK AG · Germany · All rights reserved · Subject to change without notice... -
Page 21: Applications
Scanning takes place in a sector of e.g. 360°. The scanning ranges of the sensors in the LD-OEM are approx. 180 m to bright, natural surfaces (e.g. a white house wall). 8016263/1E7K/2023-02-24 © SICK AG · Germany · All rights reserved · Subject to change without notice... -
Page 22: Fig. 5: Diffuse Reflection From Objects
(on the left). If the beam is inci-- dent at an angle, a corresponding energy and scanning range loss is incurred (on the right). 8016263/1E7K/2023-02-24 © SICK AG · Germany · All rights reserved · Subject to change without notice... -
Page 23: Tab. 6: Typical Remissions And Scanning Ranges
White cardboard 0.5 … 180 m Reflective tape >3000% 0.5 ... approx. 250 m (1.64 ... 820.2 Tab. 6: Typical remissions and scanning ranges 8016263/1E7K/2023-02-24 © SICK AG · Germany · All rights reserved · Subject to change without notice... -
Page 24: Fig. 8: Beam Diameter And Distance Between Measured Points At 0 To 100 M
To reliably detect an object, a laser beam must be fully incident on it once. If the beam is partially incident, less energy will be reflected by an object than necessary in some circum-- stances (see fig. 7 on page 23). 8016263/1E7K/2023-02-24 © SICK AG · Germany · All rights reserved · Subject to change without notice... -
Page 25: Output Of Measured Values
OUT3 OUT4 Fig. 9: Principle of field application By means of up to ten evaluation cases, the LD-OEM is adjusted to the evaluation situation. 8016263/1E7K/2023-02-24 © SICK AG · Germany · All rights reserved · Subject to change without notice... -
Page 26: Tab. 7: Buttons For Managing The Evaluation Cases
For this purpose, mark one of the evaluation cases in the table. Tab. 7: Buttons for managing the evaluation cases 8016263/1E7K/2023-02-24 © SICK AG · Germany · All rights reserved · Subject to change without notice... - Page 27 For the evaluation case, you select a field out of the already configured evaluation fields. Its form must match the evaluation strategy (section 3.7.2 “Evaluation fields” on page 29). 8016263/1E7K/2023-02-24 © SICK AG · Germany · All rights reserved · Subject to change without notice...
- Page 28 Do not mix up the negation of the result with the setting Active High/Active Low of the outputs (section 3.7.8 “Linking the evaluation cases at the output” on page 8016263/1E7K/2023-02-24 © SICK AG · Germany · All rights reserved · Subject to change without notice...
-
Page 29: Tab. 8: Buttons For Managing The Evaluation Fields
For this purpose mark an evaluation field in the ta- ble and then click the button. Tab. 8: Buttons for managing the evaluation fields 8016263/1E7K/2023-02-24 © SICK AG · Germany · All rights reserved · Subject to change without notice... -
Page 30: Fig. 10: Selection Of The Method For Creating Evaluation Fields
37). • teach-in the reference contour for an evaluation field (see section 3.7.7 “Defining the contour as a reference” on page 8016263/1E7K/2023-02-24 © SICK AG · Germany · All rights reserved · Subject to change without notice... -
Page 31: Tab. 9: Buttons For Changing The Field Editor View
Mirror the view on the LD-OEM, i.e. you no longer see the LD-OEM from above, but from below. Tab. 9: Buttons for changing the field editor view 8016263/1E7K/2023-02-24 © SICK AG · Germany · All rights reserved · Subject to change without notice... -
Page 32: Fig. 11: End Points For A Field
The point is displayed as a green square. Move the mouse pointer to the next point on the field. The field you are creating is shown in yellow. 8016263/1E7K/2023-02-24 © SICK AG · Germany · All rights reserved · Subject to change without notice... -
Page 33: Fig. 13: Setting End Points 2
Release the mouse button at the position where you want to position the points. The field now produced is again shown in red. 8016263/1E7K/2023-02-24 © SICK AG · Germany · All rights reserved · Subject to change without notice... -
Page 34: Fig. 16: Deleting End Points 1
If, during the selection of the basic parameters you selected the RECTANGLE option, then there is already a rectangular field in the field editor. You can move, increase or reduce in size, and rotate this field. 8016263/1E7K/2023-02-24 © SICK AG · Germany · All rights reserved · Subject to change without notice... -
Page 35: Fig. 18: Moving A Rectangular Field
During the movement the future field is shown in yellow. As soon as you release the mouse button, the field is shown in red again. 8016263/1E7K/2023-02-24 © SICK AG · Germany · All rights reserved · Subject to change without notice... -
Page 36: Fig. 20: Rotating A Rectangular Field
In the C dialog box, click the Y button. ONFIRM CHANGES The changes are applied and the evaluation field is displayed in red 8016263/1E7K/2023-02-24 © SICK AG · Germany · All rights reserved · Subject to change without notice... -
Page 37: Fig. 21: Starting Points For A Field
Move the individual points of the field using the mouse until the field is of the required shape and size (see section 3.7.4 “Setting end points for a field” on page 32). 8016263/1E7K/2023-02-24 © SICK AG · Germany · All rights reserved · Subject to change without notice... - Page 38 PLC). Alternatively you can reset the output via an input. The output is only reset if the associate input enters the configured status. 8016263/1E7K/2023-02-24 © SICK AG · Germany · All rights reserved · Subject to change without notice...
-
Page 39: Fig. 22: Intrusion Display None (No Objects)
Fig. 23: Intrusion display normal (with objects). Left: small object, too small for an alarm. Right: object is visualized in red, Field intrusion 8016263/1E7K/2023-02-24 © SICK AG · Germany · All rights reserved · Subject to change without notice... -
Page 40: Fig. 24: Intrusion Display Freeze (Clear Field, But The Object Remains. Frozen Until New Field Intrusion.)
(too small, only short appearance in the field). If the scan line is ac- tivated, the scan line will be updated permanently. Fig. 26: Intrusion display: Tracking 8016263/1E7K/2023-02-24 © SICK AG · Germany · All rights reserved · Subject to change without notice... -
Page 41: Integration Of The Ld-Oem In Other Control Systems
The LD-OEM has a serial host interface and an Ethernet interface. The LD-OEM is configured with the aid of SOPAS ET via these interfaces. The LD-OEM also communicates with the ex- ternal computer via its interfaces. 8016263/1E7K/2023-02-24 © SICK AG · Germany · All rights reserved · Subject to change without notice... -
Page 42: Fig. 27: Requesting Contour Data
For precise control, it is necessary to synchronise as accurately as possible the contour data from the LD-OEM and the calculations on the external computer. 8016263/1E7K/2023-02-24 © SICK AG · Germany · All rights reserved · Subject to change without notice... -
Page 43: Fig. 29: Pulse On The Head Position
3D measurement. Important Program the external computer so that it responds to the front edge of the output pulse 8016263/1E7K/2023-02-24 © SICK AG · Germany · All rights reserved · Subject to change without notice... -
Page 44: Planning
As an alternative you can use a strong stable mounting bracket that provides adjustable alignment of the LD-OEM in the X- and Y axis. The LD-OEM weighs approx. 2.4 kg (5.29 lb). 8016263/1E7K/2023-02-24 © SICK AG · Germany · All rights reserved · Subject to change without notice... -
Page 45: Tab. 10: Beam Diameter At Different Distances From The Ld-Oem
Reflectors are shown in the measuring profile as particularly reflective targets. These can be detected by an external algorithm and used as a reference. The recommended 983-10 reflective tape (part no. 5320565) can be obtained as an accessory from SICK AG by quot- ing REF-DG. -
Page 46: Assembly
– Stable mounting bracket that provides adjustable alignment of the LD-OEM in the X and Y axis – 3 screws M6 for the LD-OEM, screw length dependent on the wall thickness of the fix- ing bracket used 8016263/1E7K/2023-02-24 © SICK AG · Germany · All rights reserved · Subject to change without notice... -
Page 47: Mounting And Adjustment Of The Device
1. Switch off the supply voltage. 2. Remove the connection cables. 3. Undo screws for mounting the LD-OEM to the fixing and remove device. 8016263/1E7K/2023-02-24 © SICK AG · Germany · All rights reserved · Subject to change without notice... -
Page 48: Electric Installation
“Power” connection “RS232” connection M12×4, socket M12×5, plug M12×8, plug Fig. 31: Connections of the LD-OEM The LD-OEM has three round multi-pin M12 plug connectors. 8016263/1E7K/2023-02-24 © SICK AG · Germany · All rights reserved · Subject to change without notice... -
Page 49: Preparing The Electrical Installation
The supply of power/the external power supply for the supply of power must be able to provide at least 40 W continuous power, if the switching output is wired at least 48 W continuous power. 8016263/1E7K/2023-02-24 © SICK AG · Germany · All rights reserved · Subject to change without notice... -
Page 50: Undertaking Electrical Installation On The Ld-Oem
(current/voltage measurement) Only connect in electrically isolated state! Ensure the power supply to which the is connected is switched off. LD-OEM 8016263/1E7K/2023-02-24 © SICK AG · Germany · All rights reserved · Subject to change without notice... -
Page 51: Fig. 32: Connection Of The Voltage Supply
Pay attention to max. cable length as per section 5.3.3 “General conditions for the data interface” on page Fig. 34: Wiring the RS232 interface 8016263/1E7K/2023-02-24 © SICK AG · Germany · All rights reserved · Subject to change without notice... -
Page 52: Fig. 35: Rs232 Connection (Ld-Oem1500)
Art.-Nr. 6021033 5 m, angled Blue = Do not use Art.-Nr. 6051482 10 m, angled Red = Do not use Fig. 36: RS232 connection (LD-OEM1501) 8016263/1E7K/2023-02-24 © SICK AG · Germany · All rights reserved · Subject to change without notice... -
Page 53: Commissioning And Configuration
Download the latest SOPAS ET software on the internet www.sick.com. The download’s size is about 150MB. It includes the setup.exe installing the SOPAS Engi- neering Tool. To complete the installation, follow the instructions. 8016263/1E7K/2023-02-24 © SICK AG · Germany · All rights reserved · Subject to change without notice... -
Page 54: Establish Communication With The Ld-Oem
OK. REATE NEW PROJECT 5. In the main window in S click the C button. SSISTANT ONFIGURATION The S dialog box appears. SSISTANT 8016263/1E7K/2023-02-24 © SICK AG · Germany · All rights reserved · Subject to change without notice... - Page 55 3. On the GENERAL tab, highlight INTERNET PROTOCOL (TCP/IP), and then click PROPER- TIES 4. Select USE THE FOLLOWING IP ADDRESS, and enter the following IP address: 192.168.1. x (e.g. 1) 5. Confirm with OK 8016263/1E7K/2023-02-24 © SICK AG · Germany · All rights reserved · Subject to change without notice...
-
Page 56: Fig. 37: Ip Communication With Fixed Ip Address
The ADD ADRESS dialog box is closed. Fig. 37: IP communication with fixed IP address 5. Click ADVANCED... button 6. Under TCP PORT(S) activate port 2112 and confirm with OK. 8016263/1E7K/2023-02-24 © SICK AG · Germany · All rights reserved · Subject to change without notice... -
Page 57: Fig. 38: Configuring With Autoip
A scan is performed for devices connected via the connection. SOPAS ET adds the de- vices found to the project tree and uploads the actual parameter set from the device. 8016263/1E7K/2023-02-24 © SICK AG · Germany · All rights reserved · Subject to change without notice... -
Page 58: Initial Start-Up
Software access to the LD-OEM is password protected. You should change the password after successful configuration for it to retain its security function. User level Password Authorised client client Tab. 17: Password LD-OEM 8016263/1E7K/2023-02-24 © SICK AG · Germany · All rights reserved · Subject to change without notice... - Page 59 2. Configure the LD-OEM for the required application with the aid of the parameters in SOPAS ET. Help for the program user interface as well as for the different options can be found in SOPAS ET. 8016263/1E7K/2023-02-24 © SICK AG · Germany · All rights reserved · Subject to change without notice...
-
Page 60: Connection And Test Measurement
4. After completing the test measurement successfully, save the configuration perma- nently to the LD-OEM: Menu LD-OEM, P ARAMETER AVE PERMANENT 8016263/1E7K/2023-02-24 © SICK AG · Germany · All rights reserved · Subject to change without notice... -
Page 61: Service
Important Claims under the warranty rendered void! The housing screws of the LD-OEM are sealed. Claims under the warranty against SICK AG will be rendered void if the seals are damaged or the device opened. The housing is only allowed to be opened by authorised service personnel. -
Page 62: Exchanging A Ld-Oem
4. Open project file (spr file with configuration data) using SOPAS ET and transfer configu- ration to the device (see fig. 39 on page 58). 8016263/1E7K/2023-02-24 © SICK AG · Germany · All rights reserved · Subject to change without notice... -
Page 63: Troubleshooting
Important Claims under the warranty rendered void! The housing screws of the LD-OEM are sealed. Claims under the warranty against SICK AG will be rendered void if the seals are damaged or the device opened. The housing is only allowed to be opened by authorised service personnel. -
Page 64: Troubleshooting And Rectification
Communication errors can occur on the transfer of telegrams to the LD-OEM. The LD-OEM then returns an error code that you can evaluate (see “„Telegrammlisting USP“, part no.: 8016687, "Telegrammlisting CoLa-A/B", article no.: 8016855). 8016263/1E7K/2023-02-24 © SICK AG · Germany · All rights reserved · Subject to change without notice... -
Page 65: Sick Support
Using the monitor you can display the measured data, the detected reflectors and the position of the LD-OEM. , LD-OEM, M ROJECT ONITOR ISPLAY 8016263/1E7K/2023-02-24 © SICK AG · Germany · All rights reserved · Subject to change without notice... -
Page 66: Technical Data
EMC test Switching on: max. 36 W (1.5 A) at DC 24 V, on power up briefly 2.1 A Tab. 19: Data sheet LD-OEM 8016263/1E7K/2023-02-24 © SICK AG · Germany · All rights reserved · Subject to change without notice... - Page 67 Condition: laser spot completely on the target, warm-up time min. 30 min. You can choose between different combinations of scan angle, scan frequency, and angular resolution. 8016263/1E7K/2023-02-24 © SICK AG · Germany · All rights reserved · Subject to change without notice...
-
Page 68: Dimensional Drawings
Mounting hole (M6x12) Rotating diameter Aligning pin „RS232“ connection (M12x4, plug) „Ethernet“ connection (M12x4, socket) „Power“ connection (12x5, plug) 8016263/1E7K/2023-02-24 © SICK AG · Germany · All rights reserved · Subject to change without notice... - Page 69 SOPAS ET Configuration software, used for the offline configuration (adaptation to the read situation on-site) and the online operation of the LD-OEM in dialog mode. 8016263/1E7K/2023-02-24 © SICK AG · Germany · All rights reserved · Subject to change without notice...
- Page 70 The effective rotational frequency is the rotational frequency of the individual scans divided by the interlace multiplier. The scanner firmware calculates the corresponding angular res- olution for the individual scan. 8016263/1E7K/2023-02-24 © SICK AG · Germany · All rights reserved · Subject to change without notice...
- Page 71 You will find further information at www.sick.com/psirt, e.g.: • General information on cybersecurity • Contact option for reporting vulnerabilities • Information on known vulnerabilities (security advisories) 8016263/1E7K/2023-02-24 © SICK AG · Germany · All rights reserved · Subject to change without notice...
- Page 72 E-Mail office@sick.hu E-Mail office@sick.si India South Africa Phone +91 22 6119 8900 Phone +27 11 472 3733 E-Mail info@sick-india.com E-Mail info@sickautomation.co.za Further locations at www.sick.com 8016263/2016-05-23 © SICK AG · Germany · All rights reserved · Subject to change without notice...
Need help?
Do you have a question about the LD-OEM15 Series and is the answer not in the manual?
Questions and answers