Table of Contents
Advertisement
Quick Links
Advertisement
Table of Contents

Related Manuals for Lupo Ultrapanel Full Color 60 Soft


Summary of Contents for Lupo Ultrapanel Full Color 60 Soft
- Page 1 Cod 816 Ultrapanel Full Color 60 Soft...
-
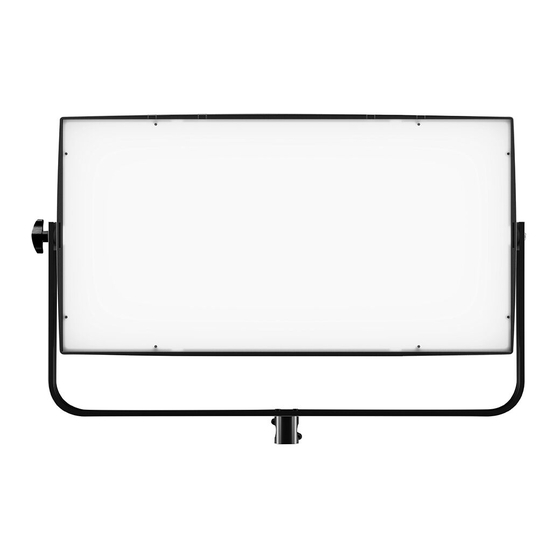
Page 2: Technical Data
Technical Data Dimensions (cm) 673 x 340 x 113 mm Dimensions (in) 26.4 x 13.5 x 4.4 in Weight (kg) 9 kg Weight (lb) 19.8 lb CRI (Colour Rendering Index) TLCI (Television Lighting Consistency Index) Estimated LED lifetime (L80) 50,000 hours Dimmer 0 - 100 included Dimming curves mode... -
Page 3: Technical Drawing
Technical Drawing 673 mm Lupo srl - Via V. Sassi 28 Collegno (TO) - 10093 - Italy Phone: +39 011 411 9919 / e-mail: contact@lupo.it website: www.lupo.it... - Page 4 User Manuals Superpanel 30 Full Color Superpanel 60 Full Color Actionpanel Full Color Ultrapanel 30 Full Color Ultrapanel 60 Full Color Release 7.xx...
- Page 5 Thanks for having purchased Lupo products. All the products are made in Italy and all the efforts have been put to keep the quality standards high. We hope this product can help you in your job and make your life easier as a professional.
- Page 6 Instructions • Device for indoor use only. • Maximum ambient temperature: 40 °C. • Make sure power supply plug is suitable to power required. • As prescribed by international regulations, a safety cable must be used when the fixture is suspended from ceiling.
- Page 7 Getting Started with the Superpanel 30 and the Ultrapanel 30 Screw hole for barndoors/diffuser DMX THROUGH (Female 5 PIN XLR connector) Display DMX INPUT Power ON indicator LED light (Male 5 PIN XLR connector) USB port CCT knob INTENSITY knob GN/SAT/COLOR knob DOWN button UP button...
-
Page 8: Control Panel
Getting Started with the Superpanel 60 and the Ultrapanel 60 UP/+ button Display Power ON indicator CCT knob DOWN/+ button LED light GN/SAT/RGBW knob DMX THROUGH Hook for safety cable (Female 5 PIN XLR) INTENSITY knob DMX INPUT (Male 5 PIN XLR) Tilt lock knob Tilt lock knob ON/OFF... -
Page 9: Manual Operation
ATTENTION: The light intensity level is adjustable from 0 - 50% if the FAN is OFF. The value on the display flashes. MANUAL OPERATION 1. Press the push button to enter the main MENU. 2. Select MANUAL by pressing the push button. -
Page 10: Dmx Operation
/ 5 rotate the knob to select the PRESET number and press the push button to confirm the selection. THE SET COLOR IS SAVED AS PRESET. "BUSY" indicates that in the user preset there are parameters memorized if you select it, the parameters is replaced by the new ones. -
Page 11: Dmx Protocol
DMX OPERATION - Advanced Settings 1. Press the push button to enter the main MENU. 2. Navigate through the main MENU with the knob and press the push button to confirm selection. 3. Rotate the knob to select DMX ADVANCED, press the push button to confirm selection. - Page 12 DMX Channel Protocol - 8 bit MODE CHANNELS DMX CHANNEL POSITION DMX VALUE VALUE 1. DIMMER 0 - 255 0 ÷ 100 % 2. COLOR TEMPERATURE 0 - 255 6500 - 2700 0 ÷ 5 Ø 3. GN COMPENSATION 6 ÷ 255 -1,00 ÷...
- Page 13 DMX Channel Protocol - 16 bit MODE CHANNELS DMX CHANNEL POSITION DMX VALUE VALUE 1. DIMMER - byte 1 0 - 65535 0 ÷ 100 % 2. DIMMER - byte 2 3. COLOR TEMPERATURE - byte 1 0 - 65535 6500 - 2700 4.
-
Page 14: Protocol Specification
2. DIMMER - byte 2 FIRE 3. SPEED - byte 1 0 ÷ 65535 1 ÷ 3 4. SPEED - byte 2 ** Only available if enabled in DMX ADVANCED. Protocol Specification COMMAND DESCRIPTION Manufacturer identification number Manufacturer ID 0x0622 (LUPO Lighting). - Page 15 Device Identification Model ID Model identification number 0x0001 Dayled 650 mono color 0x0002 Dayled 650 dual color 0x0003 Dayled 1000 mono color 0x0004 Dayled 1000 dual color 0x0005 Dayled 2000 mono color 0x0006 Dayled 2000 dual color 0x0007 Superpanel 30 dual color soft 0x0008 Superpanel 30 dual color lens 0x0009...
- Page 16 This parameter provides an ASCII text MANUFACTURER 0x0081 response with the Manufacturer name for the LABEL device. “LUPO” is the default name. Set the device to its factory defaults. Get: FACTORY DEFAULTS 0x0090 Check if settings still in default state -> 1 if...
-
Page 17: Device Settings
DEVICE SETTINGS 1. Press the push button to enter the main MENU. 2. Navigate through the MENU rotating the button, select DEVICE SETTINGS, press the push button to confirm the selection. 3. Navigate through the FAN / DISPLAY / MENU VIEW / FREQUENCY / FILTER / LINEARIZATION / CCT LIMIT functions, rotating the button to select the desired function and press the... - Page 18 USB port Use USB port for firmware updates. Update the Firmware Copy the file on an USB Pendrive (FAT32 formatted) in the main root; Switch off the equipment and insert the USB Pendrive; Switch on the equipment; Wait until display backlight flashes (it takes several minutes and red led must toggle for all time long);...
- Page 19 Package Contents for Actionpanel AC Adapter AC Adapter * AC Power Mounting Cord Cable AC input: 100 V - 240 V DC output: 24 V Bracket ATTENTION: Please keep the original package of the product in a safe place for warranty reasons. Actionpanel Package Contents for Superpanel 30 and Ultrapanel 30 AC Power...
Need help?
Do you have a question about the Ultrapanel Full Color 60 Soft and is the answer not in the manual?
Questions and answers