Table of Contents
Advertisement
Quick Links
Crestron TSW-750-FMKT
TSW750 Flush Mount Kit
Installation guide
Further inquiries
To locate specific information or resolve questions after reviewing this guide contact Crestron's
True Blue support at 1-888-CRESTRON [1-888-273-7876] or refer to the listing of Crestron
worldwide offices on the Crestron Web site (http://www.crestron.eu/?q=en/contact/global_offices)
for assistance within a particular geographic region.
To post questions about Crestron products log onto the Online help section of the Crestron Web
site (www.crestron.com/onlinehelp). First-time users must establish a user account to fully benefit
from all available features.
NOTES:
Observe the following points.
•
Use caution when installing the TSW-750-FMKT, not to plunge into a pipe or electrical
conduit.
•
For Low voltage use only.
•
Pay attention up /down orientation of the adapter according to the arrows marked on the
back sides of the adapter.
•
Pay attention, avoid plugging the microphone and speaker grills with excessive paint also do
not paint the internal surface.
Crestron International
Installation Guide
Oude Keerbergesebaan 2 Rijmenam, 2820
Tel: +32.15.50.99.50
Fax: +32.15.50.99.40
Specifications subject to
www.crestron.eu
change without notice
Future Updates
As Crestron improves functions, adds new features and extends the capabilities of the TSW-750-
FMKT, additional information may be made available as manual updates. These updates are solely
electronic and serve as intermediary supplements prior to the release of a complete technical
documentation revision.
Check the Crestron Web site periodically for manual update availability and its relevance. Updates
are identified as an "Addendum" in the Download column.
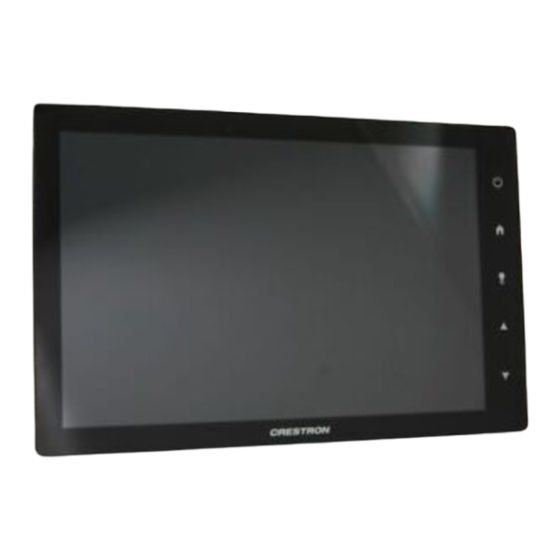
DESCRIPTION
The TSW-750-FMKT flush mount kit is an optional accessory for use with a Crestron® TSW-750 7"
touch screen. It is designed for a in-wall flush installation of a TSW-750 touch screen onto a
concrete/brick wall and drywall. The TSW-750-FMKT securely mounts the touch screen while allow-
ing easy access, insertion and exertion by manual push and magnet detachment of the touch screen
tray. When installing the TSW-750-FMKT onto a concrete/brick wall first install the TSW-750-FMKT-
BBI brick wall back box for a professional installation. The mounting kit is configured for installation
in 12.7mm (1/2 inch) thick clad constructions, shimming may be required if adjacent material is not
12.7 mm drywall (1/2 inch). Installations and finishes are in the same manner as drywall.
Specifications
Details
Material
MDF
Dimensions
Height
190.5 mm (7.5")
Width
264 mm (10.4")
Depth
16.6 mm (0.65")
Weight
0.3 kg (0.7 pounds)
Available Models
TSW-750-FMKT
TSW-750 Flush Mount Kit
Physical View - Front side and Rear
Safety
•
Use a dust mask to avoid getting dust particles in you lungs
•
Wear eye protection to avoid getting dust particles in your eyes.
•
Turn off the power in areas you'll be drilling to avoid electric shock.
•
Use plastic or canvas drop cloths to prevent the sanding dust from damaging nearby
furniture or spreading beyond you immediate work area.
SETUP
Installation Tools and Materials
Safety goggles
Taping or joint knife
Dust mask
Sandpaper
Screwdriver
Pole Sander
Measuring tape
#6 bugle head screws
Utility knife/saw
Setting-type compound
Leveller
Drywall mud or joint compound
Brush / sponge roller
Drywall Paper tape
Pencil
Paint
Spatula
Drywall
Spackle tray
Coarse Rasp
Drywall T-square
INSTALLATION
Cut and Place
First determine where the TSW-750-FMKT mount will be located, keeping in mind that the
TSW-750-FMKT mounts need to fit between two studs. To locate these studs use a stud finder
(We suggest using a high quality stud finder that can detect studs, AC cables and water pipes so
that you can avoid these in-wall obstacles).
When a favourable installation position is determined, drill a pilot hole in the middle. USE CAUTION
when drilling, not to plunge into a pipe or electrical conduit. When the hole is drilled, explore the
surrounding area, making sure there are no obstacles present and that there's enough room for
the mount. While using the mount, a level and a pencil, mark the top and bottom horizontal edges
of the mount on the drywall. Continue each line to the closest stud centre. Cut the drywall accord-
ing the top and bottom marked lines and stud centres using a utility knife or saw. After cutting the
drywall chamfer the rim of the opening using a coarse rasp.
Route adequate cabling to the installation point in accordance with your local electric regulations.
The TSW-750-FMKT needs to fit between two studs and be installed on two horizontal supports
that are secured to the studs.
It is proffered that the TSW-750-FMKT is mounted on two horizontal supports and at least one
stud. A good choice for horizontal supports are telescoping box mounting brackets that are in-
stalled on stud face without bending their fixing plates. Horizontal supports may be made on site
of the drywall U tracks. When performing a retrofit work, insert the horizontal supports half way
under the top and bottom drywall edges of the opening. PAY ATTENTION UP / DOWN ORIENTATION
OF THE ADAPTER ACCORDING TO THE ARROWS MARKED ON THE BACK SIDES OF THE ADAPTER.
Advertisement
Table of Contents

Subscribe to Our Youtube Channel
Related Manuals for Crestron TSW-750-FMKT


Summary of Contents for Crestron TSW-750-FMKT
- Page 1 INSTALLATION TSW750 Flush Mount Kit The TSW-750-FMKT flush mount kit is an optional accessory for use with a Crestron® TSW-750 7” Cut and Place touch screen. It is designed for a in-wall flush installation of a TSW-750 touch screen onto a...
- Page 2 Crestron shall not be liable to honour the terms of this warranty if the products has been used in drywall. Fill the gaps with setting-type compound and apply tape. Perform a standard mud and any application other than that for which it was intended or if it has been subjected to misuse, tape drywall joining procedure.
Need help?
Do you have a question about the TSW-750-FMKT and is the answer not in the manual?
Questions and answers