Reolink E1 - Pan-Tilt Indoor Camera Manual
- User manual ,
- Operational instruction (45 pages) ,
- Manual (14 pages)
Advertisement
Introduction
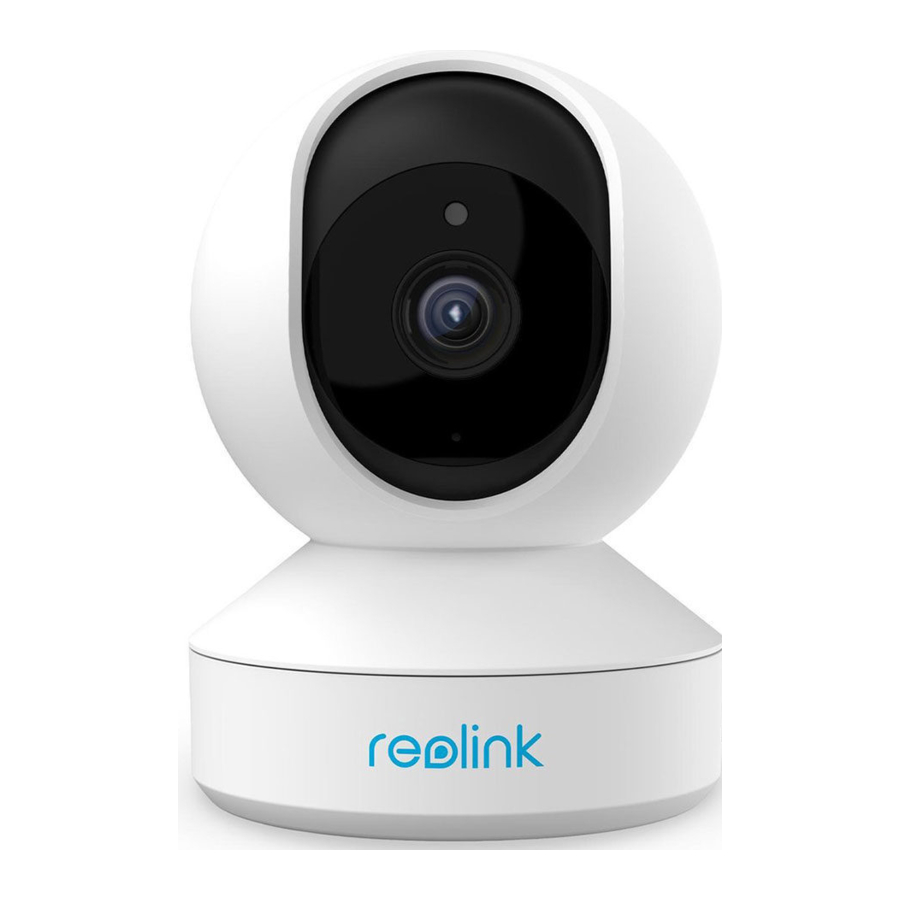
Reolink E1 smart home security camera captures Super HD videos in the resolution of 2304x1296 (3 megapixels), and with 8 infrared LEDs, it can see up to 40ft in the dark. Stay connected with what you care anytime with all-day home camera.
Specs

| 1 | Daylight Sensor |
| 2 | 8 IR LEDs |
| 3 | Lens |
| 4 | Status LED |
| 5 | Built-in Mic |
| 6 | Reset Button |
| 7 | Micro SD Card Slot |

| 1 | LAN Port |
| 2 | Speaker |
| 3 | Power |
Status Light
| Status Light | Camera Status |
| Solid Blue | Camera is starting up/ WiFi connection succeeded |
| Blinking Blue | WiFi is not configured/ WiFi connection failed |
Set up the Device
What's in the Box
Note: The package content may vary and update with different version and platforms, please take the below information only for a reference. And the actual package content are subject to the latest information on the product selling page.

Set up the Device on the App
There are two methods to do the initial setup of the camera:
- with a Wi-Fi connection;
- with a network cable connection.
With Wi-Fi Connection
- Tap the
![]() icon in the top right corner to add the camera.
icon in the top right corner to add the camera.
![]()
- Scan the QR code on the camera.
![]()
- Tap Choose Wi-Fi Connection to configure the Wi-Fi settings.
![]()
- After you hear the voice prompts from the camera, tick "I have heard the voice played by the camera" and tap Next.
![]()
- Select a WiFi network, enter the WiFi password, and tap Next.
![]()
- Scan the QR code on the app with the camera lens.
Tap Scan Now. The QR code will be generated and displayed on your phone. Please hold your phone in front of the camera at a distance of about 20 cm (8 inches) and have the phone face the camera lens to let the camera scan the QR code.
After you hear the beep sound, tick "I have heard a beep sound from the camera" and tap Next.

- After you hear a voice prompt "Connection to the router succeeded" from the camera, tick "I have heard the voice prompt" and tap Next.
![]()
Note: If you hear the voice prompt "Connection to the router failed", please double-check if you have entered the Wi-Fi information correctly in the previous step. - Create a login password and name your camera.

- Initialization finished. Tap Finish, and you can start live viewing now.
![]()


With a Network Cable Connection
To do the initial setup, please power on the camera with the DC adapter, connect the camera to your router's LAN port with an Ethernet cable, and follow the steps below.
- If your phone, the camera, and the router are on the same network and you've enabled the Add Device Automatically option in the App Settings, you can tap and select this device on the Devices page and skip to Step 3.

Otherwise, you can tap the![]() icon in the top right corner and scan the QR code on the camera to add the camera.
icon in the top right corner and scan the QR code on the camera to add the camera.

- Tap Choose Network Cable Connection.
Please make sure the camera is connected in the correct way, as shown in the diagram, and then tap Access the Camera.

- Create a device password and name the device.

- Select the WiFi network that you want to join, enter the password of the WiFi network, and tap Save to save the configuration.

- Initialization finished. Tap Finish, and you can start live viewing now.
![]()


Install the Unit
Here is a guide on how to install the camera to the ceiling.
- Install the Mounting Plate.


- Drilling two screw holes on the wall according to the mounting hole template.
- Insert the two plastic anchors into the holes in the wall.
- Secure the base unit in place by tightening the screws into the plastic anchors.
- Attach the Camera.
Align the camera with the bracket, then turn the camera unit clockwise to lock it in position.
![]()

Notes:
- To remove it from the ceiling, turn the camera counterclockwise.
- In case your camera is mounted upside down, its picture shall be rotated as well. Please go to Device Settings > Display on Reolink App/Client and click Flip Vertical to adjust the image.
Documents / Resources
References
Download manual
Here you can download full pdf version of manual, it may contain additional safety instructions, warranty information, FCC rules, etc.
Advertisement


Need help?
Do you have a question about the E1 and is the answer not in the manual?
Questions and answers