Reolink Duo 4G - 4G Mobile Dual-Lens Security Camera Manual
- Quick start manual (15 pages)
Advertisement
What's in the Box

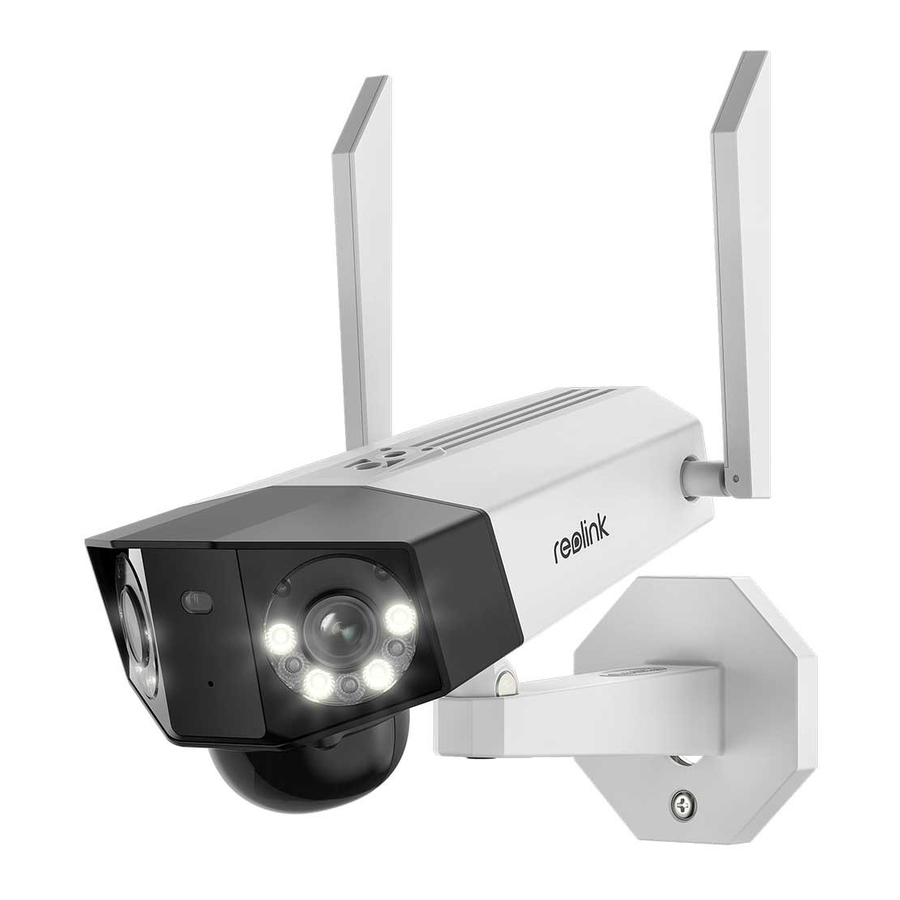
Camera Introduction

Different states of the status LED:
 Red Light: WiFi connection failed
 Blue Light: WiFi connection succeeded
Blinking: Standby status
On: Working status

Nano SIM Card Slot
* Remove the cover to find the reset hole, SIM card slot and SD card slot.
Reset Button
* Press the reset button with a pin to restore factory settings.
Set up the Camera
Activate SIM Card for the Camera
- Choose a Nano SIM card that supports WCDMA and FDD LTE.
- Some SIM cards have a PIN code. You may use your smartphone to disable the PIN first.
NOTE: Do not insert the IoT or M2M SIM into your smartphone.
Insert the SIM Card

Remove the cover with the screwdriver and then open the rubber cover.

Insert a SIM-eject tool into the hole beside the SIM tray and push it in to pop open the tray. Place the SIM card into the tray, then insert the tray into the camera completely.
Register the SIM Card

With the SIM card inserted, you can turn on the camera. Wait a few seconds and a red light will be on and solid for a couple of seconds. Then, it will go out.

A blue LED will flash for a few seconds and then go solid before going out. You will hear a voice prompt "Network connection succeeded", which means the camera has been successfully connected to the network.
Set up the Camera on the Phone


Step 1
Scan to download the Reolink App from the App Store or Google Play store.

Step 2
Launch the Reolink App, click the "![]() " button in the top right corner to add the camera. Scan the QR code on the device and follow the onscreen instructions to finish initial setup.
" button in the top right corner to add the camera. Scan the QR code on the device and follow the onscreen instructions to finish initial setup.
Set up the Camera on PC (Optional)
Step 1
Download and install the Reolink Client: Go to https://reolink.com > Support > App&Client.
Step 2
Launch the Reolink Client, click the "![]() " button, input the UID code of the camera to add it and follow the onscreen instructions to finish initial setup.
" button, input the UID code of the camera to add it and follow the onscreen instructions to finish initial setup.
NOTE: You may also run into the following situations:
| Voice Prompt | Camera Status | Solutions | |
| 1 | "SIM card cannot be recognized" | Camera cannot recognize this SIM card. |
|
| 2 | "The SIM card is locked with a PIN Please disable it" | Your SIM card has a PIN. | Put the SIM card into your mobile phone and disable the PIN. |
| 3 | "Not registered onnetwork. Please activate your SIM cardand check the signal strength" | Camera fails to register to the operator network. |
|
| 4 | "Network connection failed" | Camera fails to connect to the server. | The camera will be in Standby mode and reconnect later. |
| 5 | "Data call failed. Please confirm your cellular data plan is available or import the APN settings" | The SIM card has run out of data or APN settings are not correct. |
|
Charge the Camera
It's recommended to fully charge the battery before mounting the camera outdoors.

Charge the battery with a power adapter. (not included)

Charge the battery with the Reolink Solar Panel (not included if you only purchase the camera).
Charging Indicator
 Orange LED: charging
 Green LED: Fully charged

For better weatherproof performance, please always cover the USB charging port with the rubber plug after charging the battery.
Install the Camera

- Install the camera 2-3 meters (7-10 ft) above the ground. This height maximizes the detection range of the PIR motion sensor.
- For better motion detection performance, please install the camera angularly.
NOTE: If a moving object USB approaches the PIR sensor vertically, the camera may fail to detect motion.
Mount the Camera to the Wall

Drill holes in accordance with the mounting template. Secure the mounting plate to the wall with the upper two screws and hang the camera on it. Then lock the camera in position with the lower screw.
NOTE: Use the drywall anchors inclued in the package if needed.

To get the best field of view, loosen the adjustment screw on security mount and turn the camera.

Stiffen the adjustment screw to lock the camera.
Mount the Camera to Ceiling
NOTE: The camera can't be adjusted horizontally when ceiling mounted. Please adjust the camera angle before fixing it.

Drill holes in accordance with the mounting template. Secure the mounting plate to the wall with the upper two screws and hang the camera on it. Then lock the camera in position with the lower screw.

To get the best field of view, loosen the adjustment screw on security mount and turn the camera.

Stiffen the adjustment screw to lock the camera.
Install the Camera with Loop Strap

Thread the loop strap through the slots and fasten the strap. It is the most recommended installation method if you plan to mount the camera to a tree.
Safety Instructions of Battery Usage
The camera is not designed for running 24/7 at full capacity or around-the-clock live streaming. It's designed to record motion events and to live view remotely only when you need it. Learn useful tips on how to extend the battery life in this post.
- The battery is built-in, so do not remove it from the camera.
- Charge the rechargeable battery with a standard and high-quality DC 5V/9V battery charger or Reolink solar panel. Do not charge the battery with solar panels from any other brands.
- Charge the battery when temperatures are between 0°C and 45°C and always use the battery when temperatures are between -20°C and 60°C.
- Keep the USB charging port dry, clean and free of any debris and cover the USB charging port with the rubber plug when the battery is fully charged.
- Do not charge, use or store the battery near any ignition sources, such as fi re or heaters.
- Do not use the battery if it gives off an odor, generates heat, becomes discolored or deformed, or appears abnormal in any ways. If the battery is being used or charged, turn off the power switch or remove the charger immediately, and stop using it.
- Always follow the local waste and recycle laws when you get rid of the used battery.
Troubleshooting
Camera is not Powering on
If your camera is not turning on, please apply the following solutions:
- Make sure you've turned the power button on.
- Charge the battery with a DC 5V/2A power adapter. When the green light is on, the battery is fully charged.
If these won't work, please contact Reolink Support https://support.reolink.com
PIR Sensor Fails to Trigger Alarm
If the PIR sensor fails to trigger any kind of alarm within the covered area, try the following solutions:
- Make sure that the PIR sensor or the camera is installed in the right direction.
- Make sure the PIR sensor is enabled or the schedule is set up properly and running.
- Check the sensitivity settings and make sure it's set up properly.
- Make sure the battery is working.
- Reset the camera and try again.
If these won't work, please contact Reolink Support https://support.reolink.com
Unable to Receive Push Notifications
If you fail to receive any push notifications when motion is detected, try the following solutions:
- Make sure the push notification has been enabled.
- Make sure the PIR schedule is set up properly.
- Check the network connection on your phone and try again.
- Make sure the camera is connected to the Internet. If the LED indicator under the camera daylight sensor is solid red or flickering red, it means that your device disconnects from the Internet.
- Make sure you've enabled Allow Notifications on your phone. Go to the System Settings on your phone and allow Reolink App to send push notifications.
If these won't work, please contact Reolink Support https://support.reolink.com
Specifications
PIR Detection & Alerts
PIR Detection Distance: Adjustable/up to 10m (33ft)
PIR Detecting Angle: 150° horizontal Audio Alert:
Customized voice-recordable alerts Other Alerts:
Instant email alerts and push notifications
General
Operating Temperature: -10°C to 55°C (14°F to 131°F)
Weather Resistance: IP66 certified weatherproof
Size: 195x 103x 56 mm
Weight (Battery included): 720g (17.1 oz)

Documents / Resources
References
![www.apple.com]() App Store - Apple
App Store - Apple![play.google.com]() Google Play
Google Play![reolink.com]() Reolink: Security Cameras and Systems for Home & Business
Reolink: Security Cameras and Systems for Home & Business![support.reolink.com]() Reolink Support - Official Reolink Help Center
Reolink Support - Official Reolink Help Center
Download manual
Here you can download full pdf version of manual, it may contain additional safety instructions, warranty information, FCC rules, etc.
Download Reolink Duo 4G - 4G Mobile Dual-Lens Security Camera Manual
Advertisement


Need help?
Do you have a question about the Duo 4G and is the answer not in the manual?
Questions and answers