Table of Contents
Advertisement
Advertisement
Table of Contents

Related Manuals for poolstar SPAWER POOLEX O'SPA


Summary of Contents for poolstar SPAWER POOLEX O'SPA
- Page 1 O’SPA Installation and user manual www.poolstar.fr...
- Page 3 Acknowledgements Dear customer, Thank you for your purchase and your trust in our products. Our products are the result of years of research in the design and manufacture of heat pumps for pools. Our goal is to deliver high-quality products with exceptional performance. We took great care to put together this manual so you can get the most out of your Poolex heat pump.
- Page 4 PLEASE READ CAREFULLY These installation instructions form an integral part of the product. They must be provided to the installer and kept in a safe place by the user. If you lose this manual, please visit our website: www.poolex.fr The indications and warnings contained in this manual should be carefully read and understood as they provide important information regarding the safe handling and operation of the heat pump.
-
Page 5: Table Of Contents
Contents General information General terms and conditions of delivery Safety instructions Water treatment Operating limits Description Package contents General characteristics Technical characteristics Product dimensions Exploded view Installation & operation Location Installation diagram Hydraulic connections Electrical connections Operation Control panel Heating / Cooling / Automatic mode Functions overview Heat pump operating mode selector Using the hot tub heater control relay... -
Page 6: General Information
1. General information General terms and conditions of delivery All products and packaging, even those delivered carriage paid, travel at the risk of the recipient. Persons responsible for accepting delivery of the device must perform a visual inspection to make a note of any damage that may have occurred during transportation (refrigeration circuit, casing, electric box, frame). -
Page 7: Water Treatment
1. General information When in use Do not touch the vent during operation due to the risk of serious injury. Do not leave the heat pump within reach of children due to the risk of injury caused by the heat exchanger fins. -
Page 8: Operating Limits
1. General information Operating limits Your O’SPA heat pump’s performance is at its optimal when outside temperature is between 10°C and 43°C. When outside temperature is between -7°C and 10°C, the O’SPA heat pump is useful to maintain the temperature within the hot tub. However, it is not suitable to heat up your hot tub alone when outside temperature is below 10°C. -
Page 9: Description
2. Description Package contents At reception, please check that your package contains the following: • A Poolex O'SPA heat pump • 2x 1” (inch) to 32/38 mm hydraulic connections • 2x stainless steel hose clamps • 1x spa heater control relay •... -
Page 10: Technical Characteristics
2. Description Technical characteristics O’Spa 30 O’Spa 50 Heating power (kW) 5.02 26°C Consumption (kW) 0.58 0.97 Water 26°C 5.15 COP (Coeff. Of performance) Heating power (kW) 4.03 15°C Consumption (kW) Water 26°C 4.05 COP (Coeff. Of performance) Heating capacity (kW) 1.35 2.36 5°C... -
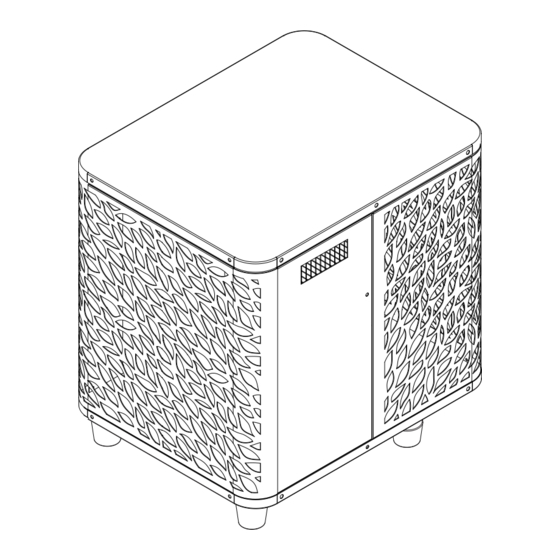
Page 11: Product Dimensions
2. Description Product dimensions Dimensions in mm O’Spa 30 O’Spa 50 68.7 68.7... -
Page 12: Exploded View
2. Description Exploded view 1. Compressor 12. Left panel 2. Evaporator 13. Fan motor mount 3. Heat exchanger 14. Fan motor protective grille 4. Rear panel 15. Front panel 5. 4-way valve 16. Control panel 6. Control panel fix plate 17. -
Page 13: Installation & Operation
3. Installation To install the heat pump only the hydraulic circuit and the power need to be connected. Location The heat pump must be installed at least 2.5 m away from the pool. >2.5m Please respect the following rules when choosing the heat pump’s installation location The location must be easily accessible for optimal operation and maintenance. -
Page 14: Installation Diagram
3. Installation Installation diagram TO THE SPA Circulation Control unit pump Filter Electric heater Spa heater control relay Wall plug 230V 16A 10mA The filter located upstream of the heat pump must be regularly cleared so that the water in the system is clean, thus avoiding the operational problems associated with dirt or clogging in the filter. -
Page 15: Operation
3. Installation Operation Use conditions For the heat pump to operate normally, the ambient air temperature must be between 10°C and 43°C when it is used alone or between -7°C and 10°C when used with the SPA heater. Advance notice Prior to starting the heat pump, please: •... -
Page 16: Use
4. Use Control panel Heating mode WiFi indicator "ON/OFF” button “High” button “Mode” button “Low” button Automatic mode Cooling Circulation pump mode indicator Heater pilot indicator (RECH indicator) Heating / Cooling / Automatic mode Before use, ensure that the filtration pump is working and that water is circulating through the heat pump. -
Page 17: Functions Overview
4. Use Functions overview The indicators to the right of the control panel indicate the O’SPA heat pump’s other functions. WiFi indicator Indicates your Wifi connection status. Flashes during pairing (see paragraph 4.9 “Pairing the heat pump”). It remains on when a connection is active. Circulation pump indicator On when the circulation pump is active: •... -
Page 18: Using The Hot Tub Heater Control Relay
4. Use Using the SPA heater control relay Poolex Relay Terminal block 11 240VAC 30A SPA heater 125VAC 30A controller 250VAC 15A cos Ø = 0.4 Insulate the connectors inside the spa in a waterproof connection box elements not provided) The SPA heater SPAWER driver system consists of a power relay (230V50Hz / 20A) which plugs into the heater phase wire (between the SPA heater controller output and the heater itself). -
Page 19: Using The Hot Tub Circulation Pump Control Relay
4. Use Using the circulation pump control relay (optional) Poolex Relay Terminal block 11 240VAC 30A 125VAC 30A 250VAC 15A cos Ø = 0.4 Circulation pump Insulate the connectors inside the spa in a waterproof connection box elements not provided) This relay is controlled by the heat pump control box either automatically or manually. -
Page 20: Downloading & Installing The Application
For more information, refer to the “Help” section of the “Smart Life” app. The “Smart Life” app and services are provided by Hangzhou Tuya Tech- nology. The company Poolstar, owner and distributor of the Poolex brand, cannot be held responsible for the operation of the "Smart Life" application. -
Page 21: Setting Up The Application
4. Use Setting up the application WARNING: Before you begin, make sure you have downloaded the «Smart Life» app, connected to your local WiFi network, and that your heat pump is electrically powered and running. You’ll need to create a «Smart Life» account to control your heat pump remotely. If you already have a Smart Life account, please log in and go directly to step 3. - Page 22 4. Use Step 3 (recommended): Add an object by clicking “...” and then “Add Object”. Enter a name («Pool» for example), then click “Done”. Step 4: Now add a device to your “Pool”. Click “Add” or “+” and then “Large appliances...” followed by “Water heater”. At this point, leave your smartphone on the “Add”...
-
Page 23: Pairing The Heat Pump
4. Use Pairing the heat pump Step 1: Now start the pairing. Choose your home WiFi network, enter the WiFi password and press “Confirm”. WARNING: The «Smart Life» application only supports 2.4Ghz WiFi networks. If your WiFi network uses the 5GHz frequency, go to the interface of your home WiFi network to create a second 2.4GHz WiFi net- work (available for most Internet boxes, routers and WiFi access points). -
Page 24: Use
4. Use 4.10 Controlling User interface Current pool temperature Temperature set point Current operating mode Switch the heat pump on/off Change the temperature Change operating mode Set the operating range Heat pump operating mode selector You can choose between Auto, Heating or Cooling modes. Available modes Automatic... - Page 25 4. Use About the settings Activating the manual mode (or automatic) for the SPA heater Activating the manual mode (or automatic) for the optional pump Timer Setting up the heat pump operating range Step 1: Create a time schedule, choose the time, the day(s) of the week concerned, and the action (switch on or switch off), then save.
-
Page 26: Status Values
4. Use 4.11 Status values The system’s settings can be checked and adjusted via the remote control by following these steps Step 1: Press on until you enter the settings verification mode. Step 2: Pres on to see the parameters. Step 3: Press on to select the setting to be viewed. -
Page 27: Advanced Settings
4. Use 4.12 Advanced settings WARNING: This operation is used to assist servicing and future repairs. The default settings should only be modified by an experienced professional person. The system’s settings can be checked and adjusted via the remote control by following these steps Caution, some settings cannot be modified, check the settings table for more information. -
Page 28: Maintenance And Servicing
5. Maintenance and servicing Maintenance, servicing and winterizing WARNING: Before undertaking maintenance work on the unit, ensure that you have disconnected the electrical power supply. Cleaning The heat pump housing must be cleaned with a damp cloth. Using detergents or other household cleaning products may degrade the surface of the housing and affect its integrity. -
Page 29: Repairs
6. Repairs WARNING: Under normal conditions, a suitable heat pump can heat up the tub water by 1°C to 2°C per hour. It is therefore normal that you do not feel any difference in temperature at the outlet level when the heat pump is on. A heated tub must be covered and insulated to avoir any heat loss. -
Page 30: Warranty
Poolstar. The parts under warranty shall be replaced or repaired at the discretion of Poolstar. Faulty parts must be returned to us during the warranty period in order to be covered. The warranty does not cover unauthorized labor or replacement costs. - Page 31 | 29...
- Page 32 O' SPA TECHNICAL ASSISTANCE www.poolex.fr 01-2023 www.poolstar.fr...
Need help?
Do you have a question about the SPAWER POOLEX O'SPA and is the answer not in the manual?
Questions and answers