Table of Contents
Advertisement
Quick Links
Advertisement
Table of Contents

Related Manuals for poolstar POOLEX


Summary of Contents for poolstar POOLEX
- Page 1 Heat pump for spa Installation and user manual www.poolstar.fr...
- Page 3 Our products are the result of years of research in the design and manufacture of heat pumps for pools. Our goal is to deliver high-quality products with exceptional performance. We took great care to put together this manual so you can get the most out of your Poolex heat pump.
- Page 4 WARNING This heat pump contains a flammable refrigerant R32. Any action on the refrigerant circuit is prohibited without a valid authorisation. Before working on the refrigerant circuit, the following precautions are necessary for safe work. 1. Work procedure The work must be carried out according to a controlled procedure, in order to minimise the risk of presence of flammable gases or vapours during the execution of the works.
- Page 5 They must be provided to the installer and kept in a safe place by the user. If you lose this manual, please visit our website: www.poolex.fr The indications and warnings contained in this manual should be carefully read and understood as they provide important information regarding the safe handling and operation of the heat pump.
-
Page 7: Table Of Contents
CONTENTS 1. General information General terms and conditions of delivery Safety instructions Water treatment Operating limits 2. Description Package contents Characteristics Product dimension Exploded view 3. Installation Location Installation diagram Hydraulic connection Electrical connection Connecting other functions Heater control relay Circulation pump control relay (optional) Operation 4. -
Page 8: General Information
1. GENERAL INFORMATION General terms and conditions of delivery All products and packaging, even those delivered carriage paid, travel at the risk of the recipient. Persons responsible for accepting delivery of the device must perform a visual inspection to make a note of any damage that may have occurred during transportation (refrigeration circuit, casing, electric box, frame). -
Page 9: Water Treatment
The low and high side test pressure must not exceed 42 bar. Water treatment Poolex heat pumps for swimming pools can be used with all types of water treatment systems. Nevertheless, it is essential that the treatment system (chlorine, pH, bromine and/or salt chlorinator metering pumps) is installed after the heat pump in the hydraulic circuit. -
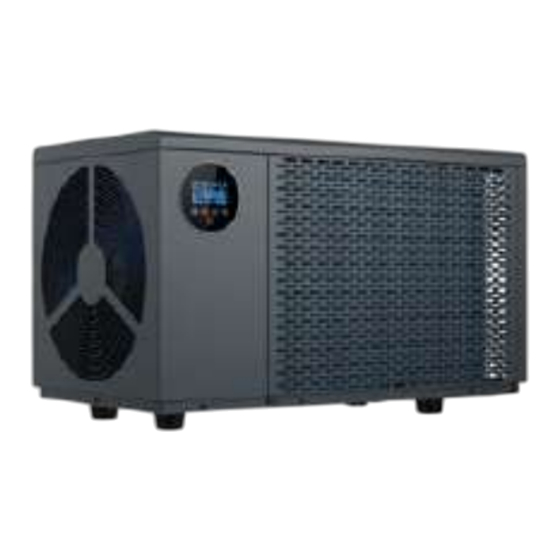
Page 10: Description
DESCRIPTION Package contents At reception, please check that your package contains the following: • A Poolex heat pump • 2x 1"1/2 (inch) to DN48.3 hydraulic connections • 1x spa heater control relay • 4x anti-vibration pads (directly mounted on the heat pump) •... -
Page 11: Product Dimension
2. DESCRIPTION Product dimension Exploded view Display Connector PG13.5 Back Panel High Pressure Switch Electrical Box Cover Evaporator Low Pressure Switch Temperature Sensor Retaining Clip Compressor Filter Fan Blade Reactor Protection Cover Needle Valve Air Deflector Electrical Box Support Plate Four-Way Valve Fan Motor Electrical Box... -
Page 12: Installation
INSTALLATION To install the heat pump only the hydraulic circuit and the power need to be connected. Location The heat pump must be installed at least 2.5 m away from the pool. >2.5m Please respect the following rules when choosing the heat pump’s installation location The location must be easily accessible for optimal operation and maintenance. -
Page 13: Installation Diagram
3. INSTALLATION Installation diagram TO THE SPA Circulation Control unit pump Filter Electric heater Spa heater control relay Wall plug 230V 16A 10mA The filter located upstream of the heat pump must be regularly cleared so that the water in the system is clean, thus avoiding the operational problems associated with dirt or clogging in the filter. -
Page 14: Connecting Other Functions
3. INSTALLATION Connecting other functions In order to ensure optimal heating of the SPA, regardless of the outside temperature, it is possible to connect a relay to control the SPA heater, which in extreme conditions will ensure good water heating. This relay is controlled by the heat pump control box either automatically or manually (boost). -
Page 15: Heater Control Relay
3. INSTALLATION Heater control relay SPA heater controller Insulate the connectors inside the spa in a waterproof connection box elements not provided Start conditions in automatic mode When the above conditions are met at the same time, the auxiliary electric heating will be turned on. •... -
Page 16: Circulation Pump Control Relay (Optional)
3. INSTALLATION Circulation pump control relay (optional) Circulation pump Insulate the connectors inside the spa in a waterproof connection box elements not provided When starting up, the water pump runs 60 seconds ahead of the compressor. When shutting down, the water pump turns off 30 seconds after the compressor. The circulation pump operation can be set to P21: •... -
Page 17: Operation
3. INSTALLATION Operation Use conditions For the heat pump to operate normally, the ambient air temperature must be between - 10 °C and 43 °C when it is used alone, or between - 20 °C and 10 °C when used with the SPA heater. In order to be heated, the water must circulate in the heat pump. -
Page 18: Use
4. USE Control panel Button Function ON/OFF Choosing modes +1 / UP - 1 / DOWN Parameters Symbol Description Symbol Description Heating mode SPA HEATER control Cooling mode Defrosting Silent mode Wi-Fi Smart mode Fault Powerful mode Key lock 16 |... -
Page 19: Control Buttons Operating Instructions
4. USE Control buttons operating instructions No. Function Description Unlocking/locking the To unlock/lock the buttons. keyboard Press UP + DOWN for 3s Turn On/Off the Heat Pump Press ON/OFF for 3s 1. Press DOWN for 3s Check running parameters 2. Use UP and DOWN for parameters browsing 3. - Page 20 4. USE No. Function Description Press MODE + DOWN to force defrosting. Forced defrosting ► The defrost symbol flashes in the display. Switches between frequency modes: silent mode, smart mode, powerful mode. Frequency mode switch Press PARAMETER to switch from one frequency mode to another.
-
Page 21: Using Operating Modes
4. USE Using operating modes Before use, ensure that the filtration pump is working and that water is circulating through the heat pump. Description of operating modes Heating mode Select the heating mode if you want to heat up the tub water with the heat pump. Cooling mode Select the cooling mode if you want to cool down the tub water with the heat pump. -
Page 22: Using Mobile Application
For more information, refer to the “Help” section of the “Smart Life” app. “Smart Life” services provided Hangzhou Tuya Techno- logy. The company Poolstar, owner and distributor of the Poolex brand, can- held responsible operation "Smart Life" application. The company Poolstar has no access to your “Smart Life” account. - Page 23 4. USE Setting up the application « Smart Life » WARNING: Before you begin, make sure you have downloaded the «Smart Life» app, connected to your local WiFi network, and that your heat pump is electrically powered and running. You’ll need to create a «Smart Life» account to control your heat pump remotely. If you already have a Smart Life account, please log in and go directly to step 3.
- Page 24 4. USE Step 3 (recommended): Add an object by clicking “…” and then “Add Object”. Enter a name («Pool» for example), then click “Done”. Step 4: Now add a device to your “Pool” Click “Add” or “+” and then “Large appliances…” followed by “Water heater”. At this point, leave your smartphone on the “Add”...
- Page 25 Check that WiFi is enabled on your smartphone. The pairing is successful, the "WiFi" logo remains fixed, you can rename your Poolex heat pump then press “Done”. Congratulations, your heat pump can now be controlled from your smartphone. | 23...
- Page 26 4. USE Control from the application « Smart Life » User interface Current pool temperature Temperature set point Current operating mode Switch the heat pump on/off Change the temperature Change operating mode Set the operating range Heat pump operating mode selector You can choose between Heating or Cooling modes.
- Page 27 4. USE Setting up the heat pump operating range Step 1: Create a time schedule, choose the time, the day(s) of the week concerned, and the action (switch on or switch off), then save. Step 2: To delete a time slot, press and hold the time slot. | 25...
-
Page 28: Viewing Running Parameters
4. USE Viewing running parameters The system’s settings can be checked via the remote control by following these steps Step 1: Press DOWN for 3s to enter the settings verification mode. Step 2: Press UP and DOWN to browse the parameters. Step 3: Press ON/OFF to exit the parameter check mode. -
Page 29: Viewing And Setting Advanced Parameters
4. USE Viewing and setting advanced parameters WARNING: This operation is used to assist servicing and future repairs. The default settings should only be modified by an experienced professional person. To check and adjust the system settings, follow these steps. 1. - Page 30 4. USE Code Indication Range Default Water pump operation mode 1 = Keep running when constant temperature shutdown 2 = Turn off after constant temperature shutdown 2min 3 = Intermittent operation Fan motor mode selection 0 (automatic) / 1 (manual) Manual speed of the DC fan 0-99 (actual speed*10) 80 (actual speed*10)
-
Page 31: Maintenance
5. MAINTENANCE Maintenance and servicing WARNING: Before undertaking maintenance work on the unit, ensure that you have disconnected the electrical power supply. Cleaning The heat pump housing must be cleaned with a damp cloth. Using detergents or other household cleaning products may degrade the surface of the housing and affect its integrity. The evaporator at the rear of the heat pump must be carefully cleaned with a vacuum cleaner and soft brush attachment. -
Page 32: Repairs
5. MAINTENANCE Repairs WARNING: Under normal conditions, a suitable heat pump can heat up the tub water by 1 °C to 2°C per hour. It is therefore normal that you do not feel any difference in temperature at the outlet level when the heat pump is on. In the event of a problem, the heat pump’s screen displays an error code instead of temperature indications. - Page 33 5. MAINTENANCE Code Description Solution 1. Replace the compressor exhaust temperature sensor. 2. Reconnect or clean compressor exhaust temperature High exhaust temp. protection sensor and wrap it with insulation tape. 3. Replace the controller or PC Board. Water inlet temperature fault Check the connection, change the sensor if necessary.
- Page 34 5. MAINTENANCE Error codes 1 to 128 are displayed in priority. Error codes 257 to 384 are only displayed if the previous ones do not appear. If two or more error codes appear at the same time, then the error codes accumulate. For example, if codes 8 and 16 occur at the same time, the display shows 24.
- Page 35 5. MAINTENANCE Code Description Solution 1. The heat dissipation is poor. The condensing fan rotates at a low speed IPM over heat or stops unexpectedly. protection 2. The ambient temperature rises too fast, leading to too late reaction of over-temperature frequency reduction. 1.
-
Page 36: Warranty
Poolstar. The parts under warranty shall be replaced or repaired at the discretion of Poolstar. Faulty parts must be returned to us during the warranty period in order to be covered. The warranty does not cover unauthorised labour or replacement costs. -
Page 37: Annexe : Electrical Diagram
ANNEXE 12V2 12V1 | 35... - Page 38 TE C H NI C AL AS SI ST AN CE www.poolex.fr 05-2023 www.poolstar.fr...
Need help?
Do you have a question about the POOLEX and is the answer not in the manual?
Questions and answers