
Related Manuals for Panasonic NV-DS27


Summary of Contents for Panasonic NV-DS27
- Page 1 Digital Video Camera Model No. NV-DS27 Operating Instructions NV-DS28 NV-DS37 NV-DS38 NV-DS27 NV-DS28 NV-DS37 NV-DS38 Card DV In AV In Before use, please read these instructions completely. VQT9154...
-
Page 2: Before Use
Dear Customer, Before Use We would like to take this opportunity to thank you for purchasing this Panasonic Movie Camera. Please read these Operating Instructions carefully and keep them handy for future reference. Please note that the actual controls and components, menu items, etc. of your Movie Camera may look somewhat different from those shown in the illustrations in these Operating Instructions. -
Page 3: Table Of Contents
Contents Before Use CARD Mode Information for Your Safety ..........2 Using a Card..............33 Contents ................3 Recording on a Card............33 Standard Accessories ............4 Playing Back a Card ............34 Optional Accessories............4 Recording Pictures on a Card to a Tape ......34 Getting Started .............. -
Page 4: Standard Accessories
08705 357357 Mon–Friday 9:00am–5:30pm ≥Or go on line through our Internet Accessory ordering application at www.panasonic.co.uk. ≥Most major credit and debit cards accepted. ≥All enquires transactions and distribution facilities are provided directly by Panasonic UK Ltd. ≥It couldn’t be simpler! -
Page 5: Getting Started
Getting Started Charge the Battery. ≥Connect the Battery to the AC Adaptor. ≥Connecting the AC Mains Lead. (Charging starts.) ≥When the Charge Lamp [CHARGE] goes off, the Battery is fully charged. Attach the Charged Battery to the Movie Camera. Insert the Cassette. ≥Slide the Lever to open. -
Page 6: Controls And Components
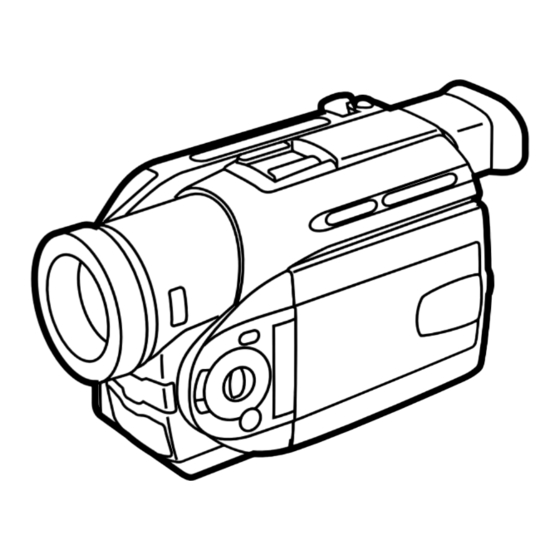
Controls and Components 1) Reverse Search Button [jSEARCH] (l 18) Rewind/Review Button [6] (l 26) Recording Check Button [S] (l 18) 2) Forward Search Button [SEARCHi] (l 18) Fast Forward/Cue Button [5] (l 26) SEARCH FADE STILL º 3) Fade Button [FADE] (l 20) Stop Button [∫] (l 26, 35) 4) Still Button [STILL] (l 19) Pause Button [;] (l 27, 35) - Page 7 28) 0-Lux Recording Switch [0 LUX OFF/ON] (l 21) 29) Lens Hood (l 45) 30) Lens 31) Recording Lamp (l 18) 32) Microphone (built-in, stereo) (l 19) 33) White Balance Sensor (l 47) Remote Control Sensor (l 9) Built-in Infra-red Beam Emitters (l 21) 34) Mode Selector Switch [AUTO/MNL/PROG.AE] (l 18, 22, 23, 24) 35) Menu Button [MENU] (l 13) FOCUS...
-
Page 8: Remote Controller
Remote Controller Using the wireless Remote Controller that is supplied with the Movie Camera, most of the Movie Camera functions can be operated from a distance. START/ Remote Controller Buttons PHOTO DATE/ STOP SHOT TIME 1) Date/Time [DATE/TIME] (l 39) 2) Indication Output Button [OSD] (l 30) COUNTER RESET... - Page 9 ≥Make sure to match the poles correctly when inserting the battery.......................... WARNING “THE LITHIUM BATTERY IS A CRITICAL COMPONENT (TYPE NUMBER CR2025 MANUFACTURED BY PANASONIC). IT MUST NEVER BE SUBJECTED TO EXCESSIVE HEAT OR DISCHARGE. IT MUST THEREFORE ONLY BE FITTED IN EQUIPMENT DESIGNED SPECIFICALLY FOR ITS USE.
-
Page 10: Power Supply
≥Be sure to start the car engine before you connect the Car Adaptor Cord, otherwise the fuse may blow. ≥For other notes concerning this item, see page 39. ~~~~~~~~~~~~~~~~~~~~~~~~ Charging Time and Available Recording Time NV-DS27/DS28 NV-DS37/DS38 Charging Time 1 h. 1 h. -
Page 11: Lens Cap And Grip Belt
Lens Cap and Grip Belt To protect the Lens surface, attach the Lens Cap. Adjust the length of the Grip Belt to the size of your hand. Attach the Lens Cap to the Grip Belt. Put your hand through the Grip Belt and adjust the length. ≥The removed Lens Cap can be hooked onto the Grip Belt .(When you are not recording, be sure to keep the Lens Cap attached to the Lens for... -
Page 12: Turning On The Movie Camera And Selecting Modes
Turning on the Movie Camera and Selecting Modes Turn on the power first and then select modes. ª How to Turn on the Power Set the [OFF/ON] Switch to [ON]. ≥The [CAMERA] Lamp lights up. ª How to Switch Modes Press the [MODE] Button. -
Page 13: Using The Menu Screen
Using the Menu Screen To facilitate the selection of a desired function or setup, this Movie Camera displays various function setups on Menus. Press the [MENU] Button. ≥The Menu corresponding to the Mode selected using by the [MODE] CAMERA Button is displayed. -
Page 14: List Of Menus
List of Menus The figures of the Menus are for explanation purposes only, and they are CAMERA FUNCTIONS different from the actual Menus. 1.CAMERA SETUP 2.DIGITAL EFFECT Camera Mode Main-Menu [CAMERA FUNCTIONS] 3.CARD SETUP 4.RECORDING SETUP [CAMERA SETUP] Sub-Menu 5.DISPLAY SETUP 6.OTHER FUNCTIONS 7.DEMO MODE 1) Progressive Photoshot Mode [PROGRESSIVE] (l 19) - Page 15 VCR Mode Main-Menu [VCR FUNCTIONS] [PLAYBACK FUNCTIONS] Sub-Menu VCR FUNCTIONS 1) Blank Search [BLANK SEARCH] (l 27) 1.PLAYBACK FUNCTIONS 2) Recording to Card [RECORD TO CARD] (NV-DS37/DS38 only) (l 33) 2.DIGITAL EFFECT 3.CARD SETUP 3) Automatic Printing [AUTO PRINT] (l 32) 4.RECORDING SETUP 5.AV IN/OUT SETUP 4) Index Search Mode [SEARCH] (l 28)
- Page 16 Card Playback Mode Main-Menu [CARD FUNCTIONS] (NV-DS37/DS38 only) CARD FUNCTIONS [ERASE PICTURE/TITLE] Sub-Menu 1.ERASE PICTURE/TITLE 1) Selecting and Erasing a Picture [ERASE PICTURE BY SELECTION] 2.CARD EDITING 3.DISPLAY SETUP (l 37) 4.OTHER FUNCTIONS 2) Erasing All Pictures [ERASE ALL PICTURES] (l 37) 3) Selecting and Erasing a Title [ERASE TITLE BY SELECTION] (l 37) PRESS MENU TO EXIT [CARD EDITING] Sub-Menu...
-
Page 17: To Insert A Button-Type Battery Into The Body
≥Make sure to match the poles correctly when inserting the battery.......................... WARNING “THE LITHIUM BATTERY IS A CRITICAL COMPONENT (TYPE NUMBER CR2025 MANUFACTURED BY PANASONIC). IT MUST NEVER BE SUBJECTED TO EXCESSIVE HEAT OR DISCHARGE. IT MUST THEREFORE ONLY BE FITTED IN EQUIPMENT DESIGNED SPECIFICALLY FOR ITS USE. -
Page 18: Camera Mode
CAMERA Mode TAPE CARD Recording When recording with the Mode Selector Switch set to [AUTO], the Movie CAMERA Camera automatically adjust the focus and white balance. In some cases, CARD they cannot be adjusted automatically and need to be adjusted manually. MODE (l 24, 23) OFF ON... -
Page 19: Photoshot
Photoshot This Movie Camera can take approximately 7 seconds still pictures containing sound. SEARCH FADE STILL Slide the [TAPE/CARD] Selector towards [TAPE]. (NV-DS37/ ∫ DS38 only) Press the [PHOTO SHOT] Button in the Recording Pause Mode. ≥The Movie Camera records a still picture for about 7 seconds and then switches back to the Recording Pause Mode. -
Page 20: Digital Zoom Function
Digital Zoom Function This function is useful when you want to record close-up shots of subjects located beyond a normal zoom range of 1k to 15k magnification. With the Digital Zoom Function, you can select a magnification of 30k or even to 600k. -
Page 21: Cinema Function
Cinema Function This function is for recording in a cinema-like wide screen. Set [CAMERA FUNCTIONS] >> [CAMERA SETUP] >> [CINEMA] >> [ON]. ≥Black bars appear at the top and bottom of the screen. To Cancel the Cinema Mode Set [CAMERA FUNCTIONS] >> [CAMERA SETUP] >> [CINEMA] >> [OFF]. ≥For other notes concerning this item, see page 40. -
Page 22: Backlight Compensation Function
Backlight Compensation Function This prevents a recording subject from being recorded darker in backlight. (Backlight is the light that shines from behind a recording subject.) SEARCH FADE STILL º Press the [BLC] Button. ≥The [ª] Indication flashes and then is displayed. To Resume Normal Recording Press the [BLC] Button. -
Page 23: Recording In Natural Colours
Recording in Natural Colours ( ( ( ( White Balance) Depending on the scene or light condition, the Automatic White Balance Adjustment Mode may not be able to bring out natural colours. (l 23, 47) In such a case, the white balance can be adjusted manually. Set the Mode Selector Switch to [MNL]. -
Page 24: Manual Shutter Speed Adjustment
Manual Shutter Speed Adjustment It is useful for recording fast-moving subjects. Set the Mode Selector Switch to [MNL]. ≥The [MNL] Indication appears. Press the [PUSH] Dial until the Shutter Speed Indication appears. Turn the [PUSH] Dial to adjust the shutter speed. Range of Shutter Speed Adjustment FOCUS 1/50–1/8000 s... -
Page 25: Digital Effect Functions
Digital Effect Functions This Movie Camera is equipped with Digital Effect Functions that add special effects to the scene. Digital Effects 1 [EFFECT1] [EFFECT 1] 1) Wipe Mode [WIPE] (l 25) 1) WIPE 2) MIX 2) Mix Mode [MIX] (l 25) 3) Strobe Mode [STROBE] ≥It records images with a stroboscopic effect. -
Page 26: Vcr Mode
VCR Mode SEARCH FADE STILL ∫ Playing Back The recorded scene can be played back immediately after the recording. Press the [MODE] Button to select the VCR Mode. ≥The [VCR] Lamp lights up. Press the [6] Button to rewind the tape. CAMERA ≥Rewind the tape to the point where you want to start playback. -
Page 27: Slow Motion Playback
Slow Motion Playback This Movie Camera can play back at a slow speed. Press the [1] Button. Press the [E] Button or [D] Button on the Remote Controller. START/ DATE/ PHOTO STOP TIME SHOT ≥When the [ ] Button is pressed, Slow Motion Playback proceeds in the reverse direction, while pressing the [ ] Button starts Slow Motion COUNTER... -
Page 28: Index Search Functions
Index Search Functions To facilitate searching of desired scene, this Movie Camera automatically records index signals during recording, as explained in the following. Photoshot Index Signal These signals are automatically recorded whenever still pictures are taken in Photoshot Mode. (l 19) Photoshot Index Signals are not recorded on still pictures recorded in Continuous Photoshot Mode. -
Page 29: Playback Digital Effect Functions
Playback Digital Effect Functions During playback, special digital effects can be added to the recorded pictures. The same effects as those of Digital Effects 1 and 2, which are used during recording, are obtained. START/ PHOTO DATE/ STOP TIME SHOT Press the [1] Button. -
Page 30: Playing Back On Your Tv
Playing Back on Your TV By connecting your Movie Camera with your TV, the recorded scenes can be viewed on your TV screen. ≥Before connecting them, turn off the power of both the Movie Camera and 21-pin Adaptor Connect the [AV OUT] Socket of the Movie Camera and the [VIDEO IN] [S-VIDEO IN] Video and Audio Input Sockets of the TV. -
Page 31: Copying On An S-Vhs (Or A Vhs) Cassette
Copying on an S-VHS (or a VHS) Cassette (Dubbing) After connecting the Movie Camera and the VCR as illustrated at left start the following procedures. ≥If your TV is not equipped with AV Input Sockets, the 21-pin Adaptor 2, 4, 5 (purchase separately) is necessary. -
Page 32: Using The Dv Cable For Recording
Using the DV Cable for Recording (Digital Dubbing) By connecting this Movie Camera with other digital video equipment that has a DV Input/Output Terminal (i.LINK) using a DV Cable VW-CD1E (optional) , dubbing can be done in the digital format. ≥Only the NV-DS28/DS38 can be used as a Recorder. -
Page 33: Card Mode
CARD Mode Using a Card A Card can be used to record still pictures. ª Inserting a Card Before inserting a Card, be sure to turn off the Movie Camera. Slide the [OPEN] Lever and open the Card Compartment. Hold the Card with its notch 1 1 1 1 facing left and insert it in the Card Compartment. -
Page 34: Playing Back A Card
Playing Back a Card It plays back images recorded on a Card. Press the [MODE] Button to select the Card Playback Mode. SEARCH FADE STILL º ≥The [CARD P.B] Lamp lights up. ≥The still picture that was recorded last on the Card is displayed. Press the [6] Button or [5] Button to display the desired picture. -
Page 35: Slide Show
Slide Show The recorded still pictures in the Card can be played back like a Slide Show. SEARCH FADE STILL ∫ To Play Back All the Pictures Continuously Set [CARD FUNCTIONS] >> [CARD EDITING] >> [SLIDE SHOW] >> [SLIDE SHOW] >> [ALL] ≥But, this procedure is unnecessary when editing of a Slide Show (undermentioned reference) isn't being done. -
Page 36: Creating A Title
Creating a Title You can create a title and record on a Card. CREATE TITLE Camera Mode: Set the Lens to the image you want to use for creating a title. VCR Mode: LUMINANCE Search for the image you want to use for creating a title and RETURN PRESS MENU TO EXIT set the Movie Camera to the Still Playback Mode. -
Page 37: Protecting The Pictures On A Card
Protecting the Pictures on a Card ( ( ( ( Lock Setting) Precious pictures recorded on a Card can be locked (to prevent accidental erasure.) (Even if pictures are locked, the pictures will be deleted when the Card is formatted.) Set [CARD FUNCTIONS] >>... -
Page 38: Others
PHOTO: Photoshot Mode Recording (l 19) BLANK: Blank Search (l 27) Others R !: Repeat Playback (l 41) 2k%: Variable Speed Search (l 26) Indications 1/500: When you adjust shutter speed manually, this indication appears. (l 24) Various functions and the Movie Camera status are shown SLIDE!: Slide Show Playback (l 35) on the screen. -
Page 39: Warning/Alarm Indications
ª To Display Date/Time Indication Notes and Hints To display Date/Time Indication, set the appropriate Date/ ª Concerning the Power Supply Time in [DATE/TIME] on the [DISPLAY SETUP] Sub-Menu. ≥When the Movie Camera is used for a long time, the (l 13) Camera body becomes warm, but this is not a malfunction. - Page 40 ≥Digital Zoom [D.ZOOM] (l 20) ≥You cannot use Sports Mode, Portrait Mode or Low-Light ≥1/750 s or faster shutter speed (l 24) Mode with Gain-up Mode [GAINUP]. When [PROGRESSIVE] is set to [AUTO] Sports Mode ≥During normal playback, the image movement may not You cannot use the Progressive Photoshot Function in the following cases.
- Page 41 ≥Manual Focus Mode ≥Even if Playback Zoom Functions are being used, images ≥The shutter speed, Iris and White Balance cannot be that are output from the DV Terminal (l 7) or Digital Still operated. Picture Terminal (l 32) are not enlarged. ≥The Sports Mode [5], the Portrait Mode [7] and Low ≥As you enlarge an image, the quality of image suffers.
-
Page 42: Cautions For Use
≥When the Movie Camera is not connected to the video format the Card on the unit which will be using the Card. printer properly, when the Ink Cassette is not inserted or is Take steps to ensure that valuable pictures are stored on empty, or when the printer is out of paper, the [PRINTER the personal computer, etc. - Page 43 detergent diluted with water and afterward finish wiping Remove the Card. (NV-DS37/DS38 only) with a dry cloth. Detach the power supply and retract the ≥For storing or transporting the Movie Camera, place it in a Viewfinder or the LCD Monitor 10, 12) bag or case lined with soft pads so as to prevent the To protect the Lens, attach the supplied Lens...
- Page 44 Set the [OFF/ON] Switch to [OFF] and leave the Movie Be sure to detach the Battery from the Movie Camera. (If it is Camera in this condition for about 1 hour. When the lens left attached to the Movie Camera, a minute amount of temperature becomes close to the ambient temperature, the current is consumed even when the Movie Camera power is fog disappears naturally.
-
Page 45: Before Requesting Repair (Problems And Solutions)
≥Do not attach other conversion lenses in front of the Lens erase the contents of a recording or may cause noise in images and sounds. Hood; there is no mount to be used for the attachment. ≥When you wish to attach the Tele Conversion Lens (VW- Card (NV-DS37/DS38 only) ≥When the Card is being read, do not remove the Card, turn LT3714ME;... -
Page 46: Explanation Of Terms
1-1: Is Manual Focus Mode selected? If Auto Focus Mode is The original sound was erased when audio dubbing selected, focus is automatically adjusted. (l 24) was performed. 1-2: There are some recording subjects and recording If you perform audio dubbing on a recording done in surroundings for which the Auto Focus Function does [16bit] Mode, the original sound will be erased. - Page 47 ª Memory Stop Function 1) Recording a subject whose one end is located closer to the Movie Camera and the other end farther away The Memory Stop Function is useful for the following from it operations. ≥Because Auto Focus makes adjustments at the centre Rewinding or fast-forwarding a tape to a desired of an image, it may be impossible to focus on a subject position...
-
Page 48: Specifications
DC Output: DC 7.9 V, 9 W (Movie Camera Power Source: DC 7.9/7.2 V Operation) Power Consumption: (NV-DS27/DS28) Recording DC 8.4 V, 1.2 A (Battery Charging) 2.9 W (When using Viewfinder) 3.6 W (When using LCD Monitor) Dimensions: 70 (W) -
Page 49: Index
Index Portrait Mode ..............22 Programme AE ..............22 ª A ª R , AC Adaptor ............10 Recording Check ............. 18 Audio Dubbing ..............30 Recording Pause Mode ...........18 Auto Focus ..............47 ... - Page 52 VQT9154 F0301Yu0( 7000 A) Matsushita Electric Industrial Co., Ltd. Central P.O. Box 288, Osaka 530-91, Japan...
Need help?
Do you have a question about the NV-DS27 and is the answer not in the manual?
Questions and answers