Summit ASDG2411 User Manual
Wine and beverage cooler
Hide thumbs
Also See for ASDG2411:
- User manual (24 pages) ,
- User manual (32 pages) ,
- User manual (32 pages)
Table of Contents
Advertisement
Quick Links
WINE and BEVERAGE COOLER
Beverage Coolers:
ASDG1521
Wine Coolers:
ASDW1522
BEFORE USE, PLEASE READ AND FOLLOW ALL SAFETY RULES AND OPERATING INSTRUCTIONS.
Write Serial Nos. (on lower left corner of
inside cabinet) here:
MODELS:
ASDG2411
AL57GPNR
ASDW2412
User Manual
Felix Storch, Inc.
An ISO 9001:2015 registered company
770 Garrison Ave
Bronx, New York 10474
www.summitappliance.com
Advertisement
Table of Contents

Related Manuals for Summit ASDG2411


Summary of Contents for Summit ASDG2411
- Page 1 WINE and BEVERAGE COOLER MODELS: Beverage Coolers: ASDG1521 ASDG2411 AL57GPNR Wine Coolers: ASDW1522 ASDW2412 User Manual BEFORE USE, PLEASE READ AND FOLLOW ALL SAFETY RULES AND OPERATING INSTRUCTIONS. Felix Storch, Inc. Write Serial Nos. (on lower left corner of An ISO 9001:2015 registered company...
-
Page 2: Table Of Contents
TABLE OF CONTENTS Appliance Safety Important Safeguards Location of Parts Installation Instructions 8-13 Before Using your Appliance Installation of your Appliance 8-10 Electrical Connection Reversing the Door Swing of your Appliance Adjusting the Kick Plate 11-12 Installing the Stainless Steel Handle Full Overlay Panel Installation Instructions 12-13 Operating your Appliance... -
Page 3: Appliance Safety
APPLIANCE SAFETY Your safety and the safety of others are very important. We have provided many important safety messages in this manual and on your appliance. Always read and obey all safety messages. This is the Safety Alert Symbol. The symbol alerts you to potential hazards that can kill or injure you and others. - Page 4 For every ounce of coolant at least 325 cubic feet of room space is required. The amount of coolant in the appliance is stated on the data plate inside the appliance. It is hazardous for anyone other than an Authorized Service Person to carry out servicing or repairs to this appliance. •...
-
Page 5: Location Of Parts
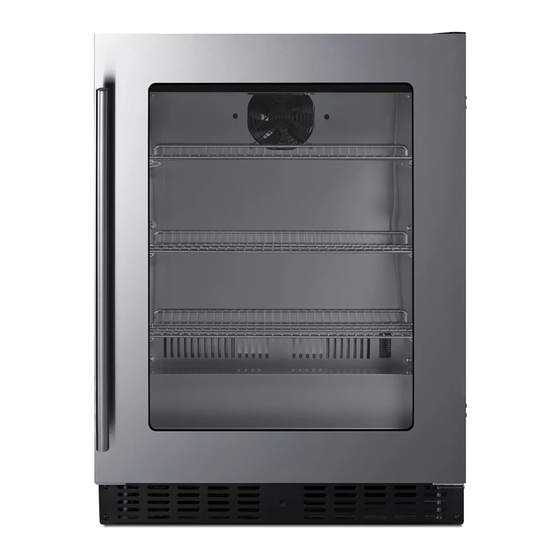
LOCATION OF PARTS Model ASDW1522 Handle Shelves (5) Door LED Light Digital Control Panel Ventilation Grille Adjustable Security Legs Lock Cabinet Model ASDW2412 Handle Digital Control Panel Door Shelves (6) LED Light Ventilation Grille Adjustable Security Legs Lock Cabinet... - Page 6 Model ASDG1521 Handle Digital Control Panel Door Shelves (3) LED Light Ventilation Grille Adjustable Security Lock Cabinet Legs Model ASDG2411 Handle Digital Control Panel Door Shelves (3) LED Light Ventilation Grille Security Adjustable Legs Lock Cabinet...
- Page 7 Model AL57GPNR Handle Digital Control Panel Door LED Light Shelves (3) Security Lock Ventilation Grille Cabinet Adjustable Legs...
-
Page 8: Installation Instructions
INSTALLATION INSTRUCTIONS Before Using your Appliance Remove the exterior and interior packing. • CAUTION: After unpacking you MUST allow this appliance to stand upright for at least 2 hours to allow the lubricant and refrigerant to drain back into the compressor and stabilize. Failure to do so may adversely affect performance and the lifetime of this unit. - Page 9 23⅝" / 600 NOTE: 1. Model ASDG1521 has the same size as ASDW1522. 2. Model ASDG2411 has the same size as ASDW2412. Anti-tip Bracket Installation To reduce the risk of the unit tipping over via abnormal usage or improper loading, the appliance must be secured by properly installing the anti-tip device packed with the appliance.
-
Page 10: Electrical Connection
Securing the Appliance Pop out the cover cap on the opposite side of the hinge and secure the appliance into the space by tightening the screws through the attachment bracket if the unit is provided with an attachment bracket. Electrical Connection WARNING Improper use of the grounded plug can result in the risk of electrical shock. -
Page 11: Reversing The Door Swing Of Your Appliance
Reversing the Door Swing of your Appliance This unit has the capability of the door opening from either the left or right side. The unit is delivered to you with the door opening from the left side. Should you desire to reverse the opening direction, please follow the reversal instructions shown on the following page. -
Page 12: Installing The Stainless Steel Handle
NOTE: 1. For models ASDG1521 and ASDW1522 the width is 14¾” (375mm); for models ASDG2411, ASDW2412 and AL57GPNR, it is 23.4” (595mm). 2. Weight of the overlay panel should not exceed 15.4 lbs (7kg). - Page 13 Door Panel Installation 1. Attach the two provided mounting brackets (2) to the prepared wood overlay panel (3) by using 6 wood screws ST4x10 Type AB Philips (1). (Fig. 1) 2. Gently slide the overlay panel onto the glass door (4). (Fig. 2) 3.
-
Page 14: Operating Your Appliance
OPERATING YOUR APPLIANCE It is recommended that you install the appliance in a place where the ambient temperature is between 72º and 78ºF (23º to 26ºC). If the ambient temperature is above or below the recommended temperatures, the performance of the unit may be affected. For example, placing your unit in extremely cold or hot conditions may cause interior temperatures to fluctuate. -
Page 15: Settings Mode
Setting the Temperature Control You can set the temperature by touching the UP and DOWN symbols. When you push the two • buttons at the same time, the LED readout will show the original temperature set previously. (The temperature preset at the factory is 54°F or 12°C for the wine cooler and 38°F or 3°C for the beverage cooler.) The temperature you are setting will increase by one degree each time you touch the Up symbol, •... -
Page 16: Interior Light
Fan Mode 1. Lightly touch and hold the UP key for 5 seconds to enter Settings mode and then touch the POWER key three (3) times. 2. Use the UP and DOWN keys to select the fan mode. • F0: Silent mode - Energy saving mode (default) •... -
Page 17: Temperature Alarm/Door Alarm
Remove the key and put it in a secure place for safekeeping. Glass Shelves (Only for Models ASDG1521 / ASDG2411.) Any of the shelves can be removed to store larger items. -
Page 18: Defrosting
Glass Shelves (Only for Model AL57GPNR.) To prevent damaging the door gasket, make sure to have the door all the way open when pulling the shelves out of the rail compartment. Any of the shelves can be removed to store larger items. When removing the shelf from the rail compartment, make sure to remove all items first. -
Page 19: Storage
Storage Bottles can differ in size. Accordingly, the actual number of bottles you can store may vary. The approximate maximum bottle capacity can be achieved when storing traditional 750 ml Bordeaux bottles in bulk storage. You may load your wine bottles in single rows or by stacking while taking note of the following: if you do not have enough bottles to fill your wine cellar, it is better to distribute the load throughout the wine cellar so as to avoid “all on top”... -
Page 20: Care And Maintenance
CARE AND MAINTENANCE Cleaning your Appliance CAUTION: Failure to unplug the appliance during cleaning could result in electrical shock or other personal injury. Turn off the power, unplug the appliance, and remove all items, including shelves. • Wash the inside surfaces with a solution of warm water and baking soda (about 2 tablespoons of •... -
Page 21: Troubleshooting
TROUBLESHOOTING You can solve many common problems easily, saving you the cost of a possible service call. Try the suggestions below to see if you can solve the problem before calling the servicer. PROBLEM POSSIBLE CAUSE REMEDY The appliance is not connected to a Connect the appliance. - Page 22 “E5”, “E6” or temperature sensor has failed. “E7”. “E3” or “E4” indicates that the defrost sensor in the evaporator has failed. “E5” indicates a defrost heater failure. “E6” indicates a solenoid valve failure. “E7” indicates a door switch failure. Has the appliance door been open for If yes, close the door.
- Page 23 NOTES...
-
Page 24: Limited Warranty
LIMITED WARRANTY ONE-YEAR LIMITED WARRANTY Within the 48 contiguous United States, for one year from the date of purchase, when this appliance is operated and maintained according to instructions attached to or furnished with the product, warrantor will pay for factory-specified parts and repair labor to correct defects in materials or workmanship. Service must be provided by a designated service company.
Need help?
Do you have a question about the ASDG2411 and is the answer not in the manual?
Questions and answers