Table of Contents
Advertisement
Advertisement
Table of Contents

Related Manuals for Summit SBC570B


Summary of Contents for Summit SBC570B
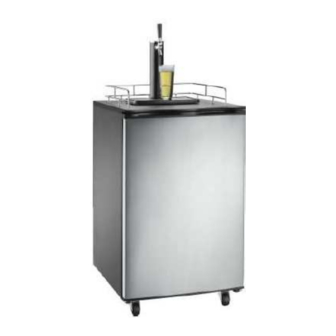
- Page 1 BEER DISPENSER Model SBC570B Instruction Manual BEFORE USE, PLEASE READ AND FOLLOW ALL SAFETY RULES AND OPERATING INSTRUCTIONS. Felix Storch, Inc. Write Serial No. (from back of unit) here: 770 Garrison Avenue Bronx, NY 10474 ________________________________ ww.summitappliance.com...
-
Page 2: Important Safeguards
IMPORTANT SAFEGUARDS IMPORTANT – All persons who will operate this equipment must read and become thoroughly familiar with all operating procedures and safety precautions. Misuse of this equipment may result in personal injury, death, or property damage. 1. You will need this manual for the safety warnings and precautions, operating, inspection, maintenance and cleaning procedures, parts list and assembly diagram. - Page 3 18. KEEP UNIT UPRIGHT when transporting. Do not allow to tilt past 45 degrees. Do not upend or turn upside down. 19. WARNING! Children must be supervised around this machine. Make sure that children know that this beer dispenser is NOT A TOY. Close door during operation and leave closed at all times when children are present.
-
Page 4: Table Of Contents
Regulator & Tap Connection Examples ........7 How to Tap a Beer Keg ................... 8 Operation, Maintenance & Storage ..............9 Accessories (Parts List) ................. 10 Limited Warranty ................... 11 TECHNICAL INFORMATION Model: SBC570B Capacity: 6.0 cubic feet Electrical Input: 115VAC ~ 60Hz Rated Current: 1.9A... -
Page 5: Beer Dispenser Flow And Parts
BEER DISPENSER FLOW AND PARTS SAVE THESE INSTRUCTIONS... -
Page 6: Beer Dispenser Assembly
BEER DISPENSER ASSEMBLY Be sure you have a thorough familiarity with the assembly and installation process before turning on your beer dispenser. NOTE: Once casters are assembled, place your unit in an upright position and allow it to sit for at least 8-10 hours before plugging into an outlet. -
Page 7: Co 2 Regulator Installation
BEER DISPENSER ASSEMBLY, continued REGULATOR INSTALLATION Proper installation of your CO regulator and a thorough under- standing of CO canisters are essential to the safe use of this product. Review and follow instructions for handling CO cylinders and this section in particular to ensure your safety and the safety of others. -
Page 8: Co 2 Regulator & Tap Connection Examples
BEER DISPENSER ASSEMBLY, continued REGULATOR & TAP CONNECTION EXAMPLES PLEASE NOTE: Your CO hose comes equipped and assembled with coupling connections for the regulator (green coupler) and the tap connection (silver coupler). The photos below show correct connections. -
Page 9: How To Tap A Beer Keg
HOW TO TAP A BEER KEG INSTALLING KEG TAP ON SINGLE BARREL TYPE KEG This beer dispenser's coupler is compatible with a 1/4 pony keg sized barrel and a 1/2 barrel full size (U.S.A.). The beer dispenser is capable of holding a 5-gallon cornelius keg and a 5-gallon D system keg. -
Page 10: Operation, Maintenance & Storage
OPERATION, MAINTENANCE & STORAGE USING YOUR BEER DISPENSER 1. First be sure that you are connected safely to the proper power supply: a 120V, 60Hz, 16 Amp grounded AC outlet. The cord should be rated for AT LEAST 1875 Watts and a No. 14 AWG minimum size. -
Page 11: Accessories (Parts List)
ACCESSORIES... -
Page 12: Limited Warranty
LIMITED WARRANTY ONE-YEAR LIMITED WARRANTY Within the 48 contiguous United States, for one year from the date of purchase, when this appliance is operated and maintained according to instructions attached to or furnished with the product, warrantor will pay for factory-specified parts and repair labor to correct defects in materials or workmanship.
Need help?
Do you have a question about the SBC570B and is the answer not in the manual?
Questions and answers