Table of Contents
Advertisement
Quick Links
BEVERAGE MERCHANDISER
BEFORE USE, PLEASE READ AND FOLLOW ALL SAFETY RULES AND OPERATING INSTRUCTIONS.
Write Serial No. (on lower left corner of
inside cabinet) here:
____________________________________________
INSTRUCTION MANUAL
Model Nos.: AL57G
Felix Storch, Inc.
An ISO 9001:2008 registered company
770 Garrison Avenue
Bronx, NY10474
www.summitappliance.com
Advertisement
Table of Contents

Related Manuals for Summit AL57G


Summary of Contents for Summit AL57G
- Page 1 BEVERAGE MERCHANDISER INSTRUCTION MANUAL Model Nos.: AL57G BEFORE USE, PLEASE READ AND FOLLOW ALL SAFETY RULES AND OPERATING INSTRUCTIONS. Felix Storch, Inc. Write Serial No. (on lower left corner of An ISO 9001:2008 registered company inside cabinet) here: 770 Garrison Avenue...
-
Page 2: Table Of Contents
TABLE OF CONTENTS Appliance Safety Important Safeguards Location of Parts Installation Instructions Before Using Your Appliance Installation of Your Appliance Electrical Connection Extension Cord Reversing the Door Swing of Your Appliance Installing the Stainless Steel Handle Operating Your Appliance 8-10 Control Panel Interior Light Sabbath Mode... -
Page 3: Appliance Safety
APPLIANCE SAFETY Your safety and the safety of others are very important. We have provided many important safety messages in this manual and on your appliance. Always read and obey all safety messages. This is the Safety Alert Symbol. The symbol alerts you to potential hazards that can kill or injure you and others. - Page 4 parts of the cooling system are damaged. Leaking coolant can ignite and may damage the eyes. In the event of any damage: - Avoid open flames and anything that creates a spark, - Disconnect from the electrical power line, - Air the room in which the appliance is located for several minutes and - Contact the Service Department for advice.
-
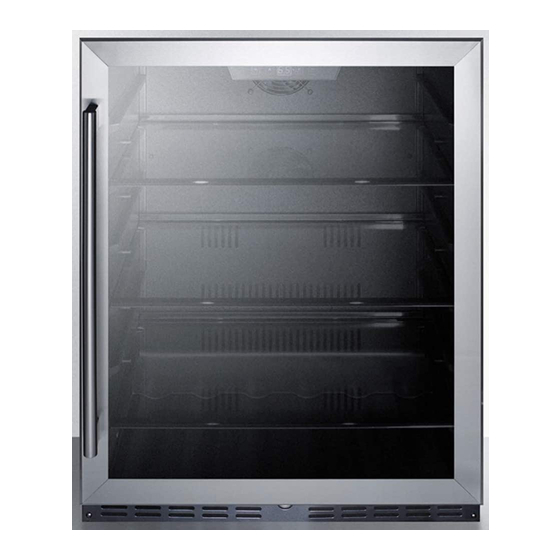
Page 5: Location Of Parts
LOCATION OF PARTS Digital Control Panel LED Light Handle Shelves (3) Door Security Lock Ventilation Grille Adjustable Legs... -
Page 6: Installation Instructions
INSTALLATION INSTRUCTIONS BEFORE USING YOUR APPLIANCE Remove the exterior and interior packing. CAUTION:After unpacking you MUST allow this appliance to stand upright for at least 2 hours to allow the lubricant and refrigerant to drain back into the compressor and stabilize. Failure to do so may adversely affect performance and the lifetime of this unit. -
Page 7: Extension Cord
To prevent accidental injury, the cord should be secured behind the appliance and not left exposed or dangling. The appliance should always be plugged into its own individual electrical outlet which has a voltage rating that matches the rating label on the appliance. This provides the best performance and also prevents overloading house wiring circuits that could cause a fire hazard from overheating. -
Page 8: Installing The Stainless Steel Handle
2. Gently pull down to remove the door from the right top hinge and place it on a padded surface to avoid the risk of damage. Then remove the right top hinge (4). (Fig. 3) 3. Unscrew and transfer the hinge pin (3 )of the hinge plate to the opposite side. (Fig. 2) 4. -
Page 9: Interior Light
LIGHT Turns the inner light ON and OFF. Used to increase (warm) the set temperature by 1°C/1ºF. DOWN Used to decrease (cool) the set temperature by 1°C/1ºF. ºF/ºCSelector Select the temperature display setting in Fahrenheit or Celsius degrees. To change the temperature from Fahrenheit to Celsius or from Celsius to Fahrenheit, press and hold the LIGHT key for 5 seconds. -
Page 10: Temperature Memory Function
TEMPERATURE MEMORY FUNCTION In the event of a power interruption (power surge, breaker switch, etc.), the unit will remember the previous temperature settings, and when the power is recovered, the cabinet temperature will return to the same setting temperature as before power was lost. TEMPERATURE ALARM AND DOOR ALARM ... -
Page 11: Care And Maintenance
CARE AND MAINTENANCE CLEANING YOUR BEVERAGE MERCHANDISER CAUTION: Failure to unplug the appliance during cleaning could result in electrical shock or other personal injury. Turn off the power, unplug the appliance, and remove all items, including shelves. Wash the inside surfaces with a solution of warm water and baking soda (about 2 tablespoons of baking soda to a quart of water). -
Page 12: Troubleshooting
TROUBLESHOOTING You can solve many common problems easily, saving you the cost of a possible service call. Try the suggestions below to see if you can solve the problem before calling the servicer. Troubleshooting Guide PROBLEM POSSIBLE CAUSE REMEDY Appliance is not connected to a power ... - Page 13 The gasket is dirty. Clean the door gasket. The shelves are out of position. Check the shelves and refit correctly. “E0” indicates a communication error for Call for service. 3 zone models. “E1” or “E2” indicates that the air Display “E0”, “E1”.
-
Page 14: Limited Warranty
LIMITED WARRANTY ONE-YEAR LIMITED WARRANTY Within the 48 contiguous United States, for one year from the date of purchase, when this appliance is operated and maintained according to instructions attached to or furnished with the product, warrantor will pay for factory-specified parts and repair labor to correct defects in materials or workmanship. Service must be provided by a designated service company.
Need help?
Do you have a question about the AL57G and is the answer not in the manual?
Questions and answers