Table of Contents
Advertisement
Available languages
Available languages
Quick Links
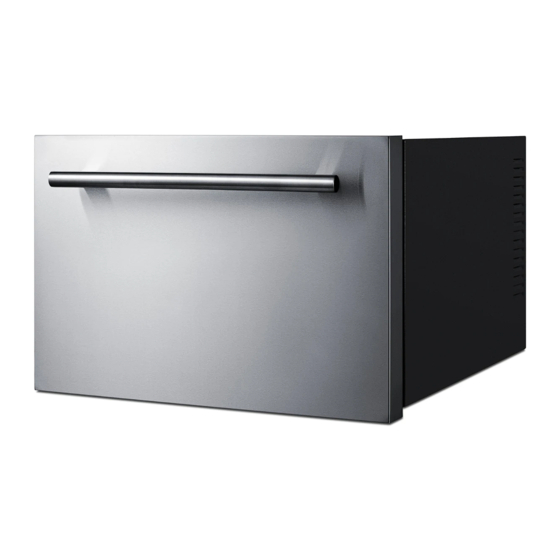
WINE COOLER/REFROIDISSEUR DE VIN
Model No. / No. des Modèles: COOL1D
LX1D
WC1D
/
/
INSTRUCTION MANUAL/ MANUEL D'INSTRUCTIONS
BEFORE USE, PLEASE READ AND FOLLOW ALL SAFETY RULES AND OPERATING
INSTRUCTIONS. /
AVANT UTILISATION, VEUILLEZ LIRE ET SUIVRE TOUTES LES RÈGLES DE
SÉCURITÉ ET LES
INSTRUCTIONS D'UTILISATION.
Write Model and Serial Numbers here/ Écrivez les numéros de
modèle et de série ici :
Felix Storch, Inc.
An ISO 9001:2015 registered company
Model No/ Modèle No.:
770 Garrison Ave
Bronx, New York 10474
Serial No/ Serie No.:
www.summitappliance.com
Advertisement
Table of Contents

Related Manuals for Summit COOL1D


Summary of Contents for Summit COOL1D
- Page 1 WINE COOLER/REFROIDISSEUR DE VIN Model No. / No. des Modèles: COOL1D LX1D WC1D INSTRUCTION MANUAL/ MANUEL D'INSTRUCTIONS BEFORE USE, PLEASE READ AND FOLLOW ALL SAFETY RULES AND OPERATING INSTRUCTIONS. / AVANT UTILISATION, VEUILLEZ LIRE ET SUIVRE TOUTES LES RÈGLES DE SÉCURITÉ...
-
Page 2: Table Of Contents
TABLE OF CONTENTS Appliance Safety Important Safeguards Location of Parts Installation Instructions 6-10 Before Using your Appliance Installation of your Appliance Shelves and Capacity Electrical Connection Extension Cord Installing the Stainless Steel Handle Full Overlay Panel Installation Instructions Operating your Appliance 13-14 Control Panel Setting the Temperature Control... -
Page 3: Appliance Safety
APPLIANCE SAFETY Your safety and the safety of others are very important. We have provided many important safety messages in this manual and on your appliance. Always read and obey all safety messages. This is the Safety Alert Symbol. The symbol alerts you to potential hazards that can kill or injure you and others. - Page 4 FOLLOW WARNINGS BELOW ONLY WHEN APPLICABLE TO YOUR MODEL • Use two or more people to move and install appliance. Failure to do so can result in back or other injuries. • To ensure proper ventilation for your appliance, the front of the appliance must be completely unobstructed.
-
Page 5: Location Of Parts
LOCATION OF PARTS S.S. drawer Control panel Wine shelf Handle Rolling slideway S.S. foaming door Door gasket NOTES: • This wine cooler is designed for indoor use only. • For ventilation purposes, the solid face of the drawer must face toward the door. -
Page 6: Installation Instructions
INSTALLATION INSTRUCTIONS Before Using your Appliance • Remove the exterior and interior packing. • Before connecting the appliance to the power source, let it stand upright for approximately 2 hours. This will reduce the possibility of a malfunction in the cooling system from handling during transportation. - Page 7 Ventilation channel 5.11x2.36 in. (130x60mm) NOTE: If you are unable to cut a top ventilation hole, install the included ventilation grille and allow for extra ventilation space. *Height needed if installing with included grille. Recess the cooler into the kitchen cabinet and remove the S.S.
- Page 8 Adjust side limited block (b) close to the kitchen cabinet and remove the 4 limited block covers (a) on the left and right inside walls of the cooler cabinet. Drill the screw (c) through the left and right side holes (b) to affix the unit to the kitchen cabinet.
- Page 9 Put side limited block cover (a) and cover the screw holes. (b) Put the S.S. drawer back into the wine cooler. a. Side limited cover (2pcs on each side of cabinet) b. Side limited block (2pcs on each side of cabinet) c.
-
Page 10: Shelves And Capacity
Shelves and capacity This model includes 2 movable wine shelves, you can store the wine with or without using the wine shelves. However, there will be different bottle capacities depending on if you use the wine shelves or not. Wine shelf •... -
Page 11: Electrical Connection
Electrical Connection WARNING Improper use of the grounded plug can result in the risk of electrical shock. If the power cord is damaged, have it replaced by a qualified electrician or an authorized service center. This appliance should be properly grounded for your safety. The power cord of this appliance is equipped with a three-prong plug, which mates with standard three-prong wall outlets to minimize the possibility of electrical shock. -
Page 12: Installing The Stainless Steel Handle
Installing the Stainless Steel Handle This appliance includes one stainless steel handle that is not required to operate the appliance. To install the handle, follow the instructions below: 1. Remove the door gasket. 2. Install the handle with the screws provided. DO NOT over-tighten as this will cause damage to the stainless steel door surface. -
Page 13: Operating Your Appliance
OPERATING YOUR APPLIANCE Install the appliance in a place where the ambient temperature is between 50ºF and 89ºF (10º to 32ºC), and ideally about 77ºF (25ºC). If the ambient temperature is above or below the recommended temperatures, the interior temperatures may fluctuate, and the optimal operating temperature may not be reached. -
Page 14: Sabbath Mode
Sabbath Mode • Sabbath mode is available for the observance of certain religious holidays. This mode turns off the displays, interior light, and audible alarms and prevents them from turning on again. Normal cooling operations will still take place. To initiate Sabbath mode, press the ON/OFF and UP symbols at the same time and hold for 3 •... -
Page 15: Care And Maintenance
CARE AND MAINTENANCE Cleaning your Appliance • Turn off the power, unplug the appliance, and remove all items. • Wash the inside surfaces with a solution of warm water and baking soda (a quart of water to about 2 tablespoons of baking soda). •... -
Page 16: Troubleshooting
TROUBLESHOOTING You can solve many common problems easily, possibly saving you the cost of a service call. Try the suggestions below to see if you can solve the problem before calling the servicer. PROBLEM POSSIBLE CAUSE REMEDY The appliance is not connected to a power Connect the appliance to a power source ... -
Page 17: Limited Warranty
LIMITED WARRANTY ONE-YEAR LIMITED WARRANTY Within the 48 contiguous United States, for one year from the date of purchase, when this appliance is operated and maintained according to instructions attached to or furnished with the product, warrantor will pay for factory- specified parts and repair labor to correct defects in materials or workmanship. -
Page 18: French Version Of The Manual
SÉCURITÉ DE L'APPAREIL Votre sécurité et celle des autres sont très importantes Nous avons fourni de nombreux messages de sécurité importants dans ce manuel et sur votre appareil. Lisez et respectez toujours tous les messages de sécurité. C’est le symbole d'alerte de sécurité. Le symbole vous avertit des dangers qui peuvent vous tuer ou vous blesser ainsi que d'autres personnes. - Page 19 SUIVEZ LES AVERTISSEMENTS CI-DESSOUS UNIQUEMENT LORSQU'APPLICABLES À VOTRE MODÈLE • Utilisez deux personnes ou plus pour déplacer et installer l'appareil. Le non-respect de cette consigne peut entraîner des blessures au dos ou autres. • Pour assurer une bonne ventilation de votre appareil, la face avant de l'appareil doit être complètement dégagée. Choisissez un endroit bien aéré...
- Page 20 EMPLACEMENT DES PIÈCES Tiroir inox Panneau de Étagère à vin commande Gérer Glissière roulant Porte moussante SS Joint de porte REMARQUES : Ce refroidisseur à vin est conçu pour une utilisation en intérieur uniquement. Pour des raisons de ventilation, la face pleine du tiroir doit être orientée vers la porte.
- Page 21 INSTRUCTIONS D'INSTALLATION Avant d'utiliser votre appareil • Retirer l'emballage extérieur et intérieur. • Avant de brancher l'appareil à la source d'alimentation, laissez-le debout pendant environ 2 heures. Cela réduira la possibilité d'un dysfonctionnement du système de refroidissement dû à la manipulation pendant le transport. •...
- Page 22 " " Canal de ventilation 5,11 x 2,36 (130 x 60 mm) REMARQUE : Si vous ne parvenez pas à découper un trou de ventilation supérieur, installez la grille de ventilation incluse et prévoyez un espace de ventilation supplémentaire. Enfoncer le refroidisseur dans l’armoire de cuisine et retirer le tiroir SS...
- Page 23 Ajustez le bloc de limitation latéral (b) près de l'armoire de cuisine et retirez les 4 couvercles de bloc de limitation (a) sur les parois intérieures gauche et droite de la glacière. Percez la vis (c) dans les trous latéraux gauche et droit (b) pour fixer l'appareil au meuble de cuisine.
- Page 24 Placez le couvercle du bloc limité latéral (a) et couvrez les trous de vis. (b) Remettrez le tiroir DD dans le refroidisseur a vin. a. Couverture limitée latérale (2 pièces de chaque côté de l'armoire) b. Blocage latéral limité (2 pièces de chaque côté de l'armoire) c.
- Page 25 Étagères et capacité Ce modèle comprend 2 étagères à vin mobiles, vous pouvez stocker le vin avec ou sans utiliser les étagères à vin. Cependant, il y aura différentes capacités de bouteilles selon que vous utilisez ou non les étagères à vin. Étagère à...
- Page 26 Connexion électrique ATTENTION Une mauvaise utilisation de la fiche mise à la terre peut entraîner un risque de choc électrique. Si le cordon d'alimentation est endommagé, faites-le remplacer par un électricien qualifié ou un centre de service agréé. Cet appareil doit être correctement mis à la terre pour votre sécurité. Le cordon d'alimentation de cet appareil est équipé...
- Page 27 Installation de poignée en acier inoxydable Cet appareil comprend une poignée en acier inoxydable qui n'est pas nécessaire pour faire fonctionner l'appareil. Pour installer la poignée, suivez les instructions ci-dessous Retirez le joint de la porte. Installez la poignée avec les vis fournies. NE PAS trop serrer car cela endommagerait la surface de la porte en acier inoxydable.
- Page 28 FONCTIONNEMENT DE VOTRE APPAREIL Installez l'appareil dans un endroit où la température ambiante est comprise entre 50 °F et 89 °F (10 °C à 32 °C) et idéalement d'environ 77 °F (25 °C). Si la température ambiante est supérieure ou inférieure aux températures recommandées, les températures intérieures peuvent fluctuer et la température de fonctionnement optimale peut ne pas être atteinte.
- Page 29 Mode Sabbat • Le mode Sabbat est disponible pour l'observance de certaines fêtes religieuses. Ce mode éteint les écrans, l'éclairage intérieur et les alarmes sonores et les empêche de se rallumer. Les opérations de refroidissement normales auront toujours lieu. • Pour activer le mode Sabbat, appuyez simultanément sur les symboles ON/OFF et UP et maintenez-les enfoncés pendant 3 secondes.
- Page 30 SOIN ET ENTRETIEN Nettoyage de votre appareil • Coupez l'alimentation, débranchez l'appareil et retirez tous les éléments. • Lavez les surfaces intérieures avec une solution d'eau tiède et de bicarbonate de soude (un litre d'eau pour environ 2 cuillères à soupe de bicarbonate de soude). •...
- Page 31 DÉPANNAGE Vous pouvez facilement résoudre de nombreux problèmes courants, ce qui peut vous faire économiser le coût d'un appel de service. Essayez les suggestions ci-dessous pour voir si vous pouvez résoudre le problème avant d'appeler le réparateur. PROBLEM POSSIBLE CAUSE REMEDY L’Appliance ...
- Page 32 GARANTIE LIMITÉE GARANTIE LIMITÉE D'UN AN Dans les 48 États américains contigus, pendant un an à compter de la date d'achat, lorsque cet appareil est utilisé et entretenu conformément aux instructions jointes ou fournies avec le produit, le garant paiera les pièces spécifiées par l'usine et la main-d'œuvre pour corriger les défauts de matériaux ou de fabrication.
Need help?
Do you have a question about the COOL1D and is the answer not in the manual?
Questions and answers
Where does the ventilation grill get installed?