Table of Contents
Advertisement
Quick Links
Advertisement
Table of Contents

Summary of Contents for Eyevision EV-TRUWL7-KP22
- Page 1 TruWireless Intercom System with Built-in Halow WiFi Bridge EV-TRUWL7-KP22...
-
Page 2: Table Of Contents
Description Table of Contents Description ------------------------------------------------------------------------------------------ 3 Contents --------------------------------------------------------------------------------------------- 3 Parameters (Indoor Unit) ------------------------------------------------------------------------ 3 Parameters (Video Intercom) ------------------------------------------------------------------- 3 Setup Monitor and Intercom Device Setup ------------------------------------------------- 4 Monitor and Intercom Device Pairing ------------------------------------------------ 4 Connecting to a Smartphone Device ------------------------------------------------- 4 Tuya Smart APP ---------------------------------------------------------------------------- 5 Indoor Monitor Operation Instructions Home Page ---------------------------------------------------------------------------------- 6... -
Page 3: Description
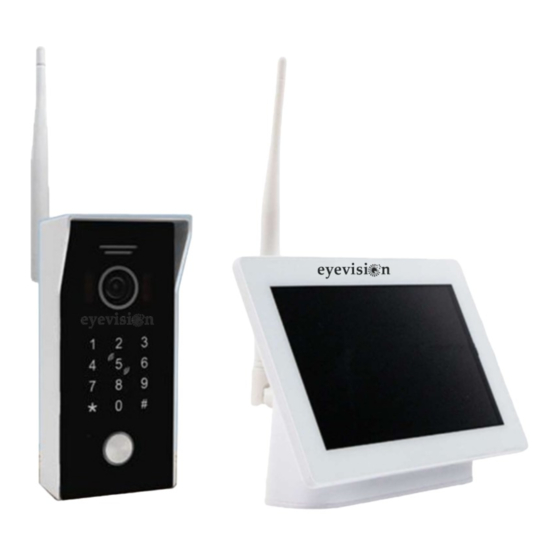
Description EV-TRUWL7-KP22 is a True Wireless Intercom System with a built-in WiFi Bridge. This system contains two main devices; the indoor monitoring screen in addition to the smart video intercom, these devices are connected through WiFi antennas. The indoor monitoring screen is a 7 inch HD touch screen that allows for remote monitoring of the smart video intercom and its connected locks. -
Page 4: Setup
Setup Monitor and Intercom Device Setup 1. Screw an antenna onto the back of the video intercom device. 2. Screw the remaining antenna onto the back of the indoor monitoring device. 3. If required, use the antenna extension cord to reduce the distance or number of obstructions between the two antennas. 4. -
Page 5: Tuya Smart App
Connecting to a Smartphone Device Press the QR code button Scan the QR code on minute Wait up to 2 Device Press Add indoor in the top right corner: monitor: the device to connect: Tuya Smart APP (1). Hang off (Back): During a call or monitoring process, click this key to exit the current interface. -
Page 6: Indoor Monitor Operation Instructions
Indoor Monitor Operation Instructions Home Page Overview of the main home page with screenshots Records Monitor Mobile Access User Settings System Settings Ring Monitor Door 1 Unlock Records Photo Record Storage cells, motion detections, snapshot pictures will all be accessible in the photo record page. The text for the photo that is currently selected will be blue and a blue tick will be present on the left hand side. - Page 7 User Settings System Info Click “System Info” to see the following details: IP address. Extension Code, Mask, Gateway, Soft, MAC, PID, ID and SC capacity. Format: This will wipe the SD card Read: This will automatically create folders for wallpaper, screen saver and ring files. Ringtone Custom audio files can be selected by uploading them as mp3 files onto an SD card in the ring folder.
-
Page 8: User Settings
User Settings Delay There are 5 different delay settings that can be adjusted on this page: Ringing time (5, 10, 15, 20, 30, 60, 90) - This is the amount of time the monitor device for will ring for when the monitor receives a call from a connected video intercom device. -
Page 9: Video Intercom Programming
Video Intercom Programming Modes Mode Purpose Indicator Standby Unlocking the device LED light colour: White Administrator To change password, general LED light colour: White with red settings and reset the device flashing every second Unlocked Unlock attached lock or trigger the LED light colour: Green opening of an attached automatic Sound signal: Beep x 2 “The door is... -
Page 10: Modify Administrator Code
Modify Administrator Code Default Admin Code is 999999 To change the administrator code New 6 Digit Code Admin Code New 6 Digit Code If successful, the device will sound Beep x 2 Public Unlock Code The public unlock code can be enabled and disabled by the administrator. This setting directly effects all stored public unlock codes. -
Page 11: Modify The Unlock Time Of Relay
Modify the Unlock Time of Relay The unlock time can be set to any value from 0~150 s. Default Admin Code is 999999 To change the value of the unlock time Admin Code Where xxx = 002 for a 2 s unlock time. If successful, the device will sound Beep x 2. -
Page 12: Add User Card
Add User Card In standby mode, swipe Add Card Master Card 3 times within 15 seconds. The LED light indicator will then flash red and The device will Beep x4 to confirm that the device has entered the add user card mode. Swipe the card which is to become a user card in the RFID area. -
Page 13: User Operations
User Operations Every user card has an associated 4 digit passcode that a user may be required to or have the option of inputting to unlock the device. The default user passcode for all user cards is 0000 but this code can only be used to initially modify the user passcode.


Need help?
Do you have a question about the EV-TRUWL7-KP22 and is the answer not in the manual?
Questions and answers