Advertisement
Quick Links
Advertisement

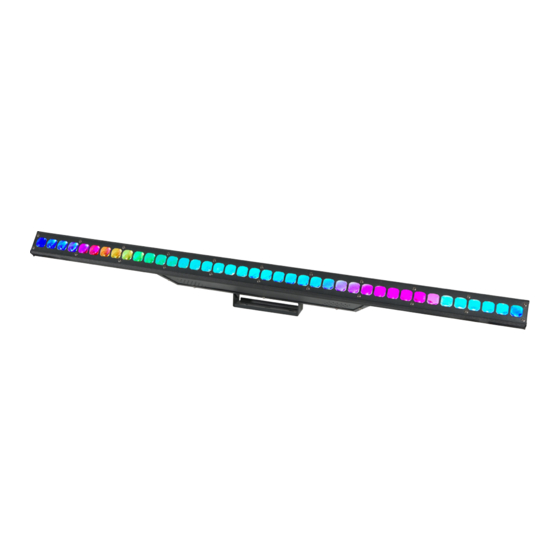
Summary of Contents for Equinox Systems PIXELpoint Batten
- Page 1 PIXELpoint Batten User Manual Order codes: EQLED059...
-
Page 2: Safety Advice
Please note: These fixtures are intended for stage lighting and entertainment applications only, and are not intended for extended periods of use, including but not limited to house-light, industrial or architectural applications and should only be operated with short duty cycles. www.prolight.co.uk PIXELpoint Batten User Manual... - Page 3 • Supplied with mounting bracket Fuse F1A 250V • 4 push button menu with LED display Dimensions 55 x 1005 x 145mm • powerCON input/output Weight 2.5kg • 3-Pin XLR input/output Order code EQLED059 • Fan cooled 1005mm www.prolight.co.uk PIXELpoint Batten User Manual...
-
Page 4: Technical Specifications
02 - powerCON input 05 - 3-Pin XLR output 08 - LED display 1 x mounting bracket 03 - powerCON output 06 - Bracket tightening knobs 09 - Function buttons & 2 x knobs 10 - Fan www.prolight.co.uk PIXELpoint Batten User Manual... - Page 5 F 2 5 5 Strobe C C 0 1 C C 1 5 Colour change (slow-fast) d E 0 1 d E 1 5 Colour fade (slow-fast) C P 0 1 C P 1 5 Colour pulse (slow-fast) www.prolight.co.uk PIXELpoint Batten User Manual...
- Page 6 E 8 - 1 E 8 - 8 E 9 - 1 E 9 - 8 S U d 1 S E 0 1 Sound mode Sensitivity S E 1 5 S U d 3 www.prolight.co.uk PIXELpoint Batten User Manual...
- Page 7 Channel Value Function 000-255 Master dimmer (0-100%) 000-255 Red dimmer (0-100%) 000-255 Green dimmer (0-100%) Section 1 000-255 Blue dimmer (0-100%) 000-255 Red dimmer (0-100%) 000-255 Green dimmer (0-100%) Section 2 000-255 Blue dimmer (0-100%) www.prolight.co.uk PIXELpoint Batten User Manual...
- Page 8 Sound mode 1 use channel 5 for 220-229 Sound mode 2 sensitivity 230-255 Sound mode 3 000-255 Speed (slow-fast) 000-255 Colour selection/sensitivity (low-high) 000-255 Red dimmer (0-100%) 000-255 Green dimmer (0-100%) 000-255 Blue dimmer (0-100%) www.prolight.co.uk PIXELpoint Batten User Manual...
- Page 9 000-255 Green dimmer (0-100%) Section 7 000-255 Red dimmer (0-100%) 000-255 Blue dimmer (0-100%) 000-255 Green dimmer (0-100%) Section 4 000-255 Red dimmer (0-100%) 000-255 Blue dimmer (0-100%) 000-255 Green dimmer (0-100%) Section 8 000-255 Blue dimmer (0-100%) www.prolight.co.uk PIXELpoint Batten User Manual...
- Page 10 Now use the “UP” and “DOWN” buttons to select the brightness between . Press the “ENTER” button and repeat for green ( ) and blue ( Value: 000 - 255 (000 = low brightness, 255 = high brightness) www.prolight.co.uk PIXELpoint Batten User Manual...
- Page 11 . Press the “ENTER” button and use the “UP” and “DOWN” buttons to SEO1 SE15 select the sound sensitivity between Press the “ENTER” button to confirm the setting. To exit out of any of the above options, press the “MENU” button. www.prolight.co.uk PIXELpoint Batten User Manual...
-
Page 12: Dmx Setup
Please quote: 3-Pin: CABL10 – 2m CABL11 – 5m CABL12 – 10m 5-Pin: CABL185 – 2m CABL187 – 5m CABL188 – 10m Also remember that DMX cable must be daisy chained and cannot be split. www.prolight.co.uk PIXELpoint Batten User Manual... -
Page 13: Line Termination
5-pin XLR (male) 3-pin XLR (female) Pin 1: GND (screen) Pin 1: GND (screen) Pin 2: Signal (-) Pin 2: Signal (-) Pin 3: Signal (+) Pin 3: Signal (+) Pin 4: N/C Pin 5: N/C www.prolight.co.uk PIXELpoint Batten User Manual... - Page 14 Please note: Caution should be used when power linking other fixtures to the PIXELpoint batten as the power consumption of other fixtures will vary. Fixtures fitted with lamps often require 2/3 times more current on startup, these may require their own power source.


Need help?
Do you have a question about the PIXELpoint Batten and is the answer not in the manual?
Questions and answers