Table of Contents
Advertisement
Quick Links
Advertisement
Table of Contents

Subscribe to Our Youtube Channel
Related Manuals for Mondraker NEAT 2024


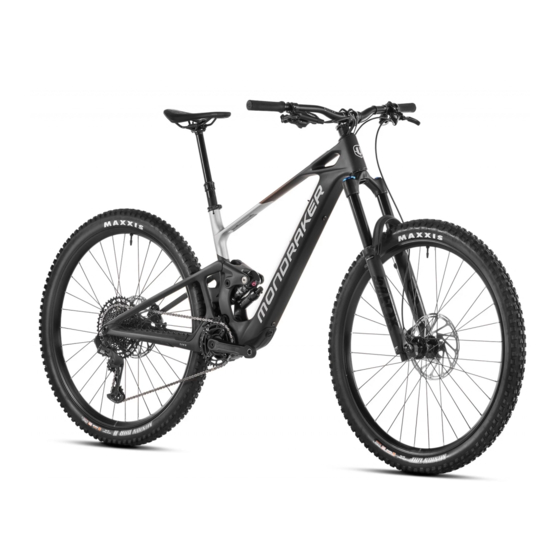
Summary of Contents for Mondraker NEAT 2024
- Page 1 MANUALS & DOCUMENTS NEAT 2024 / EN Rev. 01...
-
Page 2: Safety And General Instructions
In the event of not being qualified to follow any of these steps, please take your bicycle to a Mondraker authorized technical service for maintenance and replacement of its components. The incorrect installation of spare parts can result in malfunctions, accidents, injuries, and warranty void. - Page 3 NEAT 2024 Manuals & Documents 1. GEOMETRY SIZE Seat Tube Length 380mm 420mm 450mm 490mm Top Tube Length 595mm 615mm 640mm 660mm Bottom Bracket Drop -25mm -25mm -25mm -25mm Bottom Bracket Height 348mm 348mm 348mm 348mm Chainstay Length 450mm 450mm...
- Page 4 NEAT 2024 Manuals & Documents 2. FRAME TECHNICAL SPECIFICATIONS FRAME SIZES S / M / L / XL FRONT WHEEL SIZE 29” FRONT HUB 110mm x 15mm REAR WHEEL SIZE 29” REAR HUB 148mm x 12mm (BOOST) REAR AXLE L180mm M12 PITCH 1.0, HEAD DIAMETER 19mm...
-
Page 5: Remove Cover
NEAT 2024 Manuals & Documents 4. BATTERY 4. 1. REMOVE COVER LOCKED UNLOCKED STEP 1 STEP 2 STEP 3 4. 2. UNPLUG BATTERY PULL TURN 90º STEP 1 STEP 2 STEP 3... - Page 6 NEAT 2024 Manuals & Documents UNSCREW Never ride the bicycle without the battery cover. EXTRACT Please, follow steps in reverse for battery insertion.
- Page 7 NEAT 2024 Manuals & Documents 4. 3. BATTERY Please, refer TQ service website for maintenance. To correctly position the battery, LEDs must be on bicycle drive side. 100% Light sensor • To check battery charge level briefly cover the LEDs with a finger.
- Page 8 NEAT 2024 Manuals & Documents 5. DISPLAY AND REMOTE This bicycle comes with the HPR Display V01. For further details regarding display and remote functionality, please refer to TQ manuals. 5.1. HOME SCREEN OVERVIEW 5.2. HPR REMOTE Assist mode Range extender...
-
Page 9: Pairing Your Smartphone
NEAT 2024 Manuals & Documents 5. 5. PAIRING YOUR SMARTPHONE 1. To connect your smartphone to your Mondraker Neat, first download TQ E-Bike app from the Appstore for IOS or Google Play Store for Android. 2. Turn on your bike. -
Page 10: Changing Assist Mode
NEAT 2024 Manuals & Documents 5. 7. CHANGING ASSIST MODE Your bike has 3 modes of assistance: You can customize each mode within your smartphone TQ App. You can select the mode by pressing UP or DOWN in the Remote or pressing Display button. -
Page 11: Walk Mode
NEAT 2024 Manuals & Documents 5. 9. SETUP-MODE LONG PRESS > 5 SEC LONG PRESS > 5 SEC 1. Turn on the drive system. 2. Press and hold for 5 seconds simultaneously the button on the Display and the Down button on the Remote. - Page 12 NEAT 2024 Manuals & Documents 5. 11. CUSTOMIZATION AND OTHER SETTINGS Once you paired your Mondraker Neat with your smartphone you can customize Max Power, Assist and Pedal response for the 3 assistance modes. • Turn on your bike and connect the smartphone.
-
Page 13: Cable Connection Diagram
NEAT 2024 Manuals & Documents 6. INTERNAL ROUTING CHARGING PORT DROPPER POST SPEED SENSOR BRAKE BRAKE REMOTE SPLITTER MOTOR DERAILLEUR Cables are hold in place by two cable guides Display cable routing HEATSHRINK SLEEVE SPEED SENSOR BRAKE DERAILLEUR Rear derailleur cable is hold... - Page 14 NEAT 2024 Manuals & Documents 8. INSTALLING CHARGING PORT SPLITTER TQ special tool is needed for the following steps. LOOP CABLE REMOTE ZIP TIE CABLES BRAKE DROPPER POST SPLITTER DERAILLEUR Make sure the battery is removed from the frame. Secure cables and guide using zip ties. Do not tight them too much. Cables should slide easily.
-
Page 15: Installing Cable Guides
NEAT 2024 Manuals & Documents 9. INSTALLING CABLE GUIDES After charging port is installed, cable guide needs to be attached into the frame. Secure cables and guide using zip ties. Do not tight them too much. Cables should slide easily. - Page 16 NEAT 2024 Manuals & Documents STEP 4 TIGHT M3 SCREW 1N.m Hold in place the cable guide with the M3 screw STEP 5 Install Fidlock base...
-
Page 17: Speed Sensor
NEAT 2024 Manuals & Documents Lower cable guide does not require the use of TQ tool. Follow same cable layout order as the upper cable guide. STEP 6 BRAKE DROPPER POST ZIP TIE CABLES LOWER CABLE GUIDE SPLITTER DERAILLEUR Hold in place the cable guide 1N.m... -
Page 18: Chain Stay Protector
NEAT 2024 Manuals & Documents 11. DISPLAY 12. REMOTE 1N.m 13. CHAIN STAY PROTECTOR New chainstay protectors, come with no hole for mechanical or wired derailleurs. On the back side there is a mark for piercing the outlet exit of the cable. - Page 19 NEAT 2024 Manuals & Documents 15. FENDERS AND MUDGUARDS STEP 1 STEP 2 1N.m 1N.m STEP 3 1N.m 16. CRANKSET ALIGN The motor has a small notch in the crankset axle. Rotate motor to place the indentation at 12 o’clock. Place the...
- Page 20 NEAT 2024 Manuals & Documents Using an oval chainring or any other than a 34-tooth chainring will affect motor performance. Or even damage frame. 17. UPPER LINK INSTALLATION GUIDE To access rear triangle bolts, shock absorber must be removed. For Rear shock removal, first release all air pressure.
- Page 21 NEAT 2024 Manuals & Documents 12N.m 12N.m 12N.m 8N.m 8N.m For main bolts apply grease to shaft and Loctite 243 or similar to threads. Apply grease.
- Page 22 NEAT 2024 Manuals & Documents 18. LOWER LINK INSTALLATION GUIDE 12N.m 12N.m 10N.m 12N.m For main bolts apply grease to shaft and Loctite 243 or similar to threads. Apply grease.
-
Page 23: Spare Parts
NEAT 2024 Manuals & Documents 19. SPARE PARTS DETAIL 01 DETAIL 02 Grease Threadlocker Grease + Threadlocker Apply grease to the shaft, and locker to the threads ITEM No. DESCRIPTION QTY. PART NUMBER TORQUE ITEM No. DESCRIPTION QTY. PART NUMBER... - Page 24 NEAT 2024 Manuals & Documents DETAIL 01 DETAIL 02 SET 1 SET 2 ZERO BEARING KIT 26 SHOCK HARDWARE KIT 16 SET 4 SET 3 SET 5 SET 6 SET 7 LOWER LINK KIT 28 HANGER M075 + NUT UPPER LINK KIT 30...
- Page 25 27.5 x 2.6” rear wheel and tire combination will reduce cut-off speed by about 1 or 2 km/h. Geometry will be heavily compromised as well and Mondraker does not cover the warranty riding anything different from the stock 29” rear wheel.
- Page 26 NEAT 2024 Manuals & Documents HOW LONG CAN I RIDE WITH THE NEAT? This is always a tricky question and also depends on rider fitness, rider weight and riding conditions. An aver- age rider with 80 kgs riding weight can climb +1000m elevation gain in MID-HIGH modes and ride as much as 3-4 hours / 40-50 kms in ECO-MID modes again, depending on riding conditions and rider physical level.
- Page 27 All information and pictures on this document is provided for information purposes only and does not constitute a legal contract between Mondraker and any person or entity. Specifications, geometries or any other technical information published is subject to change without prior notice.
Need help?
Do you have a question about the NEAT 2024 and is the answer not in the manual?
Questions and answers