RiverRidge 06-083 Assembly Instructions Manual
Hide thumbs
Also See for 06-083:
- Assembly instructions manual (24 pages) ,
- Assembly instructions manual (13 pages)

Subscribe to Our Youtube Channel
Related Manuals for RiverRidge 06-083


Summary of Contents for RiverRidge 06-083
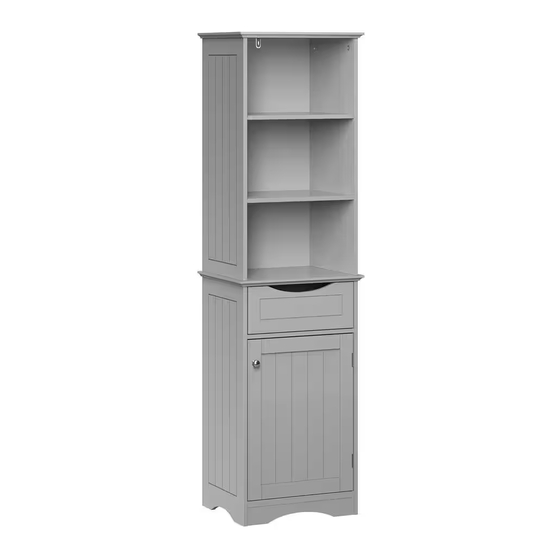
- Page 1 ASSEMBLY INSTRUCTIONS INSTRUCCIONES DE ENSAMBLAJE INSTRUCTIONS D’ASSEMBLAGE MONTAGEANLEITUNGEN 06-082 - White, Blanco, Blanc, Weiß 06-083 - Gray, Gris, Gris, Grau 06-124 - Espresso, Café Espresso, Espresso, Espresso...
-
Page 6: Parts List
PARTS LIST DESCRIPTION Top Board Lower Left Side Panel Lower Right Side Panel Lower Back Panel Upper Cross Bar Adjustable Shelf Bottom Board Decorative Panel Door Drawer Back Board 2PCS Drawer Side Panel Drawer Bottom Board Drawer Front Board Upper Left Side Panel Upper Right Side Panel 2PCS Fixed Shelf... - Page 7 PARTS DESCRIPTION 18PCS Cam Bolt � 18PCS Cam Lock � 26PCS Wood Dowel � 14PCS Screw (3x10mm) � ! :t 2PCS Drawer Holder C6 I Screw (3.5x25mm) 8PCS � 24PCS Screw (2.5x12mm) � 2PCS Drawer Plastic Stopper 2PCS Metal Hinge �...
- Page 8 STEP 1 1. Screw 2 cam bolts (A) in cam bolt holes on upper left side panel (14). 2. Screw 2 cam bolts (A) in cam bolt holes on upper right side panel (15). STEP 2 1. Insert 8 wood dowels (C) into wood dowel holes on upper left side panel (14) and upper right side panel (15).
- Page 9 STEP 3 1. Insert 1 screw (Q) through hole on adjustable anchor bracket (P), then tighten to top board (1). 2. Screw 4 cam bolts (A) into cam bolt holes on top board (1). 3. Insert 4 wood dowels (C) into wood dowel holes on top board (1). 4.
- Page 10 STEP 5 1. Screw 3 cam bolts (A) into cam bolt holes on lower left side panel (2). 2. Attach drawer holder (E) to lower left side panel (2) by inserting 2 screws (D) through holes on drawer holder (E) then tighten to lower left side panel (2). 3.
- Page 11 STEP 7 1. Insert 4 wood dowels (C) into wood dowel holes on middle connection board (18). 2. Attach upper pre-assembled unit to lower pre-assembled unit by inserting wood dowels (C) into wood dowel holes and inserting cam bolts (A) into cam lock holes on end of lower side panels (2) and (3).
- Page 12 STEP 9 1. Attach 1 drawer side panel (11) to drawer back board (10) by inserting 2 screws (F) through holes on drawer side panel (11), then tighten to drawer back board (10). 2. Repeat above step to assemble another drawer side panel (11) to drawer back board (10). 3.
- Page 13 STEP 10 1. Attach magnet plate (L) to door (9) by inserting 2 screws (D) through holes on magnet plate (L), then tighten to door (9). 2. Attach 2 metal hinges (I) to door (9) by inserting 4 screws (D) through holes on metal hinges (I), then tighten to door (9).
- Page 14 STEP 11 Option #1: Securing to Drywall Position cabinet against wall in desired location. Using a pencil, make small mark on wall through hole on bracket (P). Move cabinet away from wall and screw 1 plastic anchor (R) into wall on pencil mark. Place cabinet against wall, insert 1 screw (S) through hole on brackets (P), then tighten to plastic anchor (R).
-
Page 15: Care Instructions
ATTENTION ADULTS: Cabinet should be checked periodically for damage or loose screws/parts. Take appropriate action necessary to correct hazards such as tightening of screws and taking any damaged parts away from children. WARNING Please make sure your item is secured to the wall, per assembly instructions. CARE INSTRUCTIONS: Wipe clean with a water dampened cloth. - Page 16 LISTA DE PIEZAS N.° DESCRIPCIÓN CANT. Tablero superior Panel izquierdo inferior Panel derecho inferior Panel trasero inferior Barra transversal superior Repisa regulable Tablero base Panel decorativo Puerta Tablero trasero del cajón Panel lateral del cajón Tablero inferior del cajón Tablero delantero del cajón Panel superior izquierdo Panel superior derecho Repisa fija...
- Page 17 Tornillo (4x10mm) Anclaje plástico Tornillo (4x30mm) Tornillo (4x40mm) HERRAMIENTAS NECESARIAS PARA EL ENSAMBLAJE: DESTORNILLADOR PLANO Y PHILLIPS (NO ESTÁN INCLUIDOS). NO SE RECOMIENDA EL USO DE UN DESTORNILLADOR ELÉCTRICO PARA EL ENSAMBLAJE. NO UTILICE EL ARTÍCULO SI TIENE PIEZAS DAÑADAS O PIEZAS QUE FALTAN. PASO 1 1.
- Page 18 PASO 5 1. Atornille 3 pernos de anclaje (A) en los agujeros correspondientes del panel inferior izquierdo (2). 2. Fije el soporte del cajón (E) al panel inferior izquierdo (2) insertando 2 tornillos (D) a través de los agujeros del soporte del cajón (E) y, luego, ajústelos al panel inferior izquierdo (2). 3.
- Page 19 PASO 10 1. Fije la placa magnética (L) a la puerta (9) insertando 2 tornillos (D) a través de los agujeros de la placa magnética (L) y, luego, ajústelos a la puerta (9). 2. Fije las 2 bisagras (I) a la puerta (9) insertando 4 tornillos (D) a través de los agujeros de las bisagras de metal (I) y, luego, ajústelos a la puerta (9).
-
Page 20: Liste Des Pièces
LISTE DES PIÈCES Nº DESCRIPTION QTÉ Plaque supérieure Panneau latéral gauche inférieur Panneau latéral droit inférieur Panneau arrière inférieur Barre transversale supérieure Étagère réglable Plaque inférieure Panneau décoratif Porte Plaque arrière du tiroir Panneau latéral du tiroir Plaque inférieure du tiroir Plaque avant du tiroir Panneau latéral gauche supérieur Panneau latéral droit supérieur... - Page 21 Vis (4x10mm) Ancrage en plastique Vis (4x30mm) Vis (4x40mm) OUTILS NÉCESSAIRES POUR L’ASSEMBLAGE : TOURNEVIS À TÊTE PLATE ET À POINTE CRUCIFORME (NON FOURNIS). NOUS DÉCONSEILLONS D’UTILISER UN TOURNEVIS ÉLECTRIQUE POUR L’ASSEMBLAGE. N’UTILISEZ PAS CET ARTICLE SI UNE PIÈCE EST MANQUANTE OU ENDOMMAGÉE.
- Page 22 ÉTAPE 5 1. Vissez 3 boulons à came (A) dans les trous de boulons à came sur le panneau latéral gauche inférieur (2). 2. Fixez le support du tiroir (E) sur le panneau latéral gauche inférieur (2) en insérant 2 vis (D) dans les trous du support du tiroir (E), puis en les serrant dans le panneau latéral gauche inférieur (2).
-
Page 23: Instructions D'entretien
ÉTAPE 10 1. Fixez la plaque magnétique (L) sur la porte (9) en insérant 2 vis (D) dans les trous de la plaque magnétique (L), puis en les serrant dans la porte (9). 2. Fixez 2 charnières métalliques (I) sur la porte (9) en insérant 4 vis (D) dans les trous des charnières métalliques (I), puis en les serrant dans la porte (9). - Page 24 TEILELISTE BESCHREIBUNG ANZ. Oberstes Brett Linkes unteres Seitenteil Rechtes unteres Seitenteil Untere Rückwand Obere Querleiste Verstellbarer Regalboden Unterstes Brett Dekorative Blende Tür Schublade, hinteres Brett Schublade, Seitenteil Schublade, unterstes Brett Schublade, vorderes Brett Oberes linkes Seitenteil Obere rechte Seitenteil Fester Regalboden Obere Rückwand Mittleres Verbindungsbrett Korpusverbinder-Bolzen...
- Page 25 Schraube (4x10mm) Kunststoffdübel Schraube (4x30mm) Schraube (4x40mm) FÜR DIE MONTAGE BENÖTIGTE WERKZEUGE: FLACH- UND KREUZSCHLITZSCHRAUBENDREHER (NICHT ENTHALTEN). DIE VERWENDUNG EINES ELEKTRISCHEN SCHRAUBENDREHERS WIRD FÜR DIE MONTAGE NICHT EMPFOHLEN. VERWENDEN SIE DEN ARTIKEL NICHT, WENN TEILE FEHLEN ODER BESCHÄDIGT SIND. SCHRITT 1 1.
- Page 26 SCHRITT 4 1. Schrauben Sie 4 Korpusverbinder-Bolzen (A) in die Korpusverbinder-Bolzenbohrungen des mittleren Verbindungsbretts (18). 2. Befestigen Sie das mittlere Verbindungsbrett (18) an dem oberen linken Seitenteil (14) und dem oberen rechten Seitenteil (15), indem Sie 4 Schrauben (U) durch die Löcher des mittleren Verbindungsbretts (18) stecken und an dem oberen linken Seitenteil (14) und dem oberen rechten Seitenteil (15) festziehen.
- Page 27 2. Wiederholen Sie den obigen Schritt, um das andere Schubladen-Seitenteil (11) am hinteren Brett der Schublade (10) anzubringen. 3. Schieben Sie das unterste Brett der Schublade (12) in die Nuten der beiden Schubladen- Seitenteile (11). 4. Befestigen Sie das vordere Brett der Schublade (13) an den Schubladen-Seitenteilen (11) und dem untersten Brett der Schublade (12), indem Sie das unterste Brett der Schublade (12) in die Nut des vorderen Bretts der Schublade (13) einsetzen und dann 4 Schrauben (F) durch die Löcher der Schubladen-Seitenteile (11) stecken und am vorderen Brett der Schublade (13)
- Page 28 VORSICHTSHINWEIS FÜR ERWACHSENE: Der Schrank sollte regelmäßig auf Schäden oder lose Schrauben/Teile überprüft werden. Ergreifen Sie erforderliche Maßnahmen, um Gefahren zu beheben, wie das Anziehen von Schrauben und das Fernhalten beschädigter Teile von Kindern. WARNUNG Bitte stellen Sie sicher, dass Ihr Artikel gemäß...
Need help?
Do you have a question about the 06-083 and is the answer not in the manual?
Questions and answers