
Related Manuals for Fanimation Benito FP8003 220 Series


Summary of Contents for Fanimation Benito FP8003 220 Series
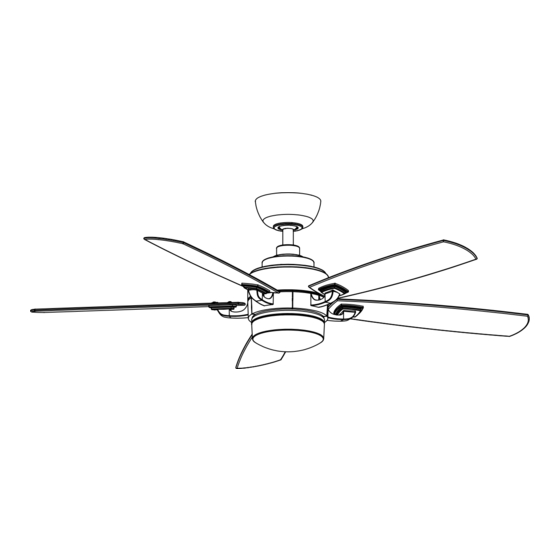
- Page 1 The Benito ™ Ceiling Fan Net Weight 9.3 kg. (20.5 lbs.) Model No. FP8003**-220 OWNER'S MANUAL READ AND SAVE THESE INSTRUCTIONS...
- Page 2 1. LIMITED LIFETIME MOTOR WARRANTY - If any part of your fan motor fails, due to a defect in materials or workmanship during the lifetime of the original purchaser, Fanimation will provide the replacement part free of charge, when the defective fan is returned to our national service center.
-
Page 3: Table Of Contents
Fanimation. 7. Fanimation reserves the right to modify or discontinue any product at any time and may substitute any part under this warranty. 8. Under no circumstances may a fan be returned without prior authorization from Fanimation. The receipt of purchase must ac- company authorized returns and must be sent freight prepaid to Fanimation. -
Page 4: Unpacking Instructions
(blade arm to motor) • Blade Arm Set accessories not designated for use with this product Pan Head Screw by Fanimation could result in personal injury or • Blade Set property damage. – Phillips Screwdriver, 4” • Light Plate-Upper Assembly •... -
Page 5: Energy Efficient Use Of Ceiling Fans
8 - 9 feet above the floor for optimal This produces a gentle updraft, which forces warm air airflow. Consult your Fanimation Retailer for optional near the ceiling down into the occupied space. mounting accessories. -
Page 6: How To Assemble Your Ceiling Fan
How to Assemble Your Ceiling Fan 1. Remove the hanger ball portion from the downrod/hangerball assembly by loosening the set screw in the hanger ball until the ball falls freely down the downrod. Remove the pin from the DOWNROD downrod, then remove the hanger ball. Retain the pin and hanger ball for reinstallation in Step 6 (Figure 1). -
Page 7: How To Hang Your Ceiling Fan
How to Assemble Your Ceiling Fan (continued) 6. Reinstall the hanger ball on the downrod as GROOVE follows.Route the three 80-inch wires through the hanger ball. Position the pin through the two holes in the downrod and align the hanger ball so the pin CANOPY is captured in the groove in the top of the hanger ball. -
Page 8: How To Wire Your Ceiling Fan
How to Hang Your Ceiling Fan (continued) 2. Carefully lift the fan and seat the downrod/hanger OUTLET BOX ball assembly on the hanger bracket that was just attached to the outlet box. Be sure the groove in the ball is lined up with tab on the hanger bracket (Figure 3). -
Page 9: How To Install Your Canopy Housing
How to Wire Your Ceiling Fan (Continued) (Figure 4) LEARN MODE PROCESS: Control and receiver have been factory • LIGHT DIMMER FUNCTION SELECT SWITCH programmed. If replacing the ransmtitter or receiver, the learn mode process will need to be used. After installing the unit and restoring power to your •... -
Page 10: How To Assembly The Blades & Light Kit
How to Assemble the Blades and Light Kit 1. Position the blade over the blade holder with threaded posts showing. Make sure the bottom edge of the blade is fully seated against the blade arm. With a Phillips screwdriver, tighten 3/16-24 x 3/16-24 x 7.5 mm WASHER HEAD SCREW AND FIBER 7.5 mm washer head screws and fiber washers to... - Page 11 How to Assemble the Blades and Light Kit (continued) Connect the 2-pin connector from the socket plate assembly to 2-pin connector from motor assembly (Figure 4). MOTOR ASSEMBLY 2-PIN CONNECTOR SOCKET PLATE 2-PIN CONNECTOR SOCKET PLATE ASSEMBLY Figure 4 Remove one of the three screws in the socket plate assembly.
-
Page 12: How To Operate Your Ceiling Fan
How to Operate Your Ceiling Fan 1. Restore electrical power to the outlet box by turning the electricity on at the main fuse box (Figure 1). WARNING MAIN FUSE BOX Check to see that all connections are tight, including ground, and that no bare wire is visible at the wire connectors, except for the ground wire. -
Page 13: Trouble Shooting
Trouble Shooting WARNING For your own safety turn off power at fuse box or circuit breaker before trouble shooting your fan. Trouble Probable Cause Suggested Remedy 1. Fuse or circuit breaker blown. 1. Check main and branch circuit fuses or circuit breakers. 2. -
Page 14: Parts List
Parts List Model No. FP8003**-220 Reference # Description Part # Hanger Bracket Assembly w/Screws AP255BL-220 Ball - Downrod Assembly (4.5) R1-45** Canopy PG155** Canopy Screw Cover Assembly AP260** Motor Coupling Cover Assembly APPAC1403** Fan Motor Assembly *-220 Light Plate - Upper Assembly AP800306** Light Kit Assemby-Glass AP800311**-220... -
Page 15: Exploded-View Illustration
FP8003**-220 Exploded-View NOTE: The illustration shown is not to scale or its actual configurations may vary. - Page 16 10983 Bennett Parkway Zionsville, IN 46077 Toll Free (888) 567-2055 FAX (866) 482-5215 Outside U.S. call (317) 733-4113 Fanimation Visit Our Website www.fanimation.com Copyright 2013 2013/06 V.01...
- Page 17 The Benito ™ Ventilador de techo Versión Peso neto 20.5 lb (9.3 kg) Modelo N.º FP8003**-220 MANUAL DEL PROPIETARIO LEA Y GUARDE ESTAS INSTRUCCIONES...
- Page 18 Fanimation proporcionará la pieza de repuesto sin cargo una vez que el ventilador defectuoso sea devuelto a nuestro centro de servicios nacional. Se requiere comprobante de venta. El cliente se hará responsable de todos los gastos de remoción o reinstalación y envío del producto para reparaciones o sustitución.
- Page 19 .etelf led ogap oiverp ,noitaminaF a esraivne nárebed y atnev ed obicer led sadañapmoc deberá estar embalado en forma adecuada a fin de evitar daños durante el transporte. Fanimation no se hará responsable de los daños que resulten del embalaje incorrecto del producto.
-
Page 20: Instrucciones Para El Desempaque
La sustitución de piezas o accesorios no – 1/4”-20 x 14 mm • Cubierta de unión del motor designados por Fanimation para usar con este producto (brazo aspas en el motor) • Soportes de aspas podría ocasionar lesiones personales o daños en el tornillo de cabeza troncocónica... -
Page 21: Uso Eficiente De La Energía En Ventiladores De Techo
óptimo. del reloj. Esto produce una suave corriente ascendente, Consulte en su tienda minorista de Fanimation para que obliga al aire cálido que se acumula cerca del techo a obtener accesorios de montaje opcionales. -
Page 22: Cómo Ensamblar El Ventilador De Techo
Cómo ensamblar el ventilador de techo Extraiga la pieza de la bola colgante de la unidad de Pasador la bola colgante / varilla aflojando el tornillo de presión de la bola colgante hasta que la bola se libere de la varilla. -
Page 23: Cómo Colgar El Ventilador De Techo
Cómo ensamblar el ventilador de techo (cont.) Vuelva a colocar la semiesfera en el barral como Ranura de la Pasador se indica a continuación. Pase los tres cables de bola colgante 2.03 m (80˝) a través de la semiesfera. Pase el pasador a través de los dos orificios en el barral y Capuchón de alinee la semiesfera de modo que el pasador quede... -
Page 24: Cómo Realizar La Instalación Eléctrica Del Ventilador De Techo
Cómo colgar el ventilador de techo (cont.) 2. Levante cuidadosamente el ventilador y coloque el ensamble de la bola para colgar/varilla en la abrazadera Caja de salida para colgar que acaba de fijar a la caja de salida. Asegúrese de que la ranura de la bola esté alineada con la lengüeta de la abrazadera para colgar. -
Page 25: Cómo Instalar La Carcasa De La Cubierta
Cómo realizar la instalación eléctrica del ventilador de techo (cont.) (Figura 4) PROCESO DEL MODO APRENDIZAJE: INTERRUPTOR DE SELECCIÓN DE El mando y el receptor vienen programados de • LA FUNCIÓN DE ATENUACIÓN DE LUZ fábrica. Si sustituyera el transmisor o el receptor, tendrá... -
Page 26: Cómo Instalar Las Palas Y El Kit De Luces
Cómo ensamblar los Blades y kit de luces 1. Coloque el aspa sobre el soporte de aspas con los pilotes roscados a la vista. Asegúrese de que la parte inferior del aspa se encuentre bien apoyada sobre el soporte. Con un destornillador Phillips, fije los tornillos arandela de la cabeza del tornillo con cabeza de arandela de 3/16-24 x 7.5 mm para de 3/16-24 x 7.5 mm... - Page 27 Cómo ensamblar los Blades y kit de luz (cont.) Instale el conector de 2 clavijas desde la placa de conexión a la unidad del motor. (Figura 4) El conjunto del motor Conector de 2 pines Toma de la placa del conector de 2 clavijas Unidad de la placa de conexión...
-
Page 28: Cómo Utilizar Su Ventilador De Techo
Cómo utilizar su ventilador de techo Restaure la fuente de alimentación de la toma de corriente enciendo la electricidad del fusible principa (Figura 1) ADVERTENCIA PRINCIPAL CAJA DE FUSIBLES Compruebe que todas las conexiones realizadas correctamente, incluyendo la toma de tierra, y que no se visualizan ningún cable pelado en los conectores Figura 1 de cables, con la excepción del cable de toma de... -
Page 29: Solución De Problemas
Solución de problemas ▲ ADVERTENCIA Para su propia seguridad, desconecte la electricidad de la caja de fusibles o disyuntor antes de solucionar problemas en su ventilador. Problema Causa posible Solución sugerida 1. EL VENTILADOR NO 1. El fusible o el disyuntor están fundidos. 1. -
Page 30: Lista De Piezas
Lista de piezas Modelos N.° FP8003**-220 Pieza # N.° Descripción N.° de Ref. AP255BL-220 Unidad del soporte de suspensión R1-45** Unidad del barral/de la semiesfera (4.5) PG155** Capuchón de techo AP260** Cubierta para el tornillo del capuchón APPAC1403** Cubierta de unión del motor *-220 Unidad del motor del ventilador... -
Page 31: Ilustración Del Despiece
FP8003**-220 Despiece NOTA:... - Page 32 10983 Bennett Parkway Zionsville, IN 46077 Llame sin cargo al (888) 567-2055 FAX (866) 482-5215 Desde fuera de los EE.UU., llame al (317) 733-4113 Visite nuestro sitio Web en www.fanimation.com Copyright 2013 2013/06 V0.1...
Need help?
Do you have a question about the Benito FP8003 220 Series and is the answer not in the manual?
Questions and answers