
Related Manuals for fantastic furniture Arcadia


Summary of Contents for fantastic furniture Arcadia
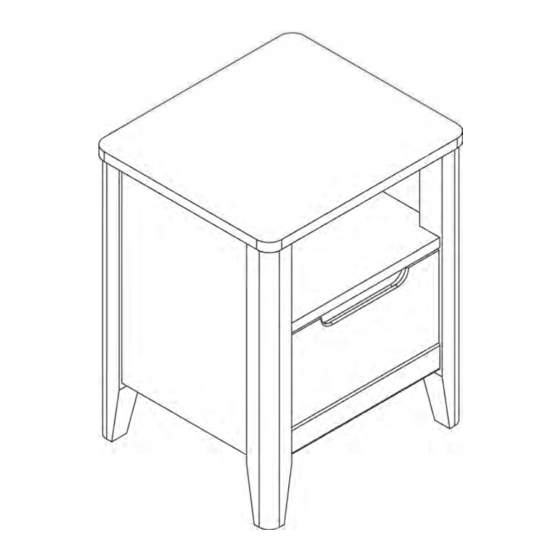
- Page 1 � Fantastic Furniture Version 1.0 Two People Arcadia Bedside 1 Drawer Dark Brown fantasticfurniture.com.au Required...
- Page 2 Secure it! Reduce the risk of furniture tip-over accidents Please seek professional advice if • • • Do not • • Wall attachment guide (with available wood stud) (with available wood stud) crew Screw directly into stud. fantasticfurniture.com.au fantasticfurniture.com.au...
- Page 3 Assembly checklist Useful Information...
-
Page 4: What You Need
What you need... - Page 5 Step 1 � You will need: � {H1)x4 � Phillips Head 4x Large Screwdriver Cam Bolts (H1) {P1) � Attach 4 x large cam bolts {H1) to top panel {P1) using a phillips head screwdriver. Step2 You will need: /) 8xWooden Dowels(H3) �...
- Page 6 Step3 You will need: 1 x Left 3xSmall Runner Track Screws � � (H11) (H9) (H9)x3 2xWooden Phillips Head Dowels Screwdriver � ( H 3) Insert 2 x wooden dowels (H3) into left side panel (P2). Attach left runner tracks (H11) to left side panel (P2) using 3 x small screws (H9), tightening using a phillips head screwdriver.
- Page 7 Step5 � " You will need: (H1)x4 � 4x Large Phillips Head Screwdriver Cam Bolts (H1) (P2) Attach 4 x large cam bolts (H1) into left side panel (P2) u�ing a phillips head screwdriver. Step6 � " You will need: (H1)x4 �...
- Page 8 with a phillips head screwdriver. Insert 1 x large cam nut (H2) into rear lower rail (P6) and 1 x large cam nut (H2) into front lower rail (P7).
- Page 9 (P4) (P5) (P6) Insert 4 x large cam nuts (H2) into middle shelf panel (P4) and rails (P5 & P6). Rotate the cam nuts so the arrows point towards the incoming cam bolts. Attach the left side panel (P2) to panels (P4, P5 & P6), by tightening all the cam nuts with a phillips head screwdriver.
- Page 10 Step 11 � (P7) (P3) Slide the back panel (P7) into the grooves of panels (P1, P2 & P3) as shown. Ensure the back panel slots into grooves fully. Step 12 You will need: � Phillips Head 2 x Back Panel Screwdriver Screws (H4)
- Page 11 Step 13 " You will need: (H7)x4 � Phillips Head 4xSmall Cam Bolts (H7) Screwdriver Attach 4 x small cam bolts (H7) to drawer front panel (PB) using a phillips head screwdriver. Step 14 " (P10) You will need: � <...
- Page 12 Step 15 Laminated side facing up (P12) Slide the drawer base (P12) i.nto the grooves on the drawer si.de panels (P9, P10) and drawer front panel (P8). Ensure the base slots into the grooves fully. Step 16 You will need: �...
- Page 13 Note: Ensure the stoppers on the tracks (H11, H12) are positioned at the back of the drawer. (P10) (P9) Attach left runner (H5) to the left drawer side panel (P9), and right runner (H6) to the right drawer side panel (P10), using 6 x small screws (H9), tightening with a phillips head screwdriver.
- Page 14 Step 19 "" -------- Wall Screw and Wall Plug are not provided. Please use appropriate fixtures for your wall. "- ------ ------ Seek advice from a qualified trades person on how to attach safety strap to the wall. Required With assistance, move the bedside to its final position.
-
Page 15: Job Complete
Job Complete! In the interest of our environment please dispose of all packing thoughtfully. � � Fantastic Furniture Page15 fantasticfurniture.com.au...