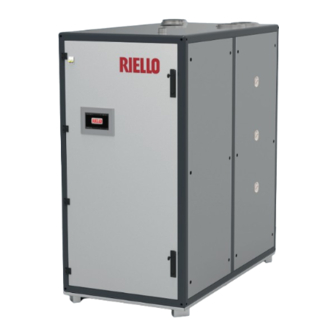
Riello Array AR 1500 Installation And Operation Manual
Hide thumbs
Also See for Array AR 1500:
- Installation and operation manual (76 pages) ,
- Installation and operation manual (80 pages)
Advertisement
Quick Links
Advertisement

Related Manuals for Riello Array AR 1500


Summary of Contents for Riello Array AR 1500
- Page 1 Array AR 1000 - AR 1500 - AR 2000 - SERIES 1 US INSTALLATION AND OPERATION MANUAL...
- Page 2 Array AR 1000 20115022 This manual provides information that is essential to the in- Array AR 1500 20115023 stallation of the appliance. Used in conjunction with your own knowledge and expertise it will enable you to install the appliance...
- Page 3 4.3.1 Riello Screen ....... 25 Prolonged shutdown ......5 4.3.2 Cascade Screen .
- Page 4 GENERAL GENERAL 1.1 Warnings & cautions Array AR 1000, AR 1500 and AR 2000 MBH Boilers are Installers and operating personnel MUST, at all times, observe all modulating and condensing units. They represent a true industry safety regulations. The following warnings and cautions are gen- advance that meets the needs of today’s energy and environmen- eral and must be given the same attention as specific precautions tal concerns.
- Page 5 GENERAL 1.2 Emergency shutdown (a) For all side wall horizontally vented gas fueled equipment in- stalled in every dwelling, building or structure used in whole or in If overheating occurs or the gas supply fails to shut off, close the part for residential purposes, including those owned or operated manual gas shutoff valve (Fig.
- Page 6 GENERAL 2 INSTALLATION (c) MANUFACTURER REQUIREMENTS - GAS EQUIPMENT VENTING SYS- TEM PROVIDED When the manufacturer of Product Approved side wall horizon- 2.1 Introduction tally vented gas equipment provides a venting system design or venting system components with the equipment, the instructions provided by the manufacturer for installation of the equipment This Chapter provides the descriptions and procedures necessary and the venting system shall include:...
- Page 7 INSTALLATION 2.4.1 Installation clearances The Array models AR 1000, AR 1500 and AR 2000 are packaged in an enclosure having identical footprint but different height. The unit must be installed with the prescribed clearances for ser- 60.8” vice as shown in Fig. 2 and Fig. 3. The minimum clearance dimen- sions, required by , are listed below.
- Page 8 INSTALLATION 2.4.2 Setting the Unit Remove the top and side wooden panels, the plastic film and the polystyrene sheets. Remove the lag screws securing the unit to the shipping skid. Lift the unit off the shipping skid with a forklift and position it on the floor in the desired location.
- Page 9 INSTALLATION 2.5 Boiler location The unit must be installed on a concrete flat floor, with no gra- dient in any direction, to ensure proper condensate and water drainage (see Fig. 7). If anchoring the unit, refer to Fig. 8 for anchor −...
- Page 10 INSTALLATION 2.7 Low water cutoff Excessive water hardness causing a lime buildup in the stainless steel coils or tubes is not a fault of the appliance and is not cov- ered by warranty. Water hardness must fall within the following A low water cut off (LWCO) is installed on each boiler.
- Page 11 If a floor drain is not available, a condensate pump can be used to remove the condensate to drain. The maximum condensate flow rate is 7.9 GPH for Array AR 1000, 13.9 GPH for Array AR 1500 and Syphon 15.9 GPH for Array AR 2000. The drain line must be removable for routine maintenance.
- Page 12 INSTALLATION 2.11 Gas supply piping of natural gas while maintaining a recommended minimum gas pressure of 8.0” W.C. to the unit. Array AR 1000, AR 1500 and AR 2000 boilers contain a 1.5 inch NPT − A regulator MUST be used when gas supply pressure will ex- gas inlet connection on the top of the unit as shown in Fig.
- Page 13 INSTALLATION − Open the front panels To adjust the CO value at the maximum power turn the screw “A” − Unscrew the swivel joint indicated in Fig. 14 to separate the (rotate counter-clockwise to increase CO2) shown in Fig. 16, allen valve from the connection pipe with the fan type wrench is necessary for this adjustment.
- Page 14 INSTALLATION 2.12 AC electrical power wiring All of the components in the Electrical box are mounted on a DIN rail. External AC power connections are made to the unit inside the electrical box, located on the front of the unit, inside the front door.
- Page 15 INSTALLATION NOTE: Any electrical load connected to the terminal strip (external pumps, air damper, alarm) must be powered through a relay, not included in the boiler, to be provided and wired by the installer. CASCADE Supply DHW Tank Room 0-10 V System BMS - RS232 LINK...
- Page 16 INSTALLATION 2.13.3 Outdoor Temperature Sensor DANGER: The condensate traps must be filled with water or combustion gases will enter the room with a risk of an exces- If outdoor temperature sensor is to be used, the outdoor probe sive level of carbon monoxide. needs to be connected to terminals 5 and 6 as shown in Fig.
- Page 17 INSTALLATION VENTING CONFIGURATIONS: The following figures show the acceptable piping installation for venting and combustion air. EXHAUST EXHAUST BOILER BOILER Fig. 26 All Combustion Air from Adjacent Indoor Spaces through Fig. 28 All Combustion Air From Outdoors - Inlet Air From Ventilat- indoor Combustion Air Openings ed Crawl Space and Outlet Air to Ventilated Attic EXHAUST...
- Page 18 INSTALLATION EXHAUST EXHAUST BOILER BOILER Fig. 30 All Combustion Air from Outdoors through Single Combus- Fig. 32 Sealed Combustion located on same side with Exhaust tion Air Opening (horizontal) EXHAUST EXHAUST BOILER BOILER Fig. 31 Sealed Combustion located on same side with Exhaust Fig.
- Page 19 INSTALLATION exceeded, the unit will not operate properly or reliably. − For Massachusetts installations, contact companies able to provide vent systems which conform to all applicable re- quirements for installations within the Commonwealth of Massachusetts. − For multiple boilers installation, common venting shall be sized based on the data of “Appendix M - Venting size data”.
- Page 20 INSTALLATION 2.15.1 Combustion air from outside the building Air supplied from outside the building must be provided through two permanent openings. For each unit these two openings must have a free area of not less than one square inch for each 4000 BTUs input of the equipment or 750 square inches of free area.
- Page 21 COMMISSIONING 3 COMMISSIONING Filling the boiler heating system To fill the heating system, proceed as follows: Introduction − Open any automatic air vents in the heating system. − Open the fill valve and proceed to fill the heating system Before starting the boiler, the user must be correctly instructed by and boiler until the pressure gauge (shown on Fig.
- Page 22 COMMISSIONING 3.5 Boiler startup procedure − Pushing the Settings button, the Settings screen will show To start the boiler, do the following: − Open the manual gas shut off valve (Fig. 1). − Turn ON the main power switch (Fig. 20). −...
- Page 23 COMMISSIONING Adjusting the parameters on that screen, the reset curve below The setpoint modulation will occur between 2 and 9 volts. The re- will modify shape and slope to meet the needs of the specific ap- quest for heat will be removed when the voltage drops below 1 plication.
- Page 24 COMMISSIONING 3.6 Boilers’ cascade installation and start-up Appendix L shows an example of Array boilers installed in a cascade of three units. The built-in control system is capable to manage up to 8 boilers as a single, coordinated heating system. The logical scheme is: Demand: 0-10V / OpenTherm / On-Off System sensor D2 is T outside...
- Page 25 6 must be completed before attempting to start the unit. Control panel description Fig. 46 Riello Screen All Array Series Boilers utilize the Touchscreen Control Panel shown in Fig. 46. This Touchscreen panel contains the basic controls for The R logo is the entry point of the Control System.
- Page 26 OPERATION − Home button: move back to the R screen; − Performance button: move to the Performance screen of the cascade; − Stats button: not active; − Errors button: move to the Errors screen; − Service button: move to Service screen; −...
- Page 27 OPERATION 4.3.6 Error Screen how long service was overdue on the system/appliance which can be useful when handling warranty claims. For each boiler, the Error screen shows the list of the last 40 errors A maximum of 15 Service moments can be logged by the 900PB, occurred on its own modules.
- Page 28 SHUTDOWN 5 SHUTDOWN 6 ENVIRONMENTAL PROTECTION/DISPOSAL Environmental protection is one of the fundamental company policies of the . We regard quality of performance, economy CAUTION: Risk of system damage through frost. and environmental protection as equal objectives. When there is a frost, the heating system can freeze up if it is not Environmental protection laws and regulations are strictly ad- operational, e.g.
- Page 29 APPENDIX APPENDIX SHUTDOWN APPENDIX APPENDIX A - WIRING DIAGRAM green 120VAC black FOR 4 PUMPS FOR 3 PUMPS J3-4 SLAVE 4 J3-4 SLAVE 3 J3-4 SLAVE 2 J3-4 MASTER J3-9 SLAVE 4 J3-9 SLAVE 3 J3-9 SLAVE 2 J3-9 MASTER J1-5 MASTER/SLAVE 2 / 3 / 4 ON-OFF POWER BUTTON...
- Page 30 APPENDIX SHUTDOWN APPENDIX WIRING DIAGRAM - MASTER J7-2 WATER PRESSURE SWITCH CONDENSATE PRESS. SWITCH SLAVE 4 CONDENSATE PRESS. SWITCH SLAVE 8 FLOWMETER 11 12 J6-5 FLUE SENSOR MIN+MAX GAS J6-12 J7-4 9 10 PRESSURE SWITCH J9-4 J6-10 RETURN T. SENSOR J9-2 J6-3 WATER PRESSURE...
- Page 31 APPENDIX SHUTDOWN APPENDIX WIRING DIAGRAM - SLAVE 2 / 3 / 4 J12-2 UNIT FLOW TEMP. J12-5 J12-4 SAFETY LIMIT WATER THERMOSTAT J12-1 FLOWMETER J7-8 J7-7 FLUE PRESS. SWITCH + J7-6 CONDENSATE PRESS. SWITCH J7-2 J7-3 FOR SLAVE 2 / 3 J6-5 Only ON Slave 4 FLUE TEMP.
- Page 32 APPENDIX SHUTDOWN APPENDIX APPENDIX B - SIZE AND CONNECTIONS ARRAY AR 1000, AR 1500 60.8” 12.1” 9.44” 50.36” 7.08” 9.63” 7.47” 9.48” Dimensions are in inches...
- Page 33 APPENDIX SHUTDOWN APPENDIX ARRAY AR 2000 60.8” 12.12” 9.79” 51.05” 7.1” 11.05” 7.52” 9.49” Dimensions are in inches...
- Page 34 APPENDIX SHUTDOWN APPENDIX APPENDIX C - CONNECTION DIAGRAM Int. ionization CONNECTION DIAGRAM 905MN CONTROL BOARD 0...10V J9-1 Ignition 0V(GND) J9-3 BURNER J9-2 Open Thermostat interface Spark Return Room Thermostat ON/OFF J9-4 J10-1 J2 1-6 J10-2 J10-5 J10-6 J1-5 MAINS SUPPLY (120VAC, 60Hz) J1-1 COMM.
- Page 35 APPENDIX SHUTDOWN APPENDIX CONNECTION DIAGRAM 905PB DISPLAY CONNECTION DIAGRAM 905PB DISPLAY 905PB05_3R Connector Function PC interface Connection to MN control/Modbus 905PB05_3R Display: RJ-11 Connector: RS485 / Mod BUS J25-1 J25-2 J25-3 1: GND/VSS J25-4 AL-BUS 2: ModBus_B (= Data -) J25-5 3: ModBus_A (= Data +) +24V...
- Page 36 APPENDIX SHUTDOWN APPENDIX APPENDIX D - TECHNICAL DATA Unit AR 1000 AR 1500 AR 2000 Boiler Category ASME Sect.IV Type of Gas Natural Gas, Propane BTU/hr 1,000,000 1,500,000 2,000,000 Max input rate (kW) (293) (440) (586) BTU/hr 100,000 100,000 100,000 Min input rate (kW) (29)
- Page 37 APPENDIX SHUTDOWN APPENDIX APPENDIX E - STRUCTURE 28 2726 25...
- Page 38 APPENDIX SHUTDOWN APPENDIX Item Description Q.ty Item Description Q.ty Outer frame Burner head O-ring Burner flange (outer) Burner gasket Supply pipe Sight glass combustion Purge valve Ingiter Gas pipe Burner tube Gas valve Burner flange (inner) Heat exchanger Gasket burner flange Pump Water shutoff valve Brass connection...
- Page 39 APPENDIX SHUTDOWN APPENDIX APPENDIX F - MAINTENANCE GAS LEAKING INSPECTION A qualified and adequately trained technician must perform the Verify all gas piping to ensure that there are no leaks. inspection as specified in these instructions and in the Service Manual (provided separately) before each heating season and at DANGER: To verify the gas leaks use a soap solution or a gas regular intervals.
- Page 40 APPENDIX SHUTDOWN APPENDIX APPENDIX G - HEAD AVAILABLE FOR THE SYSTEM HEAD AVAILABLE (NO GLYCOL) Array ∆T = 36°F ∆T = 45°F AR 1000 7,5ft 15,5ft AR 1500 7,5ft 15,5ft AR 2000 7,5ft 15,5ft HEAD AVAILABLE (65% GLYCOL) ∆T = 36°F ∆T = 45°F Array AR 1000...
- Page 41 To calculate the de-rating of the input capacity follow this example: We have an ARRAY AR 1500 boiler installed at 5400 ft with a 6” flue system. The equivalent length of the vent pipe installed is 55 ft. The equivalent length of the air combustion pipe installed is 35 ft.
- Page 42 APPENDIX SHUTDOWN APPENDIX APPENDIX I - EFFICIENCY CURVES ARRAY AR 1000, AR 1500, AR 2000 100% 100% input 30% input 20% input Return water temperature (°F)@36 Degree Rise...
- Page 43 APPENDIX SHUTDOWN APPENDIX APPENDIX J - TROUBLESHOOTING TABLE LOCKOUT CODES Error no. Error Description Checks Solutions E2PROM_READ_ERROR Internal software error Replace the power control board IGNIT_ERROR Three unsuccessful ignition a- Check gas supply pres- a- If the gas supply pres- attempts in a row sure;...
- Page 44 APPENDIX SHUTDOWN APPENDIX Error no. Error Description Checks Solutions MAX_TEMP_ERROR The external overheat pro- a- Check the pump to verify a- Change the pump or tection is enabled or the the flow circulation; restart it; T_Supply sensor measures a b- Check if the valves on b- Open the valves on hy- temperature of over hydraulic circuit are open;...
- Page 45 APPENDIX SHUTDOWN APPENDIX Error no. Error Description Checks Solutions AIR_DAMPER_LOCKING Air Damper feedback is not received when the relative output is closed for the fourth time. FLUE_PRESSURE_LOCKING Flue pressure switch is closed for the fourth time. BLOCKING ERRORS Error no. Error Description Checks Solutions...
- Page 46 APPENDIX SHUTDOWN APPENDIX Error no. Error Description Checks Solutions a- If the wiring is damaged, replace it; a- Check the integrity of the b- Verify that the tempera- wire connections; RETURN_OPEN Return sensor open ture sensor has the correct b- Check the return tem- resistance values.
- Page 47 APPENDIX SHUTDOWN APPENDIX Error no. Error Description Checks Solutions Too many resets in a short RESET_BUTTON_ERROR time period Exchange temperature ex- T_EXCHANGE_BLOCK_ERROR ceeded 90°C T_CHIMNEY_OPEN Chimney sensor open T_EXCHANGE1_OPEN Exchange 1 sensor open T_EXCHANGE2_OPEN Exchange 2 sensor open T_SELECTION1_OPEN Selection 1 sensor open T_SELECTION2_OPEN Selection 2 sensor open T_SELECTION3_OPEN...
- Page 48 APPENDIX SHUTDOWN APPENDIX Error no. Error Description Checks Solutions Flow is too low, demand needs to be stopped with LOWEXFLOW_PROTECTION fan at ignition speed but no error needed to be stored at this time WARNINGS Error no. Error Description Checks Solutions Cascade System: Leading burner lost communication...
- Page 49 APPENDIX SHUTDOWN APPENDIX APPENDIX K - BOILER INSTALLATION (EXAMPLE DRAWINGS) ARRAY AR 1000 / AR 1500 / AR 2000 Single Unit Installation...
- Page 50 APPENDIX SHUTDOWN APPENDIX ARRAY AR 1000 / AR 1500 / AR 2000 Multiple Units Installation...
- Page 51 APPENDIX SHUTDOWN APPENDIX APPENDIX L - LADDER DIAGRAM MAIN POWER...
- Page 52 APPENDIX SHUTDOWN APPENDIX MASTER SLAVE POWER...
- Page 53 APPENDIX SHUTDOWN APPENDIX J2 CONNECTIONS...
- Page 54 APPENDIX SHUTDOWN APPENDIX J3 CONNECTIONS...
- Page 55 APPENDIX SHUTDOWN APPENDIX J4 CONNECTIONS...
- Page 56 APPENDIX SHUTDOWN APPENDIX J5 CONNECTIONS...
- Page 57 APPENDIX SHUTDOWN APPENDIX J6 CONNECTIONS...
- Page 58 APPENDIX SHUTDOWN APPENDIX J7 CONNECTIONS...
- Page 59 APPENDIX SHUTDOWN APPENDIX J8-J9 CONNECTIONS...
- Page 60 APPENDIX SHUTDOWN APPENDIX J10-J11 CONNECTIONS...
- Page 61 APPENDIX SHUTDOWN APPENDIX J12 CONNECTIONS...
- Page 62 89.6 Max. pressure at boiler exit in. wc 4.41 0.12 3.31 0.08 ARRAY AR 1500 T supply / return (F°) - 176 / 140 T supply / return (F°) - 176 / 140 Unit Maximum Input Minimum Input Maximum Input...
- Page 63 APPENDIX SHUTDOWN APPENDIX APPENDIX N - EXHAUST TERMINALS AND AIR INLET CLEARANCES Direct vent (sealed combustion) Fan assisted appliance (Room air for combustion) Forced air inlet Forced air inlet Gravity air inlet Gravity air inlet Exhaust terminal Exhaust terminal X1 1 foot (305 mm) X1 1 foot (305 mm) X2 See Note 1) X2 See Note 1)
- Page 64 APPENDIX SHUTDOWN APPENDIX Horizontal venting system (sealed combustion): Vertical venting system (sealed combustion): X ≥ 4” (102 mm); X > 12” (305 mm) Y ≥ 12” (305 mm) Y = 12” (305 mm) above maximum snow level or at least 24” which- ever is greater Air intake Vent...
- Page 65 APPENDIX SHUTDOWN APPENDIX APPENDIX O - SENSOR RESISTANCE SENSOR RESISTANCE TABLE Vent terminals Temperature °F (°C) Resistance [Ω] Testing tolerance ±10% Vent terminals 32 (0) 27396 41 (5) 22140 50 (10) 17999 59 (15) 14716 68 (20) 12099 77 (25) 10000 86 (30) 8308...
- Page 68 RIELLO S.p.A. 37045 Legnago (VR) Tel. 0442630111 - Fax 044222378 RIELLO NORTH AMERICA 35 Pound Park Road Hingham, Massachusetts U.S.A. 02043 2165 Meadowpine Blvd Mississauga, Ontario Canada L5N 6H6 www.rielloboilers.com The manufacturer strives to continuously improve all products. Appearance, dimensions, technical specifications, standard equipment and...
Need help?
Do you have a question about the Array AR 1500 and is the answer not in the manual?
Questions and answers
Is there a place to land a emergency stop button on the low voltage side of the controls
The provided context does not mention the installation of an emergency stop button on the low voltage side of the controls for the Riello Array AR 1500. Therefore, it cannot be determined from the given information.
This answer is automatically generated