Table of Contents
Advertisement
Quick Links
Advertisement
Table of Contents

Related Manuals for Crestron TSS-752-MSMK


Summary of Contents for Crestron TSS-752-MSMK
- Page 1 Crestron TSS-752-MSMK Multi-Surface Mount Kit for TSS-752 Installation Guide...
- Page 2 Other trademarks, registered trademarks, and trade names may be used in this document to refer to either the entities claiming the marks and names or their products. Crestron disclaims any proprietary interest in the marks and names of others. Crestron is not responsible for errors in typography or photography.
-
Page 3: Table Of Contents
Crestron TSS-752-MSMK Multi-Surface Mount Kit for TSS-752 Contents Multi-Surface Mount Kit for TSS-752: TSS-752-MSMK Introduction ..........................1 Setup ............................2 Supplied Hardware ...................... 2 Installation ........................6 Resources ..........................13 Further Inquiries ......................13 Future Updates ......................13 Return and Warranty Policies ....................14 Merchandise Returns / Repair Service .............. -
Page 5: Multi-Surface Mount Kit For Tss-752: Tss-752-Msmk
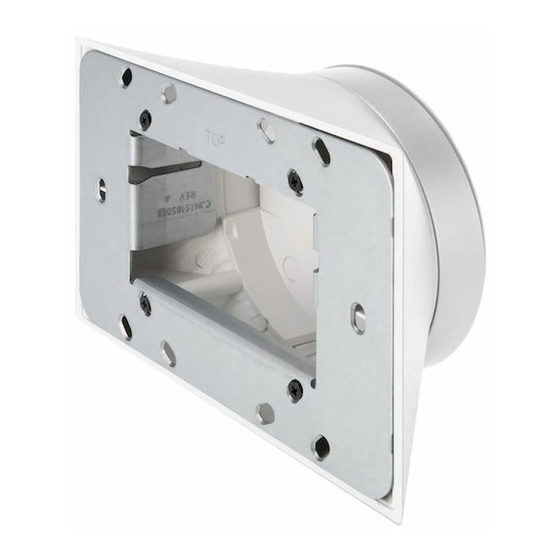
TSS-752-MSMK Multi-Surface Mount Kit provides a very versatile surface mounting solution for a TSS-752 Room Scheduling Touch Screen. Using the TSS-752-MSMK, the touch screen device can be mounted directly onto glass, granite, marble, plaster, smooth stone and masonry, or virtually any other flat surface using either the self-adhering mounting plate or screws. -
Page 6: Setup
Crestron TSS-752-MSMK Setup Supplied Hardware The TSS-752-MSMK consists of a metal mounting plate with adhesive backing, plastic racer mount, raceway and appropriate nuts for mounting. The multi-surface mounting option provides the necessary support and accessories for post-construction applications. The table below lists all parts included with the TSS-752-MSMK. - Page 7 Crestron TSS-752-MSMK Multi-Surface Mount Kit for TSS-752 The dimensions of the TSS-752-MSMK are shown below and on the following pages. Glass Mounting Plate Overall Dimensions (Front and Side Views) 0.30 in (8 mm) 0.09 in (3 mm) 3.29 in 0.05 in...
- Page 8 (24 mm) 0.66 in (17 mm) 5.25 in 0.09 in (134 mm) (3 mm) 2.50 in (64 mm) Glass Mounting Plate with Plastic Racer Mount (Rear View) 4 • Multi-Surface Mount Kit for TSS-752: TSS-752-MSMK Installation Guide – DOC. 7603B...
- Page 9 1.51 in 1.67 in 2.50 in (39 mm) (43 mm) (64 mm) Plastic Racer Mount Overall Dimensions (Rear View) 4.67 in (119 mm) 2.45 in (62 mm) Installation Guide – DOC. 7603B Multi-Surface Mount Kit for TSS-752: TSS-752-MSMK • 5...
-
Page 10: Installation
Attach the plastic racer mount to the glass mounting plate using the 1/4” hex driver and the four included #04-40 hex nuts (2004878). Refer to the following illustration. 6 • Multi-Surface Mount Kit for TSS-752: TSS-752-MSMK Installation Guide – DOC. 7603B... - Page 11 NOTE: Use care when pulling plenum rated cable through the bottom of the plastic racer mount as the rigidity of the cable causes slight resistance. Installation Guide – DOC. 7603B Multi-Surface Mount Kit for TSS-752: TSS-752-MSMK • 7...
- Page 12 (2025312 or 2039651) 12. For a neat appearance, apply the peel-and-stick label that came with the TSS-752-MSMK (4519867 or 4519868) to the opposite side of the glass. Refer to the following illustration. 8 • Multi-Surface Mount Kit for TSS-752: TSS-752-MSMK...
- Page 13 Drywall, Paneling, Concrete or Brick Mounting This section provides the steps required for assembly and installation of the TSS-752-MSMK onto drywall, paneling, concrete or brick. The touch screen can be mounted onto the surface by following the procedure below. After installation is complete, the raceway may be installed following the “Raceway Mounting”...
- Page 14 NOTE: Use care when pulling plenum rated cable through the bottom of the plastic racer mount as the rigidity of the cable causes slight resistance. 10 • Multi-Surface Mount Kit for TSS-752: TSS-752-MSMK Installation Guide – DOC. 7603B...
- Page 15 Refer to the following illustration. Secure Touch Screen with Screws (Mounting Surface Not Shown) TSS-752 Screws (2) #04-40 x 1/4” (2025312 or 2039651) Installation Guide – DOC. 7603B Multi-Surface Mount Kit for TSS-752: TSS-752-MSMK • 11...
- Page 16 Insert cables into raceway and press to snap shut. Peel liner from the back of the raceway to expose adhesive strip. Press firmly against wall. Use elbows and couplings as necessary. 12 • Multi-Surface Mount Kit for TSS-752: TSS-752-MSMK Installation Guide – DOC. 7603B...
-
Page 17: Resources
Crestron worldwide offices at www.crestron.com/offices. To post a question about Crestron products, log onto Crestron’s Online Help at www.crestron.com/onlinehelp. First-time users must establish a user account to fully benefit from all available features. -
Page 18: Return And Warranty Policies
(property or economic damages inclusive) arising from the sale or use of this equipment. Crestron is not liable for any claim made by a third party or made by the purchaser for a third party. - Page 19 Crestron TSS-752-MSMK Multi-Surface Mount Kit for TSS-752 This page is intentionally left blank. Installation Guide – DOC. 7603B Multi-Surface Mount Kit for TSS-752: TSS-752-MSMK • 15...
- Page 20 Crestron Electronics, Inc. Installation Guide – DOC. 7603B (2038158) 15 Volvo Drive Rockleigh, NJ 07647 Tel: 888.CRESTRON 02.14 Fax: 201.767.7576 Specifications subject to www.crestron.com change without notice.
Need help?
Do you have a question about the TSS-752-MSMK and is the answer not in the manual?
Questions and answers