Advertisement
Quick Links
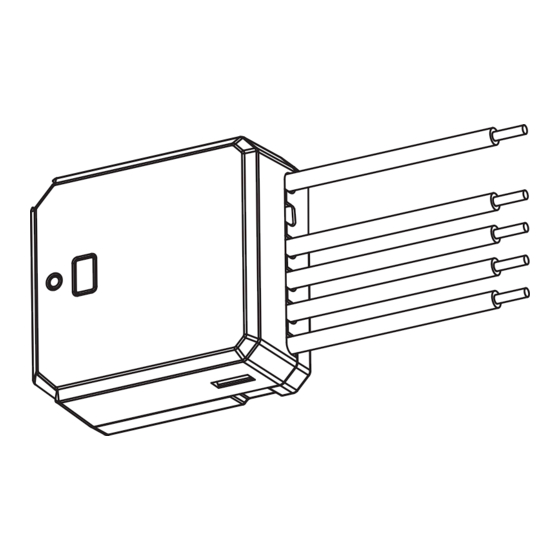
DC SIGNAL SENSOR
www.getzooz.com
ask@getzooz.com
Z-Wave alerts from low-voltage trigger signals
Ÿ
Connect to smoke or CO detectors to monitor activity
Ÿ
120 V relay to control a security siren or lights
Ÿ
Installs in the box with the last smoke detector in series
Ÿ
800 series Z-Wave chip for better range and faster control
Ÿ
Z-Wave Long Range for ultra reliable no-mesh communication
Ÿ
Advanced settings to customize the device's behavior
Ÿ
Built-in Z-Wave signal repeater for boosted communication
Ÿ
SmartStart and S2 Authenticate Security for a safer network
Ÿ
Model Number: ZEN55 LR
Ÿ
Power Input: 100-240 VAC, 50/60 Hz
Ÿ
Maximum Load: 10 A
Ÿ
Range: Up to 300 feet line of sight (or up to a mile with LR)
Ÿ
Operating Temperature: 32-104° F (0-40° C)
Ÿ
Installation and Use: Indoor only
Ÿ
CAUTION
This is an electrical device - please use caution when installing and
operating the DC Signal Sensor. Remote control of appliances may
result in unintentional or automated activation of power.
Do not use this Z-Wave device to control electric heaters or other
appliances which produce the risk of fire, burns, or electrical shock
when unattended.
To reduce risk of overheating and possible damage to other equipment,
do not install this unit to control a receptacle; a motor-operated
appliance; a fluorescent lighting fixture; any device over 32 V DC power;
or a transformer-supplied fixture. Use with low-voltage inputs only.
BEFORE YOU INSTALL
This device is intended for installation in accordance with the
National Electric Code and local regulations. It is recommen-
ded that a licensed electrician perform this installation.
This is NOT a security alarm component and the device is
NOT part of a life-safety system. Check local regulations
before installing.
1. LOCATE THE DETECTOR: install the DC Signal Sensor in
the box with the last smoke detector in series, it will only have
3 wires in the box (usually black, white, and red).
2. POWER OFF: turn the circuit power off in the breaker panel
before you start.
3. CHECK THE WIRES: mark the interconnect alarm wire
(usually red), power line (usually black), and neutral (white).
Don't rely exclusively on your multimeter to identify the
wires!
µ
NOT SURE WHAT YOU'RE SEEING? WE'LL HELP! SUPPORT.GETZOOZ.COM
SEND US PICTURES OF YOUR SET-UP, BEFORE YOU DISCONNECT WIRES.
4. DISCONNECT THE DETECTOR: remove the wires from the
smoke detector and label them accordingly.
5. CONNECT THE DC SIGNAL SENSOR: follow all installation
steps carefully. Wire the device EXACTLY like in the diagram.
Depending on your set-up, you may need a custom diagram
to connect a load to the relay part of the DC Signal Sensor.
These instructions only cover the basic wiring for smoke and
CO alarm monitoring from an existing interconnect detector.
Scan the QR code on page 3 to access more wiring diagrams
and expanded instructions for different installation types.
USER MANUAL
ZEN55 LR
FEATURES
SPECIFICATIONS
WIRING: READ IT!
PAGE 1
ZEN55 WIRING DIAGRAM FOR INTERCONNECTED SMOKE DETECTORS
1
Cap the IN and OUT wires on the ZEN55.
2
Connect the interconnect wire (usually red) on the
smoke detector to the S pigtail on the ZEN55.
3
Connect the L pigtail on the ZEN55 to the line bundle
from the 120 V power source (usually black).
4
Connect the N pigtail on the ZEN55 to the neutral
bundle from the 120 V power source (usually white).
INTERCONNECT SMOKE DETECTOR
QUESTIONS?
ask@getzooz.com
COMPLETE INSTALLATION
Secure your Z-Wave DC Signal Sensor and the smoke / CO
detector back in the box, handling the wires with care.
Restore power to the circuit.
If using SmartStart to add your device to the Z-Wave hub,
please wait with putting it back into the box since you'll need
to scan the QR code on the DC Signal Sensor and activate it
for inclusion. Turn the power off at the breaker again before
putting the wires back into the box.
Z-WAVE CONTROL
1. ADD DEVICE to your hub
Initiate inclusion (pairing) in the app (or web
interface). Check Long Range if using.
Not sure how? Scan one of the QR codes
below for step-by-step instructions or get in
touch: www.support.getzooz.com
2. Finalize inclusion at the device.
TAP THE Z-WAVE BUTTON 3 TIMES QUICKLY
if using traditional Z-Wave inclusion.
SCAN THE QR CODE / ENTER THE 5-DIGIT PIN
if using the new SmartStart method.
The SmartStart security PIN is located on the back
of the device, next to the ETL logo.
The LED indicator will blink green to signal communication
and turn green for 2 seconds if inclusion is successful or turn
red for 2 seconds if the pairing attempt fails.
NEED SOME HELP? ask@getzooz.com
Choose your hub and scan the QR code with your phone's
camera. Then click on the link to access the step-by-step
pairing instructions.
Z-Box Hub
Hubitat
Get more tutorials and helpful tips at ww.support.getzooz.com
Register your product for extended warranty and
direct access to firmware files: getzooz.com/register
S
OUT
IN
ZEN55
L
N
14-3 ROMEX FROM
ANOTHER DETECTOR
DC Signal Sensor ZEN55 LR
FCC ID: 2AZ2V-091821ZEN51
Power: 100-240V~, 50/60Hz
Max Load: 10A resistive
Freq: 908.42MHz
Firmware: 1.10
SmartThings
Home Assistant
PAGE 2
SmartStart
PIN: XXXXX
5021636
Advertisement

Related Manuals for ZooZ ZEN55 LR


Summary of Contents for ZooZ ZEN55 LR
- Page 1 1. LOCATE THE DETECTOR: install the DC Signal Sensor in SCAN THE QR CODE / ENTER THE 5-DIGIT PIN the box with the last smoke detector in series, it will only have DC Signal Sensor ZEN55 LR FCC ID: 2AZ2V-091821ZEN51 Power: 100-240V~, 50/60Hz if using the new SmartStart method.
- Page 2 ARISING IN CONNECTION WITH THIS AGREEMENT OR THE SALE OR USE OF PRODUCTS SHALL BE DEEMED seconds to confirm successful reset. WAIVED UNLESS MADE IN WRITING WITHIN THIRTY (30) DAYS FROM ZOOZ'S DELIVERY, OR THE DATE FIXED FOR DELI-VERY IN THE EVENT OF NONDELIVERY.
Need help?
Do you have a question about the ZEN55 LR and is the answer not in the manual?
Questions and answers