Table of Contents
Advertisement
Quick Links
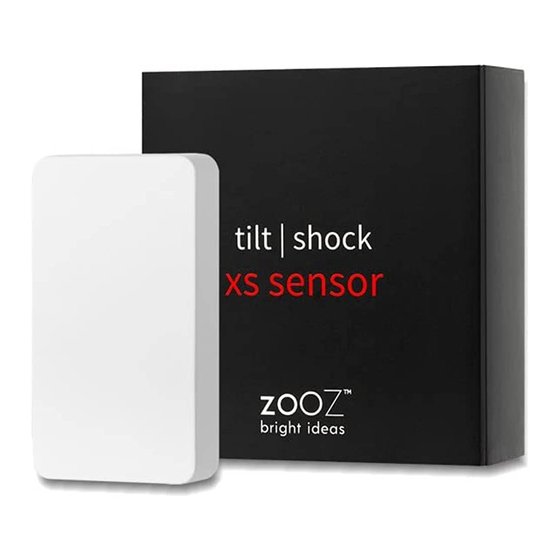
USER MANUAL
TILT | SHOCK XS SENSOR
ZSE43
FEATURES
Quick and reliable tilt and
Ÿ
vibration alerts to your hub
NEW 700 series chip for faster
Ÿ
communication and more
battery life than ever
Extra small for discreet mounting
Ÿ
Protective rubber coating
Ÿ
Powered by a long-lasting single
Ÿ
coin battery
The latest S2 security and
Ÿ
SmartStart for secure set-up
Supports OTA firmware updates
Ÿ
SPECIFICATIONS
Model Number: Z
Ÿ
Power: 1 x CR2032 battery
Ÿ
Operating Temperature: 5°-104° F
Ÿ
Dimensions: 1.9" x 1" x 0.3"
Ÿ
Range: Up to 130 feet line of sight
Ÿ
Installation and Use: Indoor or
Ÿ
outdoor under eve (can't be
exposed to direct rainfall or sun, a
little splash is OK)
INSTALLATION
1. POWER THE SENSOR
Use the triangle tool to
gently open the sensor's
cover and access the
battery. Pull the tab from
under the battery to activate the
sensor.
Don't close the cover just yet.
The LED indicator will start blinking
for around 10 seconds once the
sensor is powered.
The LED indicator doesn't blink
or light up at all?
Make sure the battery is
Ÿ
inserted correctly per the
positive / negative pole marks.
Try a fresh lithium non-
Ÿ
rechargeable battery.
Click the Z-Wave button 3
Ÿ
times as quickly as possible to
force inclusion/exclusion
mode in case you missed
when it first flashed.
LED INDICATOR
Z-WAVE
BUTTON
3 x CLICK
TO PAIR
Z-WAVE CONTROL
1. ADD DEVICE to your hub
Initiate inclusion (pairing) in the
app (or web interface). Not sure
how? ask@getzooz.com
If you're using an S2 hub, it will ask
you to enter the DSK PIN or scan
the QR code printed on the inside
of the sensor's battery cover to
complete SmartStart inclusion.
2. ACTIVATE the sensor
While the hub is looking for new
devices, click the Z-Wave button
3 times as quickly as possible.
The LED indicator will start
flashing to confirm inclusion
mode and turn off once inclusion
is completed.
TIP!
It's best to add your sensor from
the area where it will be installed
so the hub can find the best route
to reach it right away. If the signal
is weak in your garage, you may
need to add Z-Wave repeaters
between the hub and the sensor.
PAGE 1
www.getzooz.com
S2
Firmware 1.10
SE43
NEED SOME HELP?
ask@getzooz.com
Choose your hub and scan the QR
code with your phone's camera.
Then click on the link to access the
step-by-step pairing instructions.
SmartThings
Home Assistant
Get more tutorials and helpful tips at
ww.support.getzooz.com
TROUBLESHOOTING
The sensor won't add to your
system? Try this:
1. Initiate EXCLUSION in your hub
and click the Z-Wave button 3
times as quickly as possible.
2. Click the Z-Wave button quicker
when adding it.
3. Bring the sensor closer to your
hub, it may be out of range.
4. Double-check if the device is
powered.
5. Get troubleshooting tips specific
to your hub at
www.support.getzooz.com
EXCLUSION (REMOVE DEVICE)
1. Bring the sensor within direct
range of your Z-Wave hub.
2. Put the Z-Wave hub into
exclusion mode (not sure how to
do that? ask@getzooz.com).
3. Click the Z-Wave button 3 times
as quickly as possible.
4. Your hub will confirm exclusion
and the sensor will disappear
from your controller's device list.
FACTORY RESET
When your network's primary
controller is missing or otherwise
inoperable, you may need to reset
the device to factory settings
manually. In order to complete the
process, make sure the sensor is
powered, then click the Z-Wave
button twice and hold it the third
time for 10 seconds. The LED
indicator will blink continuously.
Immediately a er, click the Z-
Wave button twice more to
finalize the reset. The LED
indicator will flash 3 times to
confirm a successful reset.
NOTE: All previously recorded activity and
custom settings will be erased from the
device's memory.
WAKE-UP MODE
The sensor's wake-up interval is set
to 12 hours by default to save
battery life. Use the Wake Up
Command Class to adjust the
interval. Click the Z-Wave button 4
times quickly to wake the sensor
up manually. The LED indicator will
flash twice to confirm the device is
awake. During wake-up, the sensor
turns the Z-Wave radio on for one
minute to receive communication
from the hub. Long wake-up
interval will not affect how o en the
sensor reports to your hub so we
recommend leaving the default
setting to conserve battery.
ASSOCIATION
The XS Sensor supports Group 1 for
Lifeline communication, Group 2
(tilt sensor reports), and Group 3
(shock sensor reports) with up to 5
devices for Basic Set on/off control
of the associated devices. The value
of the basic set command sent to
Group 2 and Group 3 can be
adjusted in the advanced settings
to customize the sensor's behavior.
Please note that not all Z-Wave
systems give users access to direct
association settings so if you're
note sure where to find it, please
get in touch with our support and
we'll be happy to help.
Hubitat
Vera
PAGE 2
Advertisement
Table of Contents

Subscribe to Our Youtube Channel
Related Manuals for ZooZ ZSE43


Summary of Contents for ZooZ ZSE43
- Page 1 USER MANUAL NEED SOME HELP? ask@getzooz.com Choose your hub and scan the QR TILT | SHOCK XS SENSOR code with your phone’s camera. Then click on the link to access the ZSE43 step-by-step pairing instructions. www.getzooz.com SmartThings Hubitat Firmware 1.10 FEATURES Quick and reliable tilt and Ÿ...
- Page 2 IN NO EVENT SHALL ZOOZ OR ITS SUBSIDIARIES and it will change the open/close AND AFFILIATES BE LIABLE FOR ANY INDIRECT, status when the sensor is fully...
Need help?
Do you have a question about the ZSE43 and is the answer not in the manual?
Questions and answers