Chapters
Table of Contents

Subscribe to Our Youtube Channel
Related Manuals for Sage BES500


Summary of Contents for Sage BES500
- Page 1 User Guide Bambino Plus ™ B###### / S###### BES500 / SES500 QUICK GUIDE KURZANLEITUNG GUIDE RAPIDE SNELSTARTGIDS GUIDA RAPIDA GUÍA RÁPIDA MANUAL RÁPIDO SZYBKI PRZEWODNIK...
-
Page 2: Table Of Contents
• To eliminate a choking hazard RECOMMENDS for young children, discard the SAFETY FIRST protective cover fitted to the power plug safely. At Sage we are very safety ® • Ensure the product is properly conscious. We design and assembled before first use. - Page 3 We do not recommend the use the nearest authorised Sage of highly filtered, de-mineralised Service Centre for examination, replacement or repair. or distilled water as this may affect the taste of the coffee and •...
- Page 4 • Ensure the portafilter is firmly • The use of attachments not sold or recommended inserted and secured into by Sage may cause fire, the brewing head before using electric shock or injury. the machine. • Always turn the appliance to •...
- Page 5 NOTICE TO CUSTOMERS SPECIFIC INSTRUCTIONS REGARDING MEMORY FOR WATER FILTER STORAGE • Filter cartridge should be kept out of reach of children. Please note that in order to better • Store filter cartridges in a dry serve our customers, internal memory storage has been place in the original packaging.
-
Page 6: Components
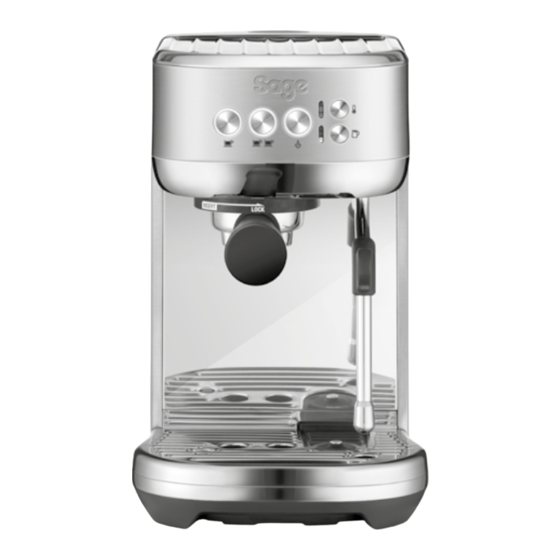
Components G. Steam wand grip A. 1.9L removable water tank H. Extra-tall cup clearance for tall mugs B. Control panel 1 CUP, 2 CUP and STEAM buttons I. Steam wand With preset shot durations or programmable With automatic milk texturing durations and volumes J. - Page 7 ACCESSORIES A. Stainless steel milk jug E. Dual wall filter baskets (1 cup & 2 cup) With MIN and MAX markings F. Single wall filter baskets (1 cup & 2 cup) B. 54mm tamper G. Espresso cleaning tablets C. Steam wand tip cleaning tool H.
-
Page 8: Assembly
Assembly BEFORE FIRST USE 6. Remove the water tank from the machine. Align the base of the filter holder with the Machine Preparation adapter inside the water tank. Push down Remove and discard all labels and packaging to lock into place. materials attached to your machine. -
Page 9: Functions
The machine will detect when the water level is low. The 1 CUP , 2 CUP and STEAM buttons will not be Functions illuminated. FIRST USE 1. Remove the water tank and fill with When this occurs, add water to the water tank. potable water to the indicated MAX Once there is sufficient water, all buttons will be line. - Page 10 TRIMMING THE DOSE NOTE The Razor™ precision dose trimming tool allows you to trim the puck to the right level You may need to experiment with how much for a consistent extraction. coffee is dosed into the filter baskets or how long the grinder needs to run to achieve the correct dose.
- Page 11 PRE-PROGRAMED SHOT VOLUME PROGRAMMING SHOT VOLUME – 1 CUP Press and hold the 1 CUP and 2 CUP buttons for 2 seconds, the buttons will illuminate and flash. Press the 1 CUP button once, the button will flash indicating that it has been selected. A preset single espresso volume of approximately 30mls will be extracted.
- Page 12 NOTE NOTE Prior to texturing milk, it is recommended to Pressurised steam can still be released, even momentarily purge the steam wand. To do this after the machine has been switched off. press the STEAM button to start purging and Children must always be supervised.
- Page 13 HOT WATER OPERATION • Lift the jug to lower the tip beneath the surface but keep the vortex spinning. The milk Hot water through the steam wand: is at the correct temperature (60-65°C) when When the machine is in ‘ready mode’, the jug is hot to touch.
- Page 14 EXTRACTION TIPS A great espresso is about achieving the perfect balance between sweetness, acidity, and bitterness. The flavour of your coffee will depend on many factors, such as the type of coffee beans, degree of roast freshness, coarseness or fineness of the grind, dose of ground coffee and tamping pressure. Experiment by adjusting these factors just one at a time to achieve the taste of your preference.
-
Page 15: Care & Cleaning
Care & Cleaning REPLACING THE WATER FILTER It is recommended to descale your unit every 90 days when water hardness is at level 4; and when water hardness is at level 6, descale your unit every 60 days. 6. Press and hold the 1 CUP and 2 CUP CLEANING CYCLE buttons for 5 seconds to enter the cleaning cycle mode. - Page 16 5. With the machine off, press the 1 CUP The machine will indicate that it requires and STEAM buttons simultaneously for descaling when the 1 CUP and STEAM button 5 seconds to enter descale mode. and the 2 CUP button flash alternately for 15 seconds.
- Page 17 Both the milk temperature and milk foam lights will CLEANING THE DRIP TRAY fully illuminate and flash. These lights will flash until • The drip tray should be removed, emptied and a manual steam purge has been completed. cleaned after each use or when the drip tray indicator rises through the drip tray grid.
-
Page 18: Troubleshooting
Troubleshooting PROBLEM POSSIBLE CAUSES EASY SOLUTION Water does not flow • Water tank is empty. Fill tank. from the group head. • Water tank is not fully Push water tank down completely No hot water. inserted and locked to lock into place. into position. - Page 19 PROBLEM POSSIBLE CAUSES EASY SOLUTION Espresso runs out • Coffee is ground Use slightly finer grind. too quickly. too coarsely. Refer to 'Coffee Dose and Tamping' on page 10 and 'Extraction Tips' on page 14. • Not enough coffee in Increase dose of coffee.
- Page 20 5 seconds to the pump overheating. switch the machine off and unplug from the power outlet. Allow to cool for about 30–60 minutes. If problem persists, call Sage Support. Too much/too little • Grind amount and/or grind Adjust the grind amount and/or...
-
Page 21: Guarantee
During this guarantee period Sage Appliances will repair, replace, or refund any defective product (at the sole discretion of Sage Appliances). All legal warranty rights under applicable national legislation will be respected and will not be impaired by our guarantee. - Page 22 Notes...
- Page 23 User Guide Bambino Plus ™ B###### / S###### BES500 / SES500 KURZANLEITUNG...
- Page 24 BITTE ALLE ANWEISUNGEN Inhalt VOR GEBRAUCH LESEN UND ZUM SPÄTEREN NACHSCHLAGEN AUFBEWAHREN Bei Sage steht Sicherheit • Dieses Dokument ist auch an erster Stelle zum Download verfügbar unter sageappliances.com Komponenten • Bitte vergewissern Sie sich vor Montage dem ersten Gebrauch, dass...
- Page 25 • Rollen Sie das Kabel vor in dieser Bedienungsanleitung Inbetriebnahme ganz aus. beschriebenen Vorgänge sind • Lassen Sie das Kabel nicht über in einem Sage Service Center die Kante einer Arbeitsfläche durchzuführen. oder eines Tisches hängen. Das • Dieses Gerät darf von Kindern Netzkabel darf nicht mit heißen...
- Page 26 Espressomaschine beein- trächtigen kann. • Die Verwendung von Zubehörteilen, die nicht • Verwenden Sie das Gerät nicht von Sage vertrieben oder mit leerem Wassertank. empfohlen werden, kann • Vergewissern Sie sich, dass der zu Bränden, Stromschlägen Siebträger fest in den Brühkopf oder Verletzungen führen.
- Page 27 KUNDENMITTEILUNG • Mit Ausnahme der Reinigung BEZÜGLICH DES SPEICHERS müssen sämtliche Wartungs- arbeiten von einer autorisierten Bitte beachten Sie, dass Sage -Kundendienststelle ® in Ihrem Gerät ein internes durchgeführt werden. Speichermedium enthalten ist, um die Benutzerfreundlichkeit • Verwenden Sie das Gerät nicht unserer Produkte zu steigern.
- Page 28 BESONDERE ANWEISUNGEN Dieses Symbol bedeutet, FÜR DEN WASSERFILTER dass das Gerät nicht mit dem gewöhnlichen • Die Filterpatronen sollten Haushaltsmüll entsorgt werden außerhalb der Reichweite von darf. Stattdessen muss es Kindern aufbewahrt werden. zu einer für diesen Zweck • Bewahren Sie die Filterpatronen eingerichteten behördlichen an einem trockenen Ort in der Sammelstelle oder zu einem...
- Page 29 Komponenten A. Abnehmbarer 1,9-l-Wassertank E. Brühkopf B. Bedienfeld F. 54-mm-Edelstahl-Siebträger Tasten für eine Tasse, zwei Tassen und Dampf G. Dampfdüsengriff mit voreingestellten oder programmierbaren H. Extra Platz für hohe Tassen Mengen- und Zeitangaben I. Dampfdüse C. Milchtemperatur-Einstellungen mit automatischer Milchzubereitung Sie können zwischen Warm, Ideal oder Heiß...
- Page 30 ZUBEHÖR A. Milchkanne aus Edelstahl F. Einwandige Siebeinsätze (für eine Tasse und zwei Tassen) mit MIN- und MAX-Markierungen B. 54 mm-Tamper G. Reinigungstabletten für Espressomaschinen C. Reinigungstool für die Spitze der Dampfdüse H. Reinigungsscheibe (Befindet sich unter dem Wassertank) I. Wasserfilterhalter mit Filter D.
- Page 31 Montage VOR DEM ERSTEN GEBRAUCH 6. Entfernen Sie den Wassertank von der Maschine. Richten Sie den Boden des Vorbereiten des Geräts Filterhalters mit dem Adapter im Wassertank Entfernen und entsorgen Sie alle am Gerät ange- aus und drücken Sie ihn nach unten, brachten Etiketten und Verpackungsmaterialien.
- Page 32 Wenn die Tasten für eine Tasse, zwei Tassen und Dampf aufleuchten, wurde der Wassertank korrekt Funktionen eingesetzt. Das Gerät erkennt, wenn der Wasserstand niedrig ist. Die Tasten für eine Tasse, zwei Tassen und Dampf leuchten nicht auf. ERSTE INBETRIEBNAHME 1. Entnehmen Sie den Wassertank und füllen Sie ihn bis zur „MAX“-Markierungmit Trinkwasser auf.
- Page 33 DOSIEREN DES KAFFEEPULVERS unabhängig von Mahlgrad, Dosierung, Tamperdruck oder Frischegrad. Mit der Razor™ Dosierhilfe können Sie den Puck für perfekte Extraktion auf die richtige Höhe bringen und begradigen. EINE TASSE ZWEI TASSEN HINWEIS Möglicherweise müssen Sie ausprobieren, wie • Setzen Sie die Razor™ Dosierhilfe so in den viel Kaffee in die Siebeinsätze dosiert wird oder Filterhalter ein, dass die Ecken der Klinge auf wie lange das Mahlwerk braucht, bis die ideale...
- Page 34 VOREINGESTELLTE MENGE – EINE TASSE MENGENEINSTELLUNG EINPROGRAMMIEREN Drücken Sie die Taste für eine Tasse einmal. Sie blinkt zur Bestätigung der Auswahl. Es wird eine Wenn Sie sowohl die Taste für eine Tasse als auch voreingestellte Menge für einen einfachen Espresso die Taste für zwei Tassen für zwei Sekunden von ca.
- Page 35 HINWEIS HINWEIS Es wird empfohlen, die Dampfdüse vor dem Heißer Dampf kann auch nach dem Abschalten Aufschäumen von Milch kurz mit Dampf zu der Maschine noch austreten. Kinder müssen reinigen. Drücken Sie dazu die Dampf-Taste, um deshalb immer beaufsichtigt werden. mit dem Durchspülen zu beginnen, und drücken Sie sie erneut, um aufzuhören.
- Page 36 NUTZUNG DER HEISSWASSERFUNKTION • Zerteilen Sie die Milchoberfläche vorsichtig mit der Spitze, damit sich die Milch schnell So erhalten Sie Heißwasser genug dreht. durch den Dampfstab. • Halten Sie die Spitze der Dampfdüse an oder Wenn sich die Maschine im „Bereitschafts- leicht unter die Milchoberfläche und erhalten Sie den Wirbeleffekt weiterhin aufrecht.
- Page 37 EXTRAKTION – TIPPS UND TRICKS Wirklich erstklassiger Espresso entsteht nur im Gleichgewicht von Süße, Säure und Bitterkeit. Der Geschmack Ihres Kaffees hängt von vielen Faktoren ab, zum Beispiel von der Kaffeesorte, der Röstfrische, der Dosierung des gemahlenen Kaffees, vom Tamperdruck und davon, wie grob oder fein der Kaffee gemahlen ist. Wir empfehlen Ihnen, mit jeweils einem dieser Faktoren nach dem anderen zu experimentieren, um Ihren persönlichen Lieblingskaffee zu kreieren.
- Page 38 Pflege und Reinigung AUSTAUSCHEN DES WASSERFILTERS Wir empfehlen, das Gerät bei Wasserhärte 4 alle 90 Tage zu entkalken; bei Wasserhärte 6 sollte das Gerät alle 60 Tage entkalkt werden. 5. Füllen Sie den Wassertank bis zur „MAX“- REINIGUNGSZYKLUS Markierung auf und setzen Sie ihn wieder korrekt in das Gerät ein.
- Page 39 1000 DESCALE 5. Drücken Sie nun im ausgeschalteten Zustand 68oz ENTKALKEN erneut gleichzeitig die Tasten für eine Tasse und für Dampf fünf Sekunden lang, um in den Bei regelmäßigem Gebrauch kann hartes Wasser Entkalkungsmodus zu gelangen. zu Kalkablagerungen in der Maschine führen, was den Wasserfluss, die Brühtemperatur, die Maschinenleistung und den Geschmack des Espressos beeinträchtigen kann.
- Page 40 DIE DAMPFDÜSE IST BLOCKIERT REINIGEN DER SIEBEINSÄTZE UND DES SIEBTRÄGERS Wenn das Gerät während der Milchzubereitung registriert, dass die Dampfdüse verstopft ist, bricht • Die Siebeinsätze und der Siebträger sollten es den derzeitigen Prozess sofort ab und das direkt nach Gebrauch unter heißem Wasser Licht der Dampf-Taste geht aus.
- Page 41 WARNUNG Netzkabel, Netzstecker oder das Gerät selbst dürfen niemals in Wasser oder andere Flüssigkeiten getaucht werden. AUFBEWAHREN DER MASCHINE Bevor Sie die Maschine aufbewahren können, müssen Sie sie ausschalten und den Netzstecker aus der Steckdose ziehen. Leeren Sie Wassertank und Abtropfschale und vergewissern Sie sich, dass das Gerät abgekühlt, sauber und trocken ist.
- Page 42 Störungsbehebung PROBLEM MÖGLICHE URSACHEN EINFACHE LÖSUNG Aus dem • Der Wassertank ist leer. Füllen Sie den Wassertank auf. Brühkopf fließt • Der Wassertank ist nicht Drücken Sie den Wassertank ganz nach kein Wasser. ordnungsgemäß angebracht unten, bis er einrastet. und nicht richtig eingerastet. Kein heißes Wasser.
- Page 43 PROBLEM MÖGLICHE URSACHEN EINFACHE LÖSUNG Der Espresso • Der Kaffee ist zu grob gemahlen. Stellen Sie einen etwas feineren Mahlgrad ein. läuft zu schnell Siehe Abschnitt „Kaffee dosieren und durch. tampen“ auf Seite 11 und „Extraktion – Tipps und Tricks“ auf Seite 15. •...
- Page 44 Sie den Netzstecker aus der Steckdose. Lassen Sie das Gerät für etwa 30–60 Minuten abkühlen. Wenn das Problem weiterhin besteht, kontaktieren Sie den Sage-Support. Es fließt zu viel/ • Die Einstellungen für Mahlmenge und/oder Mahlgrad müssen zu wenig Espresso Mahlmenge und/oder angepasst werden.
- Page 45 Garantie 2 JAHRE BESCHRÄNKTE GARANTIE Sage Appliances gibt auf dieses Produkt für den häuslichen Gebrauch in bestimmten Gebieten eine Garantie über 2 Jahre ab Kaufdatum für Mängel, die durch fehlerhafte Verarbeitung und Materialien verursacht wurden. Während dieser Garantiezeit wird Sage Appliances jedes fehlerhafte Produkt reparieren, ersetzen oder das Geld zurückerstatten...
- Page 46 Notizen...
- Page 47 User Guide Bambino Plus ™ B###### / S###### BES500 / SES500 GUIDE RAPIDE...
- Page 48 LISEZ TOUTES LES Table des INSTRUCTIONS AVANT matières UTILISATION ET CONSERVEZ- LES POUR RÉFÉRENCE ULTÉRIEURE Sage recommande la sécurité • Une version téléchargeable avant tout de ce document est également disponible sur le site Composants sageappliances.com. Assemblage • Avant une première utilisation,...
- Page 49 Ne l'utilisez pas sur ou à proximité d'utiliser l'appareil et renvoyez-le d'une source de chaleur au centre de réparation Sage (plaque chauffante, four agréé le plus proche pour qu'il ou cuisinière au gaz). soit vérifié, remplacé ou réparé.
- Page 50 • Cet appareil peut être utilisé • N'utilisez que de l'eau froide par des enfants âgés de 8 ans du robinet. N'utilisez pas d'eau ou plus et des personnes aux hautement filtrée, déminéralisée capacités mentales, sensorielles ou distillée, car elle affectera ou physiques réduites, ou ayant le goût du café...
- Page 51 • L'utilisation d'accessoires mémoire interne a été intégrée non fabriqués ou non indiqués à votre appareil. Cette mémoire par Sage peut provoquer se compose d'une petite des incendies, des chocs puce recueillant certaines électriques ou des blessures.
- Page 52 INSTRUCTIONS SPÉCIALES Le symbole illustré indique POUR LE FILTRE À EAU que cet appareil ne doit pas être jeté aux ordures • La cartouche filtrante doit être ménagères. Il doit être amené conservée hors de la portée dans un centre de collecte de des enfants.
- Page 53 Composants A. Réservoir d'eau amovible de 1,9 L F. Porte-filtre en acier inoxydable de 54 mm B. Panneau de commande G. Manche de la buse vapeur Boutons 1 TASSE, 2 TASSES et VAPEUR H. Hauteur importante pour grandes tasses Avec durées d'infusion préréglées ou durées I.
- Page 54 ACCESSOIRES E. Paniers-filtres à double paroi A. Pichet à lait en acier inoxydable (1 tasse et 2 tasses) Avec repères MIN et MAX F. Paniers-filtres à paroi simple B. Dameur 54 mm (1 tasse et 2 tasses) C. Outil de nettoyage pour embout de buse vapeur G.
- Page 55 Assemblage AVANT LA PREMIÈRE UTILISATION 6. Retirez le réservoir d'eau de l'appareil. Alignez la base du support de filtre et Préparation de la machine l'adaptateur à l'intérieur du réservoir d'eau. Retirez et jetez toutes les étiquettes et les Appuyez pour verrouiller. emballages entourant votre machine.
- Page 56 Lorsque le niveau de l'eau est insuffisant, la machine le détecte. Les boutons 1 TASSE, Fonctions 2 TASSES et VAPEUR ne s'allumeront pas. PREMIÈRE UTILISATION 1. Retirez le réservoir d'eau et remplissez. le avec de l'eau potable jusqu'au Quand cela se produit, ajoutez de l'eau dans le repèreMAX.
- Page 57 DOSAGE REMARQUE L'outil de dosage de précision the Razor™ vous permet de régler le galet presseur au bon niveau Vous pouvez avoir besoin de tester la quantité de pour une extraction uniforme. café dosée dans les paniers-filtres ou la durée de fonctionnement du broyeur pour obtenir la dose correcte.
- Page 58 VOLUME DE PRÉPARATION PRÉ-INFUSION ET VOLUME PRÉDÉFINI - 1 TASSE DE PRÉPARATION MANUELS Appuyez une fois sur le bouton 1 TASSE. Le bouton Appuyez sur le bouton 1 TASSE ou 2 TASSES clignote pour indiquer qu'il a été sélectionné. et maintenez-le enfoncé pour obtenir la durée Un volume d'expresso simple prédéfini d'environ désirée de pré-infusion.
- Page 59 AJUSTER LA MOUSSE DU LAIT • Appuyez sur les boutons MILK TEMP et MILK La machine dispose de 3 réglages de la mousse FOAM pour sélectionner les réglages souhaités. de lait ; • Appuyez sur le bouton STEAM qui clignotera pendant la préparation du lait.
- Page 60 PRÉPARATION MANUELLE D'UNE PURGE DE LA BUSE VAPEUR MOUSSE DE LAIT Après avoir préparé du lait, la buse vapeur doit être abaissée et purgée automatiquement. Si vous • Les fonctions de préparation automatique ne le faites pas, vous risquez de boucher la buse et d'arrêt automatique sont désactivées pendant vapeur.
- Page 61 ASTUCES Un grand expresso, c'est l'équilibre parfait entre la douceur, l'acidité et l'amertume. La saveur de votre café dépend de nombreux facteurs, tels que le type de grains de café, le degré de fraîcheur de la torréfaction, l'épaisseur ou la finesse de la mouture, la dose de café moulu et la pression de tassage. Expérimentez en ajustant ces facteurs un à...
- Page 62 Entretien et nettoyage REMPLACEMENT DU FILTRE À EAU Il est recommandé de détartrer votre appareil tous les 90 jours lorsque la dureté de l'eau est de niveau 4. Lorsque la dureté de l'eau est de niveau 6, détartrez votre appareil tous les 60 jours. 6.
- Page 63 4. Éteignez la machine en appuyant sur les DÉTARTRAGE boutons 1 TASSE et STEAM simultanément et laissez-la refroidir avant Après un usage régulier, l'eau dure peut de commencer le détartrage. engendrer des dépôts de minéraux dans et sur les composants internes, réduisant le flot 1000 d'écoulement, la température, la puissance DESCALE...
- Page 64 LA BUSE VAPEUR EST BOUCHÉE NETTOYAGE DES PANIERS-FILTRES ET DU PORTE-FILTRE Pendant la préparation du lait, si la machine détecte que la buse vapeur est bouchée, • Les paniers-filtres et le porte-filtre doivent elle s'arrête immédiatement et le voyant du être rincés à...
- Page 65 REMARQUE Veillez à ne mettre aucune pièce ni aucun accessoire au lave-vaisselle. AVERTISSEMENT Ne plongez pas le cordon électrique, la prise électrique ou la machine dans l'eau ou dans un autre liquide. RANGEMENT DE LA MACHINE Avant de la ranger, mettez la machine hors tension et débranchez-la de la prise électrique.
- Page 66 Dépannage PROBLÈME CAUSES POSSIBLES SOLUTION FACILE L'eau ne s'écoule pas • Le réservoir d'eau est vide. Remplissez le réservoir. au travers du groupe • Le réservoir d'eau n'est pas Appuyez complètement sur chauffant. complètement inséré et le réservoir d'eau pour verrouiller verrouillé...
- Page 67 PROBLÈME CAUSES POSSIBLES SOLUTION FACILE L'expresso • La mouture du café est trop Utilisez une mouture légèrement plus grossière. fine. s'écoule trop vite. Consultez la section « Quantité de café et tassage » à la page 11 et « Astuces » à la page 15. •...
- Page 68 électrique. pas. Laissez refroidir pendant 30 à 60 minutes. Si le problème persiste, veuillez contacter le service client Sage. Trop/trop peu • La quantité de mouture et/ou Ajustez les paramètres de quantité d'expresso le degré...
- Page 69 Garantie GARANTIE LIMITÉE 2 ANS Sage Appliances garantit ce produit pour un usage domestique sur les territoires spécifiés pendant 2 ans à compter de la date d’achat, contre les défauts de fabrication et de matériaux. Au cours de cette période de garantie, Sage Appliances s’engage à...
- Page 70 Déclaration à l'intention du consommateur SAGE FRANCE - GARANTIE LIMITÉE Sage Appliances garantit ce produit pour un usage Article L. 217-4 du Code de la consommation : « Le vendeur livre un bien conforme au contrat et domestique sur les territoires spécifiés pendant 2 répond des défauts de conformité...
- Page 71 User Guide Bambino Plus ™ B###### / S###### BES500 / SES500 SNELSTARTGIDS...
- Page 72 LEES ALLE INSTRUCTIES Inhoud VÓÓR GEBRUIK EN BEWAAR DEZE VOOR TOEKOMSTIGE NASLAG Sage stelt veiligheid voorop • Een downloadbare versie van dit document Onderdelen is ook beschikbaar op 13 Montage sageappliances.com 14 Functies • Zorg er vóór het eerste gebruik...
- Page 73 • Plaats het apparaat op Sage-servicecentrum voor een stabiele, hittebestendige, onderzoek, vervanging vlakke, droge ondergrond, of reparatie. uit de buurt van de rand van het aanrecht en werk niet op of in •...
- Page 74 • Het gebruik van accessoires u het apparaat gebruikt. die niet door Sage zijn verkocht of aangeraden, kan risico op • Verwijder het portafilter nooit brand, elektrische schokken tijdens het koffiezetten, omdat of letsel met zich meebrengen.
- Page 75 • Alle onderhoud anders dan zodat we onze klanten beter reiniging moet worden uitgevoerd van dienst kunnen zijn. Deze door een geautoriseerd geheugenopslag bestaat Sage -servicecentrum. ® uit een kleine chip waarmee • Gebruik het apparaat niet op informatie over uw apparaat...
- Page 76 SPECIFIEKE INSTRUCTIES Het weergegeven symbool VOOR WATERFILTER geeft aan dat dit apparaat niet met het normale • Filterpatroon moet buiten het huishoudelijke afval mag worden bereik van kinderen worden weggegooid. Het moet naar een gehouden. geschikt plaatselijk afvalverwer- • Bewaar filterpatronen op een kingscentrum worden gebracht droge plaats in de originele of naar een dealer die deze...
- Page 77 Onderdelen F. Roestvrijstalen portafilter van 54 mm A. Verwijderbaar waterreservoir van 1,9 liter G. Greep voor stoompijpje B. Bedieningspaneel Knoppen 1 KOPJE, 2 KOPJES en STOOM H. Extragrote ruimte voor grote koppen Met vooraf ingestelde extractieduur I. Stoompijpje of programmeerbare duur en volume voor automatisch melk opschuimen C.
- Page 78 ACCESSOIRES A. Melkkan van roestvrij staal F. Filterbakjes met enkele wand met MIN- en MAX-markeringen (1 kopje en 2 kopjes) B. Tamper van 54 mm G. Espressoreinigingstabletten C. Reinigingstool voor uiteinde van stoompijpje H. Reinigingsschijf (Bevindt zich onder het waterreservoir) I.
- Page 79 Montage VOOR HET EERSTE GEBRUIK 5. Plaats de filter in de twee delen van de filterhouder. Zorg ervoor Voorbereiding van het apparaat dat ze verbonden zijn. Verwijder alle labels en verpakkingsmateriaal 6. Haal het waterreservoir uit het apparaat. van uw apparaat. Zorg ervoor dat u alle onderdelen Zorg dat de basis van de filterhouder en accessoires uit de verpakking heeft gehaald is uitgelijnd met de adapter in het...
- Page 80 Het apparaat detecteert een laag waterniveau. De knoppen 1 KOPJE, 2 KOPJES en STOOM Functies branden dan niet. EERSTE GEBRUIK 1. Verwijder het waterreservoir en vulhet met drinkwater tot de aangegevenMAX-lijn. Zet Als dat gebeurt, moet u het reservoir met water het waterreservoir terugop het apparaat.
- Page 81 DE JUISTE HOEVEELHEID DOSEREN OPMERKING Met de Razor™-doseringstool kunt u de puck op het juiste niveau trimmen voor een consistente Mogelijk moet u experimenteren met de extractie. hoeveelheid koffie die u in het filterbakje doet en hoe lang de koffiemolen moet malen voor de juiste dosering.
- Page 82 VOORGEPROGRAMMEERD HET SHOTVOLUME PROGRAMMEREN SHOTVOLUME: 1 KOPJE Houd de knoppen 1 KOPJE en 2 KOPJES 2 seconden lang ingedrukt. De knoppen lichten Druk eenmaal op de knop 1 KOPJE. De knop op en knipperen. knippert om aan te geven dat deze is geselecteerd. Een vooraf ingesteld espressovolume van een enkele shot (ca.
- Page 83 OPMERKING OPMERKING Voordat u melk gaat opschuimen is het Stoom onder druk kan nog steeds vrijkomen, raadzaam het stoompijpje even te spoelen. Druk zelfs nadat het apparaat is uitgeschakeld. hiervoor op de knop STOOM om het spoelen te Kinderen moeten altijd onder toezicht staan. starten en druk opnieuw om het te stoppen.
- Page 84 • Breng het uiteinde van stoompijpje voorzichtig BEDIENING HEET WATER net boven het oppervlak van de melk om te Heet water door het stoompijpje. zorgen dat de melk snel genoeg ronddraait. Volg deze stappen wanneer het • Houd het stoompijpje op of net onder het apparaat in READY-modus is: oppervlak zodat de draaikolk behouden blijft.
- Page 85 TIPS VOOR EXTRACTIE Een heerlijke espresso steunt op de perfecte balans tussen zoet, zuur en bitter. De smaak van uw koffie hangt af van diverse factoren, zoals het type koffiebonen, de mate van versheid van de gebrande bonen, een grove of fijne maalgraad, de dosering van de gemalen koffie en de aandrukkracht. Experimenteer met uw koffie door deze factoren een voor een aan te passen en ontdek wat u het lekkerst vindt.
- Page 86 Onderhoud en reiniging DE WATERFILTER VERVANGEN Bij een waterhardheidsniveau van 4 wordt aanbevolen uw eenheid om de 90 dagen te ontkalken; bij een waterhardheidsniveau van 6 moet u om de 60 dagen ontkalken. 6. Houd de knoppen 1 KOPJE en REINIGINGSCYCLUS 2 KOPJES 5 seconden lang ingedrukt om de reinigingsmodus te starten.
- Page 87 4. Schakel het apparaat uit door tegelijk ONTKALKING op de knoppen 1 KOPJE en STOOM te drukken, en laat het apparaat volledig Na regelmatig gebruik kan hard water in en afkoelen voordat u begint met ontkalken. op veel van de functionele onderdelen in het 1000 apparaat kalkaanslag veroorzaken.
- Page 88 STOOMPIJPJE VERSTOPT DE FILTERBAKJES EN HET PORTAFILTER REINIGEN Als het apparaat tijdens het opschuimen van melk detecteert dat het stoompijpje verstopt is, stopt • De filterbakjes en het portafilter moeten direct het onmiddellijk met werken en stopt de knop na gebruik worden afgespoeld onder heet water STOOM met branden.
- Page 89 WAARSCHUWING Dompel het netsnoer, de stekker of het apparaat niet onder in water of een andere vloeistof. UW APPARAAT OPBERGEN Voordat u het apparaat opbergt, schakelt u het apparaat uit en haalt u de stekker uit het stopcontact. Maak het waterreservoir en de opvangbak leeg en zorg dat het apparaat koel, schoon en droog is.
- Page 90 Problemen oplossen PROBLEEM MOGELIJKE OORZAKEN EENVOUDIGE OPLOSSING Er komt geen water uit • Waterreservoir is leeg. Vul het waterreservoir. de zetgroep. • Waterreservoir is niet correct Duw het waterreservoir naar beneden Geen heet water. geplaatst en op zijn plaats om het te vergrendelen. vergrendeld.
- Page 91 PROBLEEM MOGELIJKE OORZAKEN EENVOUDIGE OPLOSSING Espresso loopt • Koffie is te grof gemalen. Gebruik een iets fijnere maling. Lees 'Koffie doseren en aandrukken' te snel door. op pagina 11 en 'Tips voor extractie' op pagina 15. • Er zit niet genoeg koffie in het Gebruik meer koffie.
- Page 92 Laat het zo'n 30–60 minuten afkoelen. Neem contact op met de Sage- ondersteuning als het probleem aanhoudt. Er komt te veel/ • Instellingen voor...
- Page 93 Garantie BEPERKTE GARANTIE VAN 2 JAAR Sage Appliances biedt een garantie op dit product voor huishoudelijk gebruik in genoemde gebieden gedurende 2 jaar vanaf de datum van aankoop tegen defecten veroorzaakt door gebrekkige afwerking en materialen. Gedurende deze garantieperiode zal Sage Appliances defecte producten repareren, vervangen of terugbetalen (naar eigen goeddunken van Sage Appliances).
- Page 94 Opmerking...
- Page 95 User Guide Bambino Plus ™ B###### / S###### BES500 / SES500 GUIDA RAPIDA...
- Page 96 LEGGERE TUTTE LE Sommario ISTRUZIONI PRIMA DELL'USO E CONSERVARLE PER CONSULTARLE IN FUTURO Sage consiglia: la sicurezza prima • Sul sito sageappliances.com di tutto è disponibile anche una versione scaricabile del Componenti presente documento. Montaggio • Prima di usare l'apparecchio per...
- Page 97 Utilizzare assistenza Sage autorizzato l'apparecchio lontano da fonti di più vicino affinché venga calore come piastre elettriche, esaminato, sostituito o riparato.
- Page 98 • Non lasciare che i bambini • Assicurarsi che il portafiltro giochino con l'elettrodomestico. sia ben inserito e fissato nella bocchetta di estrazione prima • La pulizia dell'elettrodomestico di utilizzare l'apparecchio. può essere effettuata da bambini di età non inferiore •...
- Page 99 AVVISO AI CLIENTI IN • L'utilizzo di prolunghe MERITO AI DISPOSITIVI o accessori non venduti DI ARCHIVIAZIONE o consigliati da Sage può provocare incendi, scosse Al fine di offrire un servizio elettriche o lesioni. migliore ai nostri clienti, nei nostri prodotti è stato inserito •...
- Page 100 ISTRUZIONI SPECIFICHE Questo simbolo indica che PER IL FILTRO DELL'ACQUA l'apparecchio non può essere smaltito con i rifiuti • Tenere la cartuccia del filtro fuori domestici comuni. Deve essere dalla portata dei bambini. conferito presso un centro di • Conservare le cartucce del smaltimento locale specializzato filtro in un luogo asciutto e nella o presso un rivenditore che...
-
Page 101: Componenti
Componenti G. Maniglia della lancia vapore A. Serbatoio dell'acqua rimovibile da 1,9 litri H. Spazio extra per tazze grandi B. Pannello di controllo pulsanti 1 TAZZA, 2 TAZZE e STEAM (vapore) I. Lancia vapore Con durata di erogazione e volume Con montatura del latte automatica preimpostati o programmabili J. - Page 102 ACCESSORI A. Lattiera in acciaio inossidabile F. Filtri a parete singola (1 tazza e 2 tazze) Con segni MIN e MAX G. Detergente in capsule per la macchina B. Pressino da 54 mm espresso C. Accessorio per la pulizia della punta della H.
-
Page 103: Montaggio
Montaggio PREPARAZIONE AL PRIMO UTILIZZO 6. Estrarre il serbatoio dell'acqua dall'elettrodomestico. Allineare la base del Preparazione dell'elettrodomestico supporto del filtro con l'adattatore all'interno Rimuovere e smaltire tutte le etichette promozionali del serbatoio dell'acqua. Spingere verso e i materiali di imballaggio forniti con il prodotto. il basso per bloccarlo in posizione. -
Page 104: Funzioni
L'apparecchio rileverà automaticamente quando il livello dell'acqua è basso. I pulsanti 1 TAZZA, Funzioni 2 TAZZE e STEAM (vapore) non si illumineranno. PRIMO USO 1. Estrarre il serbatoio dell'acqua e riempirlo con acqua potabile fino al punto indicato dalla linea MAX. Rialloggiare il serbatoio Se ciò... - Page 105 LIVELLARE LA DOSE NOTA Lo strumento di dosaggio di precisione Razor™ consente di dosare il caffè al giusto livello per Potrebbe essere necessario fare diverse prove un'estrazione uniforme. per determinare la quantità di caffè nel filtro o la durata della macinatura necessarie per ottenere la dose corretta.
- Page 106 VOLUME TAZZA PREPROGRAMMATO - PROGRAMMARE IL VOLUME TAZZA 1 TAZZA Tenere premuti i pulsanti 1 TAZZA o 2 TAZZE per 2 secondi; i pulsanti si illumineranno Premere il pulsante 1 TAZZA una volta: il e lampeggeranno. pulsante lampeggia quando viene selezionato. Sarà...
- Page 107 NOTA NOTA Prima di iniziare a montare il latte, È possibile che venga rilasciato vapore si raccomanda di pulire brevemente la lancia pressurizzato anche dopo lo spegnimento vapore. Per farlo, premere il pulsante STEAM della macchina. I bambini devono utilizzare (vapore) per iniziare il lavaggio;...
- Page 108 • Mantenere la punta della lancia vapore sulla FUNZIONAMENTO ACQUA CALDA superficie o poco al di sotto, continuando Erogazione di acqua calda a produrre il vortice. Montare il latte fino attraverso la lancia vapore. a ottenere un volume sufficiente. • Sollevare la lattiera per immergere la punta Quando la macchina è...
- Page 109 SUGGERIMENTI PER L'ESTRAZIONE Il segreto di un ottimo caffè espresso è il perfetto equilibrio di dolcezza, acidità e asprezza. Il sapore del caffè dipenderà da molti fattori quali il tipo di chicchi, il grado di tostatura, la texture della macinatura, la dose di caffè e il grado di pressatura. Per ottenere il gusto più...
-
Page 110: Manutenzione E Pulizia
Manutenzione e pulizia SOSTITUIRE IL FILTRO DELL'ACQUA Si consiglia di decalcificare l'unità ogni 90 giorni se la durezza dell'acqua è al livello 4; se invece la durezza dell'acqua è al livello 6, decalcificare ogni 60 giorni. 6. Tenere premuti i pulsanti 1 TAZZA e 2 TAZZE CICLO DI PULIZIA per 5 secondi per avviare la modalità... - Page 111 4. Spegnere l'apparecchio premendo DECALCIFICAZIONE contemporaneamente i pulsanti 1 TAZZA e STEAM (vapore) e lasciarlo raffreddare Con l'uso regolare dell'apparecchio, l'acqua dura completamente prima di procedere alla può causare accumulo di minerali all'interno o sulla decalcificazione. superficie di diversi componenti interni, riducendo così...
- Page 112 PULIRE I FILTRI E IL PORTAFILTRO 11. Rimuovere e svuotare il contenitore dell'acqua di scarto. Sciacquare il vassoio • I filtri e il portafiltro devono essere sciacquati raccogligocce e il serbatoio dell'acqua in acqua calda subito dopo l'uso per rimuovere e asciugarli completamente prima di tutti i residui di oli del caffè.
- Page 113 RIPORRE L'ELETTRODOMESTICO Spegnere e scollegare l'apparecchio dalla presa di corrente prima di riporlo. Svuotare il serbatoio dell'acqua e il vassoio raccogligocce e assicurarsi che la macchina sia fredda, pulita e asciutta. Conservare in posizione verticale. Non posizionare oggetti sull'elettrodomestico. RIPRISTINARE LE IMPOSTAZIONI DI FABBRICA PER IL VOLUME ESPRESSO 1.
-
Page 114: Risoluzione Dei Problemi
Risoluzione dei problemi POSSIBILI CAUSE SOLUZIONE SEMPLICE PROBLEMA L'acqua non scorre dal • Il serbatoio dell'acqua è Riempire il serbatoio dell'acqua. gruppo di erogazione. vuoto. • Il serbatoio dell'acqua non Spingere il serbatoio dell'acqua verso Non viene erogata acqua calda. è... - Page 115 POSSIBILI CAUSE SOLUZIONE SEMPLICE PROBLEMA Il caffè espresso esce • La macinatura del caffè Scegliere una macinatura è troppo grossa. leggermente più fine. troppo velocemente. Consultare "Dosaggio e pressatura del caffè" a pag. 11 e "Suggerimenti per l'estrazione" a pag. 15. •...
- Page 116 Lasciar raffreddare per 30-60 minuti. Se il problema persiste, contattare l'assistenza Sage. • È necessario regolare i volumi Regolare le impostazioni della Troppo/troppo poco caffè espresso viene erogati e/o le impostazioni della quantità...
-
Page 117: Garanzia
Garanzia GARANZIA LIMITATA DI 2 ANNI Sage Appliances offre una garanzia per l’utilizzo domestico di questo prodotto in specifiche aree geografiche, per 2 anni dalla data di acquisto. La garanzia copre eventuali malfunzionamenti causati da difetti di fabbricazione o dei materiali. - Page 118 Nota...
- Page 119 User Guide Bambino Plus ™ B###### / S###### BES500 / SES500 GUÍA RÁPIDA...
- Page 120 LEE TODAS LAS Índice INSTRUCCIONES ANTES DEL USO Y GUÁRDALAS PARA PODER CONSULTARLAS EN EL FUTURO. Sage recomienda seguridad ante todo • Hay una versión de este documento disponible Componentes en sageappliances.com Ensamblaje para descargar. Funciones • Antes de usar el producto por 15 Cuidado y limpieza primera vez, asegúrate de que...
- Page 121 Centro de servicio autorizado • Coloca el aparato sobre una de Sage más cercano para superficie estable, resistente que la examinen, reemplacen al calor, nivelada y seca. No lo o reparen. pongas muy cerca del borde de la encimera ni cerca de una •...
- Page 122 • El uso de accesorios no ya que esto puede afectar al vendidos o recomendados por sabor del café y la forma en Sage puede provocar incendios, que la máquina de expreso descargas eléctricas o lesiones. está diseñada para funcionar.
- Page 123 INSTRUCCIONES • Ten cuidado después de ESPECÍFICAS PARA espumar la leche, ya que la EL FILTRO DE AGUA función de purga automática puede producir vapor caliente • El filtro debe mantenerse fuera cuando se baja el vaporizador. del alcance de los niños. •...
- Page 124 Componentes F. Portafiltro de acero inoxidable de 54 mm A. Depósito de agua extraíble de 1,9 l G. Mango del vaporizador B. Panel de control Botones 1 TAZA, 2 TAZAS y VAPOR H. Espacio extra para tazas altas Con dosis predeterminadas o duraciones I.
- Page 125 ACCESORIOS A. Jarra de leche de acero inoxidable E. Filtros presurizados (1 taza y 2 tazas) con marcas MIN y MAX F. Filtros no presurizados (1 taza y 2 tazas) B. Prensador de 54 mm G. Pastillas limpiadoras para máquina expreso C.
- Page 126 Ensamblaje ANTES DEL PRIMER USO 6. Retira el depósito de agua de la máquina. Alinea la base del portafiltros con el Preparación de la máquina adaptador dentro del depósito de agua. Retira y desecha todas las etiquetas y materiales Empújalo hasta encajarlo. de embalaje adjuntos a la máquina.
- Page 127 La máquina detectará cuando el nivel de agua sea bajo. Los botones 1 TAZA, 2 TAZAS y VAPOR Funciones no se iluminarán. PRIMER USO 1. Retira el depósito de agua y llenacon agua potable hasta la línea MAX.Vuelve a Cuando esto ocurra, agrega agua al depósito. Una colocar el depósito de aguaen la máquina.
- Page 128 NIVELADO DE LA DOSIS NOTA La herramienta de nivelado the Razor™ te permite eliminar el exceso de café para asegurar una Es posible que debas experimentar con extracción homogénea. la cantidad de café que se dosifica en el filtro o el tiempo que necesita el molinillo para alcanzar la dosis correcta.
- Page 129 VOLUMEN DE DOSIS PROGRAMACIÓN DE LA DOSIS PREPROGRAMADO: 1 TAZA Mantén pulsados los botones 1 TAZA y 2 TAZAS durante 2 segundos. Los botones se iluminarán Pulsa el botón 1 TAZA una vez, el botón parpadeará y parpadearán. para indicar que está seleccionado. Se extraerá un volumen de café...
- Page 130 NOTA NOTA Antes de espumar la leche, se recomienda Incluso después de que la máquina se haya purgar momentáneamente el vaporizador. Para apagado, es posible que salga vapor a presión. hacerlo, pulsa el botón VAPOR una vez para Siempre hay que vigilar a los niños. comenzar a purgar y nuevamente para detenerlo.
- Page 131 • Rompe suavemente la superficie de la leche AGUA CALIENTE con la punta para que la leche gire lo suficiente- Cómo obtener agua caliente mente rápido. con el vaporizador. • Mantén la punta del vaporizador al mismo nivel que la leche o ligeramente por debajo, Cuando la máquina esté...
- Page 132 CONSEJOS DE EXTRACCIÓN Un gran expreso consiste en lograr el equilibrio perfecto entre dulzura, acidez y amargura. El sabor del café dependerá de muchos factores, como el tipo de café en grano, la frescura del tostado, el grosor del molido, la cantidad de café y la presión de prensado. Experimenta con estos factores de uno en uno para lograr el sabor perfecto para ti.
- Page 133 Cuidado y limpieza REEMPLAZO DEL FILTRO DE AGUA Recomendamos descalcificar la unidad cada 90 días cuando la dureza del agua sea de nivel 4 y cada 60 días cuando sea de nivel 6. 6. Mantén pulsados los botones 1 TAZA CICLO DE LIMPIEZA y 2 TAZAS durante 5 segundos para entrar en el modo de ciclo de limpieza.
- Page 134 4. Apaga la máquina pulsando DESCALCIFICACIÓN simultáneamente los botones 1 TAZA y VAPOR, y deja que se enfríe completa- Con el tiempo, el agua dura puede causar la mente antes de descalcificar. acumulación de minerales en muchos de los componentes internos. Esto afecta el flujo de líquido, la temperatura de preparación, la potencia de la máquina y el sabor del expreso.
- Page 135 LIMPIEZA DEL FILTRO Y DEL PORTAFILTROS 11. Retira y vacía el recipiente de agua residual. Enjuaga la bandeja de goteo y el depósito • El filtro y el portafiltros deben enjuagarse con de agua y sécalos completamente antes agua caliente directamente después de su uso de volver a colocarlos en la máquina.
- Page 136 ALMACENAMIENTO DE LA MÁQUINA Antes de guardar la máquina, apágala y desenchufa el cable de la toma de corriente. Vacía el depósito de agua y la bandeja de goteo, y asegúrate de que la máquina esté fría, limpia y seca. Almacénala en posición vertical.
- Page 137 Resolución de problemas PROBLEMA POSIBLES CAUSAS SOLUCIÓN FÁCIL El agua no fluye desde • El depósito de agua está vacío. Llena el depósito. el grupo. • El depósito de agua no se Empuja el depósito de agua para ha introducido ni encajado encajarlo.
- Page 138 PROBLEMA POSIBLES CAUSAS SOLUCIÓN FÁCIL El expreso sale • Café molido demasiado Usa un molido ligeramente más fino. grueso. Consulta la sección “Dosis y prensado demasiado del café” en la página 10 y “Consejos rápidamente. de extracción” en la página 14. •...
- Page 139 Deja que se enfríe durante unos 30-60 minutos. Si el problema persiste, llama al soporte de Sage. Se vierte demasiado/ • Debes ajustar la cantidad Ajusta la cantidad o el grosor muy poco expreso de molido, el grosor del molido de molido.
- Page 140 Garantía GARANTÍA LIMITADA DE 2 AÑOS La garantía de Sage Appliances cubre este producto para uso doméstico en territorios específicos durante 2 años a partir de la fecha de compra contra fallos causados por mano de obra y materiales defectuosos. Durante el plazo de la garantía, Sage Appliances reparará...
- Page 141 User Guide Bambino Plus ™ B###### / S###### BES500 / SES500 MANUAL RÁPIDO...
- Page 142 LEIA TODAS AS INSTRUÇÕES Índice ANTES DE UTILIZAR E GUARDE-AS PARA CONSULTA FUTURA A Sage recomenda a segurança • Está disponível uma versão como máxima prioridade transferível deste documento em sageappliances.com Componentes • Antes de utilizar pela primeira 11 Montagem vez, certifique-se de que 12 Funções...
- Page 143 Sage mais próximo para fins uma placa térmica, forno de inspeção, substituição ou bico de gás. ou reparação.
- Page 144 • As crianças não devem brincar • Certifique-se de que o manípulo com o aparelho. de café está firmemente inserido e fixo na unidade • As tarefas de limpeza de extração antes de utilizar do aparelho não devem ser a máquina. executadas por crianças exceto caso tenham mais de 8 anos •...
- Page 145 AVISO AOS CLIENTES • O uso de acessórios não EM RELAÇÃO AO vendidos ou recomendados ARMAZENAMENTO pela Sage pode provocar NA MEMÓRIA incêndios, choque elétrico ou lesões. Tenha em atenção que, para servir melhor os nossos clientes, • Desligue sempre o aparelho, o armazenamento da memória...
- Page 146 INSTRUÇÕES ESPECÍFICAS O símbolo apresentado PARA O FILTRO DE ÁGUA indica que este aparelho não deve ser eliminado • O cartucho do filtro deve juntamente com os resíduos ser mantido fora do alcance domésticos normais. Deve ser das crianças. encaminhado para um centro de •...
- Page 147 Componentes E. Unidade de extração A. Depósito de água removível de 1,9 L F. Manípulo de café de aço inoxidável de 54 mm B. Painel de controlo Botões 1 CUP (Chávena), 2 CUPS G. Tubo do vaporizador (Chávenas) e STEAM (Vapor) H.
- Page 148 ACESSÓRIOS E. Cestos de filtro de parede dupla A. Jarra de leite de aço inoxidável (1 e 2 chávenas) Com marcas de MÁX. e MÍN. F. Cestos de filtro de parede única B. Prensa de 54 mm (1 e 2 chávenas) C.
- Page 149 Montagem ANTES DA PRIMEIRA UTILIZAÇÃO 6. Remova o depósito de água da máquina. Alinhe a base do suporte do filtro com Preparação da máquina o adaptador no interior do depósito de Remova e elimine todas as etiquetas e materiais água. Empurre para baixo para fixar na sua de embalagem da sua máquina.
- Page 150 A máquina deteta quando o nível de água é baixo. Os botões 1 CUP, 2 CUP e STEAM Funções não se iluminam. PRIMEIRA UTILIZAÇÃO 1. Remova o depósito de água e encha-o com água potável até à linha MÁX. Coloque o Quando isto ocorre, adicione água ao depósito depósito de água na máquina.
- Page 151 AJUSTAR A DOSE NOTA A ferramenta de ajuste de dose Razor™ permite-lhe ajustar a quantidade da dose de Poderá ter de experimentar com a quantidade café até ao nível adequado para uma extração de café nos cestos de filtro ou com o tempo consistente.
- Page 152 INSERIR O MANÍPULO DE CAFÉ PRÉ-INFUSÃO E VOLUME DE DOSE MANUAL Mantenha premido o botão 1 CUP (1 Chávena) Coloque o manípulo de café debaixo da unidade ou 2 CUP (2 Chávenas) para definir o tempo de extração de modo a alinhar a pega do manípulo de pré-infusão pretendido.
- Page 153 DEFINIR A ESPUMA DO LEITE • Prima os botões MILK TEMP e MILK FOAM para selecionar as definições pretendidas. A máquina tem 3 definições de espuma do leite; • Prima o botão STEAM, o botão pisca durante 1 Baixa a texturização. 2 Média •...
- Page 154 TEXTURIZAÇÃO DE LEITE MANUAL PURGAR O VAPORIZADOR • A texturização de leite automática e a função Após terminar a texturização do leite, deve para desligar automaticamente estão desativa- colocar o vaporizador na posição para baixo das durante a texturização de leite manual. e permitir a purga automática.
- Page 155 SUGESTÕES DE EXTRAÇÃO Um ótimo café expresso deve apresentar um equilíbrio perfeito entre doçura, acidez e amargor. O sabor do seu café depende de muitos fatores, como o tipo de grãos de café, grau de frescura da torrefação, grau de moagem fina ou grossa, dose de café moído e pressão de prensagem. Experimente ajustando estes fatores, um de cada vez, para obter o sabor da sua preferência.
- Page 156 Cuidados e limpeza SUBSTITUIR O FILTRO DE ÁGUA Recomenda-se que descalcifique a sua unidade a cada 90 dias quando o nível de dureza da água for o nível 4; e descalcifique a sua unidade a cada 60 dias quando o nível de dureza da água for o nível 6.
- Page 157 4. Desligue a máquina premindo DESCALCIFICAR simultaneamente os botões 1 CUP e STEAM e permita que arrefeça completamente antes de descalcificar. Após o uso regular, a água dura pode provocar a acumulação de minerais em muitos componentes interiores operacionais, reduzindo o fluxo de extração, a temperatura de extração, a potência da máquina e o sabor do café...
- Page 158 LIMPAR OS CESTOS DE FILTRO 11. Remova e esvazie o recipiente de água residual. Lave a bandeja de gotejamento e E O MANÍPULO DE CAFÉ o depósito de água e seque completamente • Os cestos de filtro e o manípulo de café antes de instalá-los novamente na máquina.
- Page 159 AVISO Nunca coloque o cabo de alimentação, a ficha ou a máquina dentro de água ou qualquer outro líquido. ARMAZENAR A MÁQUINA Antes de guardar, desligue a máquina, desligue e retire o cabo de alimentação da tomada elétrica. Esvazie o depósito de água e a bandeja de gotejamento e certifique-se de que a máquina está...
- Page 160 Resolução de problemas PROBLEMA CAUSAS POSSÍVEIS SOLUÇÃO FÁCIL A água não sai da • O depósito de água está Encha o depósito. unidade de extração. vazio. • O depósito de água não foi Empurre o depósito de água Não há água quente. totalmente introduzido e fixo completamente para baixo para na sua devida posição.
- Page 161 PROBLEMA CAUSAS POSSÍVEIS SOLUÇÃO FÁCIL O café expresso sai • O grau de moagem do café Use um grau de moagem demasiado depressa. é demasiado grosso. ligeiramente mais fino. Consulte "Dose de café e prensa" na página 11 e "Sugestões de extração"...
- Page 162 Deixe arrefecer durante cerca de 30–60 minutos. Contacte o serviço de atendimento ao cliente da Sage se o problema persistir. Está a ser fornecido • As definições do tempo de Ajuste as definições da quantidade...
- Page 163 Garantia GARANTIA LIMITADA DE 2 ANOS A Sage Appliances fornece uma garantia para este produto para uso doméstico nos territórios especificados de 2 anos a partir da data de compra contra avarias provocadas por defeitos na mão- de-obra e nos materiais. Durante este período da garantia, a Sage Appliances irá...
- Page 164 Notas...
- Page 165 User Guide Bambino Plus ™ B###### / S###### BES500 / SES500 SZYBKI PRZEWODNIK...
- Page 166 DOTYCZĄCE materiały pakunkowe. BEZPIECZEŃSTWA • Aby wykluczyć ryzyko uduszenia małych dzieci, W Sage zdajemy sobie usuń opakowanie ochronne ® sprawę z wagi bezpie- wtyczki kabla sieciowego tego urządzenia i w bezpieczny czeństwa. Projektujemy sposób je zutylizuj.
- Page 167 Zadbaj o to, aby nie dotykał serwisowym marki Sage. gorących powierzchni ani się • Utrzymuj urządzenie i jego nie zaplątał. wyposażenie w czystości. • Nie pozostawiaj włączonego Przestrzegaj wskazówek...
- Page 168 WAŻNE ZALECENIA DOTYCZĄCE BEZPIECZEŃSTWA • Dzieci poniżej 8 roku • Nie dotykaj gorących życia oraz dzieci bez powierzchni. Przed nadzoru osoby dorosłej przemieszczeniem lub nie mogą zajmować się czyszczeniem urządzenia czyszczeniem urządzenia. odczekaj do jego ostygnięcia. • Urządzenie i jego •...
- Page 169 WAŻNE ZALECENIA DOTYCZĄCE BEZPIECZEŃSTWA • Na powierzchnię do do pozycji OFF (WYŁ.). Wyłącz podgrzewania filiżanek i wyjmij wtyczkę z gniazdka stawiaj wyłącznie elektrycznego. filiżanki przeznaczone do • Przed każdym użyciem przyrządzania kawy. upewnij się, że urządzenie • Podczas użytkowania jest prawidłowo zmontowane. powierzchnia urządzenia się...
- Page 170 WAŻNE ZALECENIA DOTYCZĄCE BEZPIECZEŃSTWA • Podczas pracy zachowaj o częstotliwości jego użytkowania szczególną ostrożność, po- oraz sposobie pracy. W przypadku nieważ metalowe powierzch- zwrotu urządzenia do serwisu nie mogą się nagrzewać. informacje uzyskane z chipa pozwolą nam szybko i sprawnie •...
- Page 171 WAŻNE ZALECENIA DOTYCZĄCE BEZPIECZEŃSTWA • Nie używaj uszkodzonego filtra. odpadów. W niektórych państwach Unii Europejskiej • Nie otwieraj celowo lub innych krajach europejskich filtra wody. można zwrócić produkt • Jeśli przez dłuższy czas lokalnemu sprzedawcy przy nie używasz ekspresu do zakupie ekwiwalentnego kawy, opróżnij zbiornik na nowego produktu.
- Page 172 WAŻNE ZALECENIA DOTYCZĄCE BEZPIECZEŃSTWA WYŁĄCZNIE DO UŻYTKU Zastrzegamy sobie możliwość DOMOWEGO dokonywania zmian tekstu, ZACHOWAJ NINIEJSZE designu i danych technicznych INSTRUKCJE wyrobu bez uprzedzenia. Wersja angielska jest wersją oryginalną. Polska wersja jest tłumaczeniem wersji oryginalnej. ABY UNIKNĄĆ PORAŻENIA PRĄDEM ELEKTRYCZNYM, Adres producenta: NIE WOLNO ZANURZAĆ...
- Page 173 OPIS TWOJEGO NOWEGO URZĄDZENIA A. Zbiornik na wodę 1,9 l E. Głowica zaparzająca B. Panel sterowania F. Kolba ze stali nierdzewnej 54 mm Przyciski 1 filiżanki , 2 filiżanek G. Uchwyt dyszy pary i pary H. Dodatkowa przestrzeń na duże szklanki Ustawienie czasu ekstrakcji kawy i możliwość...
- Page 174 OPIS TWOJEGO NOWEGO URZĄDZENIA AKCESORIA A. Dzbanek na mleko ze stali nierdzewnej F. Sitka z pojedynczym dnem z oznaczeniami MIN i MAX (1 filiżanka i 2 filiżanki) B. Tamper 54 mm G. Tabletki do czyszczenia ekspresu do kawy C. Przyrząd do czyszczenia dyszy pary H.
- Page 175 OBSŁUGA TWOJEGO NOWEGO URZĄDZENIA PRZED PIERWSZYM UŻYCIEM Przygotowanie urządzenia Usuń z urządzenia wszystkie części opakowania i przekaż je do utylizacji. Upewnij się, że przed utylizacją wyjęto z opakowania wszystkie akcesoria. Umyj ociekacz, kratkę ociekacza, kolbę, sitka i dzbanek do mleka w ciepłej wodzie z odrobiną 7.
- Page 176 OBSŁUGA TWOJEGO NOWEGO URZĄDZENIA NAPEŁNIENIE POJEMNIKA NA WODĘ Wyjmij zbiornik na wodę. Zdejmij pokrywę i wlej do zbiornika czystą, zimną wodę, maksymalnie do znacznika MAX. Włóż zbiornik z powrotem do ekspresu. Upewnij się, że zbiornik jest prawidłowo włożony i zainstalowany. Jeśli przyciski 1 filiżanki, 2 filiżanek i przycisk pary są...
- Page 177 OBSŁUGA TWOJEGO NOWEGO URZĄDZENIA DOZOWANIE I UBIJANIE KAWY • Włóż sitko do kolby. • Zmiel świeżą kawę do sitka. • Ubij kawę w sitku kilkoma ruchami, aby ją równomiernie rozłożyć i ubić w sitku. • Ubij ją dość mocno (z naciskiem 15–20 kg). Ilość...
- Page 178 OBSŁUGA TWOJEGO NOWEGO URZĄDZENIA OPCJONALNA ILOŚĆ KAWY – 2 FILIŻANKI USTAWIENIE TEMPERATURY MLEKA Naciśnij jeden raz przycisk 2 filiżanek, przycisk Ekspres umożliwia wybór jednej z 3 opcji zacznie mrugać. Fabrycznie ustawiona objętość dla ustawień temperatury mleka: 2 filiżanek, około 60 ml, zostanie nalana do filiżanki. 1 Warm (ciepłe mleko) Ekspres do kawy zakończy pracę...
- Page 179 OBSŁUGA TWOJEGO NOWEGO URZĄDZENIA UWAGA Jeżeli ekspres wyrzuca parę, słychać również dźwięk pompy. Jest to normalne zjawisko. UWAGA Do spieniania mleka korzystaj z dzbanka ze stali nierdzewnej dostarczanej wraz z urządzeniem. Użycie innego dzbanka grozi niebezpieczeństwem. RĘCZNE SPIENIANIE MLEKA Mleko •...
- Page 180 OBSŁUGA TWOJEGO NOWEGO URZĄDZENIA OBSŁUGA GORĄCEJ WODY • Teraz zanurz dyszę pary głębiej w mleku, aby podgrzać mleko w dolnej części dzbanka, Gorąca woda przez dyszę pary. cały czas utrzymując stałą cyrkulację mleka. Gdy urządzenie jest w trybie gotowości, Prawidłowa temperatura mleka to 60-65°C, wykonaj następujące czynności: można ją...
- Page 181 OBSŁUGA TWOJEGO NOWEGO URZĄDZENIA RADY DOTYCZĄCE PRAWIDŁOWEJ EKSTRAKCJI Wyśmienita kawa to doskonałe zrównoważenie słodkiego, kwaśnego i gorzkiego smaku. Smak kawy zależy od wielu czynników, takich jak typ ziarna, stopień palenia, świeżość, stopień zmielenia, dozowanie mielonej kawy i nacisku przy ubijaniu. Aby osiągnąć...
- Page 182 KONSERWACJA I CZYSZCZENIE WYMIANA FILTRA WODY Filtr wody znajdujący się w komplecie pomaga zapobiegać osadzaniu się kamienia wodnego na wewnętrznych częściach ekspresu. Jeśli będziesz wymieniać filtr wody regularnie co 3 miesiące lub po 40 l zużytej wody, nie będzie trzeba wykonywać odwapniania ekspresu. 5.
- Page 183 KONSERWACJA I CZYSZCZENIE 6. Przycisk 1 filiżanki i przycisk pary będą UWAGA zapalone, co oznacza, że ekspres jest gotowy do odwapniania. NIE ZANURZAJ KABLA ZASILAJĄCEGO, WTYCZKI ANI URZĄDZENIA W WODZIE LUB INNEJ CIECZY. 7. Wciśnij przycisk 1 filiżanki lub przycisk PRZED ODWAPNIANIEM pary, aby rozpocząć...
- Page 184 KONSERWACJA I CZYSZCZENIE ZATKANA DYSZA PARY CZYSZCZENIE SITEK I KOLBY • Sitka i kolbę opłucz pod gorącą, bieżącą Jeśli podczas spieniania mleka ekspres wykryje wodą bezpośrednio po użyciu, aby usunąć zatkanie dyszy pary, natychmiast zatrzyma resztki kawy. proces spieniania i przycisk pary zgaśnie. Kontrolki świetlne ustawienia temperatury •...
- Page 185 KONSERWACJA I CZYSZCZENIE UWAGA NIE ZANURZAJ KABLA ZASILAJĄCEGO, WTYCZKI ANI URZĄDZENIA W WODZIE LUB INNEJ CIECZY. PRZECHOWYWANIE EKSPRESU Przed odstawieniem do przechowywania wyłącz ekspres i odłącz wtyczkę przewodu zasilającego z gniazda sieciowego. Opróżnij zbiornik na wodę i ociekacz i upewnij się, że ekspres jest ostygnięty, czysty i suchy.
- Page 186 ROZWIĄZYWANIE PROBLEMÓW PROBLEM MOŻLIWE PRZYCZYNY ROZWIĄZANIE Woda nie wypływa • Zbiornik na wodę jest pusty. Napełnij zbiornik na wodę. z głowicy zaparzającej. • Zbiornik na wodę jest Zbiornik na wodę wsuń całkowicie Ekspres nie wydaje nieprawidłowo włożony. do ekspresu i zablokuj. gorącej wody.
- Page 187 ROZWIĄZYWANIE PROBLEMÓW PROBLEM MOŻLIWE PRZYCZYNY ROZWIĄZANIE Kawa wylewa się • Kawa jest zbyt grubo Użyj kawy zmielonej drobniej. zmielona. Więcej informacji w poprzedniej zbyt szybko. części instrukcji „Dozowanie i ubijanie kawy” i „Rady dotyczące prawidłowej ekstrakcji”. • W sitku jest zbyt mało kawy Zwiększ ilość...
- Page 188 Odczekaj około 30–60 minut do wystygnięcia. Jeśli problem się powtarza, skontaktuj się z autoryzowanym serwisem Sage. Zbyt duża/mała ilość • Należy zmienić ilość kawy Zmień ilość mielonej kawy mielonej ekstrahowanej kawy. mielonej i/lub ustawienia lub stopień...
- Page 189 Gwarancja obowiązuje w ciągu dwóch lat od zakupu i w określonych regionach. W czasie okresu gwarancji firma Sage Appliances naprawi lub wymieni wadliwe produkty lub zwróci ich koszt (decyzja należy wyłącznie do firmy Sage Appliances). Będą przestrzegane wszelkie prawa dotyczące...
- Page 190 NOTATKI...
- Page 191 NOTATKI...
- Page 192 FI Jatkuvan tuotekehittelyn seurauksena kuvituksen tuotteet eivät välttämättä ole täysin samanlaisia kuin varsinainen tuote. NO På grunn av kontinuerlig produktutvikling kan produktene som er vist eller avfotografert i dette dokumentet, variere noe fra det faktiske produktet. Copyright BRG Appliances 2022 BES500 / SES500 UG8 – H22 B##### / S##### UG# – #22...
Need help?
Do you have a question about the BES500 and is the answer not in the manual?
Questions and answers