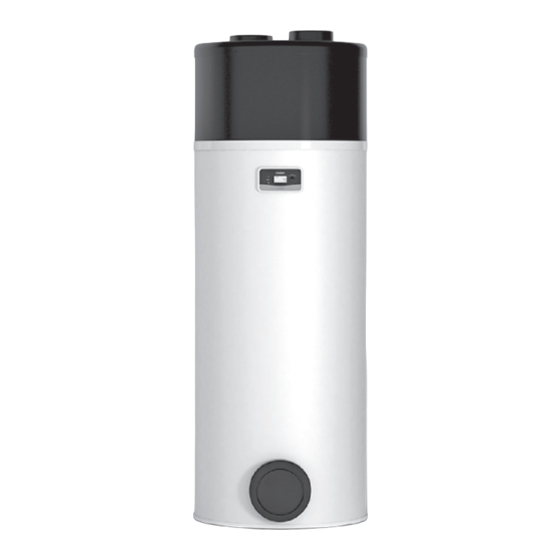
Vaillant aroSTOR VWL BM 270/5 Installation And Maintenance Instructions Manual
Hide thumbs
Also See for aroSTOR VWL BM 270/5:
- Operating instructions manual (24 pages) ,
- Manual (312 pages)

Related Manuals for Vaillant aroSTOR VWL BM 270/5


Summary of Contents for Vaillant aroSTOR VWL BM 270/5
- Page 1 Installation and maintenance instructions aroSTOR VWL BM 200/5 VWL BM 270/5 KOsq Publisher/manufacturer Vaillant GmbH Berghauser Str. 40 D-42859 Remscheid Tel. +492191 18 0 Fax +492191 18 2810 info@vaillant.de www.vaillant.de...
-
Page 2: Table Of Contents
Contents Contents Handing the product over to the operator ..18 Adapting the unit to the installation ....18 Calling up the installer level ......... 18 Safety ..............3 Optimising the unit's energy consumption ... 18 Action-related warnings ......... 3 Activating and setting photovoltaic mode .... -
Page 3: Safety
Safety 1 Safety Risk caused by inadequate qualifications Action-related warnings The following work must only be carried out Classification of action-related warnings by competent persons who are sufficiently The action-related warnings are classified in qualified to do so: accordance with the severity of the possible –... -
Page 4: Risk Of Being Burned Or Scalded By Hot Components
1 Safety Risk of being burned or scalded by prises, you can read the qualities that the hot components water that is used must have. ▶ Only carry out work on these components 1.13 Risk of damage from corrosion once they have cooled down. caused by unsuitable room air Material damage due to unsuitable Sprays, solvents, chlorinated cleaning... -
Page 5: Regulations (Directives, Laws, Standards)
Safety 1 1.16 Regulations (directives, laws, standards) ▶ Observe the national regulations, stand- ards, directives, ordinances and laws. 0020290840_00 aroSTOR Installation and maintenance instructions... -
Page 6: Notes On The Documentation
Pass these instructions and all other applicable docu- ments on to the end user. Validity of the instructions Validity: aroSTOR VWL BM 200/5 OR aroSTOR VWL BM 270/5 These instructions apply only to: Unit – article number aroSTOR VWL BM 200/5... -
Page 7: Product Description
Product description 3 Product description Basic system diagram Validity: aroSTOR VWL BM 200/5, aroSTOR VWL BM 270/5 Domestic hot water cylinder Evaporator Heating coil Defrosting sensor Immersion heater temperature cut-out Thermostatic expansion valve Immersion heater safety cut-out Thermostatic expansion valve capillary... -
Page 8: Product Design
4 Set-up Product design 3.3.2 Defrosting mode Validity: aroSTOR VWL BM 200/5, aroSTOR VWL BM 270/5 Evaporator Defrosting valve Compressor Thermostatic expansion valve Condenser Type designation and serial number Cold water connection Domestic hot water flow connection Back-up water-outlet Circulation circuit con-... -
Page 9: Carrying The Product
Set-up 4 Carrying the product Note The transport bag must be kept away from children in order to prevent the risk of suffoc- ation. When transporting the product using a hand truck, se- cure it using a belt. In order to avoid scratches and damage, protect the sides of the product that come into contact with the hand truck. -
Page 10: Product Dimensions And Connection Dimensions
4 Set-up Product dimensions and connection dimensions Validity: aroSTOR VWL BM 200/5, aroSTOR VWL BM 270/5 ØA ØB ØB Unit dimensions and connection dimensions for 200 and 270 l (→ Page 10) Unit dimensions and connection dimensions for 200 and 270 l... -
Page 11: Minimum Clearances
Installation 5 Minimum clearances Removing/installing the protective cover 4.8.1 Removing the covering hood ≥ 3 ≥ 3 Turn the screw (A) on the product's ring by a few milli- ≥ 3 metres using a Torx screwdriver. ≥ 3 Turn the unit out of the covering hood (B) and turn the ring anti-clockwise in order to loosen the lugs on the bayonet fitting. -
Page 12: Installing The Air Supply And Air Exhaust
Installing the air supply and air exhaust 5.1.1 Selecting air duct systems Validity: Vaillant Caution. Risk of material damage caused by incor- rect installation. ▶ Do not connect the product to extractor hoods. - Page 13 Installation 5 5.1.3 Installing the partial pipe system 2 2 0 2 9 2 External area Heat-insulated pipe (diameter ≥ 160 mm) Internal area (heated or Ventilation not heated) The hot air is drawn into the room and the cold air is This installation type is particularly suitable for small rooms (supply or store room, etc.).
-
Page 14: Installing The Water Connections
– Minimum room height: ≥ 2.20 m Validity: aroSTOR VWL BM 200/5 OR aroSTOR VWL BM 270/5 To limit the heat losses, add heat insulation to the hy- draulic connections, the plugs on the cylinder outlet and all visible lines. -
Page 15: Electrical Installation
VWL BM 200/5 1047 mm In order to keep the product's operating times as low as aroSTOR VWL BM 270/5 1367 mm possible during high-tariff periods of the power supply Route the condensate discharge pipe with a downward (where applicable), connect the electricity meter's con- gradient and without any kinks. - Page 16 ▶ Validity: aroSTOR VWL BM 200/5 In particular, do not connect any live OR aroSTOR VWL BM 270/5 cables. If the unit is connected to a pipework system with lines that ▶ are more than five metres long or smooth lines that are more Remove the covering hood.
-
Page 17: Start-Up
Start-up Filling the domestic hot water circuit Validity: aroSTOR VWL BM 200/5 OR aroSTOR VWL BM 270/5 Before starting up the product, ensure that the plugs (1) have been removed from the condensate discharge Note connection. -
Page 18: Handing The Product Over To The Operator
7 Handing the product over to the operator ▶ Handing the product over to the Measure the voltage before connecting. operator ▶ Remove the covering hood. (→ Page 11) ▶ Explain to the operator how the safety devices work and ▶... -
Page 19: Reading The Input Data
Adapting the unit to the installation 8 If the target temperature for the cycle is not reached within Note 24 hours, the cycle stops and then starts again at the next When photovoltaic mode has the higher prior- interval deadline. If an anti-legionella cycle is interrupted by ity, domestic hot water is also heated during a time period in which the back-up heater is prevented from periods that have not been set (e.g. -
Page 20: Setting Ventilator Mode
8 Adapting the unit to the installation ▶ 8.10 Reading the meter status Press the rotary knob to confirm the selection. ▶ Press the menu button to return to the original display. If you want to read the product's counter statuses, se- lect this menu INST.MENU COUN TERS. -
Page 21: Checking The Immersion Heater
Troubleshooting 9 8.11.4 Preparing a blower door test Remove the limit thermostat (5) from the immersion heater (6). Unscrew the set-up unit along with the immersion heater (6) and its seal. 10. Check the scale deposition on the immersion heater. 11. -
Page 22: Replacing The Mains Connection Cable
10 Inspection and maintenance Replacing the mains connection cable 10.2 Observing inspection and maintenance intervals ▶ Adhere to the minimum inspection and maintenance in- tervals. Annual inspection and maintenance work – Overview 10.3 Draining the product Decommission the product. Disconnect the product from the power mains. Close the stop cock upstream of the safety group on the cold water inlet. -
Page 23: 12 Customer Service
12 Customer service Validity: Kosovo, Vaillant Për të dhënat e kontaktit për shërbimin tonë të klientit, mund të shkruani në adresën që gjeni në faqen e pasme ose në faqen e internetit www.vaillant.com. 13 Recycling and disposal Disposing of the packaging ▶... -
Page 24: Appendix
Appendix Appendix Annual inspection and maintenance work – Overview Work Check that the safety devices are functioning properly. Check the refrigerant circuit for leak-tightness. Check the hydraulic circuit for leak-tightness. Check that the safety group is working properly. Check whether the components of the refrigerant circuit show any signs of rust or traces of oil. Check the unit's components for wear. - Page 25 Appendix Fault code Description Possible cause Solution Temporary operation – – OVER PRESS. Overpressure inside the No water in the do- Checking that the Heat pump decommis- heat pump mestic hot water cyl- product is correctly sioned. inder filled with water and The reset must be imple- purged –...
-
Page 26: C Installer Level - Overview
Appendix Fault code Description Possible cause Solution Temporary operation Incorrect defrosting sensor Defrosting sensor incor- Re-establishing contact readings rectly installed on the pipe. between the defrosting Air temperature is meas- sensor and the pipe ured Heat pump out of gas Leak in the cooling circuit Finding and repairing the leak before filling the cool-... - Page 27 Appendix Setting level Values Factory Unit Increment, select, explanation setting Min. Max. PV ECO Current value Only visible if PV MODE = YES 0: Contact opened; 1: Contact closed PV MAX Current value Only visible if PV MODE = YES 0: Contact opened;...
-
Page 28: D Electronics Box Wiring Diagram
Appendix Electronics box wiring diagram Validity: aroSTOR VWL BM 200/5, aroSTOR VWL BM 270/5 T air T degiv T eau Comp Alim Ph 4 Ph 5 Ph 12 N 13 Control panel Pressure switch Control panel connection plug Safety cut-out, 87 °C... -
Page 29: E Basic Hydraulic Diagram
Appendix Basic hydraulic diagram Validity: aroSTOR VWL BM 200/5, aroSTOR VWL BM 270/5 Note All of the valves and connections that are integrated into the system must have a nominal operating pressure of 0.6 MPa (6 bar) or higher. Dielectrically isolated hydraulic connection... -
Page 30: G Technical Data
COP at a cold water temperature of 10 °C for a tar- get temperature of 55 °C (EN 16147:2017/extraction cycle L) Technical data Technical data – General aroSTOR VWL BM 200/5 aroSTOR VWL BM 270/5 Nominal capacity 200 l 270 l Outer diameter 634 mm... - Page 31 Appendix aroSTOR VWL BM 200/5 aroSTOR VWL BM 270/5 Refrigerant type R 290 R 290 Refrigerant volume for complete filling 0.15 kg 0.15 kg Max. overpressure in the heat pump 2.5 MPa 2.5 MPa (25.0 bar) (25.0 bar) Max. low pressure in the heat pump 1.5 MPa...
-
Page 32: Index
Index Index Voltage .................. 3 Basic diagram................ 3 Water hardness ..............4 Wiring .................. 15 Calling up the installer level..........18 CE marking................8 Combustion air ..............4 Combustion air supply............4 Competent person..............3 Completing repair work ............22 Completing, repair work ............ - Page 36 0020290840_00 0020290840_00 23.06.2019 Supplier Vaillant d.o.o. Heinzelova 60 10000 Zagreb Tel. 01 6188 670 Tel. 01 6188 671 Tel. 01 6064 380 Tehnički odjel 01 6188 673 Fax 01 6188 669 info@vaillant.hr www.vaillant.hr © These instructions, or parts thereof, are protected by copyright and may be reproduced or distributed only with the manufacturer's written consent.
Need help?
Do you have a question about the aroSTOR VWL BM 270/5 and is the answer not in the manual?
Questions and answers