Table of Contents
Advertisement
Quick Links
- 1 Find the Perfect Space for Your Installation: Quiet, Vented, Safe
- 2 Choose Your System Schematic
- 3 Proceed to the Power Supply and Ebus Connection
- 4 Choose Your Indoor Unit Unitower, Hydraulic Module or Heat Pump Interface
- 5 Follow the Instructions of the Installation Assistant
- 6 Just in Case: Find Remedies to Error, Status and Maintenance Codes
- 7 Technical Data
- Download this manual
Advertisement
Table of Contents

Related Manuals for Vaillant aroTHERM plus


Summary of Contents for Vaillant aroTHERM plus
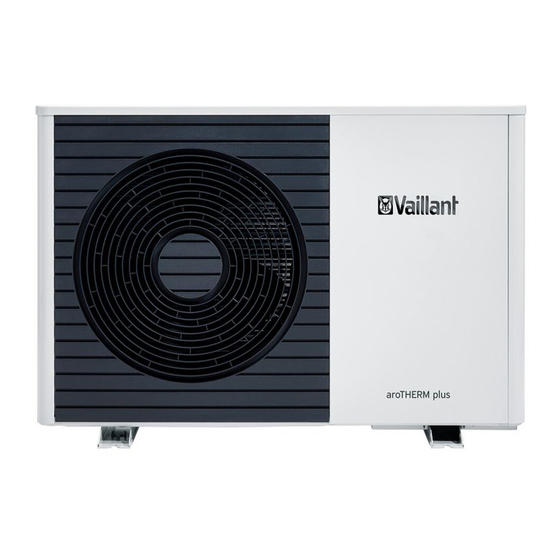
- Page 1 • Installer‘s Quick Guide Air-to-water heat pumps aroTHERM plus aroTHERM plus Comfort for your home...
- Page 2 Vaillant Group UK Ltd shall not be held liable for any damages or injuries arising directly or indirectly from the use of this quick guide.
-
Page 3: Table Of Contents
Get started quickly! Your step-by-step guide to installing the aroTHERM plus Plan your work … » Select the correct aroTHERM plus to fit your needs: performance, dimensions, sound emmissions » Find the perfect space for your installation: quiet, vented, safe »... -
Page 4: Plan Your Work
Plan your work … Select the correct aroTHERM plus to fit your needs Performance data When designing a heating system that utilises a heat pump, there are a number of design factors that need to be considered. Heat loss MCS recommend using the MIS 3005 installation standard for designing a heat pump system. Systems should be specified at peak winter requirements, depending on location, to ensure year round comfort as detailed in the table below. - Page 5 Product dimensions ¹ “ 1565 mm 10kW 12kW 185 kg* 965 mm 133 kg* 765 mm 3.5kW 121 kg* *unboxed, ready for operation Installer's Quick Guide - aroTHERM plus 11/2020 Back to main menu...
- Page 6 49,4 49,0 46,9 44,9 43,3 43,0 40,8 39,5 38,9 37,3 37,0 35,4 35,0 33,4 30,9 29,0 27,4 25,5 Distance from heat pump [m] aroTHERM VWL 125/5 (230V) Listen here Back to main menu Installer's Quick Guide - aroTHERM plus 11/2020...
-
Page 7: Find The Perfect Space For Your Installation: Quiet, Vented, Safe
Find the perfect space for your installation A quiet space for your installation Whilst the aroTHERM plus has been accredited by Quiet Mark* for it‘s super low noise levels. When siting pay consideration to bedroom windows and flat roof installations. - Page 8 Dimension lamps or rotary insolation switches in the protective zone. 2100 3100 Air vents to void areas and air tight drains can be within the 200/250 protective zone. 1000 Back to main menu Installer's Quick Guide - aroTHERM plus 11/2020...
- Page 9 A vented space for perfect operation Don't Operation clearances Installer's Quick Guide - aroTHERM plus 11/2020 Back to main menu...
- Page 10 Install several aroTHERM plus in one spot: quiet, vented, safe! Don't Back to main menu Installer's Quick Guide - aroTHERM plus 11/2020...
-
Page 11: Select The Perfect Domestic Hot Water Storage
Heat Pump standard cylinder range Storage temperature in cylinder Amount of useable hot water at point of use (litres) 1067 1200 1333 1467 note: 40 C temperature at point of use Installer's Quick Guide - aroTHERM plus 11/2020 Back to main menu... -
Page 12: System Expansion Vessel Sizing
10 and 12kW 45 litres System expansion vessel sizing Scan the QR code to easily size the expansion vessel Scan or click the QR-Code for dimensions of the expansion vessel Back to main menu Installer's Quick Guide - aroTHERM plus 11/2020... -
Page 13: Decide On Installation Type To Select Required Accessories (Ground, Wall, Roof)
Decide on the installation type On the roof ... On the wall ... On the ground ... Soak away should 100 mm always be used Installer's Quick Guide - aroTHERM plus 11/2020 Back to main menu... - Page 14 Art.-No.: 0020252091 Art.-No.: 0020250224 Art.-No.: 0020250225 (excludes rubber feet) (excludes rubber feet) Please note that the wall brackets are only suitable for the 3.5kW, 5kW and 7kW models. Back to main menu Installer's Quick Guide - aroTHERM plus 11/2020...
- Page 15 Wall EPP insulation kit Art.-No.: 0010027974 (includes short straight flexible hose) Snow Floor EPP insulation kit Art.-No.: 0010027971 (includes short right angled flexible hose) Floor EPP extension kit Art.-No.: 0010027972 Installer's Quick Guide - aroTHERM plus 11/2020 Back to main menu...
-
Page 16: Tick Your Planning Checklist
Installation site planned (quiet, vented, safe) System temperatures chosen (underfloor, radiator, fan coil) Domestic hot water and buffer tank chosen Expansion vessel determined System schematic selected System components including accessories for installation ordered Back to main menu Installer's Quick Guide - aroTHERM plus 11/2020... -
Page 17: Choose Your System Schematic
Choose your system schematic..Scan or click the QR-Code to download the aroTHERM plus schematics PDF Watch our installation videos..Scan or click QR-Code for installation video playlist Installer's Quick Guide - aroTHERM plus 11/2020 Back to main menu... -
Page 18: Start With The Hydraulic Connection
Start with the hydraulic connection Scan or click QR-Code for installation video NOTE: use of system filter and de-airing is important for the long running low maintenance of the system Back to main menu Installer's Quick Guide - aroTHERM plus 11/2020... -
Page 19: Proceed To The Power Supply And Ebus Connection
If possible e-bus and power cable must be run separately, if this is not possible the e-bus cable must be shielded to prevent voltage induction ≤ 40 mm ≤ 30 mm eBUS 230 V Fuse T4A Installer's Quick Guide - aroTHERM plus 11/2020 Back to main menu... - Page 20 Fasten cable strain reliefs 0,6 x 3,5 X200 X206 X211 X210 eBUS Power supply X200 230 V X210 X211 Back to main menu Installer's Quick Guide - aroTHERM plus 11/2020...
-
Page 21: Choose Your Indoor Unit Unitower, Hydraulic Module Or Heat Pump Interface
Scan or click QR-Code for installation video ³ “ “ 1880 mm ¹ “ 97 103 Service clearances A 130mm B 300mm C 600mm D 40mm E 10mm Installer's Quick Guide - aroTHERM plus 11/2020 Back to main menu... - Page 22 Art.-No.: 0010030975 Art.-No.: 0010027982 for the 3.5, 5 and 7kW Art.-No.: 0010027973 for the 10 and 12kW Scan or click QR-Code for installation video Back to main menu Installer's Quick Guide - aroTHERM plus 11/2020...
- Page 23 Art.-No.: 0020170508 Art.-No.: 0020170509 Important note: you can use the 18l buffer OR the multizone kits as they fit in the same space at the rear of the uniTOWER Installer's Quick Guide - aroTHERM plus 11/2020 Back to main menu...
- Page 24 Hydraulic module In the case of higher hot water demand, the aroTHERM plus can be used together with a wall-mounted hydraulic station and a wide range of accessories, including the uniSTOR heat pump cylinders and buffer tanks. Scan or click QR-Code for installation video...
- Page 25 230 V~ 230 V~ DCF/AF PE N PE N PE N PE N PE N Auf Zu PE N 1 cable 230 V~ 1. Fixing points (on site) Installer's Quick Guide - aroTHERM plus 11/2020 Back to main menu...
-
Page 26: Connect The System Accessories Heat Exchanger Module
Connect the system accessories Install the heat exchanger module (not for use with uniTOWER) >600* min. min. 81.5 81.5 Back to main menu Installer's Quick Guide - aroTHERM plus 11/2020... - Page 27 1500 2000 2500 3000 Pressure (mbar) Position "II" Pressure (mbar) 50% glycol circuit flow Flow rate (l/hour) Position "I" rate Flow rate (l/hour) Position "III" Water circuit flow rate Installer's Quick Guide - aroTHERM plus 11/2020 Back to main menu...
-
Page 28: Connect The Buffer Tank
≥ 100 ≥ 100 ≥ 100 ≥ 600 ≥ 600 ≥ 600 ≥ 200 ≥ 200 ≥ 200 ≥ 200 ≥ 200 ≥ 200 ≥ 10 ≥ 10 ≥ 10 Back to main menu Installer's Quick Guide - aroTHERM plus 11/2020... - Page 29 Flow and return system options 4x G 1¼" 4x G 1¼" 1x G ½ 1x G ½ XXXXXXXXX Installer's Quick Guide - aroTHERM plus 11/2020 Back to main menu XXX/XXXX...
-
Page 30: Tick Your Installation Checklist
Filling loop and pressure gauge installed All valves installed in system Hydraulic connected and tight (pressure test performed) Wiring connection done Heating system vented Optional: Warranty extension/ maintanance and service contract signed Back to main menu Installer's Quick Guide - aroTHERM plus 11/2020... -
Page 31: Follow The Instructions Of The Installation Assistant
... and start your System Simply follow the instructions of the installation assistant on the aroTHERM plus system controller ... Have the installation assistants for all system components nished? Press OK to con rm Back Have the installation assistants for all system components nished? -
Page 32: Technical Data
1,205 2,065 Water volume, in the outdoor unit Minimum open water volume Remaining feed pressure, hydraulic 56.0 44.0 55.0 (mbar) (560.0) (440.0) (550.0) Download our technical specification brochure here Back to main menu Installer's Quick Guide - aroTHERM plus 11/2020... - Page 33 Unit 3.5kW 10kW 12kW VWL 35 / 6 VWL 55 / 6 VWL 75 / 6 VWL 105 / 6 VWL 125 / 6 Refrigerant circuit Fluid type R290 Fluid fill quantity Refrigerant, Global Warming Potential (GWP) equivalent 0.0018...
-
Page 34: Accessories
0010027971 aroTHERM connection kit for ground install 0010027972 aroTHERM plus 3.5kW - VWL 35 / 6 0010037211 extension aroTHERM plus 5kW - VWL 55 / 6 0010037212 aroTHERM connection kit for wall install... - Page 35 VR 91f wireless, additional room thermostat 0020231566 VR 40 two-in-seven multifunction module 0020017744 VR 11 solar collector NTC 306788 VR 10 immersion or contact sensor bare ends 306787 VR 32 eBUS coupler 0020139895 Installer's Quick Guide - aroTHERM plus 11/2020 Back to main menu...
- Page 36 VR 92 wired additional room thermostat 0020260925 VR 92f wireless additional room thermostat 0020260940 sensoNET internet gateway 0020260963 VR 40 two-in-seven multifunctional module 0020017744 VR 32/B eBUS coupler (includes housing) 0020235465 Back to main menu Installer's Quick Guide - aroTHERM plus 11/2020...
-
Page 37: Notes
Notes... - Page 38 Notes...
- Page 39 Notes...
- Page 40 Telephone: 0345 601 8885 email: training@vaillant.co.uk Dedicated state-of-the-art Centres of Excellence Vaillant has training facilities all over the country. Our centres have been developed and designed with you in mind, offering a comfortable and superbly equipped training environment in spacious facilities. We offer plenty of opportunities for hands-on experience and product familiarisation.
Need help?
Do you have a question about the aroTHERM plus and is the answer not in the manual?
Questions and answers