Table of Contents
Advertisement
Quick Links
Advertisement
Table of Contents

Related Manuals for Philco PT 2122


Summary of Contents for Philco PT 2122
- Page 1 REFRIGERATOR FREEZER USER’S MANUAL PT 2122...
- Page 2 Dear customer, Thank you for buying a PHILCO brand product. So that your appliance serves you well, please read all the instructions in this user’s manual. Copyright © 2016, Fast ČR, a. s. 03/2016...
-
Page 3: Table Of Contents
CONTENTS PART 1: Safety information ..........................2 • Children and vulnerable people safety ...........................2 • General safety ....................................2 • Daily use ......................................3 • Care and cleaning ...................................3 • Installation ......................................4 • Service ........................................4 • Energy saving ....................................4 • Environment Protection ................................4 PART 2: Overview ............................. -
Page 4: Part 1: Safety Information
PART 1: SAFETY INFORMATION In the interest of your safety and to ensure the correct use, before installing and fi rst using the appliance, read this user manual carefully, including its hints and warnings. To avoid unnecessary mistakes and accidents, it is important to ensure that all people using the appliance are thoroughly familiar with its operation and safety features. -
Page 5: Daily Use
• During transportation and installation of the appliance, be certain that none of the components of the refrigerant circuit become damaged. avoid open fl ames and sources of ignition thoroughly ventilate the room in which the appliance is situated • It is dangerous to alter the specifi cations or modify this product in any way. -
Page 6: Installation
Installation IMPORTANT! For electrical connection carefully follow the instructions given in specifi c paragraphs. • Unpack the appliance and check if there are damages on it. Do not connect the appliance if it is damaged. Report possible damages immediately to the place you bought it. In that case retain packing. •... - Page 7 The symbol on the product or on its packaging indicates that this product may not be treated as household waste. Instead it should be taken to the appropriate collection point for the recycling of electrical and electronic equipment. By ensuring this product is disposed of correctly, you will help prevent potential negative consequences for the environment and human health, which could otherwise be caused by inappropriate waste handling of this product.
-
Page 8: Part 2: Overview
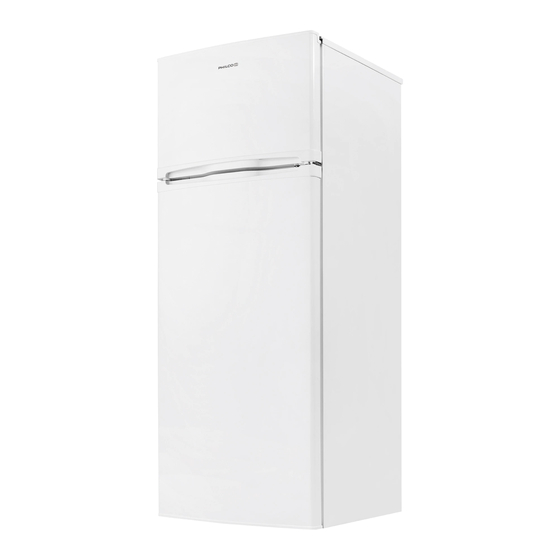
PART 2: OVERVIEW Freezer Shelf Thermostat and Light Glass Shelves Crisper Cover Crisper Balconies This illustration is only for hinting, the detail please check your appliance. EN - 6 Copyright © 2016, Fast ČR, a. s. 03/2016... -
Page 9: Part 3: Reverse Door
PART 3: REVERSE DOOR Tool required: Philips screwdriver, Flat bladed screwdriver, Hexagonal spanner. • Ensure the unit is unplugged and empty. • To take the door off , it is necessary to tilt the unit backwards. You should rest the unit on something solid so that it will not slip during the door reversing process. - Page 10 Unscrew middle hinge. Then lift lower door and place it on a soft pad to avoid scratch. Move the hinge hole covers from left side to right side. Unscrew bottom hinge. Then remove the adjustable feet from both side. Note: remove this screw if it presents.
- Page 11 Refi t the bracket fi tting the bottom hinge pin. Replace both adjustable feet. Transfer the lower door to the property position. Make the middle hinge reverse the direction 180°C, then transfer it to the left property position. Make the middle hinge pin in the upper hole of the lower door, then tight the bolts.
-
Page 12: Part 4: Installation
PART 4: INSTALLATION Install door external handle (if external handle is present) Rear spacer Screw the rear spacers at the rear of the unit. screw Space Requirement • Keep enough space of door open. • Keep at least 50mm gap at two sides. Levelling the unit To do this adjust the two levelling feet at front of the unit. -
Page 13: Positioning
Positioning Install this appliance at a location where the ambient temperature corresponds to the climate class indicated on the rating plate of the appliance: Climate class Ambient temperature +10°C to +32°C +16°C to +32°C +16°C to +38°C +16°C to +43°C Location The appliance should be installed well away from sources of heat such as radiators, boilers, direct sunlight etc. -
Page 14: Part 5: Daily Use
PART 5: DAILY USE First use Cleaning the interior Before using the appliance for the fi rst time, wash the interior and all internal accessories with lukewarm water and some neutral soap so as to remove the typical smell of a brand new product, then dry thoroughly. IMPORTANT! Do not use detergents or abrasive powders, as these will damage the fi nish. -
Page 15: Accessories
Accessories Movable shelves The walls of the refrigerator are equipped with a series of runners so that the shelves can be positioned as desired. Positioning the door balconies To permit storage of food packages of various sizes, the door balconies can be placed at diff erent heights. To make these adjustments proceed as follows: gradually pull the balcony in the direction of the arrows until it comes free, then reposition as required. -
Page 16: Cleaning
Hints for fresh food refrigeration To obtain the best performance: • Do not store warm food or evaporating liquids in the refrigerator • Do cover or wrap the food, particularly if it has a strong fl avour • Make (all types): wrap in polythene bags and place on the glass shelves above the vegetable drawer. •... -
Page 17: Defrosting Of The Freezer
Defrosting of the freezer The freezer compartment, however, will become progressively covered with frost. This should be removed. Never use sharp metal tools to scrape off frost from the evaporator as you could damage it. However, when the ice becomes very thick on the inner liner, complete defrosting should be carried out as fellows: •... -
Page 18: Troubleshooting
Troubleshooting Caution! Before troubleshooting, disconnect the power supply. Only a qualifi ed electrician of com- petent person must do the troubleshooting that is not in this manual. IMPORTANT! There are some sounds during normal use (compressor, refrigerant circulation). Problem Possible cause Solution Temperature regulation knob is set at Set the knob at other number to switch... -
Page 19: Part 6: Information Sheet
PART 6: INFORMATION SHEET INFORMATION SHEET: Philco Philco brand: Brand Philco Product number PT 2122 Type of appliance 3) Energy effi ciency class (A... low electricity consumption to G high electricity consumption) Electricity consumption per 365 days 1) kWh Total available volume: l... - Page 20 INSTRUCTIONS AND INFORMATION REGARDING THE DISPOSAL OF USED PACKAGING MATERIALS Dispose of packaging material at a public waste disposal site. DISPOSAL OF USED ELECTRICAL AND ELECTRONIC APPLIANCES The meaning of the symbol on the product, its accessory or packaging indicates that this product shall not be treated as household waste.
Need help?
Do you have a question about the PT 2122 and is the answer not in the manual?
Questions and answers