
Related Manuals for Daikin R32 Sky-Air RZAG-M


Summary of Contents for Daikin R32 Sky-Air RZAG-M
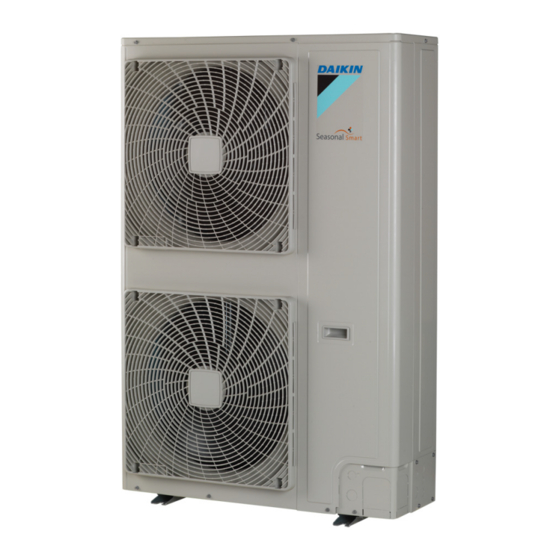
- Page 1 ESIE17-08 Service Manual R32 Sky-Air RZAG-M Indoor unit Outdoor unit FCAHG/FCAG/FFA/FBA/ RZAG-MV/Y FDA/FAA/FHA/FUA/FVA/ FNA 71~140 RZASG-MV/Y...
- Page 2 ESIE17-08 The present publication is drawn up by way of information only and does not constitute an offer binding upon Daikin Europe N.V.. Daikin Europe N.V. has compiled the content of this publication to the best of its knowledge. No express or implied warranty is given for the completeness, accuracy, reliability or fitness for particular purpose of its content and the products and services presented therein.
-
Page 3: Table Of Contents
R32 Sky-Air RZAG-M ESIE17-08 Part 1. Introduction ........................7 1.1. Version log ..............................7 1.2. Safety precautions .............................8 1.2.1. Meaning of symbols ............................8 1.2.2. Warnings ................................ 8 1.2.3. Cautions ............................... 10 1.2.4. Information ..............................11 1.3. General operation ............................12 1.4. How to use ...............................13 1.4.1. - Page 4 R32 Sky-Air RZAG-M ESIE17-08 2.2.2.18. “L8-00” – Electronic thermal overload ....................36 2.2.2.19. “L9-00” – Stall prevention time lag ......................36 2.2.2.20. “LC-00” – Transmission system abnormality ..................37 2.2.2.21. “P1-00” – Open phase or power supply voltage imbalance ..............37 2.2.2.22. “P4-00” – Radiating fin temperature sensor abnormality ...............38 2.2.2.23.
- Page 5 R32 Sky-Air RZAG-M ESIE17-08 3.3.2.13. Replacing high pressure switch ......................89 3.3.2.14. Replacing inverter PCB .......................... 90 3.3.2.15. Replacing low pressure switch ....................... 90 3.3.2.16. Replacing main PCB ..........................92 3.3.2.17. Replacing propeller fan blade assembly ....................99 Part 4. Maintenance .......................101 4.1.
- Page 6 R32 Sky-Air RZAG-M ESIE17-08 Figure 3-1: 1 service port at the stop valves ......................62 Figure 3-2: 3 service ports at the stop valves ......................63 Figure 3-3: Removing the top plate assembly ......................67 Figure 3-4: Removing the front plate ........................69 Figure 3-5: Removing the front plate assembly .......................
-
Page 7: Part 1. Introduction
R32 Sky-Air RZAG-M ESIE17-08 Part 1. Introduction 1.1. Version log Part 1. Introduction This part contains the following chapters: Version log......................................7 Safety precautions....................................8 General operation....................................12 How to use ......................................13 1.1. Version log Version code Description Date ESIE17-08 Document release 15/11/2018 15/11/18 Version 1.1... -
Page 8: Safety Precautions
R32 Sky-Air RZAG-M ESIE17-08 Part 1. Introduction 1.2. Safety precautions 1.2. Safety precautions The precautions described in this document cover very important topics, follow them carefully. All activities described in the service manual must be performed by an authorized person. - Page 9 ARNING Make sure installation, testing and applied materials comply with applicable legislation (on top of the instructions described in the Daikin documentation). ARNING Make sure the work site environment is clean and safe to work in. Beware of spilled fluids, like water, oil or other sub- stances.
-
Page 10: Cautions
R32 Sky-Air RZAG-M ESIE17-08 Part 1. Introduction 1.2. Safety precautions ARNING • Only use copper wires. • All field wiring must be performed in accordance with the wiring diagram and installation manual supplied with the product. • If the power cable and lead wires have scratches or deteriorated, be sure to replace them. Damaged cable and wires may cause an electrical shock, excessive heat generation or fire. -
Page 11: Information
R32 Sky-Air RZAG-M ESIE17-08 Part 1. Introduction 1.2. Safety precautions 1.2.4. Information NFORMATION Make sure refrigerant piping installation complies with applicable legislation. In Europe, EN378 is the applicable stand- ard. NFORMATION Make sure the field piping and connections are not subjected to stress. -
Page 12: General Operation
R32 Sky-Air RZAG-M ESIE17-08 Part 1. Introduction 1.3. General operation 1.3. General operation • The Sky-Air is typically used for cooling or heating in commercial applications. Some units also have settings to perform technical cooling. The medium which is used to transfer the heat from inside to outside or vice versa, is refrigerant. In case of the RZAG-M, the refrigerant which is used, is R32. -
Page 13: How To Use
1.4.1. Interactive information flow This Daikin product Service Manual is intended for professional use only. The actions described hereafter, are only to be performed by qualified and certified persons, taking into account the safety precautions mentioned in this manual and the local regulations as well. -
Page 14: Parts Of The Book
1.4.2. Parts of the book This Daikin product Service Manual is intended for professional use only. The actions described hereafter, are only to be performed by qualified and certified persons, taking into account the safety precautions mentioned in this manual and the local regulations as well. -
Page 15: Part 2. Troubleshooting
R32 Sky-Air RZAG-M ESIE17-08 Part 2. Troubleshooting 2.1. Error codes check Part 2. Troubleshooting This part contains the following chapters: Error codes check ....................................15 Error based troubleshooting .................................23 Symptom based troubleshooting................................43 Component checklist ....................................44 Other capacity range ....................................60 2.1. Error codes check 2.1.1. - Page 16 R32 Sky-Air RZAG-M ESIE17-08 Part 2. Troubleshooting 2.1. Error codes check 2.1.1.1.2 How to reset error codes "Error based troubleshooting" on page 23 you find a description of how to reset the specific error or warning. 2.1.1.1.3 History of error codes <Basic screen>...
-
Page 17: Error Codes Via Wireless Remote Controller Brc7
R32 Sky-Air RZAG-M ESIE17-08 Part 2. Troubleshooting 2.1. Error codes check 2.1.1.2. Error codes via wireless remote controller BRC7 2.1.1.2.1 How to retrieve error codes If the unit stops due to an error, the operation indicating LED on the indoor unit flashes. - Page 18 R32 Sky-Air RZAG-M ESIE17-08 Part 2. Troubleshooting 2.1. Error codes check Normal status Enters inspection mode from normal status when the INSPECTION/ TEST button is pressed. 1 Press INSPECTION/TEST button. 3 Press MODE When MODE selector button selector is pressed or no button is button.
-
Page 19: Error Codes Via Outdoor Unit Pcb
R32 Sky-Air RZAG-M ESIE17-08 Part 2. Troubleshooting 2.1. Error codes check 2.1.2. Error codes via outdoor unit PCB 2.1.2.1. How to retrieve error codes There are 2 ways to retrieve error codes through the outdoor unit: Troubleshooting by LED on the outdoor main PCB The following diagnosis can be conducted by turning on the power switch and checking the LED indication on the PCB of the outdoor unit. - Page 20 R32 Sky-Air RZAG-M ESIE17-08 Part 2. Troubleshooting 2.1. Error codes check (*) Using the MODE button, the modes can be changed as follows. Push the BS1 (MODE button) Push and hold the BS1 (MODE button) (Normal) one time. for 5 seconds.
-
Page 21: How To Reset Error Codes
R32 Sky-Air RZAG-M ESIE17-08 Part 2. Troubleshooting 2.1. Error codes check : ON : OFF : BLINK Return 1 Return 2 Return 3 Malfunc- Contents of retry or malfunction tion code Indoor heat exchanger thermistor c w x x x c x c c w x x c x x c c w w x x x x... -
Page 22: History Of Error Codes And Warnings
R32 Sky-Air RZAG-M ESIE17-08 Part 2. Troubleshooting 2.1. Error codes check 2.1.2.3. History of error codes and warnings As described in above procedure, the latest error or warning codes can also be consulted in Monitor mode: Setting item 5= latest error... -
Page 23: Error Based Troubleshooting
R32 Sky-Air RZAG-M ESIE17-08 Part 2. Troubleshooting 2.2. Error based troubleshooting 2.2. Error based troubleshooting Overview of error codes: Indoor unit ......................................24 “A1-01” – Indoor unit PCB abnormality ............................24 “A3-00” – Drain water level system abnormality........................24 “A6-00” – Indoor unit fan motor abnormality..........................24 “AJ-00”... -
Page 24: Indoor Unit
R32 Sky-Air RZAG-M ESIE17-08 Part 2. Troubleshooting 2.2. Error based troubleshooting 2.2.1. Indoor unit 2.2.1.1. “A1-01” – Indoor unit PCB abnormality Trigger Effect Reset EEPROM data is not received correctly. Unit will stop operating. Power reset via outdoor unit. Possible cause... -
Page 25: Aj-00" - Capacity Setting Abnormality
R32 Sky-Air RZAG-M ESIE17-08 Part 2. Troubleshooting 2.2. Error based troubleshooting Possible cause Check Corrective action Faulty indoor PCB. Check if error still occurs after turning off Adjust power to the indoor PCB. power and turning it back on again. -
Page 26: C4-00" - Liquid Pipe Thermistor For Heat Exchanger Abnormality
R32 Sky-Air RZAG-M ESIE17-08 Part 2. Troubleshooting 2.2. Error based troubleshooting Possible cause Check Corrective action External factory (e.g. electrical noise) Check for source which could cause elec- Avoid electrical interference. (cause when error is reset after power trical interference. -
Page 27: Cc-00" - Humidity Sensor System Abnormality
R32 Sky-Air RZAG-M ESIE17-08 Part 2. Troubleshooting 2.2. Error based troubleshooting Possible cause Check Corrective action Faulty suction air thermistor. Check suction air thermistor. Replace suction air thermistor when required. Faulty indoor PCB. Check if error still occurs after turning off Adjust power to the indoor PCB. -
Page 28: Outdoor Unit
R32 Sky-Air RZAG-M ESIE17-08 Part 2. Troubleshooting 2.2. Error based troubleshooting 2.2.2. Outdoor unit 2.2.2.1. “E1-00” – Outdoor unit PCB abnormality Trigger Effect Reset Outdoor main PCB detects that EEPROM Unit will stop operating. Manual reset via user interface. is abnormal. -
Page 29: E4-00" - Suction Pressure Abnormality
R32 Sky-Air RZAG-M ESIE17-08 Part 2. Troubleshooting 2.2. Error based troubleshooting Possible cause Check Corrective action Refrigerant is contaminated. Check for non condensables in refriger- In case of suspicion of non condensables. ant. Recover, vacuum and recharge refriger- ant. Stop valve is closed. -
Page 30: E7-00" - Fan Motor Abnormality
R32 Sky-Air RZAG-M ESIE17-08 Part 2. Troubleshooting 2.2. Error based troubleshooting Possible cause Check Corrective action Faulty outdoor unit main PCB. Check if the HAP LED is blinking in regu- Restore the power to the outdoor main lar intervals. PCB. -
Page 31: F3-00" - Discharge Pipe Temperature Abnormality
R32 Sky-Air RZAG-M ESIE17-08 Part 2. Troubleshooting 2.2. Error based troubleshooting Possible cause Check Corrective action Faulty outdoor unit main PCB. Check if the HAP LED is blinking in regu- Adjust the power to the outdoor main lar intervals. PCB. -
Page 32: H3-00" - High Pressure Switch Abnormality
R32 Sky-Air RZAG-M ESIE17-08 Part 2. Troubleshooting 2.2. Error based troubleshooting 2.2.2.8. “H3-00” – High pressure switch abnormality Trigger Effect Reset High pressure switch is activated when Unit will stop operating. Manual reset via user interface. compressor is off. Possible cause... -
Page 33: J3-00" - Discharge Pipe Thermistor Abnormality
R32 Sky-Air RZAG-M ESIE17-08 Part 2. Troubleshooting 2.2. Error based troubleshooting Possible cause Check Corrective action Faulty outdoor air temperature thermistor. Check outdoor temperature thermistor. Replace outdoor temperature thermistor when required. Faulty outdoor unit main PCB. Check if the HAP LED is blinking in regu- Restore the power to the outdoor main lar intervals. -
Page 34: J7-00" - Intermediate Heat Exchanger Thermistor Abnormality
R32 Sky-Air RZAG-M ESIE17-08 Part 2. Troubleshooting 2.2. Error based troubleshooting Possible cause Check Corrective action Faulty heat exchanger thermistor. Check heat exchanger thermistor. Replace heat exchanger thermistor when required. Faulty outdoor unit main PCB. Check if the HAP LED is blinking in regu- Restore the power to the outdoor main lar intervals. -
Page 35: L5-00" - Inverter Instantaneous Overcurrent (Ac Output)
R32 Sky-Air RZAG-M ESIE17-08 Part 2. Troubleshooting 2.2. Error based troubleshooting Possible cause Check Corrective action Blown fuse. Check fuse on outdoor main PCB. Replace fuse if blown. Faulty outdoor unit main PCB. Check if the HAP LED is blinking in regu- Adjust the power to the outdoor main lar intervals. -
Page 36: L8-00" - Electronic Thermal Overload
R32 Sky-Air RZAG-M ESIE17-08 Part 2. Troubleshooting 2.2. Error based troubleshooting Possible cause Check Corrective action Faulty compressor. Check compressor. Replace compressor when required. Check connections and wiring of the com- Investigate reason of breakdown. pressor. Replace expansion valve when required. -
Page 37: Lc-00" - Transmission System Abnormality
R32 Sky-Air RZAG-M ESIE17-08 Part 2. Troubleshooting 2.2. Error based troubleshooting Possible cause Check Corrective action Faulty compressor. Check compressor. Replace compressor when required. Check connections and wiring of the com- Investigate reason of breakdown. pressor. Replace expansion valve when required. -
Page 38: P4-00" - Radiating Fin Temperature Sensor Abnormality
R32 Sky-Air RZAG-M ESIE17-08 Part 2. Troubleshooting 2.2. Error based troubleshooting Possible cause Check Corrective action Faulty capacity adapter on outdoor PCB. Check if the correct adapter is installed. Adjust capacity adapter when required. Check if the correct spare part is installed. -
Page 39: System
R32 Sky-Air RZAG-M ESIE17-08 Part 2. Troubleshooting 2.2. Error based troubleshooting 2.2.3. System 2.2.3.1. “U0-00” – Refrigerant shortage Trigger Effect Reset Refrigerant shortage detected. Unit will stop operating. Automatic reset. Power reset via outdoor unit. Possible cause Check Corrective action Faulty air thermistor. -
Page 40: U2-00" - Power Supply Abnormality Or Instantaneous Power Failure
R32 Sky-Air RZAG-M ESIE17-08 Part 2. Troubleshooting 2.2. Error based troubleshooting 2.2.3.3. “U2-00” – Power supply abnormality or instantaneous power failure Trigger Effect Reset There is no zero-cross detected in Unit will stop operating. Power reset via outdoor unit. approximately 10 seconds (indoor unit PCB). -
Page 41: Ua-00" - Improper Combination Of Indoor Unit And Outdoor Unit
R32 Sky-Air RZAG-M ESIE17-08 Part 2. Troubleshooting 2.2. Error based troubleshooting Possible cause Check Corrective action Wiring abnormality between indoor unit Check wiring between indoor unit and out- Adjust wiring between indoor unit and out- and outdoor unit. door unit. -
Page 42: Others
R32 Sky-Air RZAG-M ESIE17-08 Part 2. Troubleshooting 2.2. Error based troubleshooting Possible cause Check Corrective action Faulty wiring between indoor and outdoor Check wiring between indoor and outdoor Correct wiring. unit. unit. Refrigerant shortage (incorrect Check for refrigerant shortage. If required, repair the leak and charge the charge/leakage). -
Page 43: Symptom Based Troubleshooting
R32 Sky-Air RZAG-M ESIE17-08 Part 2. Troubleshooting 2.3. Symptom based troubleshooting 2.3. Symptom based troubleshooting 2.3.1. Indoor unit Not available yet. 2.3.2. Outdoor unit Not available yet. 2.3.3. System Not available yet. 2.3.4. Others Not available yet. 15/11/18 Version 1.1... -
Page 44: Component Checklist
R32 Sky-Air RZAG-M ESIE17-08 Part 2. Troubleshooting 2.4. Component checklist 2.4. Component checklist Overview of component checklists: Indoor unit......................................45 Fan motor ....................................45 Outdoor unit......................................46 4-way valve....................................46 Compressor ..................................... 48 Electronic expansion valve ..............................50 Fan motor ....................................52 High pressure switch ................................ -
Page 45: Indoor Unit
Mechanical check PRELIMINARY ACTIONS Switch off the Daikin unit via the user interface. Switch off the Daikin unit with the field supplied circuit breaker. Remove casing when required. PROCEDURE Check the state of the rotor, replace the rotor if damaged, deformed, cracked or broken. -
Page 46: Outdoor Unit
128. Switch the circuit breaker on. Switch on the Daikin unit via the user interface, start cooling/defrost operation. If the temperature after the heat exchanger drops, proceed with next step. If the temperature after the heat exchanger rises, the 4-way valve is stuck in heating position, replace the 4-way valve body (refer to "Replacing 4-way valve body"... - Page 47 ESIE17-08 Part 2. Troubleshooting 2.4. Component checklist PRELIMINARY ACTIONS Switch off Daikin unit via the user interface. Switch off Daikin unit with the field supplied circuit breaker. Remove plate work when required (refer to "Basic removal" on page 67). PROCEDURE Switch on the Daikin unit, start heating operation.
-
Page 48: Compressor
Remove plate work when required. PROCEDURE Open the compressor insulation. Switch on the Daikin unit and measure the U, V, W inverter voltages. All voltages must be identical, if not, replace the inverter PCB. Switch off the Daikin unit via the user interface. - Page 49 R32 Sky-Air RZAG-M ESIE17-08 Part 2. Troubleshooting 2.4. Component checklist Megger the compressor using 500 or 1000 VDC, the insulation must be higher than 3 MΩ. Replace the compressor if the windings and/or insulation measurements fail (refer to "Replacing compressor" on page 77).
-
Page 50: Electronic Expansion Valve
Switch off the Daikin unit via the user interface. Switch off the Daikin unit with the field supplied circuit breaker. Switch on the Daikin unit and listen to the expansion valve assembly, if the expansion valve body does not create a latching sound, continue with the electrical check. - Page 51 R32 Sky-Air RZAG-M ESIE17-08 Part 2. Troubleshooting 2.4. Component checklist Connector pin 2-6: connected Connector pin 3-6: connected Connector pin 4-6: connected Harness 5P Check 6P Connector If one or more of the windings have no continuity, replace the expansion valve coil.
-
Page 52: Fan Motor
129. Check procedure Mechanical check PRELIMINARY ACTIONS Switch off the Daikin unit via the user interface. Switch off the Daikin unit with the field supplied circuit breaker. Remove plate work when required (refer to "Basic removal" on page 67). PROCEDURE Check the state of the propeller, replace the propeller if damaged, deformed, cracked or broken (refer to "Replacing propeller... -
Page 53: High Pressure Switch
129. Check procedure Electrical check PRELIMINARY ACTIONS Switch off the Daikin unit via the user interface. Switch off the Daikin unit with the field supplied circuit breaker. Remove plate work when required (refer to "Basic removal" on page 67). PROCEDURE Disconnect the high pressure switch connector from applicable PCB, see table "Component checklist"... -
Page 54: Low Pressure Switch
129. Check procedure Electrical check PRELIMINARY ACTIONS Switch off the Daikin unit via the user interface. Switch off the Daikin unit with the field supplied circuit breaker. Remove plate work when required (refer to "Basic removal" on page 67). PROCEDURE Disconnect the low pressure switch connector from applicable PCB. -
Page 55: Main Pcb
Mechanical check Not applicable. Electrical check PRELIMINARY ACTIONS Switch off the Daikin unit via the user interface. Switch off the Daikin unit with the field supplied circuit breaker. Remove plate work when required (refer to "Basic removal" on page 67). PROCEDURE Switch on the Daikin unit with the field supplied circuit breaker. - Page 56 90). 15. Switch off the Daikin unit with the field supplied circuit breaker. 16. Wait a few minutes and confirm that the LED's on the Inverter Analyzer are off. 17. Disconnect the Inverter Analyzer from the U V W wiring.
-
Page 57: Refrigerant Thermistors
Mechanical check PRELIMINARY ACTIONS Switch off the Daikin unit via the user interface. Switch off the Daikin unit with the field supplied circuit breaker. Locate the thermistor and check if thermal contact with the piping or ambient is ensured. Electrical check NFORMATION If a thermistor check fails, replace the thermistor. - Page 58 R32 Sky-Air RZAG-M ESIE17-08 Part 2. Troubleshooting 2.4. Component checklist • The resistance values are defined by below table "Thermistor resistance / temperature characteristics (type 1)": Resistance at 23°C: 21.85 kΩ. Resistance at 24°C: 20.90 kΩ. • The measured value 21.86 kΩ is inside the range, thermistor R3T passes the check.
- Page 59 R32 Sky-Air RZAG-M ESIE17-08 Part 2. Troubleshooting 2.4. Component checklist T °C kΩ T °C kΩ T °C kΩ T °C kΩ T °C kΩ 103.18 37.18 15.10 6.78 3.32 97.73 35.45 14.48 6.53 3.21 13.88 6.53 3.11 92.61 33.81 87.79...
-
Page 60: System
R32 Sky-Air RZAG-M ESIE17-08 Part 2. Troubleshooting 2.5. Other capacity range T °C kΩ T °C kΩ T °C kΩ T °C kΩ T °C kΩ -14,0 73,43 12,5 17,9 39,0 65,5 92,0 -13,5 71,31 13,0 17,4 39,5 66,0 92,5... -
Page 61: Part 3. Repair
3.1.2. Recovery procedure 3.1.2.1. Outdoor unit casing Switch off the Daikin unit via the user interface. Manually open the expansion valve (located on the outdoor unit). Connect the vacuum pump, manifold, recovery unit and refrigerant bottle to the service port as shown below. - Page 62 R32 Sky-Air RZAG-M ESIE17-08 Part 3. Repair 3.1. Refrigerant repair procedures In case of 1 service port at the stop valves Figure 3-1: 1 service port at the stop valves 1. Vacuum pump 3. To recovery pump 2. Connect flexible hose to service port 3 stop valve NFORMATION See instruction of the recovery pump supplier how to recover the refrigerant.
-
Page 63: Refrigerant Pump Down
R32 Sky-Air RZAG-M ESIE17-08 Part 3. Repair 3.1. Refrigerant repair procedures Figure 3-2: 3 service ports at the stop valves > 1. Vacuum pump 2. To recovery pump NFORMATION See instruction of the recovery pump supplier how to recover the refrigerant. -
Page 64: Large Outdoor Unit
Check on manifold if vacuum is reached, close gas stop valve and forced cooling operation. 3.1.3.2. Large outdoor unit Stop all demands for the Daikin unit. Switch OFF / ON the power supply of the outdoor unit. Carry out pump down operation. -
Page 65: Service Tools
3.2. Service tools 3.2. Service tools For an overview of the applicable service tools, please check the Daikin Business Portal: http://www.mydaikin.eu Go to the tab “After-sales support” on the left side and then select “Technical support”. You will then find a button “Service tools” which gives you an overview on which service tool to use for which product. Also additional information on the service tool (instruction, latest software) can be found there. -
Page 66: Unit Specific Repair Procedures
R32 Sky-Air RZAG-M ESIE17-08 Part 3. Repair 3.3. Unit specific repair procedures 3.3. Unit specific repair procedures Overview: Indoor unit......................................66 Outdoor unit......................................67 Basic removal ..................................67 Replacing thermistor................................73 Replacing 4-way valve body..............................75 Replacing 4-way valve coil ..............................76 Replacing accumulator assembly............................ -
Page 67: Outdoor Unit
Switch off the Daikin unit with the field supplied circuit breaker. PROCEDURE Removal Loosen and remove the 9 screws (1) that fix the top plate assembly (2). Lift the top plate assembly (2) and remove it from the Daikin unit. Figure 3-3: Removing the top plate assembly 15/11/18 Version 1.1... - Page 68 R32 Sky-Air RZAG-M ESIE17-08 Part 3. Repair 3.3. Unit specific repair procedures 1. Screw 2. Top panel Loosen and remove the screw (1) that fixes the front plate (2). Lift the front plate (2) and remove it from the unit.
- Page 69 R32 Sky-Air RZAG-M ESIE17-08 Part 3. Repair 3.3. Unit specific repair procedures Figure 3-4: Removing the front plate 1. Screw 2. Front plate Loosen and remove the 11 screws (1) that fix the front plate assembly (3). Loosen and remove the screw (2) that fixes the front plate assembly (3).
- Page 70 R32 Sky-Air RZAG-M ESIE17-08 Part 3. Repair 3.3. Unit specific repair procedures Figure 3-5: Removing the front plate assembly 1. Screw 3. Front plate assembly 2. Screw Loosen and remove the screw (1) that fixes the cover (2). Remove the cover (1) from the unit.
- Page 71 R32 Sky-Air RZAG-M ESIE17-08 Part 3. Repair 3.3. Unit specific repair procedures Figure 3-6: Removing the cover 1. Screw 2. Cover 10. Loosen and remove the screw (1) that fixes the piping cover (2). 11. Remove the piping cover (2) from the unit.
- Page 72 R32 Sky-Air RZAG-M ESIE17-08 Part 3. Repair 3.3. Unit specific repair procedures Figure 3-8: Removing the right side plate 1. Thermistor R1T 3. Screw 2. Thermistor fixing plate 4. Right side plate Page 72 15/11/18 Version 1.1...
-
Page 73: Replacing Thermistor
3.3. Unit specific repair procedures 3.3.2.2. Replacing thermistor PRELIMINARY ACTIONS Switch off the Daikin unit via the user interface. Switch off the Daikin unit with the field supplied circuit breaker. Remove plate work when required (refer to "Basic removal" on page 67). - Page 74 R32 Sky-Air RZAG-M ESIE17-08 Part 3. Repair 3.3. Unit specific repair procedures Figure 3-10: Thermistor location 1. R1T 4. R4T 2. R2T 5. R5T 3. R3T 6. R6T Installation Proceed in reverse order. Page 74 15/11/18 Version 1.1...
-
Page 75: Replacing 4-Way Valve Body
3.3. Unit specific repair procedures 3.3.2.3. Replacing 4-way valve body PRELIMINARY ACTIONS Switch off the Daikin unit via the user interface. Switch off the Daikin unit with the field supplied circuit breaker. Remove plate work when required (refer to "Basic removal" on page 67). -
Page 76: Replacing 4-Way Valve Coil
Proceed in reverse order. 3.3.2.4. Replacing 4-way valve coil PRELIMINARY ACTIONS Switch off the Daikin unit via the user interface. Switch off the Daikin unit with the field supplied circuit breaker. Remove plate work when required (refer to "Basic removal" on page 67). -
Page 77: Replacing Accumulator Assembly
Not applicable. 3.3.2.6. Replacing compressor PRELIMINARY ACTIONS Switch off the Daikin unit via the user interface. Switch off the Daikin unit with the field supplied circuit breaker. Remove plate work when required (refer to "Basic removal" on page 67). Recover the refrigerant (refer to "Refrigerant repair procedures"... - Page 78 R32 Sky-Air RZAG-M ESIE17-08 Part 3. Repair 3.3. Unit specific repair procedures Figure 3-13: Removing stop valve mounting plate 1. Screw 3. Stop valve mounting plate 2. Screw Cut the tie wrap that fixes the R2T thermistor wiring and put the R2T thermistor (2) aside.
- Page 79 R32 Sky-Air RZAG-M ESIE17-08 Part 3. Repair 3.3. Unit specific repair procedures Figure 3-14: Removing compressor 1. Compressor pipe 5. Bolt 2. R2T thermistor 6. Rubber grommet 3. Compressor wiring 7. Compressor 4. Dampers 15/11/18 Version 1.1 Page 79...
-
Page 80: Replacing Dc Fan Motor Assembly
3.3.2.7. Replacing DC fan motor assembly PRELIMINARY ACTIONS Switch off the Daikin unit via the user interface. Switch off the Daikin unit with the field supplied circuit breaker. Remove the propeller fan (refer to "Replacing propeller fan blade assembly" on page 99). -
Page 81: Replacing Electrical Noise Filter
3.3.2.8. Replacing electrical noise filter PRELIMINARY ACTIONS Switch off the Daikin unit via the user interface. Switch off the Daikin unit with the field supplied circuit breaker. Remove the main PCB assy (refer to "Replacing main PCB" on page 92). - Page 82 R32 Sky-Air RZAG-M ESIE17-08 Part 3. Repair 3.3. Unit specific repair procedures Unplug the ground wires (6). Unlock the 9 standoffs (8) that fix the electrical noise filter PCB. Remove the electrical noise filter PCB (7) from the main PCB assembly.
-
Page 83: Replacing Expansion Valve Body
Proceed in reverse order. 3.3.2.9. Replacing expansion valve body PRELIMINARY ACTIONS Switch off the Daikin unit via the user interface. Switch off the Daikin unit with the field supplied circuit breaker. Remove plate work when required (refer to "Basic removal" on page 67). - Page 84 R32 Sky-Air RZAG-M ESIE17-08 Part 3. Repair 3.3. Unit specific repair procedures PROCEDURE Removal Cut the 2 expansion valve pipes (1). Remove the expansion valve (2). AUTION The maximum applied Nitrogen pressure must not exceed 0.02 MPa. Supply nitrogen to the piping circuit.
-
Page 85: Replacing Expansion Valve Motor
3.3. Unit specific repair procedures 3.3.2.10. Replacing expansion valve motor PRELIMINARY ACTIONS Switch off the Daikin unit via the user interface. Switch off the Daikin unit with the field supplied circuit breaker. Remove plate work when required (refer to "Basic removal" on page 67). -
Page 86: Replacing Solenoid Valve
2. Expansion valve 3.3.2.11. Replacing solenoid valve PRELIMINARY ACTIONS Switch off the Daikin unit via the user interface. Switch off the Daikin unit with the field supplied circuit breaker. Remove plate work when required (refer to "Basic removal" on page 67). - Page 87 R32 Sky-Air RZAG-M ESIE17-08 Part 3. Repair 3.3. Unit specific repair procedures Figure 3-21: Removing solenoid valve 1. Solenoid valve pipe 2. Solenoid valve Installation Wrap a wet rag around the solenoid valve. ARNING Overheating the solenoid valve will damage or destroy it.
-
Page 88: Replacing Solenoid Valve Coil
3.3. Unit specific repair procedures 3.3.2.12. Replacing solenoid valve coil PRELIMINARY ACTIONS Switch off the Daikin unit via the user interface. Switch off the Daikin unit with the field supplied circuit breaker. Remove plate work when required (refer to "Basic removal" on page 67). -
Page 89: Replacing High Pressure Switch
3.3. Unit specific repair procedures 3.3.2.13. Replacing high pressure switch PRELIMINARY ACTIONS Switch off the Daikin unit via the user interface. Switch off the Daikin unit with the field supplied circuit breaker. Remove plate work when required (refer to "Basic removal" on page 67). -
Page 90: Replacing Inverter Pcb
"Replacing main PCB" on page 3.3.2.15. Replacing low pressure switch PRELIMINARY ACTIONS Switch off the Daikin unit via the user interface. Switch off the Daikin unit with the field supplied circuit breaker. Remove plate work when required (refer to "Basic removal" on page 67). - Page 91 R32 Sky-Air RZAG-M ESIE17-08 Part 3. Repair 3.3. Unit specific repair procedures Figure 3-24: Removing low pressure switch 1. High pressure switch 3. Compressor discharge thermistor 2. Low pressure switch Installation Figure 3-25: Installation AUTION Overheating the low pressure switch will damage or destroy it.
-
Page 92: Replacing Main Pcb
Only use a wrench/socket or a ring spanner to loosen or fasten the heat sink screws. Do not use a screwdriver. Remove the screws (3) that fix the main PCB support to the Daikin unit (some screws are not visible). 10. Lift and turn the lid (5) to the left. - Page 93 R32 Sky-Air RZAG-M ESIE17-08 Part 3. Repair 3.3. Unit specific repair procedures Figure 3-26: Removing the main PCB assembly (1-phase) 1. Terminal block 8. Ground wire 2. Connectors 9. Tie wrap 3. Screw 10. Screw 4. Main PCB 1-phase 11. Screw 5.
- Page 94 R32 Sky-Air RZAG-M ESIE17-08 Part 3. Repair 3.3. Unit specific repair procedures 16. Loosen and remove the 2 screws (10) that fix the wiring. 17. Loosen and remove the screw (11) that fix the wiring. 18. Loosen and remove the 3 screws (12) that fix the wiring.
- Page 95 Only use a wrench/socket or a ring spanner to loosen or fasten the heat sink screws. Do not use a screwdriver. Remove the screws (3) that fix the main PCB support to the Daikin unit (some screws are not visible). Lift and turn the lid (5) to the left.
- Page 96 R32 Sky-Air RZAG-M ESIE17-08 Part 3. Repair 3.3. Unit specific repair procedures Figure 3-28: Removing the main PCB assembly (3-phase) 1. Terminal block 5. Lid 2. Connectors 6. Screw 3. Screw 7. 7-segment display 4. Main PCB 3-phase Secondly, strip the Main PCB assembly (front) 13.
- Page 97 R32 Sky-Air RZAG-M ESIE17-08 Part 3. Repair 3.3. Unit specific repair procedures Figure 3-29: Stripping the main PCB assembly 3-phase (front) 1. Screw ground wire 3. Terminal connectors 2. Screw Finally, strip the Main PCB assembly (rear) 19. Unplug the connector (2).
- Page 98 R32 Sky-Air RZAG-M ESIE17-08 Part 3. Repair 3.3. Unit specific repair procedures Figure 3-30: Stripping the main PCB assembly 3-phase (rear) 1. Terminal connector 4. Electrical noise filter PCB (3-phase) 2. Connector 5. Standoff 3. Ground wire 6. Cable clamp Installation Proceed in reverse order.
-
Page 99: Replacing Propeller Fan Blade Assembly
Loosen and remove the 4 nuts (1) that fix the air discharge grill (2). Press (A) the 2 latches to release the air discharge grill (2). Tilt (B) the air discharge grill (2) and remove it from the Daikin unit. Remove the nut (3) that fixes the propeller fan (4). - Page 100 R32 Sky-Air RZAG-M ESIE17-08 Part 3. Repair 3.3. Unit specific repair procedures 1. Nut 4. Propeller fan 2. Air discharge grill 5. Fan motor 3. Nut Page 100 15/11/18 Version 1.1...
-
Page 101: Part 4. Maintenance
R32 Sky-Air RZAG-M ESIE17-08 Part 4. Maintenance 4.1. Indoor unit Part 4. Maintenance This part contains the following chapters: Indoor unit ......................................101 Outdoor unit......................................102 4.1. Indoor unit 4.1.1. General maintenance indoor unit Optimal operation conditions Cooling Heating Differential between suction temperature 8~18°C... -
Page 102: Outdoor Unit
R32 Sky-Air RZAG-M ESIE17-08 Part 4. Maintenance 4.2. Outdoor unit 4.2. Outdoor unit 4.2.1. General maintenance outdoor unit Outdoor unit coil Straighten hair fins. Clear coil from dust, leaves, etc. with a fin-comb, or compressed air/N2. Avoid bending or damaging of the Alu fins during the cleaning process. -
Page 103: Part 5. Appendix
R32 Sky-Air RZAG-M ESIE17-08 Part 5. Appendix Part 5. Appendix This part contains the following chapters: Field setting ......................................105 Detailed information setting mode..............................111 Wiring diagram ....................................119 Piping diagram ....................................124 Component overview of unit................................125 Product specific information ................................128 Switch box ......................................129 Field information report ..................................129... - Page 104 R32 Sky-Air RZAG-M ESIE17-08 Part 5. Appendix Page 104 15/11/18 Version 1.1...
-
Page 105: Field Setting
R32 Sky-Air RZAG-M ESIE17-08 Part 5. Appendix 5.1. Field setting 5.1. Field setting 5.1.1. Indoor unit 5.1.1.1. Retrieve field settings BRC1E <Basic screen> <Field setting menu screen> Press Menu/Enter button. <Field setting screen> In the case of individual In the case of group total... - Page 106 R32 Sky-Air RZAG-M ESIE17-08 Part 5. Appendix 5.1. Field setting Press Menu/Enter button. Setting confirmation screen is displayed. Select Yes and press Menu/Enter button. Setting details are determined and field setting list screen returns. In the case of multiple setting changes, repeat “(3)” to “(7)”.
-
Page 107: Retrieve Field Settings Brc7
R32 Sky-Air RZAG-M ESIE17-08 Part 5. Appendix 5.1. Field setting 5.1.1.2. Retrieve field settings BRC7 1. Mode No. 4. First code No. 7. DOWN button 2. Field setting mode 5. Second code No. 8. MODE button 3. RESERVE button 6. UP button 9. -
Page 108: Sky-Air R32 Indoor Field Settings
R32 Sky-Air RZAG-M ESIE17-08 Part 5. Appendix 5.1. Field setting 5.1.1.3. Sky-Air R32 indoor field settings Second Code No. Mode No. First Code No. Description of Setting 10 (20) Filter cleaning sign interval Long life filter 2,500 hrs. (factory setting) 1,250 hrs. -
Page 109: Outdoor Unit
R32 Sky-Air RZAG-M ESIE17-08 Part 5. Appendix 5.1. Field setting 5.1.2. Outdoor unit 5.1.2.1. Retrieve field settings OU mode 1 / mode 2 5.1.2.1.1 Location of the 7 segment display and BS Buttons SEG1 SEG2 SEG3 Meaning of the BS buttons: •... -
Page 110: Remote Controller
R32 Sky-Air RZAG-M ESIE17-08 Part 5. Appendix 5.1. Field setting 5.1.3. Remote controller Second Code No. Mode No. First Code No. Description Details 16 (26) Night time low Disabled (Factory Automatic low Capacity preced- Automatic low — Refer to "Quiet... -
Page 111: Detailed Information Setting Mode
R32 Sky-Air RZAG-M ESIE17-08 Part 5. Appendix 5.2. Detailed information setting mode 5.2. Detailed information setting mode 5.2.1. Indoor unit Not applicable. 5.2.2. Outdoor unit How to Access & Set the Outdoor Unit Settings (Mode 2) SEG1 SEG2 SEG3 Press and hold the BS1 button for 5 seconds to activate the outdoor unit settings (accessing Mode 2). - Page 112 R32 Sky-Air RZAG-M ESIE17-08 Part 5. Appendix 5.2. Detailed information setting mode 7 segment display 7 segment display Setting item Setting Condition SEG1 SEG2 SEG3 SEG1 SEG2 SEG3 Coefficient D (TeS lower limit depending on outdoor 23 (factory set) air temperature)
-
Page 113: Remote Controller
R32 Sky-Air RZAG-M ESIE17-08 Part 5. Appendix 5.2. Detailed information setting mode 5.2.3. Remote controller 5.2.3.1. Quiet (Low Noise) Operation Lower the operation sound of the outdoor unit. Silent Operation can be activated by: Automatic control (by field setting from remote controller) -
Page 114: I-Demand Function
R32 Sky-Air RZAG-M ESIE17-08 Part 5. Appendix 5.2. Detailed information setting mode Model RZQG71 RZQG100 RZQG125 RZQG140 Sound reduction 6 dBA 5 dBA 6 dBA 7 dBA 5.2.3.2. I-Demand Function Set a limitation towards the power consumption from the system (e.g. budget control, limit power consumption during peak moments, ...). - Page 115 R32 Sky-Air RZAG-M ESIE17-08 Part 5. Appendix 5.2. Detailed information setting mode AUTION When using the “LH settings” outside the “Low Humidity Area” there is an increased risk of ice accumulation on the indoor coil or water blowing out from the indoor unit.
- Page 116 R32 Sky-Air RZAG-M ESIE17-08 Part 5. Appendix 5.2. Detailed information setting mode Graph 2 Target evaporating temperature control when “low humidity application” is selected. Field setting 16(26)-2-03: Te target acceptable area Remote controller setting temp. Te target Te target limited ≤ 20°C (°C)
-
Page 117: Defrost Operation
R32 Sky-Air RZAG-M ESIE17-08 Part 5. Appendix 5.2. Detailed information setting mode Indoor Temp. (°C-WB) Outdoor Temp. (°C-DB) Capacity (% of standard point) 0.62 0.81 0.91 1.01 1.06 1.16 1.21 1.26 0.62 0.81 0.91 1.01 1.06 1.16 1.21 1.26 0.62 0.81... - Page 118 R32 Sky-Air RZAG-M ESIE17-08 Part 5. Appendix 5.2. Detailed information setting mode Defrost Control Defrosting complete Defrosting start Previous control A Hz Compressor 0 Hz Four way valve Electronic 480 pls (wet protection control) expansion valve 0 pls (5~60 sec.) 0 pls (5 sec.)
-
Page 119: Wiring Diagram
R32 Sky-Air RZAG-M ESIE17-08 Part 5. Appendix 5.3. Wiring diagram 5.3. Wiring diagram 5.3.1. Indoor unit Figure 5-1: Wiring diagram - indoor unit Sensor kit Input from outside (see note 4) t° t° t° 1 2 3 4 Outdoor 1 2 3 4 5 6... -
Page 120: Outdoor Unit
R32 Sky-Air RZAG-M ESIE17-08 Part 5. Appendix 5.3. Wiring diagram 5.3.2. Outdoor unit Figure 5-2: Wiring diagram - outdoor unit RZAG-MY1, RZASG-MY1, AZAS-MY1 RZAG-MY1, RZASG-MY1, AZAS-MY1 INDOOR OUTDOOR Layout NOTE 3 see note 3 Front see note 3 Position of compressor terminal... - Page 121 R32 Sky-Air RZAG-M ESIE17-08 Part 5. Appendix 5.3. Wiring diagram Figure 5-3: Wiring diagram - outdoor unit AZAS71MV1, RZASG71MV1 AZAS71MV1, RZASG71MV1 INDOOR OUTDOOR Layout NOTE 3 Lower EEV SEE NOTE 3 Upper EEV Position of compressor terminal 4D110098 Notes 1. Refer to the wiring diagram sticker (on the back of the front plate) for how to use the BSI~BS3 and DS1 switches.
- Page 122 R32 Sky-Air RZAG-M ESIE17-08 Part 5. Appendix 5.3. Wiring diagram Figure 5-4: Wiring diagram - outdoor unit RZAG71MV1, RZASG100MV1, AZAS100MV1 RZAG71MV1, RZASG100MV1, AZAS100MV1 INDOOR N = note 5 OUTDOOR Layout SEE NOTE 3 NOTE 3 Lower EEV SEE NOTE 3...
-
Page 123: Field Wiring
R32 Sky-Air RZAG-M ESIE17-08 Part 5. Appendix 5.3. Wiring diagram Figure 5-5: Wiring diagram - outdoor unit RZAG100-140MV1, RZASG125-140MV1, AZAS125-140MV1 RZAG100-140MV1, RZASG125-140MV1, AZAS125-140MV1 Only for RZAG100/125/140* INDOOR Only for RZASG125/140* and AZAS125/140* OUTDOOR Layout NOTE 3 SEE NOTE 3 Front... -
Page 124: Piping Diagram
R32 Sky-Air RZAG-M ESIE17-08 Part 5. Appendix 5.4. Piping diagram 5.4. Piping diagram 5.4.1. Indoor unit Figure 5-6: Piping diagram - indoor unit a. Liquid pipe connection b. Gas pipe connection c. Filter d. Distributor e. Heat exchanger 5.4.2. Outdoor unit Figure 5-7: Piping diagram - outdoor unit Field piping (liquid: 09.5 flare connection) -
Page 125: Component Overview Of Unit
R32 Sky-Air RZAG-M ESIE17-08 Part 5. Appendix 5.5. Component overview of unit 5.5. Component overview of unit 5.5.1. Indoor unit Figure 5-8: Components overview - indoor unit a. Switch box d. Drain pipe connection (VP25) g. Fan motor b. Gas pipe connection e. -
Page 126: Outdoor Unit
R32 Sky-Air RZAG-M ESIE17-08 Part 5. Appendix 5.5. Component overview of unit 5.5.2. Outdoor unit Figure 5-9: Components overview - outdoor unit 71 a. Heat exchanger Printed circuit board (main) b. Internal service port Motor (compressor) c. Switch box cooling Motor (fan) d. - Page 127 R32 Sky-Air RZAG-M ESIE17-08 Part 5. Appendix 5.5. Component overview of unit Figure 5-10: Components overview - outdoor unit 100-140 a. Heat exchanger Printed circuit board (main) b. Internal service port Motor (compressor) c. Switch box cooling Motor (upper fan) d.
-
Page 128: Product Specific Information
R32 Sky-Air RZAG-M ESIE17-08 Part 5. Appendix 5.6. Product specific information 5.6. Product specific information 5.6.1. Error codes 5.6.1.1. “E9-00” - Electronic expansion valve abnormality Trigger conditions • A = 4 K • B = 10 K 5.6.1.2. “F3-00” - Discharge pipe temperature abnormality Compressor A (°C) -
Page 129: Switch Box
R32 Sky-Air RZAG-M ESIE17-08 Part 5. Appendix 5.7. Switch box 5.7. Switch box 5.7.1. Indoor unit Not applicable. 5.7.2. Outdoor unit Not applicable. 5.8. Field information report See next page. 15/11/18 Version 1.1 Page 129... - Page 130 R32 Sky-Air RZAG-M ESIE17-08 Part 5. Appendix 5.8. Field information report Page 130 15/11/18 Version 1.1...
- Page 131 In case a problem occurred on the unit which could not be resolved by using the content of this service manual or in case you have a problem which could be resolved but of which the manufacturer should be notified, we advise you to contact your distributor. To facilitate the investigation, additional information is required.
- Page 132 Application info Application (house, apartment, office, …): New project or refurbishment: Heat emitters (radiators / under floor heating / fan coils / …): Hydraulic layout (simple schematic): Unit / Installation info Model name: Serial number: Installation / commissioning date: Software version hydro PCB A1P: Software version hydro PCB A5P: Software version user interface: Software version outdoor PCB:...
Need help?
Do you have a question about the R32 Sky-Air RZAG-M and is the answer not in the manual?
Questions and answers