
Related Manuals for Varian TriScroll 300


Summary of Contents for Varian TriScroll 300
- Page 1 vacuum technologies TriScroll TIP SEAL REPLACEMENT MANUAL Series Dry Scroll Vacuum Pump idealvac.com Manual No. 699904280 Revision H (505)872-0037 idealvac.com December 2004...
- Page 2 ™ TriScroll 300 Series Dry Scroll Vacuum Pump TriScroll is a trademark of Vacuum Technologies. Loctite and PST are registered trademarks of Loctite Corporation. Krytox, Teflon and Viton are registered trademarks of E. I. du Pont de Nemours and Company. Copyright 2004 Vacuum Technologies...
-
Page 3: Table Of Contents
Tip Seal Tool Kit ..... . . 3 TriScroll 300 Disassembly ....4 Remove the Outboard Housing . - Page 4 TriScroll 300 Dry Scroll Vacuum Pump This page intentionally left blank.
- Page 5 Declaration of Conformity Declaration of Conformity Konformitätserklärung Déclaration de Conformité Declaración de Conformidad Verklaring de Overeenstemming Dichiarazione di Conformità Varian, Inc. Vacuum Technologies Nous 121 Hartwell Avenue Nosotros Lexington, MA, 02421-3133 USA declare under our sole responsibility that the product, erklären, in alleniniger Verantwortung, daß...
-
Page 6: Preface
TriScroll 300 Dry Scroll Vacuum Pump Preface This manual provides the information you need to successfully perform tip seal replacement on your Vacuum Technologies TriScroll Dry Vacuum Pump. Tip seal replacement is generally is recommended when the pump base pressure has risen to an unacceptably high level for your application. - Page 7 Vacuum Technologies recommends replacing all O-rings during routine maintenance or during any mainte- nance procedure requiring that O-rings be removed. WARNING The TriScroll 300 weighs 26.4 kg (58 lbs). To avoid injury, use proper lift- ing techniques when moving the pump.
-
Page 8: Related Triscroll Manuals
TriScroll 300 Dry Scroll Vacuum Pump Related TriScroll Manuals Manuals related to the installation and operation, pump module replacement, and major maintenance for the TriScroll 300 series pumps are listed in the following table: Title Applicable TriScroll Model Part Number... -
Page 9: Factory Service Options
Advance Exchange TriScroll 300 Pump Module Only EXPTS0300SC Advance Exchange TriScroll 310 Pump Module Only EXPTS0310SC Service/Rebuild TriScroll 300 Pump (Single or Three Phase) PTS0300KMA Service/Rebuild TriScroll 310 Pump (Single or Three Phase) PTS0310KMA Service/Rebuild TriScroll 300 Pump Module Only... - Page 10 TriScroll 300 Dry Scroll Vacuum Pump This page intentionally left blank.
-
Page 11: Tip Seal Replacement
Tip Seal Replacement General Information Vacuum Technologies TriScroll 300 series pumps will provide years of trouble-free service if maintenance procedures and intervals are observed. Bearing grease replenishment and tip seal replacement is recommended when the pump base pressure rises to an unacceptably high level for your application. -
Page 12: Tip Seal Replacement Kit
TriScroll 300 Dry Scroll Vacuum Pump Tip Seal Replacement Kit 2-269 Tip Seal Krytox GPL 224 Grease... -
Page 13: Tip Seal Tool Kit
TriScroll 300 Dry Scroll Vacuum Pump Tip Seal Tool Kit Chisel Metric Hex Key... -
Page 14: Triscroll 300 Disassembly
TriScroll 300 Dry Scroll Vacuum Pump TriScroll 300 Disassembly Remove the Outboard Housing 1. Remove the three M5x16 screws that attach the cowling to the module. 2. Remove the cowling. 3. Remove the six M6x45 screws that attach the outboard housing to inboard housing. - Page 15 TriScroll 300 Dry Scroll Vacuum Pump TriScroll 300 Disassembly (continued) 5. Remove and discard the O-ring. 6. Remove and discard the tip seals from the outboard housing.
-
Page 16: Remove The Inboard Housing And The Orbiting Plate Assembly
TriScroll 300 Dry Scroll Vacuum Pump TriScroll 300 Disassembly (continued) Remove the Inboard Housing and the Orbiting Plate Assembly 1. Remove the four M5x15 screws that attach the inboard housing to the frame. 2. Remove the inboard housing from the frame. -
Page 17: Disassemble The Inboard Housing And The Orbiting Plate Assembly
TriScroll 300 Dry Scroll Vacuum Pump TriScroll 300 Disassembly (continued) Disassemble the Inboard Housing and the Orbiting Plate Assembly 1. Remove the M8x12 screw and washer that attaches the counterweight to the inboard housing. Counterweight 2. Lift the counterweight off of the inboard housing. - Page 18 TriScroll 300 Dry Scroll Vacuum Pump TriScroll 300 Disassembly (continued) 3. Remove the inboard housing from the crankshaft and orbiting plate. 4. Remove and discard the tip seals from the inboard housing.
- Page 19 TriScroll 300 Dry Scroll Vacuum Pump TriScroll 300 Disassembly (continued) 5. Remove and discard the tip seals from both sides of the orbiting plate.
-
Page 20: Scroll Cleaning
TriScroll 300 Dry Scroll Vacuum Pump TriScroll 300 Disassembly (continued) Scroll Cleaning 1. Carefully scrape with a chisel to loosen the tip seal dust from the: ❑ Orbiting plate ❑ Inboard housing ❑ Outboard housing Do not scratch or gouge any CAUTION surface. -
Page 21: Triscroll 300 Reassembly
TriScroll 300 Dry Scroll Vacuum Pump TriScroll 300 Reassembly 1. Insert the new tip seal into the scroll tip grooves on the inboard housing side of the orbiting plate. 2. Cut the seal to the correct length at the end of each groove. - Page 22 TriScroll 300 Dry Scroll Vacuum Pump TriScroll 300 Reassembly (continued) 5. Place the scroll in the vertical position and reinstall the inboard housing onto the crankshaft. Placing the scroll in the vertical position keeps the tip seals from falling out of the grooves during reassembly.
- Page 23 TriScroll 300 Dry Scroll Vacuum Pump TriScroll 300 Reassembly (continued) 10. Install the rubber spider into the motor shaft coupling. Rubber spider installed 11. Align the motor coupling to properly mate with the fan hub coupling. 12. Install the inboard housing onto the frame.
- Page 24 TriScroll 300 Dry Scroll Vacuum Pump TriScroll 300 Reassembly (continued) 13. Secure the inboard housing assembly to the frame using the four M5x15 screws. 14. Insert the tip seal in the scroll tip grooves on the orbiting plate. 15. Cut the seal to the correct length at the end of each groove.
- Page 25 TriScroll 300 Dry Scroll Vacuum Pump TriScroll 300 Reassembly (continued) O-ring 19. Lightly grease the new 2-269 O-ring and install it around the lip on the inboard housing. 20. Insert the tip seals in to the grooves on the outboard housing.
- Page 26 TriScroll 300 Dry Scroll Vacuum Pump TriScroll 300 Reassembly (continued) 22. Install the outboard housing over the orbiting plate and against the inboard housing, engaging the dowel pins. Align the three sync cranks NOTE and the orbiting plate in the downward position before installing outboard housing.
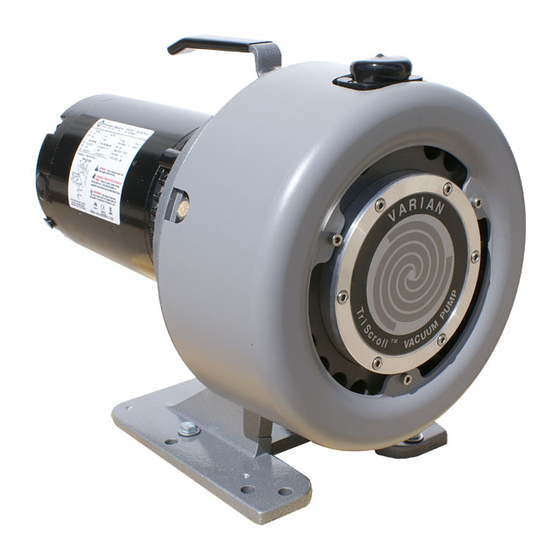
- Page 27 TriScroll 300 Dry Scroll Vacuum Pump TriScroll 300 Reassembly (continued) 24. Install the cowling over the pump module. 25. Secure with the three M5x16 screws. This figure illustrates a fully reassembled TriScroll 300 Series Pump.
-
Page 28: Putting The Pump Back Into Service
TriScroll 300 Dry Scroll Vacuum Pump Putting the Pump Back into Service The TriScroll 300 pump can be placed into service immediately after maintenance is complete. However, 24 hours of run time is required before a base pressure of 10 mTorr can be achieved. - Page 29 4. If a product is received at Varian, Inc. in a contaminated condition, the customer is held responsible for all costs incurred to ensure the safe handling of the product, and is liable for any harm or injury to Varian, Inc. employees occurring as a result of exposure to toxic or hazardous materials present in the product.
- Page 30 9001 Request for Return R E G I S T E R E D Health and Safety Certification FAILURE REPORT (Please describe in detail the nature of the malfunction to assist us in performing failure analysis): URBO UMPS AND URBOCONTROLLERS Claimed Defect Position Parameters...
- Page 32 Canada Japan Other Countries Central coordination through: Varian, Inc. Varian, Inc. Varian, Inc. Sumitomo Shibaura Building, 8th Floor Via F.lli Varian 54 121 Hartwell Avenue 4-16-36 Shibaura 10040 Leini, (Torino) Lexington, MA 02421 Minato-ku, Tokyo 108 Italy Japan Tel: (39) 011 997 9 111...
Need help?
Do you have a question about the TriScroll 300 and is the answer not in the manual?
Questions and answers