Table of Contents
Advertisement
Quick Links
OPERATION MANUAL / SPARE PARTS LIST
BATTERY - POWERED
PLASTIC STRAPPING TOOL
MODEL P324
43.0623.01
CE Declaration of conformity
We declare that the machine P324
is in conformity with the following standard or
standardised documents:
98/37/EEC
FROMM Holding AG
Hinterbergstrasse 26
CH - 6330 Cham
16.02.2006
R.Fromm
Director
Advertisement
Table of Contents

Related Manuals for Fromm P324


Summary of Contents for Fromm P324
- Page 1 OPERATION MANUAL / SPARE PARTS LIST BATTERY - POWERED PLASTIC STRAPPING TOOL MODEL P324 43.0623.01 CE Declaration of conformity We declare that the machine P324 is in conformity with the following standard or standardised documents: 98/37/EEC FROMM Holding AG Hinterbergstrasse 26 CH - 6330 Cham 16.02.2006...
-
Page 2: Table Of Contents
INDEX PAGE GENERAL SAFETY RULES SAFETY RULES FOR STRAPPING TOOLS TECHNICAL DATA ACCESSORIES Battery ............7 Battery - chargers . -
Page 3: General Safety Rules
GENERAL SAFETY RULES WARNING! Read all instructions. Failure to follow all instructions listed below may result in electric shock, fire and/ or serious injury. The term "power tool" in all of the warnings listed below refers to your mains operated (corded) power tool or battery operated (cordless) power tool. SAVE THESE INSTRUCTIONS. - Page 4 1.4 Power tool use and care a) Do not force the power tool. Use the correct power tool for your application. The correct power tool will do the job better and safer at the rate for which it was designed. b) Do not use the power tool if the switch does not turn it on and off.
-
Page 5: Safety Rules For Strapping Tools
Use only cutters designed for strap and never hammers, pliers, hacksaws, axes, etc. 2.6 Environment protection Do not dispose of used batteries in the household refuse, water or by burning them. FROMM distributors offer an environment friendly battery disposal service. P324mane.fm... -
Page 6: Technical Data
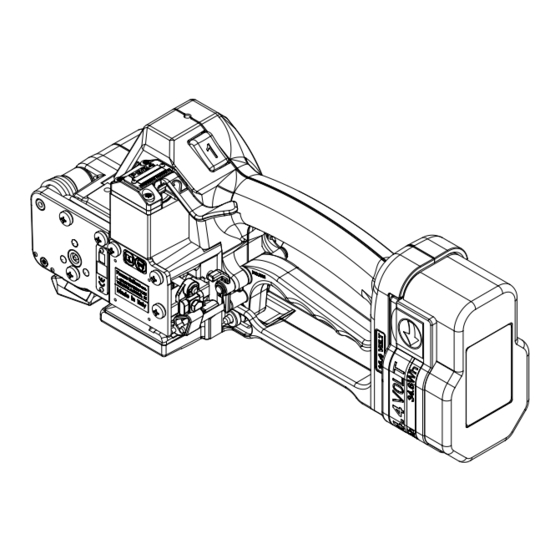
Description of the tool The tool model P324 has been designed to strap packages with plastic strapping. The plastic strapping is fed around the package manually or in combination with a strap feeder. The straps are inserted in the tool, automatically tensioned, sealed by friction welding and separated. -
Page 7: Accessories
ACCESSORIES Use only parts and accessories mentioned in the operating instruction. Using other parts or accessories can cause injuries to you and other persons. Battery Since the tool can be operated with NiCd or NiMH batteries, the battery is not automatically supplied with the tool. -
Page 8: Wearing Plate
P32.1301 N1.2221 Suspension When working stationary the P324 can be suspended at a spring loaded balancer by using a suspension bracket. For working in normal position a stiff suspension bracket with screws and washers can be ordered under item number P32.0112. -
Page 9: Turning Button Kit
For working in alternating positions a turn able suspension bracket with screws and washers can be ordered under item number P32.0137. P32.0137 N1.1904 N1.6503 P32.1307 P32.1310 P35.2069 P35.2073 N2.5623 Mobilux EP2 N1.5105 Turning button kit For a remaining adjustment of tension force and welding time. After exchanging of the turning buttons the adjustment can only be changed with the allen key (2mm) that comes with the kit. -
Page 10: Operating Elements
OPERATING ELEMENTS Tension button LED - Indication Sealing lever Green During tensioning the LED lights green. Green During welding the LED lights green. Yellow Cooling time is running, the tool must not be removed from the strap. Green Cooling time is finished, the tool can be removed from the strap. -
Page 11: Adjustments
Removing the empty battery If the red LED starts lighting while a tensioning or welding procedure, the capacity of the battery is exhausted. All electric functions of the tool are blocked. The seal efficiency is insufficient. Warning! Straps with insufficient seal strength must be removed from the package! The battery must be recharged. -
Page 12: Feeding The Strap Around The Package
Feeding the strap around the package The strapping is fed around the package as illustrated. Warning! The plastic strap which will be welded must be free from oil, grease and other dirt. Dirty plastic straps can't be welded correct! Inserting the strap Pull up the handle lever firmly with your right hand. -
Page 13: Sealing Of The Joint
Sealing of the joint Press sealing lever down until it locks and let it go immediately. The plastic strap is welded and cut off from the rest of the strap. During the welding the LED lights green. After elapsing of the adjusted welding time (see 6.2.2) the cooling time begins (LED lights yellow). -
Page 14: Chart Of Types
CHART OF TYPES Item No. Model Strap width Strap thickness 43.0601 P324/10/0.40-0.64 10 mm / 3/8" 0.40-0.64 mm / .016 - .025" 43.0602 P324/10/0.65-1.05 10 mm / 3/8" 0.65-1.05 mm / .026 - .041" 43.0611 P324/11.1/0.40-0.64 11.1 mm / 7/16" 0.40-0.64 mm / .016 - .025"... -
Page 15: Exchange Of Wearing Parts
EXCHANGE OF WEARING PARTS Remove always the battery from the tool before starting maintenance works. Exchange of tensioning wheel and grippers Disassembling • Unscrew end cover P32.1238 and remove it; • Remove the torsion spring N2.5823; • Remove the tensioning body P32.1254; •... -
Page 16: Exchange Of Cutter, Welding Stop Gripper And Welding Gripper
Exchange of cutter, welding stop gripper and welding gripper Disassembling • Unscrew cover P32.1211 and remove it; • Unscrew end cover P32.1238 and remove it; • Remove the torsion spring N2.5823 and the tensioning body P32.1254; • Remove the tensioning wheel together with the bearing N3.1172 from the tool; •... -
Page 17: Adjustment Of The Coupler P32.1250
(see name and address on the rear page of this manual). Use original packing. The battery powered plastic strapping tool P324 is a high performance tool. We strongly recommend you to have it serviced by an authorized service shop after 12 months at the latest if used one shift per day. If used two or more shifts per day the tool has to be serviced after a shorter period of time. -
Page 18: Warranty Conditions And Liability
12 WARRANTY CONDITIONS AND LIABILITY FROMM Holding AG warrants all its strapping tools and machine heads during a period of 90 days from the date of sale. The warranty includes all deficiencies clearly resulting from poor manufacturing or faulty materials. Damage claims as a result of production shutdowns and claims for damage to persons and to property resulting from warranty deficiencies cannot be asserted by the customer. - Page 19 43062301.z...
- Page 20 43062301.z...
- Page 21 43062301.z...
- Page 22 43062301.z...
- Page 23 14 SPARE PARTS LIST 43.0623.01 43.0623.01 P324/12.7/0.40-0.64 P324.0001.01 23.04.07 Item-No. in group Pcs. Description Dimension Field N1.1305 P32.0147 2 SCREW M4 X 7.8 N1.1553 P32.1250 1 HEXAGON SCREW M4 X 8 N1.1904 5 SCREW M5 X 20 N1.1909 2 FLAT HEAD SCREW M3 X 5 N1.1922...
- Page 24 43.0623.01 P324/12.7/0.40-0.64 P324.0001.01 23.04.07 Item-No. in group Pcs. Description Dimension Field N2.5296 P32.0147 1 PRESSURE SPRING 0.5 X 4 X 24/16.5 N2.5822 P32.0147 1 TORSION SPRING 1.25 X 12/3.75 N2.5823 1 TORSION SPRING 2.8 X 17/4 N31.1118 P32.0148 2 BALL BEARING 10 X 19 X 5 N31.1120...
- Page 25 43.0623.01 P324/12.7/0.40-0.64 P324.0001.01 23.04.07 Item-No. in group Pcs. Description Dimension Field [P32.0156] P32.0147 1 SPUR WHEEL P32.1011 P32.0147 1 FELT P32.1011 P32.0148 1 FELT P32.1012 P32.0147 1 COUPLER [P32.1021] P32.0147 1 WELDING EXCENTRIC P32.1022 P32.1021 1 WELDING EXCENTRIC P32.1023 P32.1021 1 PINION P32.1024...
- Page 26 43.0623.01 P324/12.7/0.40-0.64 P324.0001.01 23.04.07 Item-No. in group Pcs. Description Dimension Field P32.1422 P32.1414 1 LEVER P32.2001 P32.0153 1 BODY [P32.2006] P32.0148 1 HANDLE LEVER P32.2009 P32.2043 2 TURNING BUTTON P32.2010 P32.0148 1 COVER P32.2011 P32.0148 1 INSERTATION PART P32.2012 P32.0147 1 GUIDE P32.2015...
Need help?
Do you have a question about the P324 and is the answer not in the manual?
Questions and answers