American Standard SELECTRONIC 6065.521 Installation Instructions Manual
Dc powered proximity exposed toilet flush valve 1.1, 1.28, 1.6, 1.6/1.1 & 1.28/1.1 gpf
Hide thumbs
Also See for SELECTRONIC 6065.521:
- Installation instructions manual (12 pages) ,
- Installation instructions manual (10 pages) ,
- Installation instructions manual (14 pages)
Table of Contents
Advertisement
SELECTRONIC
DC POWERED PROXIMITY EXPOSED
TOILET FLUSH VALVE
1.1, 1.28, 1.6, 1.6/1.1 & 1.28/1.1 GPF
Certified to comply with ASME A112.19.2
© 2018 AS America, Inc.
NOTE TO INSTALLER: Please give this manual to the customer after installation.
To learn more about American Standard Selectronic
or e-mail us at: CRTTEAM@americanstandard.com
For Parts, Service, Warranty or other Assistance,
please call (844) CRT-TEAM / (844) 278-8326 (In Canada: 1-800-387-0369)
© 2018 AS America Inc.
®
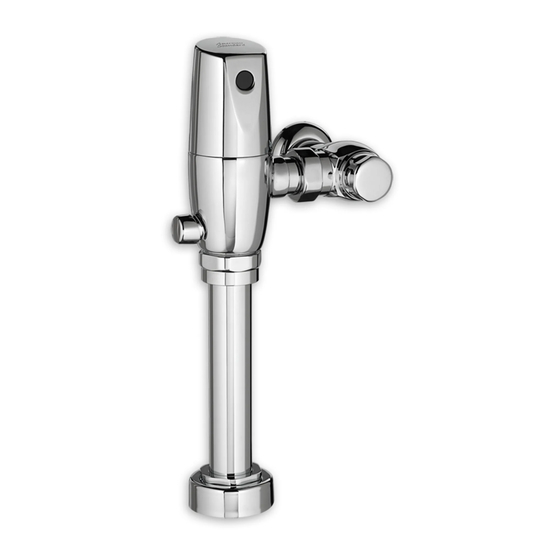
Exposed Flushometer
for 1-1/2" Top Spud Bowls
CAUTION: Use only American Standard supplied
transformers and cable sets. Using non-AS supplied
cables, or cutting, splicing or modifying any components
will void the warranty.
Products visit our website at: www.americanstandard-us.com
®
(In Toronto Area only: 1-905-306-1093)
1
MODEL NUMBERS
6065.111 6065.521
6065.121 6065.525
6065.161 6065.561
6065.721 6065.565
6065.761
)
M965646 REV. 1.9 (9/18)
Advertisement
Table of Contents

Subscribe to Our Youtube Channel
Related Manuals for American Standard SELECTRONIC 6065.521


Summary of Contents for American Standard SELECTRONIC 6065.521
- Page 1 © 2018 AS America, Inc. NOTE TO INSTALLER: Please give this manual to the customer after installation. Products visit our website at: www.americanstandard-us.com To learn more about American Standard Selectronic ® or e-mail us at: CRTTEAM@americanstandard.com For Parts, Service, Warranty or other Assistance,...
-
Page 2: Care Instructions
Thank you for selecting American-Standard...the benchmark of fine quality for over 100 years. To ensure that your installation proceeds smoothly--please read these instructions carefully before you begin. All American Standard Products Are Water Tested At Our Factory. UNPACKING Some Residual Water May Remain In The Valve During Shipping. -
Page 3: General Description
GENERAL DESCRIPTION: Fig. 1 (Before November 2017) SELECTRONIC® PROXIMITY TOILET FLUSH VALVE Roughing-in Dimensions Exposed Flushometer for 1-1/2” Top Spud Fixtures Right or Left Hand Installation See (Section 5) for converting Flush Valve to Left Hand Installation. FINISHED WALL 73 mm (2-7/8") 15˚... -
Page 4: Prior To Installation
RECOMMENDED TOOLS; Fig. 2. Fig. 2 1. Teflon Tape 2. Flat Blade Screwdriver 3. Adjustable Wrench 4. Tape Measure 5. Hacksaw 6. Tubing Cutter 7. File 8. For Sweat Connection; Solder and Torch 9. 2.5 mm Hex Wrench 10. 1.5 mm Hex Wrench PRIOR TO INSTALLATION •... - Page 5 Fig. 3 FLUSH VALVE INSTALLATION FINISHED WALL CENTER LINE OF FIXTURE SPUD INSTALL SWEAT ADAPTER; Fig. 3 Turn water supplies off before CAUTION beginning (A-B)= Note: Install Optional Sweat Adapter (Supplied) for 32mm copper pipe supply line. (1-1/4") FILE EDGES 1.
- Page 6 FLUSH OUT SUPPLY LINES; Fig. 6 Fig. 6 1. Remove STOP VALVE COVER (1) from STOP VALVE (2). REMOVE COVER 2. Open STOP VALVE (2) with a flat blade screwdriver. 3. Turn on water supply to flush line of any debris or sediment. 4.
-
Page 7: Maintenance
If these items do need replacement they must be purchased separately or order the complete flush valve assembly from American Standard. 1. Remove STOP VALVE COVER (1) from STOP VALVE (2). 2. Turn water supply off. - Page 8 REPLACE BATTERY; Fig. 11, 11a Fig. 11 1. Loosen SET SCREW (1) with 2.5mm Hex Wrench (2) in back of FLUSH VALVE COVER (3). Fig. 11. 2. Rotate COVER (3) to the right and pull off. Fig. 11. 3. Turn COVER (3) over and disconnect the SENSOR (4) from the BATTERY HOLDER (5).
- Page 9 SET DETECTION RANGE Fig. 13 (If Required); Fig. 13 y 14 Note: The detection distance is preset and ideal for most installations. Should an adjustment be required, follow the steps below. 1. Loosen SET SCREW (1) with 2.5mm Hex Wrench (2) in VIEW “A”...
-
Page 10: Troubleshooting Flowcharts
P ro d uc t n a me s l i st e d he re i n are t r a d e ma r ks o f A S A m er i ca , In c . ©20 1 8 AGAIN TO PRIME THE VALVE. To learn more about American Standard Selectronic® Products visit our website at: DOES FLUSHING STOP? www.americanstandard-us.com or e-mail us at: CRTTEAM@americanstandard.com... - Page 11 Pro duct nam es lis ted herein are tra demar ks of AS Ame rica , I n c . ©2 0 1 8 To learn more about American Standard Selectronic® Products visit our website at: www.americanstandard-us.com or e-mail us at: CRTTEAM@americanstandard.com...
Need help?
Do you have a question about the SELECTRONIC 6065.521 and is the answer not in the manual?
Questions and answers