
Subscribe to Our Youtube Channel
Related Manuals for Stryker FIRSTCARE 5012


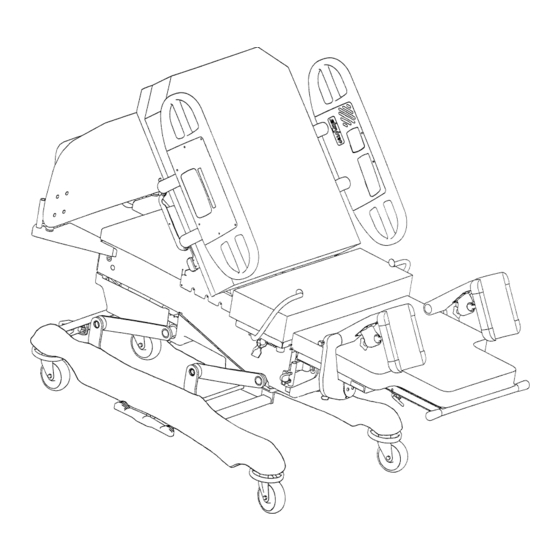
Summary of Contents for Stryker FIRSTCARE 5012
- Page 1 IMPORTANT File in your maintenance records Stryker FIRSTCAREt ULTRA Maternity Bed Model 5010 & 5012 MAINTENANCE MANUAL For beds with serial numbers 9811036008 and above For Parts or Technical Assistance 1–800–327–0770...
-
Page 2: Table Of Contents
Table of Contents Introduction Specifications ................Warning / Caution / Note Definition . - Page 3 Table of Contents Assembly Drawings and Parts Lists (Continued) Foot Potentiometer Assembly ............. Seat Assembly .
-
Page 4: Introduction
This provides special information to make maintenance easier or important instructions clearer. t ULTRA has been To ensure its proper use and the safety of patients and staff, the Stryker F IRST marked with the following caution and warning labels: DANGER Explosion Hazard –... -
Page 5: Safety Tips And Guidelines
Introduction SAFETY TIPS AND GUIDELINES t Maternity Bed, it is important to read and understand all information Before operating the Stryker F IRST in this manual. Carefully read and strictly follow the safety guidelines listed on this page. It is important that all users have been trained and educated on the inherent hazards associated with the usage of electric beds. -
Page 6: Unpacking Instructions
Refer to unpacking instructions attached to the bed inside the crate. SET–UP PROCEDURES t Ultra Maternity Bed is working properly before it is put into service. It is important that the Stryker F IRST The following list will help ensure that each part of the bed is tested. - Page 7 Bed Symbols Warning, Refer to Service/Maintenance Manual Alternating Current Type B Equipment: equipment providing a particular degree of protection against elec- tric shock, particularly regarding allowable leakage current and reliability of the protec- tive earth connection. Class 1 Equipment: equipment in which protection against electric shock does not rely on BASIC INSULATION only, but which includes an additional safety precaution in that means are provided for the connection of the EQUIPMENT to the protective earth con- ductor in the fixed wiring of the installation in such a way that ACCESSIBLE METAL...
- Page 8 Bed Symbols SYMBOL DESCRIPTION Warning: Potential Electrical Shock if Cover is Removed. Keep Feet Clear. Warning: Read all Instructions Before Plugging in the Bed. Warning: Unplug Bed Before Using the Hand Crank. Night Light On/Off Switch CPR Release Lift to Lower Lift to Move In or Out...
- Page 9 Bed Symbols SYMBOL DESCRIPTION 1. Raise Fowler. 2. Raise foot section. 3. Lower Fowler. 4. Lower foot section. Activate Nurse Call 1. Turn TV or radio on or select a channel. 2. Increase volume. 3. Decrease volume. 1. Turn the room light on or off. 2.
- Page 10 Bed Symbols SYMBOL DESCRIPTION 1. Raise Fowler. 2. Raise foot section. 3. Lower Fowler. 4. Lower foot section. 1. Activate Nurse Call. 2. Lower head end of bed 3. Raise head end of bed and/or return bed to level. 1. Raise bed height. 2.
- Page 11 Bed Symbols SYMBOL DESCRIPTION 1. Turn TV or radio on or select a channel. 2. Activate Nurse Call. 3. Increase volume. 4. Decrease volume. 5. Turn the room light on or off. 6. Turn the bed overhead light on or off. 7.
- Page 12 Notes...
- Page 13 Bed Illustration WARNING Potential pinch points Patent Information The Stryker First Caret Ultra Maternity Bed is protected by the following patents: 5774914, 5862549, 5926878 Other patents pending.
- Page 14 If these types of products are used to clean Stryker patient handling equipment, measures must be taken to insure the stretchers are rinsed with clean water and thoroughly dried following cleaning. Failure to properly rinse and dry the stretchers will leave a cor- rosive residue on the surface of the stretcher, possibly causing premature corrosion of critical components.
- Page 15 Preventative maintenance should be performed at a minimum of annually. A preventative maintenance pro- gram should be established for all Stryker Medical equipment. Preventative maintenance may need to be performed more frequently based on the usage level of the product.
-
Page 16: Static Discharge Precautions
All electronic service parts will be shipped in static shielding bags. Do not open the bags until you have com- pleted steps 2 and 3 of the following procedure. All circuit boards must be returned to Stryker Medical. Return circuit boards in the static shielding bags the new boards were shipped in. -
Page 17: Service Information
Service Information – Base STEER WHEEL CABLE ADJUSTMENT Required Tools: (2) 10 mm Open End Wrenches Adjustment Procedure: 1. Remove the base frame cover from the (patient) right side of the bed. 2. Position the steer pedal (located at the head end of the bed) in the off position. 3. -
Page 18: Lift Motor Removal And Replacement
Service Information – Litter LIFT MOTOR REMOVAL AND REPLACEMENT Required Tools: 1/2” Wrench T27 Torx Wrench Hammer Punch 3/8” Socket Wrench Standard Screwdriver Snap Ring Pliers 5/16” Nut Driver 3/16” Allen Wrench 5/32” Allen Wrench 9/16” Wrench (2) 2x4’s Removal Procedure: 1. -
Page 19: Trend Motor Removal And Replacement
Service Information – Litter LIFT MOTOR REMOVAL AND REPLACEMENT (CONTINUED) Removal Procedure (Continued): 21. Move the lift motor assembly toward the head end of the bed. 22. Remove the motor by lowering it and moving it toward the head end of the bed. 23. -
Page 20: Fowler In/Out Motor Removal And Replacement
Service Information – Litter FOWLER IN/OUT MOTOR REMOVAL AND REPLACEMENT Required Tools: 3/8” Socket Wrench 5/16” Socket Wrench Removal Procedure: 1. Raise the bed and the Fowler to the full up position. 2. Run the Fowler to the full out position (toward the head end of the bed). WARNING If the Fowler slide will not run electrically, it must be manually cranked out (toward the head of the bed) to prevent personal injury when the motor is removed. -
Page 21: Foot Motor Removal And Replacement
Service Information – Litter FOWLER MOTOR REMOVAL AND REPLACEMENT (CONTINUED) 8. Unplug the capacitor wires. 9. Lift the electrical pan up slightly and turn it sideways on an angle. WARNING It is important to properly support the Fowler before proceeding or personal injury could result. 10. -
Page 22: Power Supply Board Replacement
Service Information – Litter POWER SUPPLY BOARD REPLACEMENT Required Tools: 3/8” Socket Ratchet Needle Nose Pliers Procedure: 1. Properly ground yourself (see page 15 for static discharge precautions). 2. Raise the Fowler to the full up position. 3. Unplug the bed power cord from the wall socket. 4. -
Page 23: Optional Power Board Replacement
Service Information – Litter OPTIONAL POWER BOARD REPLACEMENT Required Tools: 3/8” Socket Ratchet 5/16” Nut Driver Removal Procedure: 1. Properly ground yourself (see page 15 for static discharge precautions). 2. Raise the Fowler to the full up position. 3. Unplug the bed power cord from the wall socket. 4. - Page 24 Service Information – Litter LIFT, FOOT, AND FOWLER CALIBRATION PROCEDURE (CONTINUED) Lift Calibration Procedure (Continued): 4. Press the “bed up” button and raise the bed until the seat section skin is 35 1/2” above the floor (± 1/8”) if the bed has 6” casters and 37 1/2” if the bed has 8” casters. 5.
-
Page 25: Smart Tv Interface Burn-In Procedure
Service Information – Litter SMART TV INTERFACE BURN–IN PROCEDURE This procedure is used for selecting the style of TV interface desired for your bed. If traditional TV is desired, no calibration is required. If optional Smart TV is available on the bed, select one of the TV manufacturers listed in the table below. -
Page 26: Troubleshooting Guide
Electrical Troubleshooting TROUBLESHOOTING GUIDE DEFINITIONS: DMM = Digital Multi–Meter PCB = Printed Circuit Board CPU = Central Processing Unit NOTE See pages 28–32 for an outline of bed PCB’s and voltage test points. See pages 22 & 23 for potentiometer calibration. - Page 27 Electrical Troubleshooting TROUBLESHOOTING GUIDE (CONTINUED) PROBLEM/FAILURE RECOMMENDED ACTION No Fowler down motion. A. Enter diagnostics, (see page 22) and check for Fowler down motion. If motion is present, re–burn all limits. B. If no Fowler down motion is present, check the Fowler Slide Out switch for proper connection.
- Page 28 Electrical Troubleshooting TROUBLESHOOTING GUIDE (CONTINUED) PROBLEM/FAILURE RECOMMENDED ACTION No Lumbar Firm. A. Check for 5VDC on HDR2 pin 2 and 1 of the option power board. B. Check for 12 VDC on HDR2 pin 3 (Red) and 1 (Black) of the option power board. C.
-
Page 29: Bed Circuit Boards
Bed Circuit Boards CPU BOARD KIT WITH HEAD WALL INTERFACE – P/N 5010–500–2 CPU BOARD KIT WITHOUT HEAD WALL INTERFACE – P/N 5010–500–3 59–137 Shunt for No Nurse Call... - Page 30 Bed Circuit Boards CPU BOARD KIT WITH HEAD WALL INTERFACE – P/N 5010–500–2 CPU BOARD KIT WITHOUT HEAD WALL INTERFACE – P/N 5010–500–3 CONNECTOR CABLE VOLTAGE POSITIVE NEGATIVE DESCRIPTION LOCATION LOCATION LEAD LEAD HDR 2 +12 VDC Pin 1 Pin 4 or 5 Relays &...
- Page 31 Bed Circuit Boards CPU BOARD KIT WITH HEAD WALL INTERFACE – P/N 5010–500–2 CPU BOARD KIT WITHOUT HEAD WALL INTERFACE – P/N 5010–500–3 CONNECTOR CABLE VOLTAGE POSITIVE NEGATIVE DESCRIPTION LOCATION LOCATION LEAD LEAD HDR 30 0 VAC w/o Switch Pin 1 Neutral Pin 3 Fowler Down 120 VAC w/...
- Page 32 Bed Circuit Boards POWER SUPPLY – P/N 59–157 CONNECTOR VOLTAGE POSITIVE LEAD NEGATIVE LEAD LOCATION 110V Pin 1 Pin 2 Pin 1 Pin 4 or 5 Pin 2 Pin 4 or 5 Pin 3 Pin 4 or 5 Pin 4 Pin 4 or 5 Pin 5 Pin 4 or 5...
- Page 33 Bed Circuit Boards OPTION POWER BOARD – P/N 5000–300–900 HDR 2 HDR 11 HDR 5 HDR 7 HDR 8 HDR 1 CONNECTOR CABLE VOLTAGE POSITIVE NEGATIVE DESCRIPTION LOCATION LOCATION LEAD LEAD HDR 1 120 VAC* Pin 1 Pin 2 AC Line Voltage from CPU Board HDR 2 +5 VDC...
- Page 34 HDR 3 +5 or +12 VDC Pin 1 Power/control line from the TV Note: This header provides TV control to a non–Stryker pendant +5 or +12 VDC Pin 34 Pin 33 Power/Control line from the TV Note: If this polarity is reversed, place...
-
Page 35: Head Wall Output Configuration
Head Wall Output Configuration 37–PIN CONNECTOR STRYKER PENDANT PORT Pin 1 Option 2 Common Pin 2 Read Light Pin 3 Room Light Pin 4 Speaker High Pin 5 Pot Wiper Pin 6 Radio Common Pin 7 Nurse Call Interlock Pin 8 Audio Transfer –... -
Page 36: Replacement Parts List
Replacement Parts PART NAME PART NUMBER Brake Adjuster ............. . 715–1–150 Brake Cam Actuator . - Page 37 Assembly part number 5000–1 (reference only) Reference page 150 & 151 for base labels Reference page 150 & 151 for base labels...
-
Page 38: Base Assembly
Base Assembly Item Part No. Part Name Qty. 3–79 Hex Hd. Cap Screw 4–12 Soc. Hd. Cap Screw 4–24 Soc. Hd. Cap Screw 4–28 Soc. Hd. Cap Screw 4–298 Soc. Hd. Cap Screw 4–32 Soc. Hd. Cap Screw 4–86 Soc. Hd. Cap Screw 4–114 Soc. -
Page 39: 715-1-150 Brake Adjuster Assembly
715–1–150 Brake Adjuster Assembly Item Part No. Part Name Qty. 715–1–62 Threaded Stud Assembly 14–4 Nylon Washer 715–1–180 Bearing 28–8 Retaining Ring... -
Page 40: 8" Casters Assembly
8” Caster Assembly Assembly part number 5000–1–32 Item Part No. Part Name Qty. 11–225 Washer (page 41) 8” Steer Caster Assembly (page 40) 8” Caster Assembly... - Page 41 5000–2–34 8” Caster Assembly Item Part No. Part Name Qty. 3–99 Hex Hd. Cap Screw 3–227 Hex Hd. Cap Screw 11–310 Washer 16–60 Hex Nut 715–2–16 Caster Horn w/Bearing 2025–1–47 Wheel Cover, Right 2025–1–48 Wheel Cover, Left 715–2–25 Molded Wheel Assembly...
- Page 42 5000–2–33 8”Steer Caster Assembly Item Part No. Part Name Qty. 3–99 Hex Hd. Cap Screw 3–227 Hex Hd. Cap Screw 11–310 Washer 16–60 Hex Nut 2025–1–47 Wheel Cover, Right 2025–1–48 Wheel Cover, Left 715–2–25 Molded Wheel Assembly 5000–2–32 Steer Caster Weldment...
- Page 43 5000–2–50 Optional 6” Caster Assembly Item Part No. Part Name Qty. 3–205 Hex Hd. Cap Screw 3–227 Hex Hd. Cap Screw 11–310 Washer 16–60 Hex Nut (page 44) Wheel Assembly 5000–2–30 Caster Horn Assembly...
- Page 44 5000–2–51 Optional 6” Steer Caster Assembly Item Part No. Part Name Qty. 3–205 Hex Hd. Cap Screw 3–227 Hex Hd. Cap Screw 11–310 Washer 16–60 Hex Nut (page 44) Wheel Assembly 5000–2–31 Steer Caster Horn Ass’y...
- Page 45 5000–2–10 Optional 6” Molded Wheel Assembly Item Part No. Part Name Qty. 81–226 Bearing 715–1–255 Wheel Bushing 5000–2–20 Molded Wheel 6060–2–46 Bearing Spacer...
- Page 46 Domestic Litter Assembly part number 5010–30 (reference only)
- Page 47 International Litter Assembly part number 5012–30 (reference only)
- Page 48 Domestic Litter Assembly part number 5010–30 (reference only) International Litter Assembly part number 5012–30 (reference only)
-
Page 49: Litter Assembly
Litter Assembly Item Part No. Part Name Qty. Item Part No. Part Name Qty. 3–47 Hex Hd. Cap Screw 81–268 Flange Bushing 3–76 Hex Hd. Cap Screw 3001–300–471 Roller Bearing 8803–016–000 Hex Hd. Cap Screw 5000–30–62 Slide Bearing 3–221 Hex Washer Hd. Screw 5000–30–160 CPR Actuator Bracket 3–224... -
Page 50: Fowler Motor/Cpr Assembly
Fowler Motor/CPR Assembly Assembly part numbers 5000–30–271 (Domestic) 5002–30–271 (International) (reference only) Item Part No. Part Name Qty. 3–214 Hex Hd. Cap Screw 11–63 Washer 26–53 Spring Pin 715–1–333 Release Valve Stop Sleeve 3000–300–442 Motor Mount Grommet 3000–300–455 CPR Isolation Bushing 3000–300–456 CPR Isolator 3000–300–461... - Page 51 Fowler Motor/CPR Subassembly Assembly part number 5000–30–369 (Domestic) Assembly part number 5002–30–369 (International) (reference only) Item Part No. Part Name Qty. 28–131 Retaining Ring 5000–30–410 Clutch Kit 5000–30–340 Fowler Motor 5002–30–340 230V Fowler Motor 3000–300–604 Warning Label 3000–200–224 Thrust Washer 3000–200–225 Roller Thrust Bearing 3000–300–465...
- Page 52 5000–30–316 Fowler Pot Assembly 8.5K ohms +/–500 ohms 3 Red 4 Black Resistance is measured between Pin 3 Red & Pin 4 Black. Adjust potentiometer to 8.5K ohms +/–500 ohms. Item Part No. Part Name Qty. 4–38 Soc. Hd. Cap Screw 14–8 Nylon Washer 21–149...
-
Page 53: Litter Capacitor Assembly
Litter Capacitor Assembly 110V Domestic Assembly part numbers Assembly 5000–30–330 (Domestic) 5002–30–330 (International) (reference only) 230V International Assembly Item Part No. Part Name Qty. 38–151 11” Cable Tie 5000–30–5 Capacitor Mounting Panel 8806–052–500 Adhesive Foam Tape 1.67’... -
Page 54: Crank Handle Assembly
5000–230–320 Crank Handle Assembly Item Part No. Part Name Qty. 26–267 Spring Pin 5000–230–321 Crank Handle 5000–30–322 Crank End 5000–30–323 Crank Handle Collar... - Page 55 230V Litter Front Cover Assembly Assembly part number 5012–30–20 (reference only) FOWLER...
- Page 56 230V Litter Front Cover Assembly Item Part No. Part Name Qty. 25–50 Rivet 59–136 Push Mount Wire Clip 5010–30–21 Top Cover 5010–30–23 Top Cover Backer Plate 5012–30–1 Bellows, Left 5012–30–2 Bellows, Right 5012–30–3 Bellows Plate 8800–380–000 Neoprene Sponge .33’...
-
Page 57: Front Cover Assembly
Front Cover Assembly Assembly part number 5010–30–20 (reference only) Item Part No. Part Name Qty. 25–50 Rivet 59–136 Push–Mount Wire Clip 5010–30–21 Top Cover 5010–30–22 Top Cover Gasket 5010–30–23 Top Cover Backer Plate... - Page 58 Non–In/Out Fowler Assembly Assembly part number 5010–30–100 (reference only) Item Part No. Part Name Qty. 5010–30–101 Non–Translating Shaft 5000–80–23 Non–Fowler Slide Opt. Cable 2025–32–86 Thrust Washer 2025–32–87 Needle Thrust Bearing 26–271 Clevis Pin 14–3 Nylon Washer 27–17 Cotter Pin 27–21 Rue Ring (page 62) Square In/Out Tube Ass’y...
- Page 59 5010–30–50 Fowler Assembly...
- Page 60 5010–30–50 Fowler Assembly Item Part No. Part Name Qty. 3–64 Hex Hd. Cap Screw 7–58 Truss Hd. Torx 11–376 Washer 13–38 External Lock Washer 15–12 Hex Nut 16–12 Nylock Nut 25–38 Pop Rivet 25–120 Pop Rivet 29–3 Brass Eyelet 30–52 Heyco Plug 3000–300–3 Bumper...
- Page 61 Assembly part number 5010–30–85 (reference only) 230V Fowler Assembly part number 5012–30–85 (reference only)
-
Page 62: Fowler In-Out Option Assembly
Fowler In–Out Option Assembly Item Part No. Part Name Qty. 3–221 Hex Washer Hd. Screw 3–224 Hex Washer Hd. Screw 4–149 Hex Soc. But. Hd. Cap Screw 16–3 Fiberlock Nut 26–271 Clevis Pin 26–168 Spiral Pin 27–17 Cotter Pin 28–120 External Retaining Ring 30–52 Snap Bushing... -
Page 63: Square In-Out Tube Assembly
Square In/Out Tube Assembly Assembly part number 5000–230–89 (reference only) Item Part No. Part Name Qty. 26–8 Spring Pin 5000–230–87 Square In/Out Tube 5000–230–90 Square In/Out Nut... -
Page 64: Litter/Lift/Trend. Assembly
Litter/Lift/Trend. Assembly Domestic assembly part number 5010–30–105 (reference only) International assembly part number 5012–30–105 (reference only) - Page 65 Litter/Lift/Trend. Assembly...
- Page 66 Litter/Lift/Trend. Assembly...
- Page 67 Litter/Lift/Trend. Assembly Item Part No. Part Name Qty. Item Part No. Part Name Qty. 2–34 Round Hd. Mach. Screw 5000–230–212 Lift Screw Tube Ass’y 3–68 Hex Hd. Cap Screw 5000–30–217 Trend Limit Switch Brkt. 3–82 Hex Hd. Cap Screw 5000–30–220 Lift Motor Pot Bracket 3–88 Hex Hd.
- Page 68 5000–30–225 Bed Lift Pot Assembly 5.8K ohms +/–500 ohms 2 Green 3 Red Resistance is measured between Pin 2 Green & Pin 3 Red. Adjust potentiometer to 5.8K ohms +/–500 ohms. Item Part No. Part Name Qty. 4–38 Soc. Hd. Cap Screw 14–8 Nylon Washer 21–149...
-
Page 69: Lift Actuator Assembly
Lift Actuator Assembly Assembly part number 5010–230–71 (Domestic) Assembly part number 5012–30–71 (International) Thrust Bearing Installation Detail Item Part No. Part Name Qty. 26–11 Spring Pin 26–267 Spring Pin 59–140 Capacitor 59–155 230V Capacitor 81–9 Bronze Bearing 81–276 Thrust Ball Bearing 5000–30–194 Motor Pivot Block 5000–30–255... -
Page 70: Trend Actuator Assembly
Trend Actuator Assembly Assembly part numbers 5000–30–278 (Domestic) 5002–30–278 (International) (reference only) Item Part No. Part Name Qty. 3–214 Hex Hd. Cap Screw 4–90 Soc. Hd. Cap Screw 11–63 Flat Washer 21–16 Set Screw 5000–230–68 Right Angle Motor Ass’y 5002–30–68 230V Right Angle Motor Ass’y 5000–30–170 Trend Motor Mount Bracket... -
Page 71: Foot Lift Assembly
Foot Lift Assembly Assembly part numbers 5000–30–273 (Domestic) 5002–30–273 (International) (reference only) - Page 72 Foot Lift Assembly Item Part No. Part Name Qty. 3–214 Hex Hd. Cap Screw 11–63 Washer 26–267 Spring Pin 28–160 Circular Retaining Ring 715–1–333 Release Valve Stop Sleeve 3000–300–442 Motor Mount Grommet 5000–30–36 Foot Lift Shaft 5000–230–68 Right Angle Motor Ass’y 5002–30–68 230V Right Angle Motor Ass’y 5000–30–208...
- Page 73 5000–30–317 Foot Pot Assembly 4.0K ohms +/–500 ohms 2 Green 3 Red Resistance is measured between Pin 2 Green & Pin 3 Red. Adjust potentiometer to 4.0K ohms +/–500 ohms. Item Part No. Part Name Qty. 4–38 Soc. Hd. Cap Screw 14–8 Nylon Washer 21–149...
- Page 74 Notes...
-
Page 75: Seat Assembly
Seat Assembly Assembly part number 5010–30–17 (reference only) Item Part No. Part Name Qty. 4–161 But. Hd. Cap Screw 7–58 Torx Hd. Screw 16–28 Nylock Nut 25–38 Rivet 29–3 Brass Eyelet (page 75) Hand Grip Ass’y, Right (page 76) Hand Grip Ass’y, Left 5010–30–19 Seat Weldment... - Page 76 Right Hand Grip Assembly Assembly part number 5010–30–60 (reference only) Item Part No. Part Name Qty. 3–32 Hex Hd. Cap Screw 3–57 Hex Hd. Cap Screw 3–73 Hex Hd. Cap Screw 4–5 Soc. Hd. Cap Screw 11–179 Nylon Washer 11–392 Nylon Washer 11–397 Serrated Belleville Washer...
- Page 77 Left Hand Grip Assembly Assembly part number 5010–30–61 (reference only) Item Part No. Part Name Qty. 3–32 Hex Hd. Cap Screw 3–57 Hex Hd. Cap Screw 3–73 Hex Hd. Cap Screw 4–5 Soc. Hd. Cap Screw 11–179 Nylon Washer 11–392 Nylon Washer 11–397 Serrated Belleville Washer...
- Page 78 Glide–Away Foot Assembly Assembly part number 5010–240 (reference only) Item Part No. Part Name Qty. 3–229 Hex Hd. Cap Screw (page 78 & 79) Foot Mattress Assembly (page 80) Left Upright Assembly (page 81) Right Upright Assembly (page 82) Left Glide–Away Assembly (page 83) Right Glide–Away Assembly...
-
Page 79: Foot Mattress Assembly
Foot Mattress Assembly Assembly part number 5000–40–70 (reference only) - Page 80 Foot Mattress Assembly Assembly part number 5000–40–70 (reference only) Item Part No. Part Name Qty. Item Part No. Part Name Qty. 25–151 Semi–Tubular Rivet 5000–40–95 Pilot Weldment, Left 4–161 But. Hd. Cap Screw 5000–40–96 Pilot Weldment, Right 4–176 But. Hd. Cap Screw 5000–40–135 Latch Weldment, Left 4–232 But.
- Page 81 Left Upright Assembly Assembly part number 5000–340–132 (reference only) Item Part No. Part Name Qty. 24–61 T–Knob 5010–40–71 Stainless Steel Knob 5000–40–134 Latch Pin Sleeve 5000–340–10 Left Upright Weldment 8800–201–100 Retaining Ring 8810–290–600 Compression Spring 8813–070–100 Foot Latch Pin...
- Page 82 Right Upright Assembly Assembly part number 5000–340–133 (reference only) Item Part No. Part Name Qty. 24–61 T–Knob 5010–40–71 Stainless Steel Knob 5000–40–134 Latch Pin Sleeve 5000–340–11 Right Upright Weldment 88–0020–11–00 Retaining Ring 8810–290–600 Compression Spring 8813–070–100 Foot Latch Pin...
- Page 83 Left Glide–Away Assembly Assembly part number 5010–240–21 (reference only) Item Part No. Part Name Qty. 4–178 But. Hd. Cap Screw 4–320 But. Hd. Cap Screw 11–411 Washer 28–166 External Retaining Ring 37–220 Hole Plug 81–289 Glide Bearing (page 84) Left Cast Link Assembly (page 86) Left Foot Pan Assembly 5010–240–25...
- Page 84 Right Glide–Away Assembly Assembly part number 5010–240–22 (reference only) Item Part No. Part Name Qty. 4–178 But. Hd. Cap Screw 4–320 But. Hd. Cap Screw 11–411 Washer 28–166 External Retaining Ring 37–220 Hole Plug 81–289 Glide Bearing (page 85) Right Cast Link Assembly (page 87) Right Foot Pan Assembly 5010–240–26...
- Page 85 5010–240–7 Left Machined Link Assembly Item Part No. Part Name Qty. Item Part No. Part Name Qty. 3–214 Hex Hd. Cap Screw 5010–240–4 Lt. Hd. End Link Half 4–28 Soc. Hd. Cap Screw 5010–40–9 Center Casting 1–124 Flat Hd. Cap Screw 5010–40–10 Glide–Away Gas Spring 4–316...
- Page 86 5010–240–8 Right Machined Link Assembly Item Part No. Part Name Qty. Item Part No. Part Name Qty. 3–214 Hex Hd. Cap Screw 5010–240–6 Rt. Hd. End Link Half 4–28 Soc. Hd. Cap Screw 5010–40–9 Center Casting 1–124 Flat Hd. Cap Screw 5010–40–10 Glide–Away Gas Spring 4–316...
- Page 87 Left Foot Pan Assembly Assembly part number 5010–40–23 (reference only) Item Part No. Part Name Qty. Item Part No. Part Name Qty. 4–42 Soc. Hd. Cap Screw 5000–90–44 “Pull” Label 4–173 But. Hd. Cap Screw 5010–40–27 Slide Weldment 4–178 But. Hd. Cap Screw 5010–40–33 Locking Plate 16–7...
- Page 88 Right Foot Pan Assembly Assembly part number 5010–40–24 (reference only) Item Part No. Part Name Qty. Item Part No. Part Name Qty. 4–42 Soc. Hd. Cap Screw 5000–90–44 “Pull” Label 4–173 But. Hd. Cap Screw 5010–40–27 Slide Weldment 4–178 But. Hd. Cap Screw 5010–40–33 Locking Plate 16–7...
-
Page 89: Glideaway Assembly, Left
5010–242 Optional V–Cut Foot Section Assembly Item Part No. Part Name Qty. 3–85 Hex Hd. Cap Screw 3–216 Hex Hd. Cap Screw 7–41 Phillips Truss Hd. Screw 721–31–65 Hole Plug (page 82) Glide–Away Assembly, Left (page 83) Glide–Away Assembly, Right (page 89 &... - Page 90 Foot Mattress Assembly – V–Cut Option Assembly part number 5010–42–7 (reference only) Item Part No. Part Name Qty. Item Part No. Part Name Qty. 4–161 But. Hd. Cap Screw 5000–40–96 Pilot Weldment, Right 4–176 But. Hd. Cap Screw 5000–40–135 Latch Weldment, Left 4–232 But.
- Page 91 Assembly part number 5010–42–7 (reference only)
- Page 92 Right Upright Assembly – V–Cut Option Assembly part number 5010–42–14 (reference only) Item Part No. Part Name Qty. 24–61 T–Knob 24–62 Plastic Ball 5000–40–134 Latch Pin Sleeve 5010–42–12 Upright Weldment, Right 8800–201–100 Retaining Ring 8810–290–600 Compression Spring 8813–070–100 Foot Latch Pin...
- Page 93 Left Upright Assembly – V–Cut Option Assembly part number 5010–42–15 (reference only) Item Part No. Part Name Qty. 24–61 T–Knob 24–62 Plastic Ball 5000–40–134 Latch Pin Sleeve 5010–42–13 Upright Weldment, Left 8800–201–100 Retaining Ring 8810–290–600 Compression Spring 8813–070–100 Foot Latch Pin...
- Page 94 Seat Assembly – V–Cut Option Assembly part number 5010–42–22 (reference only) Item Part No. Part Name Qty. 4–161 But. Hd. Cap Screw 16–28 Nylock Nut 25–38 Rivet 29–3 Brass Eyelet (page 75) Hand Grip Assembly, Right (page 76) Hand Grip Assembly, Left 5010–42–9 V–Cut Seat Weldment 7–58...
- Page 95 5010–45–20 Mattress Assembly, V–Cut Option Mattress Cover (Ref.) Fowler Foam (Ref.) Seat Foam (Ref.)
- Page 96 5010–42–26 V–Cut Option Wedge Assembly Item Part No. Part Name Qty. 25–38 Rivet 29–3 Brass Eyelet 5010–42–25 Filler Wedge Bottom Plate 5010–45–26 V–Cut Wedge Mattress Ass’y 5010–90–24 Wedge Caution Label...
- Page 97 5010–40–60 Left Locking Calf Rest Assembly Item Part No. Part Name Qty. Item Part No. Part Name Qty. 8–51 H. Soc. Hd. Sh. Bolt 8800–224–100 H. Soc. Flat Hd. Screw 1060–1–155 Ball Post 8800–250–900 Int. Tooth Lock Washer 1060–1–157 Leg Support Mtg. Plate 5010–40–71 Stainless Steel Pull Knob 5000–40–134...
- Page 98 5010–40–61 Right Locking Calf Rest Assembly Item Part No. Part Name Qty. Item Part No. Part Name Qty. 8–51 H. Soc. Hd. Sh. Bolt 8800–224–100 H. Soc. Flat Hd. Screw 1060–1–155 Ball Post 8800–250–900 Int. Tooth Lock Washer 1060–1–157 Leg Support Mtg. Plate 5010–40–71 Stainless Steel Pull Knob 5000–40–134...
- Page 99 5000–240–170 Optional Calf Support Assembly – Single 5000–240–160 Optional Calf Support Assembly – Two Item Part No. Part Name Qty. 24–44 T–Knob 5000–40–171 Calf Support Weldment 8800–200–800 Spiral Retaining Ring 8800–224–100 Flat Hd. Soc. Screw 8800–250–900 Internal Tooth Lock Washer 8805–906–900 Calf Rest 8805–907–400...
- Page 100 Assembly part number 5010–30–80 (reference only)
- Page 101 Electrical Assembly...
- Page 102 Electrical Assembly Item Part No. Part Name Qty. 2–41 Round Hd. Mach. Screw 3–221 Hex Washer Hd. Screw 3–226 Hex Washer Hd. Screw 7–58 Truss Hd. Torx 13–10 External Tooth Lock Washer 13–38 External Tooth Lock Washer 16–23 Nylock Nut 16–33 Kep Nut 59–135...
-
Page 103: Night Light Assembly
5010–30–75 Optional Night Light Assembly 5012–30–75 Optional 230V Night Light Assembly BOTTOM VIEW FOOT END Item Part No. Part Name Qty. 8815–002–200 Pan Hd. Screw 52–816 Grommet 59–160 Night Light 59–166 AC Socket 5010–80–18 Night Light Cable 5012–80–18 230V Night Light Cable 7000–1–327 PVC Tubing .33’... -
Page 104: No Head Wall Interface Assembly
No Head Wall Interface Assembly Assembly part number 5010–30–94 (reference only) Item Part No. Part Name Qty. 4–307 Hex Soc. But. Hd. Cap Screw 59–137 Shunt 3001–300–970 CPU, No Head Wall, No Scale 1 5000–30–367 No Head Wall Plate 5010–300–933 Eprom Assembly... -
Page 105: Pendant Port Assembly With No Nurse Call
5010–30–92 Pendant Port Assembly with No Nurse Call Item Part No. Part Name Qty. 4–307 Hex Soc. But. Hd. Cap Screw 59–137 Shunt 3001–303–964 Head Wall CPU, Non–Scale 3001–314–920 Pendant Port PCB Ass’y 5010–30–1 Cover Panel 5010–80–19 Pendant Port Option Cable 5010–300–933 Eprom Assembly... - Page 106 5010–30–93 Head Wall Interface w/Nurse Call – No Port Item Part No. Part Name Qty. 1–87 Flat Hd. Ctr. Sk. Mach. Screw 4–307 Hex Soc. But. Hd. Cap Screw 52–307 Speed Nut 59–710 Static Plug 3001–300–7 Jack Screw 3001–303–964 Head Wall CPU, Non–Scale 5010–30–1 Cover Panel 5010–80–8...
- Page 107 5010–30–91 Head Wall Interface w/Nurse Call & Comm. Item Part No. Part Name Qty. 1–87 Flat Hd. Ctr. Sk. Mach. Screw 4–307 Hex Soc. But. Hd. Cap Screw 52–307 Speed Nut 59–710 Static Plug 3001–300–7 Jack Screw 3001–303–964 Head Wall CPU, Non–Scale 3001–314–920 Pendant Port PCB Ass’y 5010–80–8...
- Page 108 5010–30–89 Head Wall Interface w/Smart TV and Comm. Item Part No. Part Name Qty. 1–87 Flat Hd. Ctr. Sk. Mach. Screw 4–307 Hex Soc. But. Hd. Cap Screw 52–307 Speed Nut 59–185 Miniature Support Post 59–710 Static Plug 3001–300–7 Jack Screw 3001–303–964 Head Wall CPU, Non–Scale 3001–314–920...
- Page 109 5010–30–88 Head Wall IF w/NC & Smart TV – No Port Item Part No. Part Name Qty. 1–87 Flat Hd. Ctr. Sk. Mach. Screw 4–307 Hex Soc. But. Hd. Cap Screw 52–307 Speed Nut 59–185 Miniature Support Post 59–710 Static Plug 3001–300–7 Jack Screw 3001–303–964...
- Page 110 Notes...
-
Page 111: Manifold Assembly
Optional Air Mattress Assembly Assembly part number 5010–30–95 (Domestic) 5012–30–95 (International) (reference only) Item Part No. Part Name Qty. Item Part No. Part Name Qty. 4–169 But. Hd. Cap Screw 5000–80–21 Compressor Cable 14–3 Nylon Washer (page 112) Manifold Assembly 16–3 Fiberlock Nut (page 113) - Page 112 Optional Air Mattress Assembly Assembly part number 5010–30–95 (Domestic) 5012–30–95 (International) (reference only)
- Page 113 5000–230–300 Optional Manifold Assembly, Domestic 5002–30–300 Optional Manifold Assembly, International Must be wired as shown Item Part No. Part Name Qty. 16–23 But. Hd. Cap Screw 48–159 Barbed Fitting 48–160 Nylon Elbow 48–166 Male Elbow 48–162 Miniature Barbed Tee 48–163 Brass Nipple 5002–30–239 Mounting Bracket...
- Page 114 5010–48 Optional Power Mattress Assembly Mattress Cover (Ref.) Fowler Foam (Ref.) Seat Foam (Ref.) Item Part No. Part Name Qty. (page 114) Perineal Pillow Assembly 5010–30–59 Plastic Cap 8803–002–400 Lumbar Bag NOTE Insert the perineal pillow into the bottom of the mattress. Use the guide pins (B) on the bottom plate to locate the assembly in the holes in the bottom of the mattress cover.
- Page 115 5010–48–2 Power Lumbar Mattress – V–Cut Option Mattress Cover (Ref.) Fowler Foam (Ref.) Seat Foam (Ref.) Item Part No. Part Name Qty. 8803–002–400 Lumbar Bag 5010–42–28 Perineal Pillow 113.1...
- Page 116 5010–46 Manual Lumbar Mattress Assembly Mattress Cover (Ref.) Seat Foam (Ref.) Fowler Foam (Ref.) Item Part No. Part Name Qty. 8803–002–400 Lumbar Bag 8803–085–600 1/4 x 90_ Connector 8805–907–900 Air Pump Bulb 8805–942–600 Bulb Holder Spring 113.2...
- Page 117 Notes 113.3...
- Page 118 5010–46–1 Manual Lumbar Mattress – V–Cut Option Mattress Cover (Ref.) Fowler Foam (Ref.) Seat Foam (Ref.) Item Part No. Part Name Qty. 8803–002–400 Lumbar Bag 8803–085–600 1/4 x 90_ Connector 8805–907–900 Air Pump Bulb 8805–942–600 Bulb Holder Spring 113.4...
-
Page 119: Optional Perineal Pillow Assembly
Optional Perineal Pillow Assembly Assembly part number 5010–30–45 (reference only) Item Part No. Part Name Qty. 4–189 But. Hd. Cap Screw 7–41 Truss Hd. Mach Screw 5010–30–43 Air Bladder 5010–30–44 Dist. Plate Weldment 5010–30–46 1” Limit Strap 8815–029–200 Tie Wrap H (not shown) 58–56 Edge Cover w/Adhesive... - Page 120 Assembly part numbers 5010–20–1 (Left) 5010–20–2 (Right) (reference only)
-
Page 121: Siderail Assembly (With In-Rail Controls)
Siderail Assembly (with In–Rail Controls) - Page 122 Siderail Assembly (with In–Rail Controls)
- Page 123 Siderail Assembly (with In–Rail Controls)
- Page 124 Siderail Assembly (with In–Rail Controls) Left Head End Siderail Wire Routing...
- Page 125 Siderail Assembly (with In–Rail Controls) Right Head End Siderail Wire Routing...
- Page 126 Siderail Assembly (with In–Rail Controls) 5010–20–1 Left Head End Siderail 5010–20–2 Right Head End Siderail Item Part No. Part Name Qty. Item Part No. Part Name Qty. 3–226 Hex Washer Hd. Screw 3–226 Hex Washer Hd. Screw 3–330 Hex Washer Hd. Screw 3–330 Hex Washer Hd.
- Page 127 Siderail Assembly (with In–Rail Controls) Inner Option Label 5000–20–101 Standard Siderail Item Part No. Part Name Qty. (page 135) Outer Panel Ass’y, No Nurse Call 5000–90–20 Standard Label, Inner, Right 5000–90–30 Standard Label, Inner, Left 3001–400–953 Switch Cap Outer Option Label 3001–400–522 Filler Cap 3001–400–517...
- Page 128 Siderail Assembly (with In–Rail Controls) Inner Option Label Inner Option Label 5000–20–112 Standard Siderail with Nurse Call & Lumbar Item Part No. Part Name Qty. (page 134) Outer Panel Ass’y 23–112 Tapping Screw 3000–300–114 Cable Tie 5000–90–21 Nurse Call Label, Inner, Right 5000–90–31 Nurse Call Label, Inner, Left 5000–90–68...
- Page 129 Siderail Assembly (with In–Rail Controls) Inner Option Label 5000–220–117 Standard Siderail with In/Out Item Part No. Part Name Qty. (page 135) Outer Panel Ass’y, No Nurse Call 5000–90–20 Standard Label, Inner, Right 5000–90–30 Standard Label, Inner, Left 3001–400–953 Switch Cap 3001–400–522 Filler Cap 3001–400–517...
- Page 130 Siderail Assembly (with In–Rail Controls) Inner Option Label 5000–220–124 Std. Siderail with In/Out, Nurse Call & Lumbar Item Part No. Part Name Qty. (page 134) Outer Panel Ass’y 23–112 Tapping Screw 3000–300–114 Cable Tie 5000–90–21 Nurse Call Label, Inner, Right 5000–90–31 Nurse Call Label, Inner, Left 5000–90–68...
- Page 131 Siderail Assembly (with In–Rail Controls) Inner Option Labels 5000–20–133 Std. Rail with NC, Smart TV, Lights & Lumbar Item Part No. Part Name Qty. (page 134) Outer Panel Ass’y 23–112 Tapping Screw 3000–300–114 Cable Tie 5000–90–93 N/C, TV, Lights Label, Inner, Right 5000–90–103 N/C, TV, Lights Label, Inner, Left 5000–90–79...
- Page 132 Siderail Assembly (with In–Rail Controls) Inner Option Labels 5000–220–136 Std. Rail with In/Out, Nurse Call Smart TV & Lights Item Part No. Part Name Qty. (page 134) Outer Panel Ass’y 5000–90–93 N/C, TV, Lights Label, Inner, Right 5000–90–103 N/C, TV, Lights Label, Inner, Left 5000–90–81 TV Label, Right 5000–90–82...
- Page 133 5010–20–4 Head End Siderail Timing Link Ass’y, Right Item Part No. Part Name Qty. 11–377 Nylon Washer 11–403 Shim Washer 3001–400–227 Arm Wldmt., Right, Head, Foot 3001–400–228 Arm Wldmt., Right, Head, Head 3001–400–501 Siderail Linkage Rivet 5010–20–3 Timing Link, Head End 127.1...
- Page 134 5010–20–5 Head End Siderail Timing Link Ass’y, Left Item Part No. Part Name Qty. 11–377 Nylon Washer 11–403 Shim Washer 3001–400–127 Arm Wldmt., Left, Head, Foot 3001–400–128 Arm Wldmt., Left, Head, Head 3001–400–501 Siderail Linkage Rivet 5010–20–3 Head End Timing Link 127.2...
- Page 135 5000–220–8 Optional Siderail Lumbar Module, Left Item Part No. Part Name Qty. 3001–400–524 Lumbar Module 3001–400–953 Switch Cap 5000–400–930 Lumbar Keypad PCB, Left 23–112 Tapping Screw 3001–400–522 Filler Cap...
- Page 136 5000–220–10 Optional Siderail Lumbar Module, Right Item Part No. Part Name Qty. 3001–400–524 Lumbar Module 3001–400–953 Switch Cap 5000–400–920 Lumbar Keypad PCB, Right 23–112 Tapping Screw 3001–400–522 Filler Cap...
- Page 137 5000–20–28 Optional TV Module, No Lumbar, Left Item Part No. Part Name Qty. 3001–400–524 Lumbar Module 3001–400–953 Switch Cap 5000–400–930 Lumbar Keypad PCB, Lt. 23–112 Tapping Screw 3001–400–522 Filler Cap...
- Page 138 5000–20–29 Optional TV Module, No Lumbar, Right Item Part No. Part Name Qty. 3001–400–524 Lumbar Module 3001–400–953 Switch Cap 5000–400–920 Lumbar Keypad PCB, Rt. 23–112 Tapping Screw 3001–400–522 Filler Cap...
- Page 139 5000–20–26 Optional TV Module with Lumbar, Left Item Part No. Part Name Qty. 3001–400–524 Lumbar Module 3001–400–953 Switch Cap 5000–400–930 Lumbar Keypad PCB, Left 23–112 Tapping Screw...
- Page 140 5000–20–27 Optional TV Module with Lumbar, Right Item Part No. Part Name Qty. 3001–400–524 Lumbar Module 3001–400–953 Switch Cap 5000–400–920 Lumbar Keypad PCB, Right 23–112 Tapping Screw...
- Page 141 5000–20–4 Siderail Outer Panel Assembly w/Nurse Call Item Part No. Part Name Qty. 5000–20–3 Outer Panel 23–112 Tapping Screw 3001–400–599 Handle Insert...
- Page 142 5000–20–14 Siderail Outer Panel Ass’y – No Nurse Call Item Part No. Part Name Qty. 5000–20–15 Outer Panel, No N.C. 23–112 Tapping Screw 3001–400–599 Handle Insert...
-
Page 143: Siderail Release Lever Assembly
Siderail Release Lever Assembly, Right Assembly part number 5010–20–6 (reference only) Item Part No. Part Name Qty. 4–278 But. Hd. Cap Screw 16–2 Nylock Nut 2035–400–553 Release Lever 3001–400–514 Release Lever Pad... - Page 144 Siderail Release Lever Assembly, Left Assembly part number 5010–20–7 (reference only) Item Part No. Part Name Qty. 4–278 But. Hd. Cap Screw 16–2 Nylock Nut 2035–400–553 Release Lever 3001–400–514 Release Lever Pad...
-
Page 145: Pendant Assembly
Optional Pendant Assembly 5000–81–20 Communication Pendant 5000–81–23 – No Fowler In/Out with Nurse Call Pendant 5000–81–21 Motion Pendant 5000–81–24 Motion Pendant No Fowler In/Out With Fowler In/Out and Nurse Call 5000–81–22 Motion Pendant With Fowler In/Out... -
Page 146: Standard Head Board Assembly
5000–30–354 Standard Head Board Assembly Item Part No. Part Name Qty. 3000–600–10 Clamshell Assembly 3000–500–7 ”C” Bumper Laminate Color Part Number Pech Contempe Blush 5000–30–376 Chestnut 5000–30–377 Victorian Cherry 5000–30–378 Oak Suede Classic 5000–30–405... -
Page 147: Cpr Board Assembly
3000–526–10 Optional CPR Board Assembly Item Part No. Part Name Qty. 3000–526–1 CPR Board 3000–526–3 CPR Board Label 3000–526–2 CPR Head Board Clip 23–88 Pan Hd. Tapping Screw... - Page 148 Optional Wood Head Board Mounting Bracket Assembly Assembly part number 5000–30–264 (mounting hardware only) Item Part No. Part Name Qty. 11–63 Washer 4–232 Soc. But. Hd. Cap Screw 5000–30–268 Head Board Frame Weldment 8808–340–100 Conn. Joint Cap 5000–30–337 Cut Plastic Insert Stain Color Part Number Classic...
- Page 149 5000–101–12 I.V. Pole Assembly Item Part No. Part Name Qty. 21–140 Set Screw 1015–24–35 Retaining Pin 5000–90–46 I.V. Pole Caution Label 3000–311–6 I.V. Cradle Label 3000–311–11 I.V. Receptacle Assembly 3000–311–15 Receptacle Label 3000–311–16 I.V. Rest Assembly (page 144) I.V. Pole Assembly...
- Page 150 5000–101–32 I.V. Pole Assembly – Wood Head Board Item Part Number Part Name Qty. 21–140 Set Screw 1015–24–35 Retaining Pin 3000–312–6 Foot End Cradle Label 3000–312–7 Foot End Receptacle Label 3000–312–11 Foot End Receptacle Ass’y 3000–312–35 Foot End Cradle Ass’y (page 144) I.V.
- Page 151 5000–30–356 I.V. Pole Assembly Item Part No. Part Name Qty. 4–8 Soc. Hd. Cap Screw 14–20 Nylon Flat Washer 52–17 Nylon Spacer 1010–59–16 I.V. Hook 1010–59–24 Base Tube Assembly 1010–59–30 Extension Tube Assembly 1210–110–46 Back–Up Ring 1210–110–47 Lock Ring 1210–110–49 Actuator 3000–311–19 End Spacer...
-
Page 152: Labor Bar Assembly
5000–101–27 Optional Labor Bar Assembly Item Part No. Part Name Qty. 5000–101–2 Labor Bar 5000–101–31 8809–520–500 Labor Bar Label... -
Page 153: Standard Plastic Basin Assembly
Standard Plastic Basin Assembly Assembly part number 5000–30–297 (reference only) Item Part No. Part Name Qty. 4–232 Button Hd. Cap Screw 5000–30–230 Basin 8812–290–000 Basin Button... - Page 154 5000–101–28 Optional Stainless Steel Basin Assembly Item Part No. Part Name Qty. 4–74 Button Hd. Cap Screw 7–52 Truss Hd. Torx 5000–201–29 Stainless Steel Basin 5000–101–30 Pan Spacer 8812–290–000 Basin Button...
-
Page 155: Arm Board Assembly
5000–101–3 Optional Arm Board Assembly Item Part No. Part Name Qty. 5000–101–4 Arm Board 8800–440–200 1” Hook Tape 12” 5000–101–6 Arm Board Mattress 8805–897–900 Arm Board Pad... - Page 156 5000–101–44 Optional Multi–Purpose Shelf Assembly Item Part No. Part Name Qty. 8805–946–000 Weight Capacity Label 8805–997–400 Shelf Label 5000–101–001 Shelf 4–46 But. Hd. Cap Screw 16–28 Nylock Nut 5000–40–179 Shelf Mount...
-
Page 157: Label Assembly
Label Assembly... - Page 158 Label Assembly Item Part No. Part Name Qty. 36–115 Ground Label 946–1–60 Stryker Logo Label 988–2–708 Electric Shock Caution Label 1550–90–1 Grounding Caution Label 1550–90–20 O2 Caution Label 2011–1–104 Anesthetics Danger Label 2020–88–820 Fire Hazard Label 3001–300–603 CPR Release Label 3001–310–601...
-
Page 159: Limited Warranty
If requested by Stryker, products or parts for which a warranty claim is made shall be returned prepaid to Stryker’s factory. -
Page 160: Return Authorization
Claim will be limited in amount to the actual replacement cost. In the event that this information is not received by Stryker within the fifteen (15) day period following the delivery of the merchandise, or the damage was not noted on the delivery receipt at the time of receipt, the customer will be responsible for payment of the original invoice in full. - Page 161 European Representative Stryker France Phone: 33148632290 BP 50040–95946 Roissy Ch. de Gaulle Fax: 33148632175 Cedex–France 6300 Sprinkle Road, Kalamazoo, MI 49001–9799 (800) 327–0770 DH 11/00 5010–90–30 REV F...
Need help?
Do you have a question about the FIRSTCARE 5012 and is the answer not in the manual?
Questions and answers