
Subscribe to Our Youtube Channel
Related Manuals for Plextor PX-W4220Te


Summary of Contents for Plextor PX-W4220Te
- Page 1 Model PX-W4220Ti Internal and PX-W4220Te External CD ReWritable Drive Operation Manual February 1999...
- Page 2 The laser beam emitted from the optical pickup is invisible. Accordingly: • Do not open the optical pickup housing. • Obtain service only from Plextor-authorized personnel. LASER INFORMATION These products have been designed and manufactured according to IEC 825-1 on the Safety of Laser products.
- Page 3 CD ReWritable Drive PX-W4220Ti Internal PX-W4220Te External...
- Page 4 Plextor reserves the right to make improvements in the products described in this manual at any time without prior notice. Plextor makes no representation or warranties with respect to the contents hereof and specifically disclaims any implied warranties of merchantability or fitness for any particular purpose.
-
Page 5: Table Of Contents
PX-W4220Ti Internal Drives ......3 PX-W4220Te External Drives ......4 A Gentle Reminder . - Page 6 Installation Guide ......78 About Plextor and Plextor Products ....80 Warranty Information .
-
Page 7: Introduction
Thank you for purchasing the Plextor PlexWriter RW 4/2/20, a high performance and reliable CD ReWritable drive. We appreciate the confidence you have shown in us. Our goal is to put you — and keep you — on the leading edge of CD technology. -
Page 8: Box Contents
YOUR OBJECTIVE: YOUR METHOD: What you find in your Plextor box depends on two factors: 1) what configuration you purchased; and 2) what the company that sold you the box put in — or took out — while it was in their possession. -
Page 9: Px-W4220Ti Internal Drives
CD-RW drive 4 mounting screws Approved CD-RW media (1 piece) Approved CD-R media (1 piece) Plextor CD with bundled software, Plextor Manager, and CD Res-Q SCSI interface board and manual* Audio cable* SCSI cable* Plextor operation manual* Warranty registration card... -
Page 10: Px-W4220Te External Drives
CHAPTER 2 — Box Contents PX-W4220Te External Drives CD-RW drive Approved CD-RW media (1 piece) Approved CD-R media (1 piece) Plextor CD with bundled software, Plextor Manager, and CD Res-Q SCSI interface board and manual* Audio cable* Power cable SCSI cable* Plextor operation manual* Warranty registration card * Please see Chapter 13, page 60, for locations to purchase additional or replacement accessories. -
Page 11: A Gentle Reminder
Therefore, please ship your drive in the safest manner possible. We believe your drive will be most secure if it is shipped in a Plextor box. We hope you will never have to ship your drive back to us. If you do, however, we hope you will send it packaged in a Plextor box. -
Page 12: What Else Do I Need
SCSI controller. Software Only packages are for those who need a Plextor CD-RW drive but prefer to use their own sources for all the accessories. If you purchased a software kit, you will need to select cables and a SCSI controller. - Page 13 In order to create CD-R and CD-RW discs you will need to have premastering software installed on your computer system. You can check our web site (www.plextor.com) for an updated list. We provide premastering software kits in retail packaging for your convenience.
-
Page 14: Precautions
Please read this manual carefully and keep it handy for easy reference. Use this manual for installation, operation, and troubleshooting. See your dealer or call Plextor’s Technical Support Department should your drive require repair or service. Do not put your computer monitor (or any other device weighing more than 30 lbs.) on top of the PlexWriter RW 4/2/20 external drive. -
Page 15: Drive Features
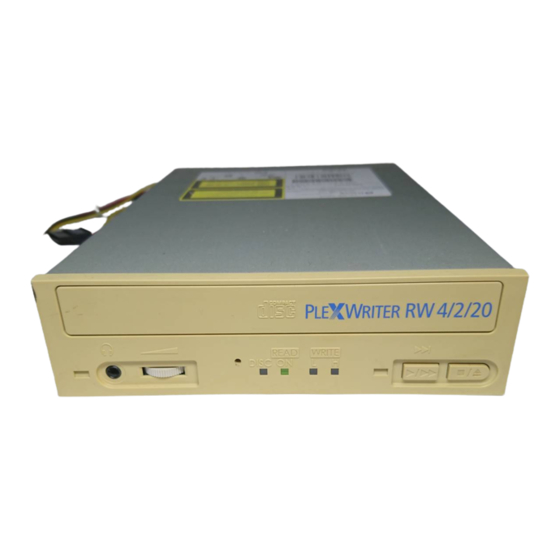
YOUR TASK: YOUR OBJECTIVE: YOUR METHOD: Front Panel — Internal and External Drive Door Closed Tray Front Door Headphone Jack Volume Control DISC Indicator Tray Front Door: Attached to tray drawer. Headphone Jack: Stereo mini-jack for headphones and powered speakers. Volume Control: Controls volume of headphone jack. -
Page 16: Px-W4220Ti Internal Drive - Rear Panel
CHAPTER 5 — Drive Features Write H Indicator: Orange when recording CD-R discs at 4X speeds. Also on (simultaneously with Write L Indicator) when recording CD-RW discs at 2X speed. CD-Audio Play Button: With audio CD in drive, push once to put drive in CD-Audio play mode. -
Page 17: Px-W4220Te External Drive - Rear Panel
Rear Panel — PX-W4220Te External Drive SCSI Interface Connector DIP Switches: Use to select parity, termination, test, block size, or eject lock. Leave these jumpers at their factory settings unless one or more of the following situations pertain to you: Termination: Review Chapter 7 to determine if you need to turn your terminator switch off. -
Page 18: Drive Switch/Jumper/Dial Settings
You should leave the jumpers found on the rear panel of the PX-W4220Ti and the switches and rotary dial found on the rear panel of the PX-W4220Te at their factory settings, unless: 1) you plan to use another SCSI peripheral (e.g., CD-ROM, hard disk, scanner) with your computer system in addition to... -
Page 19: Px-W4220Ti Internal Drive
PX-W4220Ti Internal Drive Factory Setting of Jumper Block The functions shown are ON if the jumpers are installed and OFF if the jumpers are removed. The jumpers are set by the factory as follows: Installing and Removing Jumpers Ensure power to the drive is OFF before installing or removing jumpers. To remove a jumper, pull it off with your fingers or a pair of needle-nose pliers. -
Page 20: Scsi Id Number
SCSI cabling as short as possible. Longer lengths may affect performance of SCSI devices. If you bought a Plextor kit with a SCSI interface board, both the drive and the board are SCAM compliant. This is a feature of Plug-and-Play for SCSI devices. - Page 21 Changing the SCSI ID: PX-W4220Ti The SCSI ID number of the PX-W4220Ti is determined by the placement of jumpers on Pins 1, 2, and 3. To find the location of Pin 1, Pin 2, and Pin 3, refer to the jumper diagram on page 13. To change the SCSI ID number, follow the chart below.
-
Page 22: Px-W4220Te External Drive
CAUTION: Turn the drive’s power OFF before changing the setting of the dial or DIP switches. The SCSI ID number of the PX-W4220Te is determined by the position of the pointer on the SCSI ID rotary dial. The drive will arrive with its SCSI ID set to 4. -
Page 23: Other Switch/Jumper Settings
Other Switch/Jumper Settings The remaining switches (external drives) and jumpers (internal drives) are: Parity Leave this ON. The parity check provided by the ON setting enhances the reliability of the SCSI bus. Set to OFF only if your computer system or SCSI controller specifically requests that parity be disabled. -
Page 24: Termination
This should not be confused with termination itself. Termination power can and should be provided by at least one device attached to your SCSI host adapter. Your Plextor drive automatically supplies termination power. Any additional devices supplying termination power will not cause any problems. -
Page 25: Internal Termination
REMEMBER: Only the last SCSI peripheral in a daisy chain should have termination enabled. If you have any SCSI devices chained after your PlexWriter RW, you must disable or turn OFF the PlexWriter’s termination using the following instructions: The PlexWriter RW internal drive is shipped from the factory with its termination enabled (ON). -
Page 26: Hardware Installation
Plextor strongly recommends the use of a high performance bus-mastering SCSI interface board, preferably a PCI card. You may have purchased a Plextor kit with such a board included. If you purchased your PlexWriter RW 4/2/20 without a SCSI interface board, we suggest you do not connect it to a non-bus-mastering interface board (PIO). -
Page 27: Board Installation
YOUR TASK: YOUR OBJECTIVE: YOUR METHOD: Let us point out that this is a CD-RW drive installation and operation manual — it is not a SCSI interface board operation manual. Unless you purchased a SCSI interface board (and its accompanying manual) bundled in the same box with a PlexWriter RW 4/2/20, we have no way of knowing which type of board you elect to use. - Page 28 CHAPTER 8 — Hardware Installation To remove your computer’s cover, follow the directions provided by your computer’s manufacturer. Typically, this involves loosening or removing several screws on the back panel of your computer and sliding off your computer’s cover. Carefully remove the SCSI interface board from its packaging. Select a vacant slot in your computer where you will install the board (refer to the manual packaged with your interface board for instructions as to which slot in your system to use).
- Page 29 CHAPTER 8 — Hardware Installation Once you have successfully inserted the board, fasten it in place using the cover plate screw that you removed earlier. PX-RW 4/2/20 OPERATION MANUAL...
-
Page 30: Drive Positioning
CHAPTER 8 — Hardware Installation YOUR TASK: YOUR OBJECTIVE: YOUR METHOD: The PlexWriter RW 4/2/20 should only be installed horizontally. We do not recommend installing this drive vertically. Horizontal PX-RW 4/2/20 OPERATION MANUAL Drive Positioning Determine where you want to install your CD-RW drive. -
Page 31: Mounting An Internal Drive
The drive can be mounted directly into your computer. CAUTION: Do not mount your drive in your computer using screws other than those supplied by Plextor. You may damage the drive if you insert screws that are too long. - Page 32 CHAPTER 8 — Hardware Installation If you must use mounting rails, install them as shown below: NOTE: Plextor does not provide rails. If rails are necessary, it is up to the computer/chassis manufacturer to provide them. There are four holes provided on each side of the drive. To mount an internal drive in most computers, the rails should be fastened to the lower pair of holes.
-
Page 33: Cable Connections
Cable Connections You must make a minimum of two cable connections to your CD-RW drive. A third cable connection will need to be made if you are using a sound board in your computer and plan to connect the PlexWriter’s audio output to the audio connector on the sound board. - Page 34 CHAPTER 8 — Hardware Installation The easiest way to install your SCSI cable is to plug it into the SCSI connector on the rear panel of the drive before you insert the drive into your computer. Then you can thread the cable through the front of the open bay you plan to use and back toward the SCSI interface board.
-
Page 35: External Drive Installation
YOUR OBJECTIVE: YOUR METHOD: If you are installing a single PX-W4220Te and you have no other SCSI peripherals attached to your system, you should leave the switches, dial, and terminator found on the rear panel of your drive at their factory settings. If you do have additional SCSI peripherals (e.g., CD-ROM, scanner, printer) attached... - Page 36 CHAPTER 8 — Hardware Installation PC Connection SCSI Interface Board SCSI Cable Personal Computer PX-W4220Te Rear Panel AC Power Supply PX-RW 4/2/20 OPERATION MANUAL...
- Page 37 If you are installing more than one PX-W4220Te external drive (or one PX-W4220Te and other external SCSI peripherals), connect them as shown below: NOTE: Performance of SCSI devices may suffer if total cable length in daisy chain plus cabling in external case exceeds 1.5 meters. Assume cabling in external case equals about 20cm when adding up total cable length.
-
Page 38: Regarding Sound Cards And Audio Cables
Even if your sound board has a SCSI connector, Plextor strongly suggests not using it to control your PlexWriter RW 4/2/20. -
Page 39: Device Driver And Software Installation
For the purpose of setup and installation, the primary source of the device driver you require to support your PlexWriter RW 4/2/20 CD-ROM function should be your operating system or Plextor. Your PlexWriter RW 4/2/20 acts as a “CD-ROM drive” for the purpose of setup and installation. This allows it to be easily recognized and supported by the generic CD-ROM device driver files in Windows 95, Windows 98, or Windows NT. - Page 40 Before installing drivers, check that all the cable connections between your CD-RW drive and PC are correct and that all jumpers, switches, dials, and termination are set properly. If you are using a PX-W4220Te external drive, turn the power switch to OFF. Once the drive installation is complete, remember to turn the drive’s power ON before turning your computer on.
-
Page 41: Applications Software
— or even from the web. In software only or SCSI and software kits, Plextor also provides a HDD disaster recovery program in these kits; it is called CD Res-Q™. For those who own a Plextor 12PleX or faster CD-ROM, the DiscDupe™... - Page 42 Plextor DiscDupe: A handy program for duplicating CD-ROM disks. This utility creates image copies from a source CD-ROM disc to a target disc. For those who own a Plextor 12PleX or faster CD-ROM, DiscDupe™ allows you to copy CDs directly from the CD-ROM to the CD-RW drive.
-
Page 43: Using Cd-Rom, Cd-R, And Cd-Rw Discs And Trays
Using CD-ROM, CD-R, and CD-RW Discs and Trays YOUR TASK: YOUR OBJECTIVE: YOUR METHOD: Tray Loading and Operating 1) While the drive is powered up, push the Eject button. The tray drawer will slide out in 2–3 seconds. 2) If this is the first time using the drive, remove the plastic protective strip. -
Page 44: Handling Cd-R And Cd-Rw Media
CHAPTER 10 — Using CD-ROM, CD-R, and CD-RW Discs and Trays Handling CD-R and CD-RW Media Care should be taken when handling CD-R or CD-RW media. Dust, scratches, and fingerprints on the data side of the disc can cause write errors during recording. -
Page 45: How To Play Audio Cds On Your Drive
NOTE: The volume control on the front panel of your drive adjusts only the sound level of the headphone jack. It has no impact on the volume level of the rear panel audio outputs. Plextor Manager software can — CHAPTER 11 —... - Page 46 CHAPTER 11 — How to Play Audio CDs on Your Drive control volume level of the signal from the rear panel audio outputs. Please refer to the Plextor Manager manual for information regarding this function. PX-W4220Ti Stereo Mini-Plug (To headphone jack)
-
Page 47: Troubleshooting
Gain a better understanding of how your drive operates. Attempt to prevent problems before they occur. Quickly fix many simple problems on your own, rather than wait for assistance from a Plextor representative. Read this entire section. Many of the problems discussed happen only rarely. -
Page 48: Upgrading Firmware
CHAPTER 12 — Troubleshooting The PlexWriter RW 4/2/20 has the ability to upload new firmware to the drive. Typically, Plextor creates new firmware revisions to meet the peculiar needs of large computer manufacturers. It is rare that these will impact the performance or operation of your drive. -
Page 49: 12.1 Pc Compatibles: Initial Installation
If after further sleuthing you cannot solve the issue, please contact Plextor’s Technical Support Department (see Chapter 13). 12.1 PC Compatibles: Initial Installation Symptoms • No sound when running a program Possible Causes and Solutions Application Does Not Use CD-Audio... - Page 50 CHAPTER 12 — Troubleshooting cannot hear sound when you play a CD-ROM disc, you may have configured your sound board incorrectly. Check the troubleshooting section of your sound board manual for further advice. If you have a sound board, but you cannot hear an audio CD when it is played, check the following: Improper/Missing Audio Cable If you use a sound board, you must connect the sound board to your CD-RW...
- Page 51 Possible Causes and Solutions Device Drivers Need to Be Updated If you purchased a SCSI card in a Plextor kit, contact Plextor Technical Support for device driver information. If you purchased your SCSI card separately, please contact the manufacturer of that card.
- Page 52 CHAPTER 12 — Troubleshooting If the SCSI device driver cannot be loaded properly, either a software or hardware conflict exists. Software conflicts are generally caused by memory managers; hardware conflicts by two peripherals vying for the same address space. Please read the next two sections on Software and Hardware conflicts. Software Conflict with Other Device Drivers The SCSI interface board normally designates the device driver as the first device driver loaded by the computer.
- Page 53 SCSI Interface Board Not Properly Seated If the SCSI interface board is not fully seated into the computer’s expansion slot, the device driver software will not recognize it. Inspect the interface board where it seats into the connector on your computer’s motherboard. There should not be more than a small gap between the interface board and the connector.
- Page 54 CONFIG.SYS file would look something like this: DEVICE=C:\SCSI\ASPI8DOS.SYS (ASPI Manager for AHA2940 controller) DEVICE=C:\SCSI\ASPICD.SYS /D:DEVICE_NAME (ASPI Manager CD-ROM driver) When using the Plextor driver (PLEXTOR.SYS) instead of ASPICD.SYS: DEVICE=C:\PROGRA~1\PLEXTOR\PLEXTOR.SYS /D:DEVICE_NAME (ASPI Manager CD-ROM driver) Symptoms • No device found •...
- Page 55 Audio CD Disc in the Drive Plextor CD-RW drives are capable of playing high-quality audio when used with appropriate audio playback software, or when the drive is set to Audio CD play mode (see Chapter 11). Since audio compact discs do not have computer data, typing computer commands while a CD-Audio disc is in your drive will result in an error message.
-
Page 56: 12.2 Pc Compatibles: Existing Installations
CHAPTER 12 — Troubleshooting 12.2 PC Compatibles: Existing Installations Symptoms • Invalid drive specification • No device found • Drive not responding Possible Causes and Solutions Drive Is Not On If you have a PlexWriter external drive, check that its front-panel power switch is ON. - Page 57 Improper SCSI Bus Termination Ensure that only the last peripheral on the SCSI bus is terminated (see Chapter 7). Some peripherals have a setting marked “Termination Power” instead of “Terminator.” Ensure that termination power switches are set correctly. Defective CD-ROM/CD-R/CD-RW Disc Fingerprints, contaminants, or deep scratches on the disc’s surface may prevent the drive from reading or writing data.
- Page 58 Possible Causes and Solutions Audio CD Disc in the Drive Plextor CD-ROM drives are capable of playing high-quality audio when used with appropriate audio playback software or when the drive is set to Audio CD play mode (see Chapter 11). Since audio compact discs do not have computer data, typing standard data commands when an a CD-Audio disc is in the drive will result in an error message.
- Page 59 Symptom • CDR103—Not High Sierra Format Possible Causes and Solutions Incorrect Jumper Setting You might have the block jumper set to ON. For an internal drive, see page 13. For an external drive, see page 16. Hardware Conflict If the SCSI interface board uses DMA channels, try changing the selected DMA channel.
- Page 60 Chapter 10. If there is no foreign substance on the disc, you may wish to contact the disc manufacturer for a replacement. In DOS or Windows (3.x, 95, 98, NT), use Plextor Manager to lower the drive speed. Symptom •...
-
Page 61: 12.3 Apple Macintosh
CHAPTER 12 — Troubleshooting the tray. If not, this will cause the drive to eject the CD. An incorrectly written CD-RW disc, or a damaged, scratched, or otherwise unreadable CD will cause this same symptom. Inserting a known good disc will correct this problem. 12.3 Apple Macintosh Symptoms •... - Page 62 CHAPTER 12 — Troubleshooting Symptom • Low performance of CD-ROM application software Possible Cause and Solution System Set for Virtual Memory If your Macintosh is using System 7 and is in Virtual Mode, it may exhibit slow performance during real-time graphics and animation. This is because your hard disk drive and CD-RW drive must use your computer’s SCSI bus almost simultaneously.
-
Page 63: Contacting Plextor's Technical Support Department
Questions (FAQ) section of our web site to assist you in troubleshooting the problem on your own. NOTE: We encourage you to go the Plextor web site (www.plextor.com) before attempting to contact Technical Support. The answers to the most common questions callers ask can be found quickly in the FAQ area. A link to the FAQ can be found on our home page. -
Page 64: How To Contact Us
There are three ways for you to contact Plextor’s Technical Support Department: 1) Send us email at support@plextor.com or visit our web site for answers to Frequently Asked Questions. 2) Send a fax to the attention of the Technical Support Department at 408-986-1010. -
Page 65: Returns
You must receive an RMA (Returned Materials Authorization) number from our Technical Support Department before any Plextor CD-RW drive can be returned for repair or replacement. Any drive sent to Plextor without an RMA number will not be accepted. Drives must be sent postage prepaid. We recommend that you insure your shipment, as Plextor cannot be held responsible for any damage that may occur during shipment. -
Page 66: Helpful Contacts
CHAPTER 13 — Contacting Plextor’s Technical Support Department COMPANY Product Adaptec SCSI interface boards & CD-R software Advansys SCSI interface boards Devices, cables & accessories Bason Comp. SCSI interface boards CeQuadrat CD-R software Creative Labs Soundboards Creative Digital Research 408-255-0999... -
Page 67: Specifications
PX-W4220Ti/e Internal/External Disc Useable Formats: CD-DA; CD-ROM (Mode 1); CD-ROM (Mixed Mode); Read and Write CD-ROM & CD-DA; CD-ROM XA (Mode 2, Form 1 and Form 2); Mode 2 Mixed Form; CD-I; Photo CD; CD-EXTRA, Video CD Useable Formats: CD-DA; CD-ROM (Mode 1); CD-ROM XA (Mode 2, Form 1 and 2); Read Only CD-ROM (Mixed Mode);... -
Page 68: Environmental Conditions
CHAPTER 14 — Specifications Error Rate Mode 1: Block/10 Front Panel Eject Auto Eject; Manual Emergency Eject; Software Eject Lights DISC IN; ON/READ; WRITE L; WRITE H Disc Loading Auto Headphone Jack Stereo Minijack, 0.8V at 32 ohms Volume Control Wheel Knob CD-Audio Controls Play/Track Advance;... -
Page 69: Quick Install
You will need to install third party software to use the PlexWriter as a recorder. If you purchased your SCSI controller in a Plextor kit, you can use either the Windows 95/98 CD or the Plextor Manager disc to provide the necessary file, when applicable. - Page 70 Plextor drive is fully SCAM capable. Benevolent folks that we are, if you bought a Plextor “kit” you also have a SCAM capable SCSI controller in front of you — wouldn’t make much sense to sell you a true Plug and Play drive and some old technology controller board, would it? You can also buy SCAM capable controller kits off the shelf at most computer stores now.
-
Page 71: Configuration Identification
Plug and Play BIOS. Go to the section titled Non-Plug and Play Installation (page 69). 3) You did not buy a Plextor kit and have an older SCSI board that is not SCAM capable. Go to the section titled Non-SCAM Installation (page 72). -
Page 72: Install Hardware
If you do put in your Microsoft disk or CD, Windows 95/98 may automatically load the non-SCAM capable file for the SCSI controller we provided. Instead, if you purchased a Plextor kit with SCSI controller, insert the Plextor Manager disk. This disk has the SCAM capable support file for your SCSI controller to complete your Plug and Play CD-RW environment. - Page 73 SCSI ID number. If so, you have just seen visual proof of Plextor’s SCAM capabilities. Get out your favorite or most useful CD and enjoy or install premastering software and write your own.
- Page 74 Windows 95/98 Add New Hardware Wizard to load it. If Windows 95/98 did load a file during the configuration process, and you have another SCSI device besides your Plextor CD-RW drive, then you probably have a conflict with your SCSI IDs. In other words, Windows 95/98 loaded a non-SCAM capable support file.
- Page 75 Plextor’s web site. If you do not locate the files on our web site, contact Technical Support by following the instructions in Chapter 13. They can help you locate the files or send them to you via email.
- Page 76 SCSI controller we provided. Instead, if you purchased a Plextor kit with SCSI controller, insert the Plextor Manager disc. This disc has the SCAM capable support file for your SCSI controller to complete your Plug and Play environment. After inserting the disc, select Browse in the dialog box and then select the appropriate drive letter (probably A:\).
- Page 77 Windows 95/98 Add New Hardware Wizard to load it. If Windows 95/98 did load a file during the configuration process, and you have another SCSI device besides your Plextor drive, then you probably have a conflict with your SCSI IDs. In other words, Windows 95/98 loaded a non-SCAM capable support file.
- Page 78 APPENDIX A — Windows 95/98 Installation Guide SCSI controller manufacturer. If you cannot reach them, or they cannot help you, contact Plextor’s Technical Support Department. Non-SCAM Installation Install Hardware Refer to Chapter 8 for instructions on installing your SCSI controller, cabling, and CD-RW drive.
- Page 79 If things are not working correctly, there are three likely problems: 1) You might have inadvertently copied the SCSI controller support files on the Plextor Manager disk into your Windows subdirectory. It is possible the SCAM files on our disk are not properly supporting your controller.
- Page 80 “Non-SCAM Installation” section on page 72. Install Software In order to use your Plextor drive under DOS or Windows 3.x to upgrade to Windows 95, you must have a device driver to support it. If you just installed a new SCSI controller that you did not purchase from us, you also need to load what is called an “ASPI Manager”...
- Page 81 Install Windows 95/98 Insert your Windows 95/98 CD into your new Plextor CD-RW drive and follow Microsoft’s instructions for upgrading. During the installation process, Windows 95/98 will attempt to find and install support for your SCSI...
- Page 82 Plextor drive under Windows 95/98. However, our device driver is written in 16-bit code and has not been fully tested under Windows 95/98. In addition, all the utilities (and more) available in 16-bit code Plextor Manager are also available in 32-bit code Plextor Manager. Therefore, we recommend that you disable the driver.
- Page 83 APPENDIX A — Windows 95/98 Installation Guide box called Driver Status, the message should be This Device Is Working Properly. If you get this message, you can now make full use of your CD-RW drive with the Windows 95/98 32-bit support. Add New Hardware If your SCSI controller is not recognized by Windows 95/98 after installation, or if the message under Driver Status does not indicate that it is working...
-
Page 84: Appendix B: Windows Nt 4.0 (And Below) Installation Guide
Windows NT 4.0 (and Below) Installation Procedure To install device drivers for Windows NT from your NT CD-ROM disc, you first need to verify that your SCSI interface board is supported by NT. Check your NT manual for information on which SCSI interface boards NT supports. If your SCSI interface board is on NT's list of supported hardware, you can follow the installation instructions provided by Microsoft. - Page 85 As an alternative, you can boot the system to DOS from a floppy. The contents for this floppy may be available on Plextor’s web site (www.plextor.com). Please check this first. If you do not locate the files on our web site, contact Technical Support by following the instructions in Chapter 14.
-
Page 86: About Plextor And Plextor Products
Plextor has offices in Asia, the Americas, and Europe. Plextor first opened an office in California’s Silicon Valley in 1990. Rapid growth has required it to move twice since then to larger offices. Plextor now occupies a 30,000 sq. ft. facility in Santa Clara, California, which is staffed by sales, marketing, technical support, engineering, administrative, and shipping personnel. - Page 87 Plextor CD-R Drives Record Introduced Speed 1996 1997 1998 Plextor CD-RW Drives Record & Re-Record Max Data Introduced Speed 1999 PX-RW 4/2/20 OPERATION MANUAL About Plextor and Plextor Products Data Access Time 150KB/sec 430ms 150KB/sec 340ms 300KB/sec 265ms 335KB/sec 240ms 600KB/sec 220ms...
-
Page 88: Warranty Information
PLEXTOR; c) if the unit is subject to abuse, neglect, lightning strike, electrical fault, improper packaging, or accident;... - Page 89 PX-RW 4/2/20 OPERATION MANUAL...
- Page 90 PX-RW 4/2/20 OPERATION MANUAL...
- Page 92 PLEXTOR (U.S.A.) 4255 Burton Drive, Santa Clara, CA 95054 Web Site: www.plextor.com email: support@plextor.com Phone: 408-980-1838 FAX: 408-986-1010 BBS: 408-986-1569 Toll Free: 800-886-3935 PLEXTOR (Japan) 8F Kyodo-building 1-4-21 Yaesu Chuou-ku, Tokyo, Japan 103 Web Site: www.plextor.co.jp Phone: 81-3-3517-8061 FAX: 81-3-3517-8065...
Need help?
Do you have a question about the PX-W4220Te and is the answer not in the manual?
Questions and answers