Table of Contents
Advertisement
Advertisement
Table of Contents
Troubleshooting

Subscribe to Our Youtube Channel
Related Manuals for Plextor PX-W4012TA


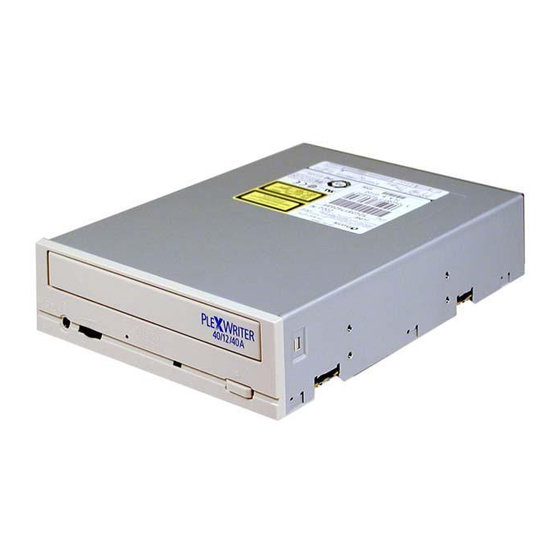
Summary of Contents for Plextor PX-W4012TA
- Page 1 Model PX-W4012TA (Internal) INSTALLATION AND USERS MANUAL AUGUST 2002...
-
Page 2: Record Your Serial Number
Plextor reserves the right to make improvements in the products described in this manual at any time without prior notice. Plextor makes no representation or warranties with respect to the contents hereof and specifically disclaims any implied warranties of merchantability or fitness for any particular purpose. - Page 3 • Do not open the optical pickup housing. • Obtain service only from Plextor-authorized personnel. LASER INFORMATION These products have been designed and manufactured according to IEC 60825-1 on the Safety of Laser products. This product comes under “Class 1 Laser Products.” A Laser Caution Marking is attached on the top of the internal drive model: “Caution: Invisible laser radiation when open.
- Page 4 This page intentionally left blank.
-
Page 5: Table Of Contents
Table of Contents 1. Getting Started ... 1 About this Manual... 1 Meet Your PlexWriter 40/12/40A... 1 What the PlexWriter 40/12/40A Does ... 1 Minimum Configuration to Use the PlexWriter 40/12/40A... 2 What You Can Do with the PlexWriter 40/12/40A... 2 Save Your Box!... - Page 6 Table of Contents 5. Maintenance and Troubleshooting ... 29 Upgrading Firmware ... 29 If You Need to Disable DMA ... 29 Troubleshooting ... 30 Using the Self-Test Diagnostics ... 30 What You’ll Need ... 30 CD Write/Read Test ... 31 6.
-
Page 7: Getting Started
40/12/40A to provide the optimum laser power and length of burn—which means the highest quality playback. In addition, it has VariRec technology, a feature offered by Plextor that allows you to manually adjust the drive's laser power during the audio recording process. The PlexWriter 40/12/40A has an EIDE interface that supports the ATAPI-5 command set, including special commands for CD-R and CD-RW. -
Page 8: Minimum Configuration To Use The Plexwriter 40/12/40A
CD-R or CD-RW disc. And Plextor backs up this remarkable drive with a one-year full warranty on parts and labor, and unlimited toll-free tech support. -
Page 9: Save Your Box
If your drive came pre-installed, some or all of the items above may have been installed and may not be separately available. See the Plextor web site for locations to purchase additional or replacement accessories. -
Page 10: Plexwriter Drive Features And Controls
Section 1. Getting Started PlexWriter Drive Features and Controls Before proceeding, become familiar with the controls and features of your PlexWriter drive. Match the parts of your drive to the illustrations below. Front Panel Figure 1: Front Panel of the PlexWriter 40/12/40A Drive •... -
Page 11: Rear Panel
Rear Panel Figure 2: Rear Panel of the PlexWriter 40/12/40A Internal Drive • Digital audio output connector: Outputs digital stereo signal. For connecting to a sound board that supports Sony/Philips digital interface (SPDIF) or Digital-In. • Analog audio output connector: Outputs analog stereo signal. Use to connect to sound board or audio amplifier. -
Page 12: About Software
A list of various software packages that you can use with your Plextor drive can be found in the Support/Compatibility section of www.plextor.com. -
Page 13: Installing Your Plexwriter
2. Installing Your PlexWriter This chapter explains how to physically install your PlexWriter in your computer. The steps you'll need to do are as follows: 1. Turn OFF your computer system. 2. Set the jumper for your new PlexWriter drive, if necessary. 3. -
Page 14: Determine Your Existing Ide Configuration
Section 2. Installing Your PlexWriter Figure 3: Removing a Typical Computer's Cover Determine Your Existing IDE Configuration With your computer open, determine the existing IDE configuration. You can do this by looking at the 40-pin IDE ribbon cable (or cables—there may be two) and seeing what is connected to them. -
Page 15: Set The Drive's Mode Jumper
Section 2. Installing Your PlexWriter Set the Drive’s Mode Jumper You specify your drive's Master or Slave setting before installing it. You do this by changing the position of a jumper on the mode jumper block at the rear of the drive. Your drive ships from our factory with its mode jumper set to operate the PlexWriter as a Master. -
Page 16: Select An Ide Configuration
Section 2. Installing Your PlexWriter Changing Jumper Settings • To remove a jumper, pull it off with your fingers or a pair of needle-nose pliers. • To install a jumper, push it onto the jumper pins. CAUTION: Ensure power to the drive is OFF before installing or removing a jumper. Figure 5: Install the Mode Jumper Across Vertical Pairs of Pins CAUTION: Install the mode jumper across the pins as shown (vertically). - Page 17 Before PlexWriter Installation A Hard disks connected as Master and Slave devices on primary IDE port; CD-ROM connected as Master device on secondary IDE port. NOTE: Configuration A can make it very difficult to write from the CD-ROM to the PlexWriter at 40X using “on-the-fly” copying. System configuration and performance will make a big difference.
- Page 18 Section 2. Installing Your PlexWriter Before PlexWriter Installation B Hard disk connected as Master device, and CD-ROM or DVD-ROM drive connected as Slave on the primary IDE port; nothing connected to secondary IDE port. Figure 7. How to Install the PlexWriter If Your Computer Is Originally Set Up in Configuration B Before PlexWriter Installation C Hard disk connected as Master...
-
Page 19: About Cable Select
Before PlexWriter Installation D System uses special Cable Select cables; all devices are jumpered for Cable Select. Figure 9: How to Install the PlexWriter If Your Computer Is Originally Set Up in Configuration D About Cable Select The Cable Select jumper position sets the PlexWriter drive to use the CSEL signal from the IDE interface for configuration purposes. -
Page 20: Identifying Whether Your System Uses Cable Select
Section 2. Installing Your PlexWriter NOTE: The IDE cable supplied by Plextor does not support CSEL. To use CSEL and Cable Select, you’ll have to purchase a CSEL cable, or use one that may be supplied with your CSEL-configured system. -
Page 21: Install The Plexwriter Drive
You can mount your internal PlexWriter drive in any available bay. You must remove the small panel that covers the bay that you want to use. CAUTION: Install your PlexWriter horizontally. Plextor does not guarantee the drive’s performance in a vertical position. - Page 22 Section 2. Installing Your PlexWriter Figure 12: Internal IDE Ribbon Cable CAUTION: The length of any IDE cable cannot exceed 18 inches. Do You Need a Power Cable? In most computers, you will find free power connectors in the computer ready for your use.
- Page 23 The drive can be mounted directly into your computer. Go to step 6. NOTE: Plextor does not provide rails. If you need rails, you can obtain them from the computer manufacturer or from a computer supply retail or mail-order store.
- Page 24 Section 2. Installing Your PlexWriter Figure 14: Installing Mounting Rails (if Needed) 6. Plug one connector of the IDE cable into the IDE connector on the rear panel of the drive before you insert the drive into your computer. Then thread the cable through the front of the open bay and back toward the motherboard.
- Page 25 8. Double-check your work. You must ensure the side of the IDE cable with the red stripe is matched to Pin 1 on the interface board and on the drive. CAUTION: In the case of only one IDE device, you must make certain that one end of the cable is always connected to the IDE connector on the motherboard.
-
Page 26: Using Sound Boards And Audio Cables
Use only these screws. CAUTION: Do not mount your drive in your computer using screws other than those supplied by Plextor. You may damage the drive if you insert screws that are too long or the wrong thread type. -
Page 27: Make Sure The Drive Is Recognized
In Windows 2000 or XP, right-click on the My Computer icon and select Properties. Click on the Hardware tab, then click on the Device Manager button. Click the + sign next to the CD-ROM heading and look at the PLEXTOR CD-R PX-W4012A entry underneath. -
Page 28: Enable Dma
Section 2. Installing Your PlexWriter Enable DMA To achieve top speeds for reading and writing with your PlexWriter drive, direct memory access (DMA) must be enabled for the drive. To enable DMA in Windows 95, 98, or Me: 1. In Windows 95, 98, or Me, click the Start button, then Settings, then Control Panel, then double-click on System icon, then click on Device Manager tab. -
Page 29: Using Your Plexwriter
To achieve 40X CD-R writing speed you must use certified 40X media; and to achieve 12X RW writing speed you must use high-speed RW media. See “Recommended Media” on page 37 for a list of Plextor-approved media at the time this manual was printed, and see the Plextor web site at http://www.plextor.com for an updated list. -
Page 30: Tray Loading And Operation
Section 3. Using Your PlexWriter Tray Loading and Operation To load and unload the tray: 1. While the PlexWriter drive is powered up, push the eject button on the front panel. The tray drawer slides out in 3–4 seconds. Figure 17: Loading the Tray 2. -
Page 31: Cleaning Discs
Cleaning Discs For proper read and write performance, your CD-R, CD-RW, and CD-ROM discs must be clean. Trying to record on a dirty disc may result in a failed session and ruin the disc. To clean the disc, wipe the disc using a clean, soft cotton cloth to remove surface dirt such as fingerprints. -
Page 32: Advantages Of Buffer Underrun-Proof Technology
Advantages of VariRec Technology This drive is equipped with VariRec (Variable Recording) technology, a feature offered by Plextor that allows you to manually adjust the drive's laser power during the audio recording process. NOTE: In order for you to actually perform the adjustment, VariRec must be supported by the recording software you’re using. -
Page 33: Changing The Varirec Setting
3. When you insert a recordable disc into your drive, Plextor’s PoweRec technology automatically identifies the manufacturer, model, and special features of the media, then adjusts the laser power and writing speed so they’re at the optimum settings for that disc. - Page 34 Section 3. Using Your PlexWriter This page intentionally left blank. PlexWriter 40/12/40A Installation and Users Manual...
-
Page 35: Maintenance And Troubleshooting
PlexWriter drive. However, we advise that our customers always update drives with the latest available firmware. Before troubleshooting a possible problem with your drive please make sure to visit our web site at www.plextor.com to check if you have the latest firmware. -
Page 36: Troubleshooting
• Tools to remove the computer’s cover • The spare jumper shipped with your drive • A blank piece of Plextor-recommended CD-R media for the CD write/read test. (See “Recommended Media” on page 37, or visit our web site.) PlexWriter 40/12/40A Installation and Users Manual... -
Page 37: Cd Write/Read Test
CD Write/Read Test This tests three functions of the drive: write, random access, and verify. To perform the CD write/read test: 1. Turn the computer’s power OFF, unplug it from its power source, and open the computer to gain access to the rear of the PlexWriter drive. Typically, this involves loosening or removing several screws on the back panel of your computer and sliding off the cover. - Page 38 8. While pressing the eject button on the PlexWriter, turn the computer power on. The LED indicator blinks green and amber and the tray ejects. 9. Insert a blank Plextor-recommended CD-R disc. Be sure to use only CD-R media of the type recommended by Plextor.
- Page 39 If you discover a problem with the PlexWriter drive, do not attempt to service the drive yourself. Contact us to get an RMA number and take steps to return the drive to Plextor. See “Returns” on page 42 for details. PlexWriter 40/12/40A Installation and Users Manual...
- Page 40 Section 4. Maintenance and Troubleshooting This page intentionally left blank. PlexWriter 40/12/40A Installation and Users Manual...
-
Page 41: Frequently Asked Questions About Recording
Share non-editable presentations Why does my unit record audio discs at a maximum speed of 24X? Plextor has limited the speed of CD-DA (digital audio) recording to 24X in order to avoid audio noise, which may be generated at speeds above 24X. - Page 42 Section 5. Frequently Asked Questions about Recording This page intentionally left blank. PlexWriter 40/12/40A Installation and Users Manual...
-
Page 43: Appendix A: Plexwriter Specifications
Operating System Windows XP, Me, 2000, 98, 95 Recommended Media CD-R: 40X To ensure 40X write speed, Plextor recommends using only certified 40X media available from Maxell or Mitsubishi Chemical (Verbatim) (With PoweRec, some discs may be recorded at 16X because of lower quality media.) - Page 44 Appendix A: PlexWriter Specifications Usable Formats Logical CD Read/Write CD-DA, CD-Extra, CD-ROM Mode-1, Mix CD, CD-ROM XA, Photo-CD, Video-CD, CD-I, Multisession, CD TEXT, CD+G, UDF Write Methods TAO, DAO, Packet Write (variable and fixed), Multi- session, SAO Performance Specifications Read Speed, CD Speed Mode-1 17-40X...
- Page 45 Front Panel Eject Eject Button; Manual Emergency Eject; Software Eject LED Indicator Green: Disc load Blinking yellow: Reading disc Blinking amber: Writing data to disc Green during writing: Buffer Underrun Proof is active LED Indicator Blink 40 ms interval, amber: 40X (R) Interval and Write 80 ms interval, amber: 32X (R);...
- Page 46 Modes 0-2 ATAPI Command Set Supports CD-ROM commands, including special commands for CD-R and CD-RW. Inquiry string PLEXTOR sp CD-R sp sp sp PX-W4012A (where “sp” equals one space) Environmental Conditions Operating Temperature 0 to 40 degrees Celsius Performance Guarantee...
-
Page 47: Appendix B: Technical Support
Appendix B: Technical Support Store Plextor’s e-mail, web site, phone, and fax numbers in a convenient location. Keep your drive’s serial number and a copy of your sales receipt handy as well. If you experience a problem while installing or operating your PlexWriter drive, please refer first to the relevant sections of this manual regarding setup and installation (Chapters 1–3). -
Page 48: Before You E-Mail/Log On/Fax/Call
510-651-9765. Forms are also available on Plextor’s web site, in the Support/Warranty section. Any drive sent to Plextor without an RMA number will not be accepted. Be sure to write the RMA number on the outside of the shipping box. -
Page 49: Appendix C: Warranty
All drives returned to PLEXTOR must be securely packaged and shipped postage prepaid. The drive will be returned to the customer at Plextor’s expense when the drive was sent to us from within the United States. For any drives originating outside of the United States, the customer is responsible for shipping costs in both directions. - Page 50 Appendix C: Warranty This page intentionally left blank. PlexWriter 40/12/40A Installation and Users Manual...
-
Page 51: Index
access time · 38 analog audio output connector · 19 analog audio output · 39 connector · 5 ATAPI command set · 1, 40 audio analog · 39 digital · 39 audio cable · 20 bay cover panel · 17 contents of ·... - Page 52 Index eject button · 4, 39 closing tray · 24 emergency eject hole · 4 enabling DMA · 22 environmental conditions · 40 error rate specification · 38 firmware · 26 obtaining · 29 upgrading · 2, 29 formats · 38 front-panel controls ·...
- Page 53 read specification · 38 reading speed · 1, 38 rear-panel connectors and jumpers · 5, 39 recognizing the drive in Windows · 21 recording, frequently asked questions · 35 reliability · 40 returns · 42 RMA number · 3, 42 Roxio software ·...
- Page 54 Index This page intentionally left blank. PlexWriter 40/12/40A Installation and Users Manual...
- Page 55 Notes PlexWriter 40/12/40A Installation and Users Manual...
- Page 56 LEXTOR 48383 Fremont Blvd. Suite 120 Fremont CA 94538-6509 www.plextor.com Phone: 510-440-2000 800-886-3935 Fax: 510-651-9755 E-mail: info@plextor.com...
Need help?
Do you have a question about the PX-W4012TA and is the answer not in the manual?
Questions and answers