Table of Contents
Advertisement
Quick Links
Advertisement
Table of Contents

Related Manuals for Bartscher AT220-MDI


Summary of Contents for Bartscher AT220-MDI
- Page 1 AT220-MDI A120821...
- Page 2 Bartscher GmbH Phone: +49 5258 971-0 Franz-Kleine-Str. 28 Fax: +49 5258 971-120 Technical Support Hotline: +49 5258 971-197 D-33154 Salzkotten Germany www.bartscher.com Version: 1.0 Date of preparation: 2023-01-31...
-
Page 3: Table Of Contents
Original instruction manual Safety ......................2 Explanation of Signal Words ..............2 Safety instructions..................3 Intended Use ................... 6 Unintended Use ..................6 General information ..................7 Liability and Warranty ................7 Copyright Protection ................7 Declaration of Conformity ................ 7 Transport, Packaging and Storage .............. -
Page 4: Safety
Safety Diese Bedi enungsanlei tung besc hrei bt di e Installation, Bedi enung und Wartung des Geräts und gilt als wic htige Infor mationsquelle un d N achschl agewer k. Di e Kenntnis aller enthaltenen Sic herheits hinweis e und H andlungs anweisungen schafft die Vorauss etz ung für das sichere und s ac hger echte Ar beiten mit dem Gerät. D arüber hi naus müs sen die für den Ei ns atz ber eic h des Geräts geltenden ör tlichen Unfall verhütungs vorsc hriften und allgemeinen Sicherheits besti mmungen eing ehalten wer den. Dies e Bedi enungs anleitung is t Bes tandteil des Produkts und muss i n unmi ttelbarer N ähe des Ger äts für das In¬s tall ations-, Bedi enungs-, Wartungs- und R einigungspers onal jederzeit z ugänglich auf¬bewahrt werden. Wenn das Ger ät an eine dritte Pers on weiterg egeben wird, muss die Bedi enungsanlei tung mit ausgehändigt wer den. -
Page 5: Safety Instructions
Safety WARNING! The signal word WARNING warns against hazards that may lead to moderate or severe injuries or death if the hazards are not avoided. CAUTION! The signal word CAUTION warns against hazards that may lead to light or moderate injuries if the hazards are not avoided. , di e IMPORTANT! The signal word IMPORTANT indicates possible property damages,... - Page 6 Safety • Always completely unwind the power cord. • Never place the appliance or other objects on the power cord. • Always take hold of the plug to disconnect the appliance from the power supply. • Check the power cord regularly for damage. Do not use the appliance if the power cord is damaged.
- Page 7 Safety • Children should be supervised to ensure that they are not playing with or switching on the appliance. Supervised Usage only • Only supervised appliance may be used. • Always remain in an immediate vicinity of the appliance. Improper Use •...
-
Page 8: Intended Use
Safety Intended Use As described below, every use of the appliance for a purpose differing and/or diverging from its intended standard use, is prohibited and considered to be an unintended use. The following is an intended use: Preparation of meat, fish and vegetables. Baking bread, pies and cakes. -
Page 9: General Information
General information General information Liability and Warranty All information and instructions in this instruction manual account for legal regulations in force, current level of technical engineering knowledge as well as our expertise and experience, developed over the years. If special models or additional options are ordered, or state-of-the-art technical solutions were implemented, the actual scope of delivery of the appliance may, in some circumstances, differ from descriptions and numerous drawings in this instruction manual. -
Page 10: Transport, Packaging And Storage
Transport, Packaging and Storage Transport, Packaging and Storage Delivery Check Immediately upon reception, check the delivery for completeness and possible shipping damage. In the case of visible transport damage refuse to accept the appliance or accept it conditionally. Mark and note the scope of damage in shipping documents/consignment list of the shipping company and lodge a complaint. -
Page 11: Technical Data
Technical Data Technical Data Technical Specifications Name: Convection oven AT220-MDI A120821 Art. No.: Material: stainless steel Thermal processing chamber material: stainless steel Thermal processing chamber dimensions 560 x 380 x 350 (W x D x H), in mm: Number of guide rail pairs:... -
Page 12: Functions Of The Appliance
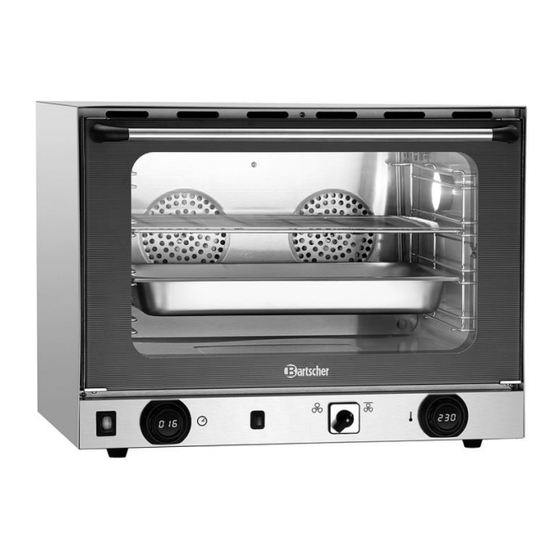
The AT220-MDI combines the tried-and-tested functions of the AT series, offering additional comfort with an integrated grill and humidification function. Ultimate operating comfort is provided by the Bartscher MDI digital control with quick and uncomplicated temperature and time control. 10 / 30... -
Page 13: List Of Components Of The Appliance
Technical Data List of Components of the Appliance Fig. 1 1. Ventilation openings 2. Glass pane door handle 3. Glass pane door 4. Internal lighting 5. Guide rails 6. Feet (4 pcs) 7. Push rotary temperature controller 8. Fan-forced air circulation/grill controller 9. -
Page 14: Installation And Operation
Installation and operation Installation and operation Installation CAUTION! Incorrect installation, positioning, operation, maintenance or misuse of the appliance may lead to personal injury or property damage. Positioning and installation, as well as repairs may be performed by authorised technical service only and in compliance with the applicable national law. - Page 15 Installation and operation – sufficiently large, and thus enabling usage of the appliance with no problems; – easily accessible; – well ventilated. • Maintain sufficient clearance from table edges. The appliance might turn over and fall down. • Keep minimum distance from flammable walls and objects; maintain clearance of 10 cm at both sides and 20 cm at the rear.
- Page 16 Installation and operation The potable water supply should feature pressure between 50 kPa (0.5 bar) and 200 kPa (2 bar). If the entry pressure exceeds 200 kPa (2 bar), install a pressure reducer. Fig. 2 Power supply connection • Verify if technical data of the appliance (see rating plate) correspond with the local electric power grid specification.
-
Page 17: Operation
Installation and operation Operation • Przed pier wsz ym uż yciem wycz yś cić urządz eni e i wypos ażenie zgodni e z e ws kazówkami z awartymi w pu nkcie 6 „Cz yszczen ie” . M ake s ure no water enters elec tric ins tall ati on and connection box. N as tępni e dokładni e os usz yć urz ądzenie i elementy wyposaż enia. •... - Page 18 Installation and operation • Setzen Sie den Schaltkasten mit H eiz element vorsichtig auf den hi nteren R and des Ger äte s. Sworz eń w dolnej cz ęści s krz ynki roz dzi elczej musi wchodzić w otwór w urz ądzeniu głównym. W taki spos ób s krz ynka rozdzi elcz a jest prawi dłowo ustawi ona. Settings The convection oven is controlled with two push/rotary control knobs: –...
- Page 19 Installation and operation The digital displays of the push/rotary control knobs show the last temperature and time sued, and the indicator lights are off. 3. Set the parameters by rotating the respective push/rotary control knobs. 4. To start the program, press the push/rotary control knob. The heating, interior lighting and fan motors are all switched on.
- Page 20 Installation and operation Food Preparation NOTE! Prior to each use, heat the convection oven properly. Set the temperature approx. 30°C above the required temperature and correct it when food is put into the oven in order to obtain uniform effect. 1.
- Page 21 Installation and operation NOTE! It is enough to press the steaming button shortly (max. 3 sec.), as otherwise excessive water accumulates at the bottom of the thermal processing chamber. Fume Extractor During spraying (humidification), steam is generated in the thermal processing chamber of the appliance.
- Page 22 Installation and operation Cooking/Roasting Process With Fan-Forced Air Circulation The cooking / roasting process is obtained with the use of hot air circulation inside the appliance. This makes homogeneous cooking/roasting possible thanks to uniform temperature distribution. The benefit of the convection oven is the fact that you may cook/roast various foods (provided the temperature of processing is the same), and different aromas of the foods do not mix.
- Page 23 Installation and operation 2. Switch the fan-forced air circulation/grill controller to the right to activate the grill function. Fig. 5 ATTENTION! The 'Fan-Forced Air Circulation' function and the 'Grill' function cannot be used simultaneously. 3. To preheat the appliance, press the rotary push timer controller. 4.
- Page 24 Installation and operation Overheating Protection The appliance is equipped with overheating protection, which activates at 320°C and disconnects the appliance. When the overheating protection has tripped, the following actions must be taken: – leave the appliance to cool down for some time, –...
- Page 25 Installation and operation Roast in the temperature of 170 °C – 180 °C. Pies As a rule, bake in the temperature of 180 °C. During baking, avoid opening the door of the convection oven. Bread Roast in the temperature of 200 °C. Thermal processing of deep frozen products Defrost the frosted bread in the temperature of 200 °C.
- Page 26 Installation and operation Baking/thermal processing table Thermal processing Temperature Food for baking/thermal processing duration in °C approx., in min. depending on Cakes 135–160 the weight Pies Sponge cake 160–175 25–35 Small pies Cherry cake Fruit pie Cakes with yeast/baking Puff pastry powder Shortcrust pastry 200–225...
- Page 27 Installation and operation Thermal processing Temperature Food for roasting/thermal processing duration in °C approx., in min. Well-done turkey until the final 160–175 30 minutes of roasting during the final 175–200 30/kg 30 minutes of roasting Rare lamb Hind, 1.5–2 kg 50/kg Roast lamb 30/kg...
-
Page 28: Cleaning
Cleaning Cleaning Safety Instructions for Cleaning • Before cleaning, disconnect the appliance from the power supply. • Leave the appliance to cool down completely. • Make sure water does not enter the appliance. Do not immerse the appliance in water or other liquids during cleaning. Do not clean the appliance with a pressurized water jet. - Page 29 Cleaning In order to facilitate cleaning of the oven chamber, you may remove the guide rails. 5. To do this, remove the knurled screws (left and right) and remove the guide rails from the oven chamber. 6. Clean the guide rails thoroughly with warm water, a soft cloth and a mild cleaning agent.
-
Page 30: Possible Malfunctions
Possible Malfunctions Possible Malfunctions Mögliche The table below contains descriptions of possible causes and solutions to malfunctions or errors during operation of the appliance. When malfunction cannot be removed, contact the technical service. In such a case, provide article number, model name and serial number. These data may be found in the rating plate. - Page 31 Possible Malfunctions Error Possible Cause Solution The oven chamber Damaged bulb. Disconnect the appliance lighting does not work. from power supply, and leave it to cool off. Remove the bulb cover. Screw the bulb off and replace it with a new one of the same technical specification.
-
Page 32: Disposal
Disposal Disposal Electrical Appliance Electric appliances are marked with this symbol. Electrical appliances must be disposed of and recycled in a correct and environmentally friendly manner. You must not dispose of electric appliances with household waste. Disconnect the appliance from the power supply and remove power cord from the appliance.
Need help?
Do you have a question about the AT220-MDI and is the answer not in the manual?
Questions and answers