
Subscribe to Our Youtube Channel
Related Manuals for Krone Bellima F 125


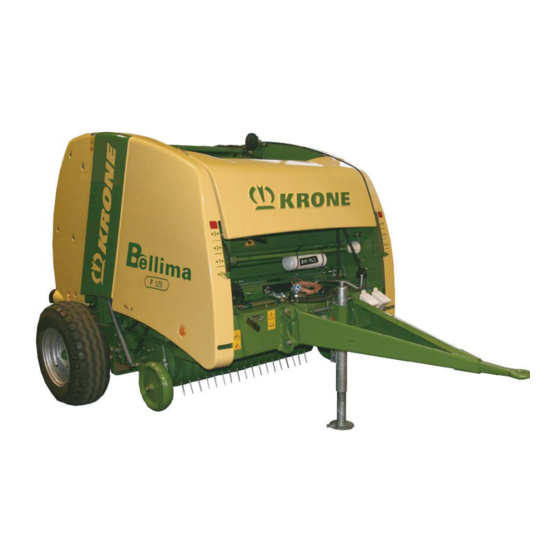
Summary of Contents for Krone Bellima F 125
- Page 1 Original Operating Instructions Document no.: 150000147_06_en Round Baler Bellima F 125 From machine no.: 995323...
- Page 2 Contact Maschinenfabrik Bernard Krone GmbH & Co. KG Heinrich-Krone-Straße 10 48480 Spelle Germany Telephone switchboard + 49 (0) 59 77/935-0 Telefax switchboard + 49 (0) 59 77/935-339 Telefax spare parts warehouse do- + 49 (0) 59 77/935-239 mestic Telefax spare parts warehouse export + 49 (0) 59 77/935-359 Internet www.landmaschinen.krone.de...
-
Page 3: Table Of Contents
Description of the twine tying functionality ................. 33 Description of the net wrapping functionality ................ 34 Technical data .......................... 36 Consumables .......................... 37 5.1.1 Oils............................. 37 5.1.2 Lubricating greases ........................ 37 Initial operation ........................ 38 Bellima F 125 Original Operating Instructions 150000147_06_en... - Page 4 Adjusting the number of twine layers .................. 73 10.3 Adjusting the twine limiter ...................... 74 10.4 Setting the number of net layers .................... 74 10.5 Setting the twine brake ...................... 75 10.6 Setting the driver of the twine tying.................... 76 Bellima F 125 Original Operating Instructions 150000147_06_en...
- Page 5 Changing O-ring seal on the twine coil starting device ............ 110 12.9 Setting the tailgate lock...................... 111 12.10 Setting the mechanical baling pressure indicator .............. 112 Storage............................ 114 Waste disposal........................ 116 Index............................ 117 Declaration of conformity ..................... 123 Bellima F 125 Original Operating Instructions 150000147_06_en...
-
Page 6: Information On This Document
Information on This Document Validity This document is valid for machines of type: Bellima F 125 All information, illustrations and technical data in this document correspond to the latest state at the time of publication. We reserve the right to make design changes at any time and without notification of reasons. -
Page 7: Figures
H = height, L = length) Left-hand side of the machine Right-hand side of the machine side Direction of travel Moving direction Reference line for visible material Reference line for covered mater- Centre line Cable routes Bellima F 125 Original Operating Instructions 150000147_06_en... - Page 8 When cleaning with compressed air, dirt particles are ejected at high speed and could get into the eyes. Therefore eyes could be hurt. „ Keep people away from the working area. „ Wear personal protective equipment when performing cleaning work with compressed air (e.g. eye protection). Bellima F 125 Original Operating Instructions 150000147_06_en...
-
Page 9: Conversion Table
Horsepower Pressure Kilopascal 0.1450 Pounds per square inch Megapascal 145.0377 bar (non-SI) 14.5038 Torque Newtonmeter 0.7376 pound-foot or ft∙lbf foot-pound 8.8507 pound-inch or in∙lbf inch-pound Temperature Degrees Celsius °C °Cx1.8+32 Degrees °F Fahrenheit Bellima F 125 Original Operating Instructions 150000147_06_en... - Page 10 Kilometres per km/h 0.6215 Miles per hour hour Volumes Litres 0.2642 US gallon US gal. Millilitre 0.0338 US ounce US oz. Cubic centi- cm³ 0.0610 Cubic inch in³ metre Weight Kilogram 2.2046 Pound Bellima F 125 Original Operating Instructions 150000147_06_en...
-
Page 11: Safety
• Attachment of unauthorised or unapproved additional equipment • Use of spare parts which are not KRONE original spare parts • Stationary operation of the machine Unauthorised modifications to the machine may affect the properties of the machine or disrupt proper operation. -
Page 12: Service Life Of The Machine
He has read the operating instructions and can implement the information in the operating instructions accordingly. • He is familiar with driving vehicles safely. • For road travel he has adequate knowledge of the highway code and has the stipulated driving licence. Bellima F 125 Original Operating Instructions 150000147_06_en... -
Page 13: Personnel Qualification Of The Technicians
Additional equipment and spare parts that do not correspond to the requirements of the manufacturer may affect the operational safety of the machine and cause accidents. „ To ensure operational safety, use original parts or standard parts which correspond to the requirements of the manufacturer. Bellima F 125 Original Operating Instructions 150000147_06_en... -
Page 14: Jobs On The Machine
„ In case of damage which may affect operational safety and cannot be repaired according to these operating instructions: Have damage repaired by a qualified service centre. Bellima F 125 Original Operating Instructions 150000147_06_en... -
Page 15: Danger Zones
This also applies to brief inspection work. „ Consider the information in all relevant operating instructions: • The operating instructions of the tractor • The operating instructions of the machine • The operating instructions of the universal shaft Bellima F 125 Original Operating Instructions 150000147_06_en... - Page 16 „ In case of dangerous situations, immediately switch off drives and instruct persons to leave the danger zone. Danger zone due to trailing machine parts If machine parts are trailing, people may be seriously injured or killed. Bellima F 125 Original Operating Instructions 150000147_06_en...
-
Page 17: Ensuring Functionality Of Safety Devices
„ Make sure every time after cleaning the safety labels that they are complete and legible. „ Immediately replace missing, damaged and unrecognizable safety labels. „ Provide spare parts with intended safety labels. Descriptions, explanations and order numbers of safety labels,refer to page 25. Bellima F 125 Original Operating Instructions 150000147_06_en... -
Page 18: Road Safety
„ Avoid abrupt steering movements on slopes. „ On slopes always deposit a round bale in such a way that it cannot move on its own. „ Do not park the machine on slopes. Bellima F 125 Original Operating Instructions 150000147_06_en... -
Page 19: Parking The Machine Safely
„ Check and clean the machine every day before using it for the first time. „ Check and clean the machine regularly during the working day. Bellima F 125 Original Operating Instructions 150000147_06_en... -
Page 20: Sources Of Danger On The Machine
„ Specify rules for the use of hearing protection and for the working time. „ During operation keep windows and doors of cabin closed. „ Remove hearing protection for road travel. Liquids under high pressure The following liquids are under high pressure: • Hydraulic oil Bellima F 125 Original Operating Instructions 150000147_06_en... -
Page 21: Dangers In Connection With Certain Activities: Working On The Machine
Thus there is a risk of serious injuries or death. „ Before carrying out any repair, maintenance and cleaning work on the machine, shutdown and safeguard it, refer to page 23. Bellima F 125 Original Operating Instructions 150000147_06_en... -
Page 22: Dangers In Connection With Certain Activities: Working On Wheels And Tyres
The fitting of wheels and tyres requires adequate knowledge and approved mounting tools. „ If there is a lack of knowledge, have the wheels and tyres fitted by the KRONE dealer or by a qualified tyre service. -
Page 23: Behaviour In Dangerous Situations And In Case Of Accidents
„ Before working on or under raised machine parts: Secure machine or machine parts against lowering by means of hydraulic shut-off device (e.g. stop cock) on machine side. „ Before working on or under raised machine parts: Safely support machine or machine parts. Bellima F 125 Original Operating Instructions 150000147_06_en... -
Page 24: Carrying Out Oil Level Check And Oil And Filter Element Changes Safely
„ Lower raised machine parts or secure them against falling, refer to page 23. „ Shut down and secure the machine, refer to page 23. „ Cordon off the danger zone of the actuated moving machine parts in a clearly visible manner. Bellima F 125 Original Operating Instructions 150000147_06_en... -
Page 25: Safety Labels On The Machine
Safety labels on the machine Every safety label is provided with an order number and can be ordered directly from the authorised KRONE dealer. Immediately replace missing, damaged and unrecognisable safety labels. When attaching safety labels, the contact surface on the machine must be clean and free of dirt, oil and grease to ensure optimum adhesion of the labels. - Page 26 Safety Safety labels on the machine Position and meaning of safety labels RPG000-006 Bellima F 125 Original Operating Instructions 150000147_06_en...
- Page 27 There is a danger of being drawn in if you ap- proach the danger zone and if you use your hands or feet to remove crop blockages. „ Before working on the pick-up, switch off the PTO shaft and the engine. Bellima F 125 Original Operating Instructions 150000147_06_en...
- Page 28 „ When uncoupling the machine, ensure that the tailgate is closed. 9. Ord. no. 27 013 422 0 (2x) Danger from shock Risk of injury from the rolling bale. „ Make certain no one remains in the danger zone. Bellima F 125 Original Operating Instructions 150000147_06_en...
-
Page 29: Safety Equipment
Safety loop The safety loop is intended for additional securing of hitched machines. Overload protection The overload protection is intended to secure the machines against overload, see refer to page 33. Bellima F 125 Original Operating Instructions 150000147_06_en... - Page 30 Wheel chock Stop cock of the tailgate When doing work to the bale chamber or at the tailgate, the stop cock of the tailgate must be closed, see refer to page 67. Bellima F 125 Original Operating Instructions 150000147_06_en...
-
Page 31: Data Memory
- if applicable in consultation with an expert. Additional functions regulated by a contractual agreement with the customer (e.g. remote maintenance) permit the transmission of certain machine data from the machine. Bellima F 125 Original Operating Instructions 150000147_06_en... -
Page 32: Machine Description
Machine description Machine overview Machine description Machine overview RPG000-013 Storage compartment Support jack Hose and cable support Pick-up Document storage tube Guide wheel Universal shaft Wheel chocks Bellima F 125 Original Operating Instructions 150000147_06_en... -
Page 33: Overload Protections On The Machine
To ensure sufficient tying safety, you must be careful only to use synthetic twine that has a running length of 400-600 m/kg. INFORMATION For twine tying, KRONE recommends using KRONE excellent Round Baler Twine. This twine can be ordered under material number 00 929 949 * (750 m/kg) or 00 929 951 * (1,000 m/kg). Bellima F 125... -
Page 34: Description Of The Net Wrapping Functionality
The deflection lever (1) moves the drive wheel (4) which presses the drive wheel (4) against the friction wheel (3). This starts up the tying unit, guides the net to the round bale, and pulls it off the round bale. Bellima F 125 Original Operating Instructions 150000147_06_en... - Page 35 The spring rail (5) settles on the setting screw (2). There, the spring rail (5) moves outwards until it drops, depending on the set net layers. This triggers the cutting unit to cut the net. Bellima F 125 Original Operating Instructions 150000147_06_en...
-
Page 36: Technical Data
Oil ISO VG 46 Delivery capacity hydraulics (min.) 30 L/min Delivery capacity hydraulics (max.) 60 L/min Electrical connections Electr. connection for road travel lighting (7-pole plug) 12 volts Electr. connection for operation (3-pole plug) 12 volts Bellima F 125 Original Operating Instructions 150000147_06_en... -
Page 37: Consumables
Lubricating greases For the manual lubrication points, a lubricating grease pursuant to DIN 51818 of NLGI class 2 (lithium soap with EP additives) must be used. KRONE recommends not to use lubricating greases based on other substances. The filling quantity depends on the requirements. Lubricate the manual lubrication points until lubricating grease escapes at the bearing position. -
Page 38: Initial Operation
„ The safety routines must be read and observed to avoid accidents, refer to page 23. Scope of delivery The machine is delivered together with the following additional parts located in the storage compartment or in the bale chamber. Bellima F 125 Original Operating Instructions 150000147_06_en... -
Page 39: Mounting Guide Wheels On Pick-Up
Depending on the equipment selected, the guide wheels are either made of sheet steel or are equipped with pneumatic tyres. Guide wheels made of sheet steel are shown here by way of example. Guide wheels with pneumatic tyres must be mounted in the same way. Bellima F 125 Original Operating Instructions 150000147_06_en... - Page 40 „ To mount the spring (2), tension the spring (2) and mount the nut (1). The guide wheel (6) can be adjusted via the oblong hole (5),refer to page 72. Left-hand machine side RP000-071 „ To dismount the spring (5), loosen the nut (6). Bellima F 125 Original Operating Instructions 150000147_06_en...
-
Page 41: Adjusting The Drawbar Height
„ Slightly raise or lower the support jack (2) so that the machine remains in the prescribed position. „ Tighten the screw connection in the oblong hole (3) on both sides of the drawbar (1). Bellima F 125 Original Operating Instructions 150000147_06_en... -
Page 42: Universal Shaft
„ Switch off the engine and remove the ignition key and carry it with you. „ Secure machine and tractor against rolling away. „ Instructions on how to shorten the universal shaft (1) can be found in the operating instructions of the universal shaft manufacturer. Bellima F 125 Original Operating Instructions 150000147_06_en... -
Page 43: Mounting Protective Cap Of Universal Shaft
„ Mount the hose and cable support (1) with the terminals (2) from the inside and with the nuts (4) from the outside. Æ The hoses and cables can be guided through the eye on the hose and cable support (1) towards the tractor. Bellima F 125 Original Operating Instructions 150000147_06_en... -
Page 44: Preparing Starter Roll Of Twine Tying
„ Remove the duct tape (1) provided as corrosion protection from the surface of the brake disc (2) and discard. Checking/adapting the tyre pressure Before the initial operation, check and adjust the tyre pressure. A label at the PTO shaft end draws the attention to this important test: Bellima F 125 Original Operating Instructions 150000147_06_en... - Page 45 Initial operation Checking/adapting the tyre pressure RP000-060 „ Checking and adjusting the tyre pressure, refer to page 89. Bellima F 125 Original Operating Instructions 150000147_06_en...
-
Page 46: Start-Up
(e.g. tractor tyres). „ Couple and connect the hoses and cables to the designated connections as described in the operating instructions. Connecting machine to tractor RP000-098 Example image Bellima F 125 Original Operating Instructions 150000147_06_en... -
Page 47: Mounting Safety Chain
The safety chain should have enough play when driving around curves. ü The machine is shut down and safeguarded, refer to page 23. Bellima F 125 Original Operating Instructions 150000147_06_en... -
Page 48: Connecting Hydraulic Hoses
If foreign objects or liquids get into the hydraulic system, the hydraulic system may be severely damaged. „ When connecting the quick couplings, ensure that they are clean and dry. „ Check the hydraulic hoses for abrasion and pinch point and replace if required. Bellima F 125 Original Operating Instructions 150000147_06_en... -
Page 49: Mounting The Universal Shaft On The Tractor
Risk of injury by failure to take account of the danger zone of the universal shaft If the danger zone of the universal shaft is ignored, persons can be seriously hurt or killed. „ To avoid accidents, observe the danger zone of the universal shaft, refer to page 16. Bellima F 125 Original Operating Instructions 150000147_06_en... -
Page 50: Connecting The Road Lighting
„ Connect the 7-pin plug of the lighting cable (2) to the 7-pin socket (1) of the machine. „ Connect the 7-pin plug of the lighting cable (2) to the 7-pin socket (3) of the tractor. „ Lay the lighting cable (2) so that it does not touch the tractor wheels. Bellima F 125 Original Operating Instructions 150000147_06_en... -
Page 51: Preparing The Operating Cables For Mechanical Machine Functions
„ Guide the rope (1) to the tractor cabin in such a way that it is easily accessible but is not under tension and does not touch the tractor wheels when cornering. To operate the rope (1), refer to page 67. Bellima F 125 Original Operating Instructions 150000147_06_en... -
Page 52: Operation
To attain a consistent bale density inside a round bale, the bale chamber must be filled evenly. Here, the swath width is important. The swath width is ideal if the swath has exactly the same width as the bale chamber. Bellima F 125 Original Operating Instructions 150000147_06_en... - Page 53 2 on the scale, complete the baling process. „ Switch off the PTO shaft in the headland. „ Start the tying cycle earlier than indicated. Driving speed KRONE recommends a driving speed of 5-12 km/h Bellima F 125 Original Operating Instructions 150000147_06_en...
-
Page 54: Completion Of The Baling Process, Start Of Tying, And Ejection Of The Round Bale
Æ The round bale rolls onto the field. Æ The tailgate is locked when the right bale pressure indicator (2) is below position "0". Initiating the tying cycle Depending on the configuration, the tying cycle can be initiated mechanically or hydraulically. Bellima F 125 Original Operating Instructions 150000147_06_en... -
Page 55: Locking/Releasing The Cutting Unit Of The Net Wrapping
RPG000-041 ü The machine is shut down and safeguarded, refer to page 23. „ Move the lever (2) in the direction of the arrow. „ Flip the stop piece (1) in the direction of the arrow. Bellima F 125 Original Operating Instructions 150000147_06_en... -
Page 56: Using The Bale Counter
„ To reset the bale counter (1), turn the knurled head screw (2) to set the indicator back to "0000". Operating support jack INFORMATION In order to increase the base of the support jack when the ground is soft, use a suitable support. Bellima F 125 Original Operating Instructions 150000147_06_en... -
Page 57: Fitting Wheel Chocks
ü The machine is shut down and safeguarded, refer to page 23. „ To dismount the wheel chocks (1) from the machine, press the supports (2) down, pull the wheel chocks (1) upwards, and remove them. Bellima F 125 Original Operating Instructions 150000147_06_en... -
Page 58: Pick-Up
(red, 1+) until the pick-up is raised. „ For the "Additional hydraulic connection for pick-up" version: Actuate the control unit at the tractor (yellow, 3+) until the pick-up is raised. 8.9.2 Adjusting the Pick-up Working Height RPG000-047 Bellima F 125 Original Operating Instructions 150000147_06_en... -
Page 59: Holding-Down Clamp
KRONE recommends a distance between tines and ground of 20-30 mm. „ For the "Hydraulic connection for tailgate and pick-up" version: Actuate the control unit at the tractor (red, 1+) until the pick-up is raised. -
Page 60: Dismounting/Mounting The Holding-Down Clamp
„ Cut off any soiled section of twine or use a new twine spool. „ Clean the components of the twine tying before inserting the twine. ü The machine is shut down and safeguarded, refer to page 23. Bellima F 125 Original Operating Instructions 150000147_06_en... - Page 61 „ Shorten the twine ends of all reef knots (2) to X=15-20 mm. „ Guide the beginning of the twine spool 1.3/2.3 via the eyelet (1) above it through the twine guide eye to the twine retainer. Bellima F 125 Original Operating Instructions 150000147_06_en...
- Page 62 RP000-081 NOTICE! The arrow (2) shows the direction of rotation of the drive roll (3). „ Place the two twines (1) around the drive roll (3). To set the number of twine layers, refer to page 73. Bellima F 125 Original Operating Instructions 150000147_06_en...
- Page 63 „ After inserting, tighten the two twines by pulling the excessive length of twine back into the storage compartment. To set the twine guide at the starter roller (3), refer to page 109. Bellima F 125 Original Operating Instructions 150000147_06_en...
-
Page 64: Dismounting/Mounting The Start Device Of The Twine Tying System
Also observe the information on the package provided by the tying material manufacturer. INFORMATION For trouble-free use in the field, KRONE recommends one of the "KRONE excellent" nets, see label on the machine with the number 27 018 640 *. Bellima F 125... - Page 65 If the net roll is not centrally aligned: „ Use a mounting lever (6) to push the net roll in the desired direction shown by the arrow until the net roll is positioned in the centre. Bellima F 125 Original Operating Instructions 150000147_06_en...
-
Page 66: Insert Net
100 mm in the bale chamber from the back of the machine. „ If required, unlock the cutting unit of the net wrapping, refer to page 55. To set the number of net layers, refer to page 74. Bellima F 125 Original Operating Instructions 150000147_06_en... -
Page 67: Actuating The Hydraulic Switching Valve
As a result, people may be seriously injured or killed. „ Always close the stop cock when carrying out work with the tailgate open. Bellima F 125 Original Operating Instructions 150000147_06_en... -
Page 68: Removing Crop Blockages
ü For the "Hydraulic switching valve" version: The hydraulic switching valve is set to "Bringing the pick-up to transport/working position",refer to page 67. „ Reverse with the PTO shaft running while repeatedly actuating the control unit in the tractor (red, 1+) to raise and lower the pick-up. Bellima F 125 Original Operating Instructions 150000147_06_en... -
Page 69: Crop Blockage Between Pick-Up And Bale Chamber
CAUTION! Risk of injury due to sharp parts! Always wear appropriate protective gloves when removing crop blockages. „ Remove the round bale from the bale chamber. „ Remove the accumulated crops manually. Bellima F 125 Original Operating Instructions 150000147_06_en... -
Page 70: Driving And Transport
ü The road lighting has been connected, tested and is functioning properly, refer to page 50. ü The pick-up is fully raised in transport position, refer to page 58. ü The fixing bolt for the pick-up is in transport position, refer to page 58. Bellima F 125 Original Operating Instructions 150000147_06_en... -
Page 71: Checking Road Travel Lighting
„ Disconnect the road lighting plug, refer to page 50. „ Disconnect the hydraulic hose lines and hook them into the support at the machine. „ Drive the tractor away carefully. Bellima F 125 Original Operating Instructions 150000147_06_en... -
Page 72: Settings
„ Loosen the nut (3). „ Loosen the screw connection (2) and set the desired height of the pick-up in the oblong hole. „ Tighten the screw connection (2) and the nut (3). Bellima F 125 Original Operating Instructions 150000147_06_en... -
Page 73: Adjusting The Number Of Twine Layers
The longer the crops, the smaller the required diameter of the stepped pulley (2) and the less twine is tied around the round bale. „ Place the two twines (1) around one of the 3 stepped pulleys in position [I], [II] or [III]. Bellima F 125 Original Operating Instructions 150000147_06_en... -
Page 74: Adjusting The Twine Limiter
RPG000-022 The number of net layers is set via the setting screw (1) on the right-hand side of the machine. Proceed as follows to set the number of net layers via dimension X: Bellima F 125 Original Operating Instructions 150000147_06_en... -
Page 75: Setting The Twine Brake
Clockwise rotation Higher Higher Anticlockwise rotation Lower Lower It is possible that the compression springs (3) will need to be adjusted differently so that the cut- off twine ends have the same length. Bellima F 125 Original Operating Instructions 150000147_06_en... -
Page 76: Setting The Driver Of The Twine Tying
ü The machine is shut down and safeguarded, refer to page 23. Setting the spring tension RPG000-051 The no-load brake spring (3) must be set so that the net can be properly retracted but is still held taut. Bellima F 125 Original Operating Instructions 150000147_06_en... -
Page 77: Setting The Hydraulic Tying Start Unit For Net And Twine Tying
The hydraulic tying start unit starts the tying at the machine via the control unit (green, 4+) at the tractor. Depending on whether you intend to start net or twine tying, you need to change the pull ropes. RP000-118 Bellima F 125 Original Operating Instructions 150000147_06_en... - Page 78 (1) to the storage compartment floor (4). „ To choose the net wrapping functionality [II], attach the steel cable (1) to the lever (3) and the plastic cable (2) to the storage compartment floor (4). Bellima F 125 Original Operating Instructions 150000147_06_en...
-
Page 79: Maintenance
Grease lubrication points according to lubrica- refer to page 81 tion chart Check the hydraulic hoses for leaks and, if ne- cessary, have them replaced by a KRONE service partner. Check electrical connection cables and road refer to page 71 travel lighting... -
Page 80: Maintenance - Once After 10 Hours
Retighten wheel nuts refer to page 90 Check tyre pressure refer to page 89 Check the hydraulic hoses for leaks and, if ne- cessary, have them replaced by a KRONE service partner. Clean the bushing and the drawbar eye refer to page 102 11.1.3 Maintenance –... -
Page 81: Lubrication Chart
„ Apply two strokes of lubricating grease from the grease gun per grease nipple. „ Remove excess lubricating grease at the grease nipple. „ Apply the oil evenly. Oils Plant-based oils, unless spe- cified otherwise. Bellima F 125 Original Operating Instructions 150000147_06_en... - Page 82 Maintenance 11.2 Lubrication Chart Left-hand machine side RPG000-031 Every 24 operating hours Bellima F 125 Original Operating Instructions 150000147_06_en...
- Page 83 Maintenance Lubrication Chart 11.2 (10) Every 50 operating hours Bellima F 125 Original Operating Instructions 150000147_06_en...
- Page 84 Maintenance 11.2 Lubrication Chart Every 100 operating hours Right and rear machine side RPG000-032 Bellima F 125 Original Operating Instructions 150000147_06_en...
- Page 85 Maintenance Lubrication Chart 11.2 Every 24 operating hours Every 50 operating hours Every 100 operating hours Bellima F 125 Original Operating Instructions 150000147_06_en...
-
Page 86: Lubricating The Universal Shaft
Metric thread screws with control thread INFORMATION The table does not apply to countersunk screws with hexagon socket in case the countersunk screw is tightened via hexagon socket. DV000-001 Thread size Strength class on screw head Bellima F 125 Original Operating Instructions 150000147_06_en... - Page 87 Tightening torque (Nm) M12 x 1.5 M14 x 1.5 M16 x 1.5 M18 x 1.5 M20 x 1.5 M24 x 2 1,121 1,312 M27 x 2 1,148 1,635 1,914 M30 x 1.5 2,100 2,650 Bellima F 125 Original Operating Instructions 150000147_06_en...
- Page 88 The term “locking screw” includes the drain plug, the inspection screw as well as the ventilation and breather filters. The table only applies to locking screws with external hexagon together with copper seal ring and for bleed valves made of brass with shaped seal ring. Bellima F 125 Original Operating Instructions 150000147_06_en...
-
Page 89: Checking/Maintaining Tyres
Inspect the tyres visually „ Visually inspect tyres for cuts or breaks. Æ If there are cuts or breaks in the tyres, have the tyres repaired or replaced by a KRONE service partner. Maintenance intervals for visual inspection of the tyres, refer to page 79. -
Page 90: Servicing The Main Gearbox
ü The machine is shut down and safeguarded, refer to page 23. „ Comply with the safety routine "Safe execution of oil level check, oil and filter element exchange", refer to page 24. „ Dismount the guard (1) behind the crossbeam (2). Bellima F 125 Original Operating Instructions 150000147_06_en... -
Page 91: Bleed The Friction Clutch On The Universal Shaft
„ Tighten the 8 screws (1) crosswise until the cover ring (3) is positioned directly on the outside washers (2). Ensure that the screws (1) are not overtightened. „ Undo the 8 screws (1) by one sixth of a turn. Bellima F 125 Original Operating Instructions 150000147_06_en... -
Page 92: Checking And Adjusting The Twine Tying Unit
„ Clean the twine guide slides (3), the drivers (4) and the area surrounding these components. „ If necessary, oil the drive chains (2). „ Close the 2 covers (1). Bellima F 125 Original Operating Instructions 150000147_06_en... -
Page 93: Checking And Adjusting The Starter Roll And The Pressure Rolls
„ Loosen the screws (1) and move the cutter blades (5) until they run smoothly once more. „ Tighten the screws (1) only so far that the cutter blades (5) still run smoothly. Bellima F 125 Original Operating Instructions 150000147_06_en... -
Page 94: Checking And Adjusting The Net Wrapping Device
(3). The distance X between setting screw (2) and spring rail (3) must be X=2-3 mm. „ To set the distance X, loosen the screws (4) and move the spring rail (3) until the dimension X=2-3 mm. „ Tighten the screws (4). Bellima F 125 Original Operating Instructions 150000147_06_en... -
Page 95: Adjusting The Cutting Unit
ü The dimension has been correctly set when the spring rail (2) is positioned on the setting screw (1), refer to page 94. „ To adjust the distance X, loosen the screws (5) and move the spring rail until the distance X=1 mm. „ Tighten the screws (5). Bellima F 125 Original Operating Instructions 150000147_06_en... -
Page 96: Checking And Setting The Hydraulic Tying Start Unit
When checking hydraulic hoses, the state-specific conditions (e.g., BGVU) must be observed. Performing a visual inspection „ Visually inspect all hydraulic hoses for damage and leaks and have them replaced by an authorised specialist if necessary. Bellima F 125 Original Operating Instructions 150000147_06_en... -
Page 97: Checking And Setting The Lock Hook Blocker At The Tailgate
ü The tailgate is open and hydraulically blocked by means of the stop cock. ü The left side hood is open. „ Loosen the screw connections (3) and move them in the oblong hole until the dimension Y=2-5 mm. „ Tighten the screw connections (3). Bellima F 125 Original Operating Instructions 150000147_06_en... -
Page 98: Set And Oil The Drive Chains
„ Loosen nuts (4) and set the chain tension correctly. „ Tighten the screw connections (3). „ Mount the guard (1). Oiling the drive chain „ Moisten the drive chain (2) with oil. Consumables, refer to page 37. Bellima F 125 Original Operating Instructions 150000147_06_en... -
Page 99: Drive Chain Of The Bale Formation Conveyor
ü The machine is shut down and safeguarded, refer to page 23. ü The side hood on the right-hand machine side is open. „ To tension the drive chain (3), set the dimension X=150 mm using the counter nut (1). Bellima F 125 Original Operating Instructions 150000147_06_en... -
Page 100: Check The Distance Of The Roller To The Bale Formation Conveyor Chain, Set If Applicable
„ Loosen the screws (1) and move the perforated plate (2) until the correct distance between roller and bale formation conveyor chain is set. „ Tighten the screws (1). „ Mount the nut (3). Bellima F 125 Original Operating Instructions 150000147_06_en... -
Page 101: Cleaning The Machine
„ Also after each use, clean all moving parts on the brake linkage and brake lever with compressed air, e.g. piston rod, brake lever and slack adjuster. This can prevent mechanical blockages. „ If required, repeat the cleaning several times a day. Bellima F 125 Original Operating Instructions 150000147_06_en... -
Page 102: Clean The Bushing And The Drawbar Eye
(1) in the drawbar eye (2) is X=43 mm. If the dimension X is exceeded, the drawbar eye (1) must be replaced by a KRONE service partner. „ To minimize wear, clean the bushing (1) and the drawbar eye (2) several times a day and coat with grease. - Page 103 2 Stop cock tailgate 5 Hydraulic cylinder tying start unit (for the "Hydraulic tying start unit" version) version 3 Hydraulic cylinder tailgate Bellima F 125 Original Operating Instructions 150000147_06_en...
-
Page 104: Disturbance, Cause And Remedy
Remedy „ Check the setting of the drawbar. The machine is hooked in too low in the front. „ If necessary, have a KRONE service partner adjust the drawbar height, refer to page 41. Disturbance: Crops fall out during the baling process between the roller and the bale formation conveyor chain. -
Page 105: Disturbances At The Tying Unit Or During The Tying Cycle
The cutting unit does not move fully down. whether the switching valve is set to net wrapping, refer to page 77. „ Have a KRONE service partner replace the cutter blade. The cutting unit is blunt. Bellima F 125 Original Operating Instructions 150000147_06_en... -
Page 106: Disturbances At The Twine Tying Unit
„ Slow down at the end of the baling process. „ Before the start of tying, Have the round bale re-baled without adding crops. Disturbance: The twine is too far away from the edge of the round bale. Bellima F 125 Original Operating Instructions 150000147_06_en... -
Page 107: Disturbances During Or After The Baling Process
„ Correctly set the baling pressure indicator, The baling pressure indicators refer to are not set correctly. page 112. Disturbance: The baling pressure indicator does not move up to the top baling pressure range. Bellima F 125 Original Operating Instructions 150000147_06_en... - Page 108 3. Disturbance: The tailgate cannot be closed completely. Possible cause Remedy „ Seal the hydraulic cylinder or have it replaced by a KRONE The hydraulic cylinder is leaky. service partner. Malfunction: The round bale is conically shaped.
-
Page 109: Setting The Twine Guide At The Starter Roll
If the two twines are not cut off simultaneously at the cutting unit, you can change the position of the cutter blades (5). To do so, the cutter blade (5) which cuts the twine too late must be positioned further outwards. Bellima F 125 Original Operating Instructions 150000147_06_en... -
Page 110: Checking And Adjusting The Starter Roll And The Pressure Rolls
The O-ring seal must be changed. RP000-540 ü The twine coil starting device (2) has been removed, refer to page 64. „ Remove the O-ring seal (2) from the friction wheel (1) and replace with a new O-ring seal. Bellima F 125 Original Operating Instructions 150000147_06_en... -
Page 111: Setting The Tailgate Lock
ð If the dimension is not Y=10–12 mm, the tailgate lock must be set. „ Adjust dimension Y with washers (4) on the rubber buffer (5). „ Check dimension X of the spring (3). Æ Dimension X must be approx. 7–7.5 mm more than when the spring is untensioned. Bellima F 125 Original Operating Instructions 150000147_06_en... -
Page 112: Setting The Mechanical Baling Pressure Indicator
„ To tension the wire rope (1), move the eyelet bolt (2) in direction of the arrow until the respective baling pressure indicator is in the correct position. „ Tighten the nuts (2). Bellima F 125 Original Operating Instructions 150000147_06_en... - Page 113 If the right-hand side baling pressure indicator is not in position "3": ü The right-hand side hood is open. „ Loosen the nuts (2) and tun until the right-hand side baling pressure indicator is in position "3". „ Tighten the nuts (2) against each other. Bellima F 125 Original Operating Instructions 150000147_06_en...
-
Page 114: Storage
„ Only jack up the machine by using a suitable car jack. „ Make certain that the machine is stable and safe when it is on blocks. „ Clean the machine thoroughly. Chaff and dirt attract moisture which causes steel parts to start rusting. Bellima F 125 Original Operating Instructions 150000147_06_en... - Page 115 Write down all repair jobs which must be performed by the next harvest and arrange for them to be done with sufficient lead time. Your KRONE dealer is better able to perform maintenance service and any required repairs outside the harvest season.
-
Page 116: Waste Disposal
All synthetic materials must be brought to a recycling centre for synthetic materials. Rubber • Rubber parts (hoses, tyres, …) must be brought to a rubber recycling centre. Electronic scrap • All electronic parts must be brought to a disposal point for electronic scrap. Bellima F 125 Original Operating Instructions 150000147_06_en... -
Page 117: Index
Behaviour in case of voltage flashover of overhead lines ..............20 Behaviour in dangerous situations and in case of accidents ............23 Bleed the friction clutch on the universal shaft ... 91 Bringing the pick-up to transport/working position ................58 Bellima F 125 Original Operating Instructions 150000147_06_en... - Page 118 ................69 Net does not extend to the outer edges . 106 Crop blockage in the pick-up ......68 Net is not conveyed........ 105 Cross references ..........6 Net pulls out ........... 106 Bellima F 125 Original Operating Instructions 150000147_06_en...
- Page 119 Lower the pick-up ..........58 Fitting wheel chocks ........... 57 Lubricating greases ..........37 Lubricating the universal shaft......86 Lubrication Chart ..........81 Guiding twines from the storage compartment to the bale chamber..........62 Bellima F 125 Original Operating Instructions 150000147_06_en...
- Page 120 Notes with information and recommendations ..9 Raised machine and machine parts ....22 Reasonably foreseeable misuse ......11 Removing crop blockages ........68 Re-ordering ............6 Road safety ............18 Running actuator test ......... 24 Bellima F 125 Original Operating Instructions 150000147_06_en...
- Page 121 Setting the wrapping material brake ....76 Waste disposal ..........116 Settings .............. 72 Shutting down and safeguarding the machine ... 23 Sources of danger on the machine ....20 Twine tying ............44 Start-up............... 46 Storage ............. 114 Bellima F 125 Original Operating Instructions 150000147_06_en...
- Page 122 This page has been left blank deliberately. Bellima F 125 Original Operating Instructions 150000147_06_en...
-
Page 123: Declaration Of Conformity
Declaration of conformity Declaration of conformity EC Declaration of Conformity Maschinenfabrik Krone Beteiligungs-GmbH Heinrich-Krone-Straße 10, D-48480 Spelle hereby declare, as manufacturer of the product named below, under our sole responsibility, that the Machine: Round Baler Type: Bellima F 125 to which this declaration refers is in compliance with the following relevant provisions: •... - Page 124 Maschinenfabrik Bernard Krone GmbH & Co. KG * Heinrich-Krone-Straße 10 D-48480 Spelle * Postfach 11 63 D-48478 Spelle ' +49 (0) 59 77 / 935-0 6 +49 (0) 59 77 / 935-339 ü www.landmaschinen.krone.de...
Need help?
Do you have a question about the Bellima F 125 and is the answer not in the manual?
Questions and answers