
Related Manuals for York Fitness 45065


Summary of Contents for York Fitness 45065
- Page 1 Owner’s Manual Warrior Ultimate Multifunction Bench 45065 V1.05 3MAY2016 www.yorkfitness.com...
-
Page 2: Table Of Contents
Table of contents Congratulations on CONTENTS purchasing your exercise equipment from Safety information Customer support Assembly instructions User instructions You have chosen a high quality, safe and innovative piece of equipment as your training partner and we are certain it will keep you motivated on the way to Fitness guide achieving your personal fitness goals. -
Page 3: Safety Information
• Due to our continuous policy of product • Replace defective components immediately, and/or development, York Fitness reserves the right to keep the equipment out of use until it is repaired. • Use only the adjustment settings as described in the instructions. -
Page 4: Customer Support
IMPORTANT!! - Please retain your sales receipt, York Fitness Customer Care may request proof of purchase to validate eligibility for warranty service. Warranty cover starts from the date shown on the proof of purchase. -
Page 5: Assembly Instructions
Assembly instructions Care & Maintenance • We recommend placing a mat beneath the equipment to protect both the equipment and your flooring • Always place the equipment in a dry environment. • Use a warm, damp cloth to keep the product clean. •... - Page 6 Assembly instructions STEP 1 B-2 x 1 T-4 x 5 T-2 x 2 T-5 x 2 T-3 x 2 T-1 x 2 T-7 x 1 T-6 x 1 Tools STEP 2 T-4 x 4 T-5 x 4 T-8 x 4 T-21 T-21 x 1 Tools...
- Page 7 STEP 3 T-4 x 4 T-2 x 8 T-5 x 2 T-10 x 8 T-9 x 2 T-11 x 1 Tools T-10 T-10 T-11 T-10 www.yorkfitness.com...
- Page 8 Assembly instructions STEP 4 T-4 x 2 T-5 x 1 T-12 x 1 T-6 x 1 Tools T-12 STEP 5 T-4 x 6 T-15 x 2 T-13 T-14 T-2 x 4 T-16 x 2 T-15 T-5 x 4 T-8 x 2 T-14 x 2 T-13 x 2 Tools...
- Page 9 STEP 6 T-17 Tools T-4 x 2 T-2 x 2 T-17 T-5 x 1 T-3 x 1 T-17 x 2 www.yorkfitness.com...
- Page 10 Assembly instructions STEP 7 T-4 x 5 T-5 x 3 T-19 x 2 Q - 3 x 2 T-18 x 1 Tools T-19 T-19 T-18 www.yorkfitness.com...
- Page 11 Final Check Your equipment is now assembled. Please make the following final checks: • Make sure all screws / bolts are tightened. • Make sure the equipment is on a flat, level surface. Incline / Flat / Decline adjustment • Lift rear upholstery slightly and extract locking pin (T-21) followed by support tube (E-1) •...
-
Page 12: User Instructions
User instructions Fitting Attachment A-8 x 2 G-3 x 1 T-4 x 5 T-8 x 1 T-20 x 2 Tools T-20 T-20 www.yorkfitness.com... - Page 13 Fitting Attachment (Continued) T-4 x 2 T-8 x 1 C-2 x 1 G -3 x 1 Tools www.yorkfitness.com...
- Page 14 User instructions Ab board adjustment Step 1 • Fit leg attachment and ensure all other attachments are removed • Remove handwheel (B-2) and bolt (T-7) • Lift rear upholstery slightly and extract locking pin (T-21) followed by support tube (E-1) •...
- Page 15 Folding for storage Step 1 • Start with bench in ab board position with or without flye arms fitted • Remove leg attachment • Remove pull pin (T-6) • Fold front leg backward until reaches main tube Step 2 • Lower bench to the ground •...
-
Page 16: Fitness Guide
Fitness guide Starting Your Workout Begin each workout with a Warm Up session - a few minutes of stretching to help prevent strains, pulls and cramps. 1. Perform some gentle stretching 2. Do light cardiovascular exercise (i.e. cycle) for approx 5-10 mins 3. - Page 17 Choosing Your Weights Start with a weight you can perform 12 repetitions without crossing the line from ‘challenged’ to ‘struggle’. If you cannot maintain correct technique, the weight is too heavy! Gradually increase the weight as you become stronger and more practiced. Training for increased muscle size •...
-
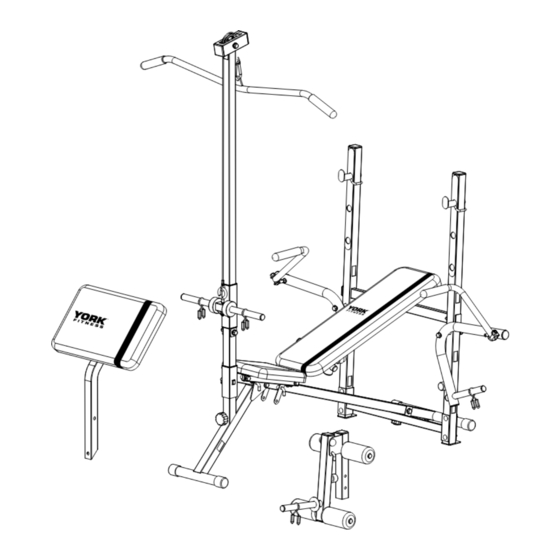
Page 18: Exploded Drawing
Exploded drawing www.yorkfitness.com... -
Page 19: Part List
Part List YORK REF. REF. DESCRIPTION QTY. YORK REF. REF. DESCRIPTION QTY. 45065-001 VERTICAL POST SET 45065-057 CIRCLE CAP 2 (Ø25*1.5) 45065-002 RIGHT VERTICAL POST COMBINATION 45065-058 SQUARE CAP (38*38*1.5) 45065-003 LEF VERTICAL POST COMBINATION 45065-059 BUSHING (Ø25*1.5) 45065-004 ADJUST KNOB (Ø35*60*M10*20) - Page 20 www.yorkfitness.com...
Need help?
Do you have a question about the 45065 and is the answer not in the manual?
Questions and answers