Sign In
Upload
Download
Table of Contents
Contents
Add to my manuals
Delete from my manuals
Share
URL of this page:
HTML Link:
Bookmark this page
Add
Manual will be automatically added to "My Manuals"
Print this page
×
Bookmark added
×
Added to my manuals
Manuals
Brands
DeLonghi Manuals
Coffee Maker
ETAM36.36 Series
Instructions for use manual
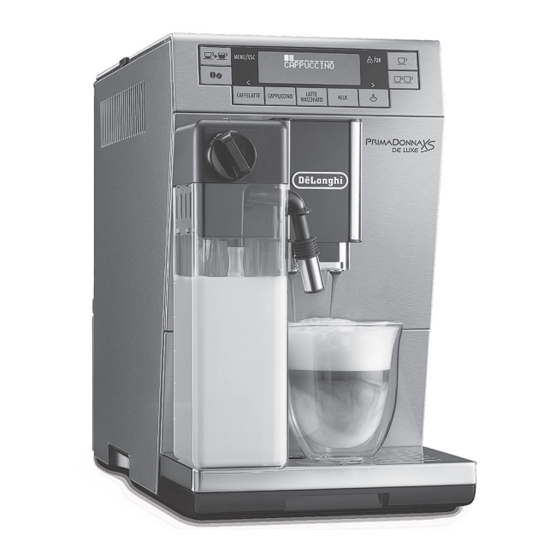
DeLonghi ETAM36.36 Series Instructions For Use Manual
Bean to cup espresso and cappuccino machine
Hide thumbs
1
2
3
4
5
6
7
8
9
10
11
12
13
14
15
16
17
18
19
20
21
22
23
24
25
26
27
28
29
30
31
32
33
34
35
36
37
38
39
40
41
42
43
44
45
page
of
45
Go
/
45
Contents
Table of Contents
Troubleshooting
Bookmarks
Table of Contents
조선말/한국어
Table of Contents
기본 안전 경고
안전 경고
사용 방법
지침에 사용되는 기호
지정된 사용
액세서리 설명
괄호 안의 글자
우유 컨테이너 설명
기기 점검
제어판 설명
기기 설명
문제 해결 및 수리
사용 전
기기 설치
기기 연결
기기 설정
기기 전원 켜기
기기 전원 끄기
시간 조정
자동 끄기
자동 시작
필터 설치
연수 필터 교체(설치한 경우)
석회질 제거
메뉴 설정
자동 대기 타이머/ 자동 끄기 타이머
에너지 절약 모드
온도 설정
물 경도 설정
언어 설정
경고음
컵 표시등
기본값 재설정
통계 기능
커피 만들기
커피 맛 선택
커피양 선택 기기
나만의 커피' 양 맞춤 설정
분쇄 커피를 사용해 커피 만들기
뜨거운 커피를 만들기 위한 팁
원두를 사용해 커피 만들기
커피 그라인더 조절
카푸치노와 우유 베이스 커피 만들기
우유 컨테이너 채우기 및 부착
거품 양 조절
카푸치노와 우유 베이스 커피 자동
Clean(청소) 기능을 사용하여 우유
거품기 청소
우유 양 프로그래밍
Caffelatte(카페라테), Cappuccino (카푸치노), Latte Macchiato(라테 마키아토) 및 Milk(우유) 버튼에 커피 및
온수 및 스팀 추출
온수 추출
자동으로 추출되는 물의 양 변경
스팀 추출
스팀을 사용해 우유 거품 만들기 팁
사용 후 추출구 청소
커피 머신 내부 청소
드립 트레이 및 응축액 받침대 청소
커피 찌꺼기 컨테이너 청소
기기의 내부 배관 청소
기기 청소
물통 청소
커피 추출구 청소
분쇄 커피 주입구 청소
추출기 청소
우유 컨테이너 청소
온수/스팀 연결 노즐 청소
석회질 제거
필터 설치
물 경도 설정
연수 필터
물 경도 측정
필터 분리
기술 자료
표시 메시지
문제 해결
English
Fundamental Safety Warnings
Designated Use
Instruction for Use
Introduction
Safety Warnings
Symbols Used in These Instructions
Before Use
Checking the Appliance
Description
Description of the Accessories
Description of the Appliance
Description of the Control Panel
Description of the Milk Container
Letters in Brackets
Troubleshooting and Repairs
Connecting the Appliance
Installing the Appliance
Setting up the Appliance
Turning the Appliance off
Turning the Appliance on
Adjust Time
Auto-Off
Auto-Start
Descale
Install Filter
Menu Settings
Replacing the Water Softener Filter (if Installed)
Rinsing
Auto-Standby Timer/ Auto-Off Timer
Beep
Energy Saving
Setting the Language
Setting the Temperature
Setting Water Hardness
Adjusting the Coffee Mill
Cup Lighting
Customising the "My Coffee" Quantity
Default Values (Reset)
Making Coffee
Selecting the Coffee Taste
Selecting the Quantity of Coffee in the Cup
Statistics Function
Filling and Attaching the Milk Container
Making Cappuccinos and Milk-Based Coffees
Making Coffee Using Coffee Beans
Making Coffee Using Pre-Ground Coffee
Tips for a Hotter Coffee
Adjusting the Amount of Froth
Cleaning the Milk Frother Using the CLEAN Function
Making Cappuccinos and Milk-Based Coffees Automatically
Programming the Quantity of Coffee and Milk in the Cup for the CAFFELATTE, CAPPUCCINO, LATTE MACCHIATO and MILK Buttons
Changing the Quantity of Water Delivered Automatically
Cleaning the Spout after Use
Delivering Hot Water and Steam
Hot Water Delivery
Steam Delivery
Tips for Using Steam to Froth Milk
Cleaning
Cleaning the Coffee Grounds Container
Cleaning the Drip Tray and Condensate Tray
Cleaning the Inside of the Coffee Machine
Cleaning the Machine
Cleaning the Machine's Internal Circuit
Cleaning the Water Tank
Cleaning the Coffee Spouts
Cleaning the Infuser
Cleaning the Milk Container
Cleaning the Pre-Ground Coffee Funnel
Cleaning the Hot Water/Steam Connection Nozzle
Descaling
Installing the Filter
Measuring Water Hardness
Setting Water Hardness
Water Softener Filter
Removing the Filter
Technical Data
Displayed Messages
Troubleshooting
Electrical Requirements (Uk Only)
Advertisement
Quick Links
Download this manual
ETAM36.36X
사용자 메뉴얼
BEAN TO CUP ESPRESSO
AND CAPPUCCINO
MACHINE
Instruction for Use
Table of
Contents
Previous
Page
Next
Page
1
2
3
4
5
Advertisement
Chapters
조선말/한국어
6
English
26
Table of Contents
Troubleshooting
Letters in brackets
29
TROUBLESHOOTING
43
Need help?
Do you have a question about the ETAM36.36 Series and is the answer not in the manual?
Ask a question
Questions and answers
Related Manuals for DeLonghi ETAM36.36 Series
Coffee Maker Delonghi ETAM36.365 Instructions For Use Manual
Bean to cup espresso and cappuccino machine (22 pages)
Coffee Maker DèLonghi ETAM36.365 Instructions For Use Manual
Bean to cup espresso and cappuccino machine (22 pages)
Coffee Maker Delonghi ETAM29.51X Instructions For Use Manual
Bean to cup espresso and cappuccino machine (21 pages)
Coffee Maker DeLonghi ETAM29.66X Instructions For Use Manual
(25 pages)
Coffee Maker DeLonghi ETAM29.62 SERIES Instructions For Use Manual
Bean to cup espresso and cappuccino machine (22 pages)
Coffee Maker DeLonghi ETAM29.620.SB Instructions For Use Manual
Bean to cup espresso and cappuccino machine (23 pages)
Coffee Maker DeLonghi ETAM29.62X Instructions For Use Manual
Bean to cup espresso and cappuccino machine (23 pages)
Coffee Maker DeLonghi ETAM29.510B Manual
(16 pages)
Coffee Maker DeLonghi Autentica ETAM29.51 Series Instructions For Use Manual
(21 pages)
Coffee Maker DeLonghi ETAM3636X Instructions For Use Manual
Bean to cup espresso and cappuccino machine (24 pages)
Coffee Maker DeLonghi ETAM36.365.M Instructions For Use Manual
Bean to cup espresso and cappuccino machine (45 pages)
Coffee Maker DeLonghi Autentica ETAM29.66 Series Instructions For Use Manual
(25 pages)
Coffee Maker DeLonghi ETAM29.666.S Instructions For Use Manual
Bean to cup espresso and cappuccino machine (25 pages)
Coffee Maker DeLonghi ECAM 22.110 Manual
Coffee bean coffee machine (14 pages)
Coffee Maker Delonghi Dedica EC680 Get Started
(10 pages)
Coffee Maker DeLonghi ECAM35075 Instructions For Use Manual
Fully automatic espresso and coffee machine (70 pages)
This manual is also suitable for:
Etam36.365.m
Table of Contents
Print
Rename the bookmark
Delete bookmark?
Delete from my manuals?
Login
Sign In
OR
Sign in with Facebook
Sign in with Google
Upload manual
Upload from disk
Upload from URL


Need help?
Do you have a question about the ETAM36.36 Series and is the answer not in the manual?
Questions and answers