Table of Contents
Advertisement
Advertisement
Table of Contents
Troubleshooting

Related Manuals for DeLonghi ETAM29.51X


Summary of Contents for DeLonghi ETAM29.51X
- Page 1 De’Longhi Appliances via Seitz, 47 31100 Treviso Italia www.delonghi.com...
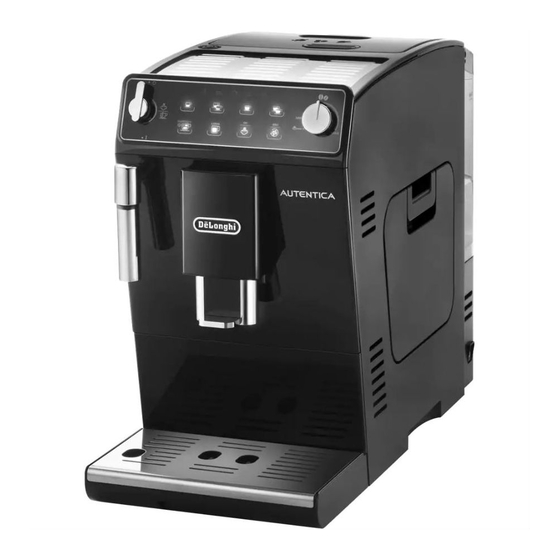
- Page 2 ETAM29.51X BEAN TO CUP ESPRESSO AND CAPPUCCINO MACHINE Instruction for Use...
- Page 3 page 6 B5 B6...
- Page 6 0,5 L...
-
Page 7: Table Of Contents
CONTENTS DELIVERING HOT WATER ......... 14 FUNDAMENTAL SAFETY WARNINGS ....7 CLEANING ............14 Cleaning the machine ..........14 IMPORTANT SAFEGUARDS .........8 Cleaning the coffee grounds container ....14 Symbols used in these instructions ......8 Cleaning the drip tray and condensate tray ....14 Designated use ............8 Cleaning the inside of the coffee machine .....14 Instruction for Use............8... -
Page 8: Fundamental Safety Warnings
FUNDAMENTAL SAFETY WARNINGS • Appliances can be used by persons with reduced physical, sensory or mental capa- bilities or lack of experience and knowledge if they have been given supervision or instruction concerning use of the appliance in a safe way and understand the hazards involved. -
Page 9: Important Safeguards
IMPORTANT SAFEGUARDS Instruction for Use Symbols used in these instructions Read this Instruction for Use carefully before using the appli- ance. Failure to follow this Instruction for Use may result in Important warnings are identified by these symbols. It is vital to burns or damage to the appliance. -
Page 10: Description Of The Touch Screen
BEFORE USE A13. Drip tray A14. Coffee grounds container Checking the appliance A15. Main switch (ON/OFF) After removing the packaging, make sure the product is com- A16. Infuser door plete and undamaged and that all accessories are present. Do A17. Infuser not use the appliance if it is visibly damaged. -
Page 11: Turning The Appliance On
2. Place a container with a minimum capacity of 100 ml under If you will not be using the appliance for some time, unplug the cappuccino maker (fig. 3). from the mains socket: 3. Plug the appliance into the mains socket and press the •... -
Page 12: Energy Saving
2 hours 3 hours 4. press the icon (B12) to confirm (or (B10) to Please note : exit without making the modification). The lights/icons go • The first time you use the appliance, you will need to make off. a number of coffees to identify the correct dial position The auto-off time is now programmed. -
Page 13: Tips For A Hotter Coffee
If the coffee is delivered too slowly or Once the coffee has been made, the appliance is ready to make not at all, turn one click clockwise to- the next drink. wards “7”. Important! For fuller bodied creamier coffee, turn •... -
Page 14: Making Long Coffee Using Coffee Beans
1. Place a sufficiently large cup or glass under the coffee 2. Fill a container (preferably one with a handle to avoid spouts. scalding) with about 100 grams of milk for each cappucci- 2. Press and hold the icon (B15) until the icon flashes no. -
Page 15: Delivering Hot Water
Cleaning the coffee grounds container 2. Wait a few minutes for the cappuccino maker to cool down. Turn the cappuccino maker downwards to remove it (fig. When the light flashes on the display, the grounds container 15). must be emptied and cleaned. The appliance cannot be used to 3. -
Page 16: Cleaning The Water Tank
Cleaning the water tank 7. Once inserted, make sure the two red buttons have snapped out (fig. 27). 1. Clean the water tank (A18) regularly (about once a month 8. Close the infuser door. and whenever you replace the water softener filter (C3) (if provided) with a damp cloth and a little mild washing up DESCALING liquid. -
Page 17: Setting Water Hardness
13. Empty the container used to collect the descaler solution 2. Press the icon (B14) until the icon lights up, togeth- and replace it empty under the hot water spout. er with the lights indicating the current setting; 14. Turn the hot water/steam dial back to the I position to 2. -
Page 18: Replacing The Filter
TECHNICAL DATA 9. Deliver hot water by turning the hot water/steam dial (B1) to the I position. Voltage: 220-240 V~ 50/60 Hz max. 10A Absorbed power: 1450W 12. Deliver at least 500 ml of hot water, then turn the hot water/ steam dial to the O position. -
Page 19: Disposal
The grinding is too fine and the coffee is delive- Repeat coffee delivery and turn the grinding red too slowly or not at all. adjustment dial (fig. 8) one click clockwise to- wards “7” while the coffee mill is in operation. If FLASH. -
Page 20: Troubleshooting
TROUBLESHOOTING Below is a list of some of the possible malfunctions. If the problem cannot be resolved as described, contact Customer Services. PROBLEM POSSIBLE CAUSE SOLUTION The coffee is not hot. The cups were not preheated. Warm the cups by rinsing them with hot water (Please note: you can use the hot water function). -
Page 21: Electrical Connection (Uk Only)
The milk is not frothed Cappuccino maker dirty. Clean as described in the section “Cleaning the cappuccino maker after use” (page 13). Steam delivery stops A safety device stops steam delivery Wait, and then enable the steam function after 3 minutes. again.
Need help?
Do you have a question about the ETAM29.51X and is the answer not in the manual?
Questions and answers