
Related Manuals for DeLonghi ETAM3636X


Summary of Contents for DeLonghi ETAM3636X
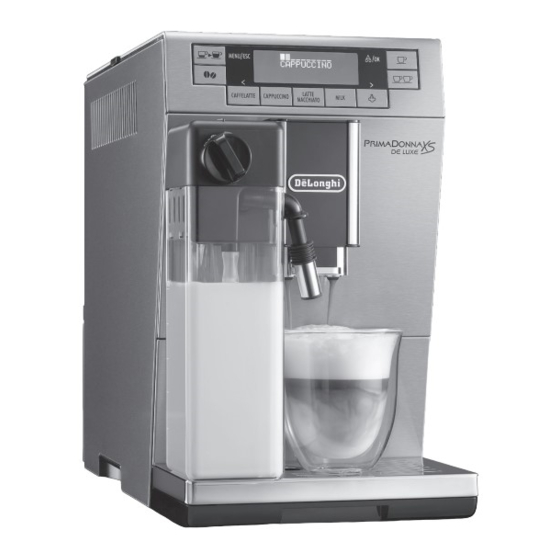
- Page 1 ETAM3636X BEAN TO CUP ESPRESSO AND CAPPUCCINO MACHINE Instruction for Use Video instruction manual available on: http://etam36365.delonghi.com...
- Page 2 A24 A23...
-
Page 4: Table Of Contents
CONTENTS 8.5 Programming the quantity of coffee and milk in the cup for the CAFFELATTE, CAPPUCCINO, INTRODUCTION .........5 LATTE MACCHIATO and MILK buttons...13 1.1 Letters in brackets .........5 9. DELIVERING HOT WATER AND STEAM ..13 1.2 Troubleshooting and repairs ......5 9.1 Hot water delivery ........13 2. -
Page 5: Introduction
Before using the appliance, always read the safety warnings. A24. button: to enable or disable the cup warmer 2.2 Description of the control panel INTRODUCTION (page 2 - B ) Thank you for choosing this bean to cup espresso and cappuccino A number of buttons on the panel have a double function. -
Page 6: Turning The Appliance On
• You should customise water hardness as soon as possible following the instructions in section “12. Setting water hardness”. 1. Plug the power cord (C8) connector into the socket (A13) at the back of the appliance and connect the appliance to the mains electricity supply (fig. -
Page 7: Turning The Appliance Off
To enable the function, proceed as follows: • To turn the appliance on, press the button (A23) (fig. 1. Press the MENU/ESC button (B3) to enter the menu; 8). The message “Heating up Please wait” appears on the 2. Press < (B12) or > (B8) (fig. 9) until “Rinsing” appears on the display (B4). -
Page 8: Auto-Start
4. Press < or > (fig. 8) to change the hour; To disable (or enable) energy saving, proceed as follows: 5. Press the button to confirm. The minutes flash; 1. Press the MENU/ESC button (B3) to enter the menu; 6. Press < or > (fig. 9) to change the minutes; 2. -
Page 9: Cup Lighting
1. Press the MENU/ESC button (B3) to enter the menu; 7. MAKING COFFEE 2. Press < (B12) or > (B8) (fig. 9) until “Beep” appears on the 7.1 Selecting the coffee taste display (B4); The appliance is set by default to make coffee with a standard 3. -
Page 10: Customising The "My Coffee" Quantity
Please note! ≃90 LONG The grinding adjustment dial must only be turned when the ≃120 EXTRA LONG coffee mill is in operation. If the coffee is delivered too slowly or not at all, turn one click clockwise to- 7.3 Customising the “my coffee” quantity wards “7”. -
Page 11: Making Coffee Using Pre-Ground Coffee
2. Open the top lid (A1), then open and raise the pre-ground coffee funnel lid (A3). 3. Make sure the funnel is not blocked, then add one level measure of pre-ground coffee (fig. 18). 16 17 4. Press the button corresponding to the number of coffees required ( B6 for 1 cup, or B7 for 2 cups);... -
Page 12: Adjusting The Amount Of Froth
6. Attach the milk container to the connection nozzle (A12) and push as far as it will go (fig. 23). The machine emits a beep (if the beep function is enabled); Place a sufficiently large cup under the coffee spouts (A11) and frothed milk spout (D5). -
Page 13: Cleaning The Milk Frother Using The Clean Function
8.4 Cleaning the milk frother using the CLEAN 3. Release the button. The appliance starts delivering milk; 4. Once the required quantity of milk has been delivered into function the cup, press the button again; Important! Danger of burns 5. The appliance stops delivering milk and, if required for the When cleaning the internal tubes of the milk container (D), a lit- beverage being prepared, after a few seconds the coffee is tle hot water and steam leak out of the frothed milk spout (D5). -
Page 14: Tips For Using Steam To Froth Milk
2. Fill a container with the liquid to be heated/frothed and 5. Wash all parts of the spout thoroughly with a sponge and immerse the spout in the liquid; warm water; 3. Press the button (B8). After a few seconds, the steam 6. -
Page 15: Cleaning The Drip Tray And Condensate Tray
been prepared. For the 72 hours to be calculated correctly, the overflow the edge and damage the appliance, the surface it machine must never be turned off with the main switch. rests on or the surrounding area. Important! Danger of burns To remove the drip tray: If you make a number of cappuccinos one after the other, the 1. -
Page 16: Cleaning The Pre-Ground Coffee Funnel
7. After cleaning, replace the infuser by sliding it onto the internal support (fig. 36), then push the PUSH symbol fully in until it clicks into place; 10.8 Cleaning the pre-ground coffee funnel Please note! Check regularly (about once a month) that the pre-ground If the infuser is difficult to insert, before insertion, adapt it to the coffee funnel (A4) is not blocked. -
Page 17: Cleaning The Hot Water/Steam Connection Nozzle
11. DESCALING Descale the machine when the message “DESCALE” flashes on the display (B4) together with the “ ” symbol. Important! • Before use, read the instructions and the labelling on the descaler pack. • You should use De’Longhi descaler only. Using unsuitable descaler and/or performing descaling incorrectly may re- sult in faults not covered by the manufacturer’s guarantee. -
Page 18: Setting Water Hardness
Important! Danger of burns • After descaling, it is normal for the grounds container Hot water containing acid flows out of the hot water spout. (A18) to contain water. Avoid contact with splashes of water. 12. SETTING WATER HARDNESS The DESCALE message appears on the display after a period of 9. -
Page 19: Installing The Filter
13.1 Installing the filter 1. Remove the filter (C4) from the packaging. 2. Turn the date indicator disk (see fig. 44) until the next two months of use are displayed. 7. Close the tank with the lid (A8) (fig. 48), then replace the tank in the machine. -
Page 20: Removing The Filter
14. TECHNICAL DATA 9. “Water delivery Press OK” is displayed. 10. Press the button to confirm the selection. The Voltage: 220-240 V~ 50/60 Hz max. 10A appliance begins hot water delivery and the message Absorbed power: 1450W “Please wait” is displayed. Pressure: 1,5 MPa (15 bar) 11. - Page 21 DISPLAYED MESSAGE POSSIBLE CAUSE SOLUTION INSERT GROUNDS CONTAINER After cleaning, the grounds container (A18) Remove the drip tray (A16) and insert the has not been replaced. grounds container. ADD PRE-GROUND COFFEE The pre-ground coffee function has been se- Place pre-ground coffee in the funnel or dese- lected without placing any pre-ground coffee lect the “pre-ground”...
-
Page 22: Troubleshooting
16. TROUBLESHOOTING Below is a list of some of the possible malfunctions. If the problem cannot be resolved as described, contact Customer Services. PROBLEM POSSIBLE CAUSE SOLUTION The coffee is not hot. The coffee is not hot. The cups were not preheated. The cups were not preheated. - Page 23 PROBLEM POSSIBLE CAUSE SOLUTION The milk contains The milk contains The milk is not cold enough or is not The milk is not cold enough or is not Use skimmed or semi-skimmed milk at refrige- Use skimmed or semi-skimmed milk at refrige- large bubbles and large bubbles and semi-skimmed.
- Page 24 De’Longhi Appliances via Seitz, 47 31100 Treviso Italia www.delonghi.com...
Need help?
Do you have a question about the ETAM3636X and is the answer not in the manual?
Questions and answers