Table of Contents
Advertisement
Quick Links
Advertisement
Table of Contents
Troubleshooting

Related Manuals for DeLonghi ETAM29.62X


Summary of Contents for DeLonghi ETAM29.62X
- Page 1 De’Longhi Appliances via Seitz, 47 31100 Treviso Italia www.delonghi.com...
- Page 2 ETAM29.62X BEAN TO CUP ESPRESSO AND CAPPUCCINO MACHINE Instruction for Use...
- Page 3 page 6...
- Page 5 HOT MILK...
-
Page 7: Table Of Contents
CONTENTS 9.9 Customising the DOPPIO+ coffee quantity ..14 9.10 Making LONG coffee using coffee beans ..14 1. FUNDAMENTAL SAFETY WARNINGS .....7 9.11 Making LONG coffee using pre-ground coffee ..............14 2. SAFETY WARNINGS ........8 9.12 Customising the LONG coffee quantity ..14 2.1 Symbols used in this Instruction for Use ..8 10. -
Page 8: Fundamental Safety Warnings
1. FUNDAMENTAL SAFETY WARNINGS • Appliances can be used by persons with reduced physical, sensory or mental capa- bilities or lack of experience and knowledge if they have been given supervision or instruction concerning use of the appliance in a safe way and if they understand the hazards involved. -
Page 9: Safety Warnings
2. SAFETY WARNINGS Any other use is considered improper and thus dangerous. The manufacturer is not liable for damage deriving from improper 2.1 Symbols used in this Instruction for Use use of the appliance. Important warnings are identified by these symbols. It is vital to respect these warnings. -
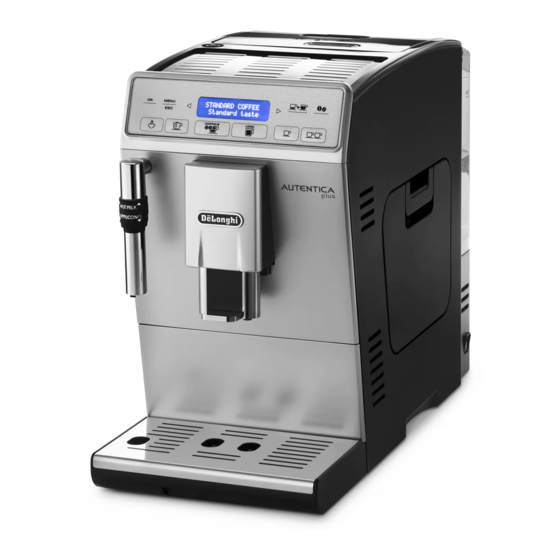
Page 10: Description
4. DESCRIPTION 4.3 Description of the accessories (page 2 - C ) 4.1 Description of the appliance C1. “Total Hardness Test” indicator paper (page 3 - A ) C2. Pre-ground coffee measure A1. Beans container lid C3. Descaler A2. Pre-ground coffee funnel lid C4. -
Page 11: Turning The Appliance On
fee in the mill. The machine is, however, guaranteed to be • To turn the appliance on, press the button (A5) (fig. new. 6). The message “Heating up Please wait” appears on the • You should customise water hardness as soon as possible display (B3). -
Page 12: Descaling
4. Press the OK icon: after a few seconds, hot water is delivered 7. Press to change the minutes. from the coffee spouts to clean and heat the appliance’ s in- 8. Press the OK icon to confirm. ternal circuit. 9. -
Page 13: Setting The Temperature
8.9 Setting the temperature 3. Press the OK icon (B1) (fig. 4). 4. The message “Confirm?” is displayed. To modify the temperature of the water used to make the coffee, 5. Press the OK icon to confirm and exit. proceed as follows: 1. -
Page 14: Customising The "My Coffee" Quantity
9.3 Customising the “my coffee” quantity 1. Fill the container (A3) (fig. 12) with coffee beans. 2. Place under the coffee spouts (A10): The appliance is set by default to automatically deliver about - 1 cup, if you want to make 1 coffee (fig. 10); 30ml of “my coffee”. -
Page 15: Making Doppio+ Coffee Using Coffee Beans
9.12 Customising the LONG coffee quantity 6. Preparation begins. The amount of coffee selected is dis- played together with a progress bar which gradually fills as The appliance is set by default to automatically deliver about preparation progresses. 200ml of LONG coffee. To modify these settings, proceed as follows: Please note! 1. -
Page 16: Making Hot Milk (Not Frothed)
7. After a few seconds, steam is delivered from the cappucci- Please note! no maker, giving the milk a creamy frothy appearance and If “Energy Saving” mode is active, you may have to wait a few making it more voluminous. seconds before hot water is delivered. -
Page 17: Cleaning The Machine's Internal Circuit
12.2 Cleaning the machine’s internal circuit 2. Empty the drip tray and grounds container and wash them. 3. Check the condensate tray (A11) and empty if necessary. If the appliance is not used for more than 3/4 days, before using 4. -
Page 18: Descaling
3. Press the two coloured release buttons inwards and at the Pour the descaler (C3) into same time pull the infuser outwards (fig. 28). the tank up to level A (cor- 4. Soak the infuser in water for about 5 minutes, then rinse responding to a 100 ml under the tap. -
Page 19: Setting Water Hardness
fresh water and insert it in the appliance. “RINSING Press 2. Press (B4) or (B5) (fig. 7) and select “Water OK” will appear on the display. hardness”. 15. Place the container used to collect the rinsing water empty 3. Confirm the selection by pressing the OK icon (B1) (fig. 4). under the cappuccino maker (fig. -
Page 20: Replacing The Filter
5. Insert the filter in the water tank and immerse it complete- 8. Press the OK icon to confirm the selection. ly for about ten seconds, sloping it and pressing it lightly to 9. “HOT WATER Press OK” is displayed. enable the air bubbles to escape (fig. -
Page 21: Displayed Messages
18. DISPLAYED MESSAGES DISPLAYED MESSAGE POSSIBLE CAUSE REMEDY FILL TANK Insufficient water in the tank (A20). Fill the tank with water and/or insert it correct- ly, pushing it as far as it will go until it clicks into place. EMPTY GROUNDS CONTAINER The grounds container (A15) is full. Empty the grounds container and drip tray (A14), clean and replace. -
Page 22: Troubleshooting
Press OK (B1) and deliver water from the cap- WATER CIRCUIT EMPTY FILL The water circuit is empty. WATER CIRCUIT puccino maker (A8) until it flows out normally. HOT WATER If the problem persists, make sure the water Press OK tank (A20) is fully inserted. -
Page 23: Electrical Connection (Uk Only)
The milk is not frothed The cappuccino maker (A8) is dirty. Clean the cappuccino maker as described in section “10.2 Cleaning the cappuccino maker after use”. The ring on the cappuccino maker (A7) Push the ring into the “CAPPUCCINO” position is in the “HOT MILK”...
Need help?
Do you have a question about the ETAM29.62X and is the answer not in the manual?
Questions and answers