
Related Manuals for Emerson iPro IPG215D


Summary of Contents for Emerson iPro IPG215D
- Page 1 iPro I/O Module Installation and Operation Manual iPro I/O Module Firmware Versions 2.0 and Above 026-1741 Rev 0...
- Page 3 Emerson 1065 Big Shanty Road NW, Suite 100 Kennesaw, GA 30144 USA 770-425-2724 • www.emerson.com Emerson Customer Service 479-845-3430...
-
Page 5: Table Of Contents
CONTENTS 1 GENERAL DESCRIPTION ............................. 1-1 1.1 I/O C ................................1-1 APACITY 1.2 O ..........................1-1 RDERING AND UMBERS 1.3 10 DIN IPG215D H ........................ 1-2 ARDWARE VERVIEW 1.4 A ..........................1-2 NALOG NPUT PECIFICATIONS 1.5 D ..........................1-3 IGITAL NPUT PECIFICATIONS 1.6 R... -
Page 7: General Description
The I/O Module inputs and outputs are fully configurable from the E2E controller via BACnet MS/TP. The I/O Remote Display Module can be used with the Emerson E2E controller to Table 1-1 - PLC Onboard I/O Capabilities gather data from analog or digital inputs, control the I/O Module’s Onboard relays, and provide an analog output... -
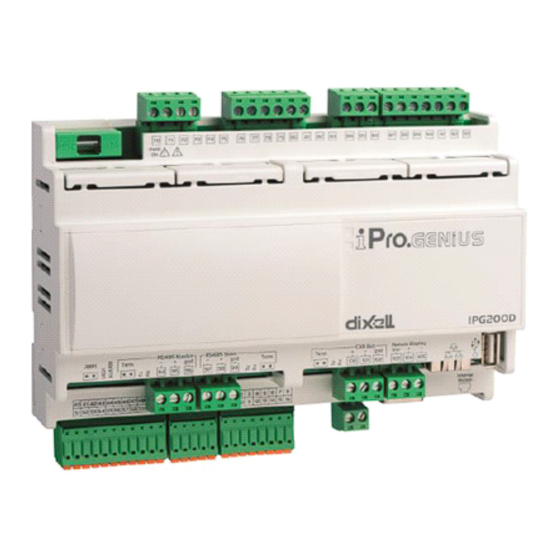
Page 8: Din Ipg215D Hardware Overview
77°F) PTC Dixell (-67T239°F; 990Ω ±1% Type of analog input at 77°F) (configurable via Emerson/CPC Temperature Sensors software Voltage: 0V, 0 to 5V, 0 to 10V (input parameter) resistance 3.7KΩ) Current: 0 to 20mA, 4 to 20mA (input resistance 100Ω) -
Page 9: Digital Input Specifications
Digital Input Relay Output Specifications Specifications The below tables outline the digital input specifications. The below tables outline the relay output specifications. 10 DIN 215D Relay Output Specifications CAUTION: Use another transformer (do Type Relays with NO contacts not use the same secondary of the controller’s power) in order to prevent the Number of outputs inputs from malfunctioning or being damaged. -
Page 10: Analog Output Specifications
A separate transformer other than the controller supply power is required to power the 10 DIN’s analog outputs. When purchasing one of the Emerson control panels, the analog output wiring and 24 VAC supply wiring is factory-wired to a terminal block. Installers only... -
Page 11: Connector Descriptions
Connector Descriptions Figure 1-2 - 10 DIN 215D Connectors Input Type of Input Description Supply Reference “-”/ GND power (24VAC or 24VDC) Configurable analog input 1 (NTC, PTC, 0 to 20mA, 4 to 20mA, 0 to 10V, 0 to 1V, 0 to 5V, DI) Configurable analog input 2 (NTC, PTC, 0 to 20mA, 4 to 20mA, 0 to 10V, 0 to 1V, ... - Page 12 Input Type of Input Description Configurable analog input 8 (NTC, PTC, 0 to 20mA, 4 to 20mA, 0 to 10V, 0 to 1V, 0 to 5V, DI) Configurable analog input 9 (NTC, PTC, 0 to 20mA, 4 to 20mA, 0 to 10V, 0 to 1V, 0 to 5V, DI) Configurable analog input 10 (NTC, PTC, 0 to 20mA, 4 to 20mA, 0 to 10V, 0 to 1V, ...
- Page 13 Input Type of Input Description DI14 Opto-insulated digital input 14 DI15 Opto-insulated digital input 15 DI16 Opto-insulated digital input 16 DI17 Opto-insulated digital input 17 DI18 Opto-insulated digital input 18 DI19 Opto-insulated digital input 19 DI20 Opto-insulated digital input 20 Common opto-insulated digital input 1 to 20 (if voltage free inputs) Relay 1 normally open contact Common relays 1, 2, and 3 (6A Max)
-
Page 14: Visograph Display
Input and output configuration is performed from the E2E. In most situations the Visograph is factory-mounted and wired inside an Emerson control panel. Figure 1-3 - Visograph Front Display With Labeled Keys Figure 1-4 - Visograph Dimensions •... -
Page 15: Panel Mounting And Wiring
Panel Mounting and Wiring In most situations the I/O Module PLC will be factory-mounted and wired inside an Emerson UL listed industrial control panel. Installers need only to make field connections for the panel’s supply power and any input or output wiring that is being used specific to the installation. -
Page 16: Din Panel Supply Power
PbC Common terminal is used for the Common terminal of all sensors. The PbC probe Common should only be used for resistive type inputs and not voltage/current inputs. If temperature sensors must be extended beyond the factory leads, Emerson specifies P/N 135-0600 22/2 shielded cable. • iPro I/O Module Installation and Operation Manual... -
Page 17: Din Panel Pressure Transducer And Voltage Input Wiring
GND pin 8, connect the red power source wire to the +5V pin 15 terminal. Connect the sensor cable shield wire to earth ground by attaching to the panel back plate. If the Emerson pressure transducer wiring must be extended beyond the factory leads, then Emerson specifies P/N 135-8771 22/3 shielded cable. -
Page 18: Din Panel 4-20Ma Input Wiring
Figure 2-5 - Emerson Pressure Transducer Input Wiring 0 to 1 VDC, 0 to 5 VDC, and 0 to 10 VDC Sensor Wiring 2.1.5 10 DIN Panel Relay Wiring Other voltage type inputs that require 5V or 12V power and Specifications can be wired similar to the 5 volt transducer. - Page 19 Figure 2-6 - 10-DIN 420mA Input Wiring • 10 DIN IPG215D Panel Mounting and Wiring Panel Mounting and Wiring...
- Page 20 Contact Characteristics Contact Material Silver Alloy Contact Rating (resistive) 30 A NO Contacts/40 A NC Contacts 277VAC Max Switching Voltage 277V Max Switching Current 2 @ 277VAC 1 @ 120VAC Coil Characteristics Voltage Range 12 to 277VAC Average Consumption Table 2-1 - 10 DIN Panel Pilot Relay Specifications Figure 2-7 - 10 DIN Panel Relay Wiring •...
-
Page 21: Din Panel Dual Temperature Switches
2.1.6 10 DIN Panel Dual Temperature Switches The 851-4445 control panel comes with ten (10) toggle switches factory-mounted in the front of the panel door beneath the E2E controller. The switches are used to put dual temperature refrigeration cases in either medium or low temperature operation mode. -
Page 22: Navigating Visograph Display
Navigating Visograph Display The Visograph display is used to view the status of inputs and outputs, toggle refrigeration circuit overrides and edit BACnet MS/TP network settings. There are eight (8) keys, T1-T8, along the bottom of the display that are used to navigate the display. -
Page 23: Accessing Main Menu
Figure 3-4 - Visograph Relay Output Screen Figure 3-6 - Visograph Circuit Override Screen AO Shortcut ALARM Shortcut Press the T5 key to access the analog output status screen. If there is at least one (1) alarm present in the system, the This screen displays the current signal voltage for all alarm shortcut will become visible. -
Page 24: Configuring Bacnet Settings
Figure 3-8 - Visograph Main Menu Baud Rate Configuring BACnet This parameter specifies how fast data is sent over the serial line. Set to 19200 for communications with E2E. Settings Max Master From the Main Menu, use the T6 key to arrow down to This parameter defines the value of the highest allowable address for master nodes on the network. -
Page 25: Controller Info
Controller Info Pressing SAVE will apply the changes made and the system will reboot. From the Main Menu, use the T6 key to arrow down to 2. Controller Info and press T5 SET to enter. The Controller Info screen has information about the current application version and build date. -
Page 26: Performing A Backup
Performing a Backup The I/O Module has the capability to back up all parameters to a backup file and transfer to the file to a USB. This feature can be helpful during a replacement device scenario or any time a quick parameter configuration is needed. -
Page 27: Performing A Restore
The display will show Backup Transfer to USB Complete, Remove USB and Exit. It is now safe to remove the USB drive. Figure 3-20 - Visograph Restore Backup - File Found The restore process will begin and display a Figure 3-18 - Visograph Backup Successful Restore In Progress message: Performing a Restore If a backup operation has been performed with a USB... -
Page 28: Service Menu
Service Menu The Service Menu is used to reboot the controller, re-initialize BACnet, and update the template.bin file for the Visograph. From the Main Menu, use the T4/T6 keys to select 5. Service and press T5 SET to enter the menu. Figure 3-24 - Visograph Service Menu - Update button The update procedure will begin and the Visograph will show an update status screen. -
Page 29: Re-Initialize Bacnet Ms/Tp
Figure 3-26 - Visograph Service - Reboot Controller No. Figure 3-28 - Visograph Service - Rebuikd BACnet Files The controller will perform a reboot. The warning message will be displayed, press T8 to continue the action or T1 to exit and abort. Figure 3-27 - Visograph Service - Controller Reboot Figure 3-29 - Rebuild BACnet Warning Message 3.7.3... -
Page 30: E2E Setup And Overview
E2E Setup and Overview The I/O Module can communicate with E2E version 4.09F04 or later. The I/O Module must be online and communicating with E2E to configure inputs and outputs. After the BACnet MS/TP serial settings have been set up in the I/O Module as outlined in Section 3.3, Configuring BACnet Settings, the E2E setup can now be completed. - Page 31 + Three (3) fields will become visible underneath at the same time to reach the Press the COM4 Connection that pertain to the way the BACnet tab. device communicates: a. COM4 DevId - This is the E2E BACnet Device ID; set this to a unique number from all other BACnet nodes on the network in the range of 0-4194303.
- Page 32 Figure 4-5 - E2E- IO Network Tab Figure 4-7 - E2E- Network Summary Screen Press (NEXT) to move over to the tab 12. Highlight the device and press C4: Third Party. In the Connected I/O screen COMMISSION, a list of networks will appear. under the Third Party tab, enter the number of ...
-
Page 33: Configuring Analog Inputs
AI Setup Description 1 - Not Used Sets the input to Not Used. 2 - Emerson Configures the input for any of Emerson’s Figure 4-11 - E2E- BACnet Device ID is Set Temp standard temperature sensors. 16. Press the to save and exit back to the Configures the input for Emerson’s 100 PSI... -
Page 34: Configuring A Custom Pressure Transducer
AI Setup Description 7 - Dixell Configures the input for standard Dixell NTC Temp NTC temperature sensor. 8 - Dixell PTC Configures the input for standard Dixell Temp NTC temperature sensor. Configures the input for a custom scaled 9 - Linear linear input. -
Page 35: Configuring A Linear Analog Input
MIN EU + Press keys at the same time to navigate In the MIN EU field, enter the engineering unit value that to the Network Summary screen. will correspond to the sensor signal voltage value entered Highlight the I/O Module device and press in the MIN SIGNAL field. -
Page 36: Configuring Digital Inputs
• Alarm- an alarm entry will be added to the E2E advisory log at the priority specified by AL_Prio. • Notice - a notice will be added to the E2E advisory log. For detailed information on the E2E advisory log, reference the E2E User Manual. AL_Prio This field is the alarm priority level for the analog input alarm that is generated when the input is configured and in... -
Page 37: Configuring Relay Outputs
Configuring Relay Outputs The I/O Module relay outputs are configured from the I/O Module application in E2E. There are eight (8) relay outputs available for the 4 DIN 208D model iPro, and 15 relay outputs for the 10 DIN 215D model. E2E commands the logical value of each relay, and the I/O Module will then apply the polarity setting and switches the physical state of the relay. -
Page 38: Configuring Analog Outputs
Configuring Analog Outputs The I/O Module analog outputs are configured from the I/O Module application in E2E. There are four (4) analog outputs available for the 4 DIN 208D model iPro, and six (6) analog outputs for the 10 DIN 215D model. E2E controls the signal output of each analog output by sending a command in the form of 0 to 100%. -
Page 39: Circuit Overrides Default Value
Highlight the I/O Module device and press refrigeration circuit. + 4.6.1 Circuit Overrides Default (SETUP), press at the same time to bring up more list. Select option F Circuit Value Ovr by pressing F on the E2E keyboard. The circuit override values may be linked to other E2E applications and logic. - Page 40 Emerson Climate Technologies Retail Solutions, Inc. and/or its affiliates (collectively “Emerson”), reserves the right to modify the designs or specifications of such products at any time without notice. Emerson does not assume responsibility for the selection, use or maintenance of any product. Responsibility for proper selection, use and maintenance of any product remains solely with the purchaser and end-user.
Need help?
Do you have a question about the iPro IPG215D and is the answer not in the manual?
Questions and answers