Table of Contents
Advertisement
Quick Links
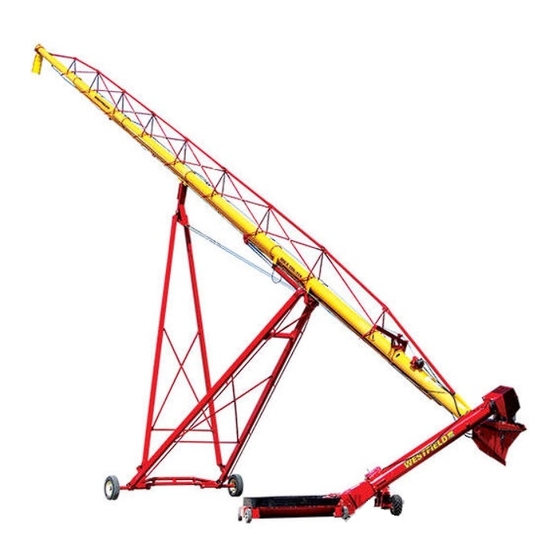
Swing-Away Grain Auger
MKX10 & HX10
Operator's Manual
This manual applies to:
Westfield MKX10-53, MKX10-63, MKX10-73, MKX10-83
Hutchinson HX10-53
Mayrath HX10-53
Read this manual before using product. Failure to
follow instructions and safety precautions can
result in serious injury, death, or property
damage. Keep manual for future reference.
LOOKING FOR PARTS?
Check out our online
Parts Catalog!
Part Number: 30939 R4
Revised: May 2023
Original Instructions
Advertisement
Chapters
Table of Contents

Subscribe to Our Youtube Channel
Related Manuals for AGI Westfield MKX10-63


Summary of Contents for AGI Westfield MKX10-63
- Page 1 Swing-Away Grain Auger MKX10 & HX10 Operator’s Manual This manual applies to: Westfield MKX10-53, MKX10-63, MKX10-73, MKX10-83 Hutchinson HX10-53 Mayrath HX10-53 LOOKING FOR PARTS? Check out our online Parts Catalog! Read this manual before using product. Failure to Part Number: 30939 R4 follow instructions and safety precautions can Revised: May 2023 result in serious injury, death, or property...
- Page 2 This product has been designed and manufactured to meet general engineering standards. Other local regulations may apply and must be followed by the operator. All personnel must be trained in the correct operational and safety procedures for this product. Use the sign-off sheet below to record initial and periodic reviews of this manual with all personnel.
-
Page 3: Table Of Contents
SWING-AWAY GRAIN AUGER – MKX10 & HX10 CONTENTS 1. Introduction ............................5 1.1 Serial Number Location......................5 1.2 Intended Use ..........................6 1.2.1 Misuse ........................6 2. Safety............................... 7 2.1 Safety Alert Symbol and Signal Words..................7 2.2 General Safety Information....................... 7 2.3 Rotating Flighting Safety ...................... - Page 4 9. Appendix ............................... 70 9.1 Power Swing Remote Transmitter Instructions ..............70 9.2 Programming Receivers......................71 9.3 Charge the Lift System (83’ Only) ................... 72 9.4 Open/Closed-Center Valve Conversion................... 72 10. Specifications ............................74 11. AGI Limited Warranty......................... 75 30939 R4...
-
Page 5: Introduction
Keep this manual handy for frequent reference and to review with new personnel. A sign-off form is provided on the inside front cover for your convenience. If any information in this manual is not understood or if you need additional information, please contact AGI or your representative for assistance. -
Page 6: Intended Use
1. INTRODUCTION SWING-AWAY GRAIN AUGER – MKX10 & HX10 1.2. Intended Use The auger is intended for use as listed below and described throughout this manual. Use in any other way is considered contrary to the intended use and is not covered by the warranty. Intended use for the auger •... -
Page 7: Safety
2. SAFETY SWING-AWAY GRAIN AUGER – MKX10 & HX10 2. Safety 2.1. Safety Alert Symbol and Signal Words This safety alert symbol indicates important safety messages in this manual. When you see this symbol, be alert to the possibility of injury or death, carefully read the message that follows, and inform others. -
Page 8: Rotating Flighting Safety
2. SAFETY SWING-AWAY GRAIN AUGER – MKX10 & HX10 2.3. Rotating Flighting Safety • KEEP AWAY from rotating flighting. • DO NOT remove or modify flighting guards, doors, or covers. Keep in good working order. Have replaced if damaged. • DO NOT operate the auger without all guards, doors, and covers in place. -
Page 9: Work Area Safety
2. SAFETY SWING-AWAY GRAIN AUGER – MKX10 & HX10 2.7. Work Area Safety • Have another trained person nearby who can shut down the auger in case of accident. • Do not allow any unauthorized persons in the work area. •... -
Page 10: Guards Safety
2. SAFETY SWING-AWAY GRAIN AUGER – MKX10 & HX10 2.8. Guards Safety • Keep guards in place. Do not operate with guard removed. • Do not walk on, step on, or damage guards. • Lock out power before removing a guard. •... -
Page 11: Hydraulic Winch Safety
2. SAFETY SWING-AWAY GRAIN AUGER – MKX10 & HX10 2.11. Hydraulic Winch Safety When Equipped: • Keep away from rotating cable drum and winch cable. Do not touch or grab cable while winch is being operated or use hands to guide the cable. •... -
Page 12: Drives And Lockout Safety
2. SAFETY SWING-AWAY GRAIN AUGER – MKX10 & HX10 2.14. Drives and Lockout Safety Inspect the power source(s) before using and know how to shut down in an emergency. Whenever you service or adjust your equipment, make sure you shut down the power WARNING source and follow lockout and tagout procedures to prevent inadvertent start-up and hazardous energy release. -
Page 13: Hydraulic Power Safety
2. SAFETY SWING-AWAY GRAIN AUGER – MKX10 & HX10 2.14.2 Hydraulic Power Safety Power Source • Refer to the rules and regulations applicable to the power source operating the hydraulic system. • Do not connect or disconnect hydraulic lines while system is under pressure. -
Page 14: Tire Safety
2. SAFETY SWING-AWAY GRAIN AUGER – MKX10 & HX10 2.15. Tire Safety Failure to follow proper procedures when mounting a tire on a wheel or rim can produce an explosion that may result in serious injury or death. • DO NOT attempt to mount a tire unless you have the proper equipment and experience to do the job. -
Page 15: Safety Equipment
2. SAFETY SWING-AWAY GRAIN AUGER – MKX10 & HX10 Steel-Toe Boots • Wear steel-toe boots to protect feet from falling debris. Work Gloves • Wear work gloves to protect your hands from sharp and rough edges. Dust Mask • Wear a dust mask to prevent breathing potentially harmful dust. Hearing Protection •... -
Page 16: Decal Installation/Replacement
2. SAFETY SWING-AWAY GRAIN AUGER – MKX10 & HX10 2.18.1 Decal Installation/Replacement 1. Decal area must be clean and dry, with a temperature above 50°F (10°C). 2. Decide on the exact position before you remove the backing paper. 3. Align the decal over the specified area and carefully press the small portion with the exposed sticky backing in place. - Page 17 2. SAFETY SWING-AWAY GRAIN AUGER – MKX10 & HX10 Figure 3. Tow Bar Safety Decal 18859 Figure 4. Auger Tube and Hopper Safety Decals 20813 20804* 20807 20811 17113 17378 17377 20816 30939 R4...
- Page 18 2. SAFETY SWING-AWAY GRAIN AUGER – MKX10 & HX10 Figure 5. Boot Safety Decals 17113 20807 20816 20813 201199 17107 201198 20813 20803 17531 Figure 6. Roll-Over / Transport Safety Decal 30939 R4...
- Page 19 2. SAFETY SWING-AWAY GRAIN AUGER – MKX10 & HX10 Figure 7. Optional Safety Decals (Hydraulic Landing Gear Power Swing) 20806 30939 R4...
- Page 20 2. SAFETY SWING-AWAY GRAIN AUGER – MKX10 & HX10 Table 1. Safety Decals Part Number Description 20813 DANGER ROTATING FLIGHTING HAZARD To prevent death or serious injury: • KEEP AWAY from rotating auger flighting. • DO NOT remove or modify auger flighting guards, doors, or covers.
- Page 21 2. SAFETY SWING-AWAY GRAIN AUGER – MKX10 & HX10 Table 1 Safety Decals (continued) Part Number Description 20816 DANGER ELECTROCUTION HAZARD To prevent death or serious injury: • When operating or moving, keep equipment away from overhead power lines and devices. •...
- Page 22 2. SAFETY SWING-AWAY GRAIN AUGER – MKX10 & HX10 Table 1 Safety Decals (continued) Part Number Description 20804 (*Located on WARNING Hopper Chain Guard) ENTANGLEMENT HAZARD To prevent serious injury or death: • Keep body, hair, and clothing away from rotating pulleys, belts, chains, and sprockets.
- Page 23 2. SAFETY SWING-AWAY GRAIN AUGER – MKX10 & HX10 Table 1 Safety Decals (continued) Part Number Description 20811 WARNING UPENDING HAZARD To prevent death or serious injury: • Anchor intake end and/or support discharge end to prevent upending. • Intake end must always have downward weight. Do not release until attached to tow bar or resting on ground.
- Page 24 2. SAFETY SWING-AWAY GRAIN AUGER – MKX10 & HX10 Table 1 Safety Decals (continued) Part Number Description 20807 WARNING To prevent serious injury or death: • Read and understand the manual before assembling, operating, or maintaining the equipment. • Only trained personnel may assemble, operate, or maintain the equipment.
- Page 25 2. SAFETY SWING-AWAY GRAIN AUGER – MKX10 & HX10 Table 1 Safety Decals (continued) Part Number Description 20803 (placed behind WARNING guard) MISSING GUARD HAZARD To prevent serious injury or death, shut off power and reattach guard before operating machine. 20809 WARNING To prevent serious injury or death:...
- Page 26 2. SAFETY SWING-AWAY GRAIN AUGER – MKX10 & HX10 Table 1 Safety Decals (continued) Part Number Description 18859 NOTICE Disconnect PTO driveline from tractor before moving equipment. If attached, driveline will bottom out, severely damaging the CV u-joint and lower flight shaft. See manual for maintenance.
- Page 27 2. SAFETY SWING-AWAY GRAIN AUGER – MKX10 & HX10 Table 1 Safety Decals (continued) Part Number Description 17378 (83' Only) NOTICE This equipment is not intended for transport on public roads. If it must be moved, check local regulations. To avoid damaging the equipment: •...
-
Page 28: Features
3. FEATURES SWING-AWAY GRAIN AUGER – MKX10 & HX10 3. Features Read this section to familiarize yourself with the basic component names and functions of the auger. Swing Discharge Spout Truss Tower Hydraulic Winch Lift Arm Hydraulic Cylinders Boot Track 30939 R4... - Page 29 3. FEATURES SWING-AWAY GRAIN AUGER – MKX10 & HX10 Grain Transfer Boot Features Overflow Panel Clean-Out Hatch Swing Arm Spout Head Hitch Jack Spout Head Service Cover Hitch Manual Winch (Hopper) PTO Driveline Grain Transfer Boot Ball Valve 30939 R4...
- Page 30 3. FEATURES SWING-AWAY GRAIN AUGER – MKX10 & HX10 Grain Hopper Features Main Auger Tube Maintenance Hatch Boot Hopper Spout Head Flights and Flight Guarding Swing Tube 30939 R4...
-
Page 31: Transport
4. TRANSPORT SWING-AWAY GRAIN AUGER – MKX10 & HX10 4. Transport Before continuing, ensure you have completely read and understood this manual’s Safety section, in addition to the safety information in the section(s) below. 4.1. Transport Safety • Check with local authorities regarding transport on public roads. -
Page 32: Transport Preparation
4. TRANSPORT SWING-AWAY GRAIN AUGER – MKX10 & HX10 4.2. Transport Preparation 1. It is not recommended that the auger be transported faster than 20 mph (32 km/h). Table 2 references the acceptable transport speed as per the ratio of tractor weight versus auger weight. See Specifications (Section 10. - Page 33 4. TRANSPORT SWING-AWAY GRAIN AUGER – MKX10 & HX10 Refer to Section 10. – Specifications on page 74 for auger weight and hitch pin information. Figure 8. Safety Chain and Hitch Connection WRAP CHAIN AROUND HITCH PIN 3/4” TO 1” CLEARANCE (1.91 cm - 2.54 cm) USE BOLT TO KEEP CHAIN IN PLACE...
-
Page 34: Placement
5. PLACEMENT SWING-AWAY GRAIN AUGER – MKX10 & HX10 5. Placement Before continuing, ensure you have completely read and understood this manual’s Safety section, in addition to the safety information in the section(s) below. 5.1. Placement Safety • The auger is not insulated, keep away from overhead power lines. Electrocution can occur without direct contact. -
Page 35: Positioning The Auger
5. PLACEMENT SWING-AWAY GRAIN AUGER – MKX10 & HX10 5.2. Positioning the Auger Filling Bins The auger is designed to be transported and operated without unhitching unit from tractor. 1. Disconnect the PTO driveline from the tractor and secure it in the transport saddle. Failure to disconnect from the tractor will damage the PTO driveline. -
Page 36: Raising And Lowering
5. PLACEMENT SWING-AWAY GRAIN AUGER – MKX10 & HX10 Figure 10. Auger Placement (Direct PTO Drive) Chock Wheels Chock Wheels Chock Wheels Chock Wheels Tractor Apply Parking Brakes 5.2.1 Raising and Lowering The intake hopper must be off the ground when raising and lowering the auger. Before using the hydraulic lift cylinder: •... -
Page 37: Extendable Axle Positioning
5. PLACEMENT SWING-AWAY GRAIN AUGER – MKX10 & HX10 Dirt in the hydraulic system can damage the cylinder o-rings and can cause leakage and failure of the system. 2. Connect the hydraulic hoses, ensure the connections are tight. Visually check for leaks, binding, flattening, kinks, or wear. -
Page 38: Auger-To-Tractor Hookup
5. PLACEMENT SWING-AWAY GRAIN AUGER – MKX10 & HX10 2. Using the jack supplied, insert it into one of the jack stubs located on one end of the axle. Jack must be secured to jack stub using pin (attached to jack). 3. - Page 39 5. PLACEMENT SWING-AWAY GRAIN AUGER – MKX10 & HX10 Figure 12. Hitching the Auger to a Tractor 3/4 TO 1” (1.91 cm - 2.54 cm) AUGUR HITCH SECURING DEVICE (2 NUTS LOCKED AGAINST EACH OTHER) TRACTOR DRAWBAR 3/4 TO 1” (1.91 cm - 2.54 cm) SECURING DEVICE (HAIRPIN AND WASHER) Measurements Between Drawbar and Driveline...
- Page 40 5. PLACEMENT SWING-AWAY GRAIN AUGER – MKX10 & HX10 Figure 13. Measurements Between Drawbar and PTO Driveline 14" (35.6 cm) 6" to 10" (15.2 cm – 25.4 cm) 34-1/2" – 36-1/2" (87.6 cm – 92.7 cm) (MUST BE TAKEN WITH AUGER ON LEVEL GROUND AND IN FULL DOWN POSITION) RAISE TRACTOR DRAWBAR IF NECESSARY TO MAINTAIN (B) DIMENSION OF 6"...
-
Page 41: Raising And Lowering The Intake Hopper
5. PLACEMENT SWING-AWAY GRAIN AUGER – MKX10 & HX10 5.5. Raising and Lowering the Intake Hopper 1. Attach the winch cable hook to the appropriate hopper lifting point. 2. Fully raise the hopper with intake side facing towards the main auger tube. 3. -
Page 42: Grain Hopper Positioning
5. PLACEMENT SWING-AWAY GRAIN AUGER – MKX10 & HX10 5. Start tractor and idle at low rpm. Engage hydraulic lever to power winch. Test the direction of rotation of winch to ensure drum is moving in the direction required. Increase tractor rpm until desired rate of lift or descent is reached. - Page 43 5. PLACEMENT SWING-AWAY GRAIN AUGER – MKX10 & HX10 If these electrical cables are not hooked up properly the electric controller will be damaged. 2. Attach the receiver cable quick connect to the tractor wire harness quick connect. 3. On the high end of the Power Swing remote receiver box, flip the power switch to the ON position. Power Swing Receiver Box Receiver Box Direction switch...
-
Page 44: Hydraulic Power Swing Operation
5. PLACEMENT SWING-AWAY GRAIN AUGER – MKX10 & HX10 For Remote Transmitter Operation: 1. Push the green button (no symbol) to turn the remote ON (Figure 16). 2. Push the yellow directional buttons (marked with arrows) located below the ON/OFF buttons in the direction you want the hopper to move (Figure 16). -
Page 45: Positioning The Tractor For Right Angle Drive Operation
5. PLACEMENT SWING-AWAY GRAIN AUGER – MKX10 & HX10 Figure 17. Control Valve Lever Functions LIFT/LOWER HOPPER MOVE HOPPER LEFT/RIGHT 5.7. Positioning the Tractor for Right Angle Drive Operation Before setting up for right angle drive operation, the auger must first be positioned at the bin with a tractor with the auger wheels securely chocked, and the ball valve for lifting must be closed. - Page 46 5. PLACEMENT SWING-AWAY GRAIN AUGER – MKX10 & HX10 8. Do not exceed the maximum PTO operating length of 80" (2.03 m) or a maximum angularity of 15° from the ideal 90° drive angle. Figure 18. Tractor Position for Right Angle PTO Drive (Left Side Drive Configuration) Chock Wheels Chock Wheels...
- Page 47 5. PLACEMENT SWING-AWAY GRAIN AUGER – MKX10 & HX10 Figure 20. Right Angle Drive Support Leg (Storage Position) 30939 R4...
-
Page 48: Operation
6. OPERATION SWING-AWAY GRAIN AUGER – MKX10 & HX10 6. Operation Before continuing, ensure you have completely read and understood this manual’s Safety section, in addition to the safety information in the section(s) below. 6.1. Operation Safety • Keep away from rotating and moving parts, including the flighting, drive components, shafts, and bearings. -
Page 49: Operation - Pto Drive
6. OPERATION SWING-AWAY GRAIN AUGER – MKX10 & HX10 Important After the initial start-up and inspection, the auger should be shut down and visually inspected (see Maintenance Section) after approximately ten hours of operation. 6.3. Operation - PTO Drive 1. Attach the PTO driveline securely to the tractor and confirm the connection to the auger shaft is secure. 2. -
Page 50: Pto Operation - Forward And Reverse Modes
6. OPERATION SWING-AWAY GRAIN AUGER – MKX10 & HX10 6.3.1 PTO Operation — Forward and Reverse Modes Shut down and lock out power before changing to forward or reverse modes. To Operate in Forward Mode: The stub spline on the PTO driveline must be inserted into the forward spline coupler and securely locked into place. -
Page 51: Safety Discharge Door
6. OPERATION SWING-AWAY GRAIN AUGER – MKX10 & HX10 6.4. Safety Discharge Door The auger is equipped with a safety discharge door which will allow grain to overflow out of the swing–away discharge spout and prevent the main auger tube from plugging. This will happen when the auger is at a steeper angle because the capacity of the auger will decrease as the tube angle increases. -
Page 52: Use Of Grain Spreaders
6. OPERATION SWING-AWAY GRAIN AUGER – MKX10 & HX10 6.8. Use of Grain Spreaders Many grain spreaders cannot handle the large capacity of some augers and can cause the auger to plug, damaging the flighting and other drive components. This type of damage is not covered by warranty. To avoid this: •... -
Page 53: Storage
6. OPERATION SWING-AWAY GRAIN AUGER – MKX10 & HX10 6.11. Storage After the season’s use, the auger should be thoroughly inspected and prepared for storage. Repair or replace any worn or damaged components and perform maintenance as described in the Maintenance Section to prevent any unnecessary downtime at the start of the next season. -
Page 54: Maintenance
• After maintenance is complete, replace all guards, service doors, and/or covers. • Use only genuine AGI replacement parts or equivalent. Use of unauthorized parts will void warranty. If in doubt, contact AGI or your local dealer. Before attempting maintenance of any kind: •... -
Page 55: Visually Inspect The Equipment
7. MAINTENANCE SWING-AWAY GRAIN AUGER – MKX10 & HX10 Section 7.5 – Inspect Hydraulic Hoses and Fittings on page 58 Section 7.11 – Check the Gearbox Oil on page 62 Section 7.13 – Check Speed Reducer Gearbox Oil Level on page 62 Annually: Section 7.16 –... -
Page 56: Lubricate The Equipment
7. MAINTENANCE SWING-AWAY GRAIN AUGER – MKX10 & HX10 10. Inspect the auger shaft bushing for unusual wear or discoloration. 11. Check the PTO shield & replace if damaged. 12. Inspect the winch cable for fraying, kinking, unwinding, or other possible damage. 13. - Page 57 7. MAINTENANCE SWING-AWAY GRAIN AUGER – MKX10 & HX10 Figure 22. Hopper Grease Points Figure 23. Upper Flighting Bearing Grease Point 30939 R4...
-
Page 58: Inspect Hydraulic Hoses And Fittings
7. MAINTENANCE SWING-AWAY GRAIN AUGER – MKX10 & HX10 Figure 24. Boot Grease Points 7.5. Inspect Hydraulic Hoses and Fittings When equipped: 1. Pressurize the system. 2. Using a piece of cardboard or wood, run it along the length of the hose and around all fittings. Escaping hydraulic fluid under pressure will cause serious injury if it penetrates the skin surface. -
Page 59: Inspect And Service The Hand Winch And Lift Cable
7. MAINTENANCE SWING-AWAY GRAIN AUGER – MKX10 & HX10 7.6. Inspect and Service the Hand Winch and Lift Cable When equipped: Place auger in fully lowered position with cable slack. 1. Inspect the cable for damage such as fraying, kinking, or unwinding. Replace if damaged (see below). 2. -
Page 60: Service The Pulleys
7. MAINTENANCE SWING-AWAY GRAIN AUGER – MKX10 & HX10 7.8. Service the Pulleys • Ensure the cable is slack before servicing the winch. • Check to make sure cable clamps are secure. • Keep a film of grease on the gears. Occasionally oil the bushings, drum shaft, and ratchet. •... -
Page 61: Service The Boot And Hopper Chain Drive
7. MAINTENANCE SWING-AWAY GRAIN AUGER – MKX10 & HX10 7.10. Service the Boot and Hopper Chain Drive 1. Remove chain cover plate from the boot or hopper. 2. Check the chain slack at the midpoint of the longest span. It should be no more than 1/4” (6 mm). Note The Hopper has two chains, one for each flighting. -
Page 62: Check The Gearbox Oil
7. MAINTENANCE SWING-AWAY GRAIN AUGER – MKX10 & HX10 7.11. Check the Gearbox Oil 1. Remove fill/vent plug to check gearbox oil level. Insert an improvised dipstick (rolled paper or plastic tie) into the oil filler hole to determine the oil level. 2. -
Page 63: Change The Speed Reducer Gearbox Oil
7. MAINTENANCE SWING-AWAY GRAIN AUGER – MKX10 & HX10 3. If the oil level is low (does not appear in the sight glass), remove the oil filler plug from the right-hand side of the speed reducer gearbox, and top up the oil level. Do not overfill. Replace and fully tighten the oil filler plug when complete. -
Page 64: Removable Hopper Mesh Guard
7. MAINTENANCE SWING-AWAY GRAIN AUGER – MKX10 & HX10 7.17. Removable Hopper Mesh Guard The hopper mesh guard can be removed for better access to cleanout or to service the hopper components. 1. Remove the six hopper mesh straps securing the mesh guard to the hopper. 2. -
Page 65: Power Swing Remote Transmitter
7. MAINTENANCE SWING-AWAY GRAIN AUGER – MKX10 & HX10 Figure 29. Diagonal Pattern for 4-bolt and 6-bolt Tires 7.19. Power Swing Remote Transmitter Ensure that a 9V battery is installed in the back of the remote transmitter. To install: • Remove the plastic from around the battery •... - Page 66 7. MAINTENANCE SWING-AWAY GRAIN AUGER – MKX10 & HX10 6. If the proper cable tension can’t be obtained before the eyebolts run out of adjustment, then do the following: a. Loosen the eyebolts. b. At the eyebolts, loosen the cable clamps, shorten the cables until there is tension on the cable, then tighten the cable clamps fully.
-
Page 67: Inspect The Retroreflective Strips
7. MAINTENANCE SWING-AWAY GRAIN AUGER – MKX10 & HX10 Figure 30. Typical Cable Truss Assembly 7.21. Inspect the Retroreflective Strips Replace missing or damaged retroreflective strips. Hopper Yellow Retroreflective Strip 30939 R4... -
Page 68: Troubleshooting
The following section covers some causes and solutions to some of the problems that may be encountered. If there is a problem that is difficult to solve, even after having read through this section, please contact your representative or AGI. Have this manual and the serial number available. Auger Cause... - Page 69 8. TROUBLESHOOTING SWING-AWAY GRAIN AUGER – MKX10 & HX10 Problem Cause Solution Flighting shaft is bent. Repair or replace flighting shaft. Flighting is damaged. Repair or replace flighting. Worn bearing. Repair or replace bearing. Low gear oil level. Inspect the gearbox, replace if damaged or add oil if not damaged.
-
Page 70: Appendix
9. APPENDIX SWING-AWAY GRAIN AUGER – MKX10 & HX10 9. Appendix 9.1. Power Swing Remote Transmitter Instructions Figure 31 shows the controls and indicators for the power swing remote and receiver. Figure 31. Remote Transmitter and Receiver Controls and Indicators TRANSMITTER HOPPER MOVE (↑-↓) -
Page 71: Programming Receivers
9. APPENDIX SWING-AWAY GRAIN AUGER – MKX10 & HX10 The transmitter automatically transmits a STOP signal after 30 minutes; this de-activates the receiver and the transmitter keypad. The remote transmitter that comes with each power swing is normally factory programmed to function with the power swing receiver. -
Page 72: Charge The Lift System (83' Only)
9.4. Open/Closed-Center Valve Conversion Note The standard configuration for the control valve is closed-center. The closed-center plug is pre-installed when delivered from AGI. The control valve can be converted from the closed-center to the open-center configuration by removing the conversion plug. - Page 73 9. APPENDIX SWING-AWAY GRAIN AUGER – MKX10 & HX10 Figure 32. Conversion Plug Location Item Description Outlet Plug Closed-Center Plug 30939 R4...
-
Page 74: Specifications
10. SPECIFICATIONS SWING-AWAY GRAIN AUGER – MKX10 & HX10 10. Specifications Specification 10-53 10-63 10-73 10-83 10" (25.4 cm) Tube Size CAPACITIES Unloading Rate 6600 Bu/Hr TRANSPORT DIMENSIONS Length 54' 6" (16.6 m) 64' 6" (19.7 m) 74' (22.6 m) 85' (25.9 m) 106"... -
Page 75: Agi Limited Warranty
11. AGI Limited Warranty This warranty relates to AGI Augers (the “Product”) sold by AGI, (referred to herein as the “Seller”) and applies only to the first user of the Product (meaning a purchaser directly from the Seller or from an authorized dealer or distributor of the Product, referred to herein as the “Buyer”). - Page 76 AGI is a leading provider of equipment solutions for agriculture bulk commodities including seed, fertilizer, grain, and feed systems with a growing platform in providing equipment and solutions for food processing facilities. AGI has manufacturing facilities in Canada, the United States, the United Kingdom, Brazil, South Africa, India and Italy and distributes its products globally.
Need help?
Do you have a question about the Westfield MKX10-63 and is the answer not in the manual?
Questions and answers
max degrees of angle
The maximum operating angle for the AGI Westfield MKX10-63 is 15 degrees.
This answer is automatically generated
@Mr. Anderson
what is angle when raised up to the bin, we are at 59 degrees at the gear drive, the mkx 10-63 auger. went online and found 35 degress.
The AGI Westfield MKX10-63 auger has a maximum discharge clearance of 40'6" (12.3m) and a maximum reach to wheels of 30' (9.1m). Using these values, the angle can be calculated using the formula:
\[
\theta = \tan^{-1} \left( \frac{\text{height}}{\text{reach}} \right)
\]
\[
\theta = \tan^{-1} \left( \frac{40.5}{30} \right)
\]
\[
\theta \approx \tan^{-1} (1.35)
\]
\[
\theta \approx 53.1^\circ
\]
So, the angle of the MKX10-63 auger when raised to the bin is approximately 53.1 degrees.
This answer is automatically generated