Table of Contents
Advertisement
Quick Links
Advertisement
Table of Contents

Related Manuals for Cardioline ar600adv


Summary of Contents for Cardioline ar600adv
- Page 1 English...
- Page 2 This User Manual is prepared with the objective of giving the user all the information ® necessary to obtain the best use of the CARDIOLINE ar600adv. Together with the traditional descriptions of the equipment's functions the following documentation will be found:...
- Page 3 Index 1 Introduction 1.1 How to read the manual 1.2 Information and recommendations relating to safe use 1.3 The electrocardiograph 2 Installation and initial preparation 2.1 Selection of the installation site 2.2 Loading the thermal paper 2.3 Power supply; control and management of the rechargeable batteries Recharging the batteries Battery charger: precautions for use 2.4 How to switch on the electrocardiograph...
-
Page 4: Table Of Contents
5.7 Recording in “HRV analysis mode” 5.8 Recording in “Arrhythmia mode” 5.9 Defibrillation! 6 Management and control of electrocardiograph functionality’s 6.1 Disconnected electrodes, potential defibrillation 6.2 Batteries low or in need of recharging 6.3 Print system control out of paper 6.4 Status messages and error indication: description and related event 6.5 Troubleshooting 7 Maintenance... - Page 5 Thanks to the flexibility of the software used and to the infrared interface, the ar600adv can be adapted at any given moment to suit your individual requirements. The range of “options” offered is particularly generous and there are no restrictions or constraints, as the selection can be made either at the moment of purchase or later on at your clinic or surgery without having to interrupt day-to-day activity.
- Page 6 The manual gives detailed information on the use of the model ar600adv in traditional ECG procedures, and an introduction to the use of particular functionalities involving interaction with software and a Personal Computer.
- Page 7 1.2 Information and recommendations relating to safe use Safety information and recommendations. The device is equipped with a set of standard accessories. For reasons of safety, reliability and conformity with the Medical Devices Directive 93/42/EEC, use only original accessories or accessories approved by the manufacturer.
- Page 8 Periodically check the efficiency of all accessories and of the device itself. Use the built-in test function to make a first check on the efficiency of the device. Contact the Authorized Assistance Centre whenever the device seems to be operating irregularly. To prolong the life of your device, have it checked periodically by an Authorized Assistance Centre.
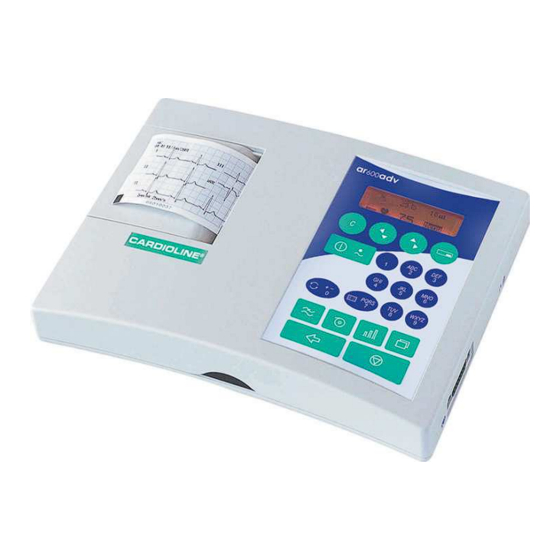
- Page 9 1.3 The electrocardiograph In order to simplify the installation and the use of your electrocardiograph, it is recommended that you become familiar with the component parts and with the logic of its operation. Front view Side view and bottom REF : 6308.
- Page 10 Parts, symbols and controls 1. display: for the management of operations and patient data. Auto 3 ch. ► Recording … Menu u ♥ 68 In normal operating mode: line 1: information relating to selected recording parameters; line 2: operating information and error messages; line 3: indication of battery charge status;...
- Page 11 - indicated electrodes not start selected connected or insufficient operating contact; saturation mode interrupt current operation; stop Select operating mode Automatic mode: 1, 2, 3, 3+R Manual mode: Select print format 1, 2, 3 a.c. mains - filter on and muscle interference filter - paper speed 25 mm/s...
- Page 12 4. IR interface. 5. Connector for CF type patient cable protected from defibrillation as indicated by the symbol 6. "Reset" key : allows normal operating conditions to be restored in the event of an error that cannot be managed using the keys. 7.
- Page 13 2.2 Loading the thermal paper ® CARDIOLINE ar600adv will reproduce the ECG signal on thermal paper procured either in rolls or in packs. No special setup procedure is required. This sections gives the instructions for the correct loading of both types of...
- Page 14 If using rolls of paper: a. Using a coin or similar implement, open the paper compartment and remove the "roll guide" hub. If replacing a depleted roll, recover the hub before throwing away the core of the previous roll. b. Slot the hub into a new roll of paper (1) and locate in the paper compartment, positioning the pins in the sockets (2).
- Page 15 battery compartment on the bottom of the device, and are protected against short circuits. Warning: before using the device, a full battery charge cycle must be carried out! To connect the electrocardiograph to the a.c. power supply, plug the REF : 6308. "battery charger"...
- Page 16 Battery charger: precautions for use The "battery charger" can be damaged if dropped, struck or tampered with. Do not immerse the "battery charger" in water or other liquids. Do not place the battery charger on or near sources of heat when in use. Do not damage or tamper with the cables for connection to the mains and to the electrocardiograph.
- Page 17 After 1 min. has elapsed without any key being pressed: reserve power between 15 and 30% After 10 sec. have elapsed without any key being pressed: reserve power < 15% If the auto power off function is activated, last ECG recorded, if any, and the relative settings, will be held in the memory.
- Page 18 3 Preparation for use: the menu Navigating within the menu of your ar600adv, there are options for intuitive personalization of the operating modes using the dedicated display keys. To ensure your electrocardiograph can be operated taking advantage of its simplicity and versatility of use to the maximum, it is advisable to select the preferred setup before the first recording is made.
- Page 19 ECG autotimer Arrhythmia Monitor HRV analysis Print format 1 channel 2 channels 3 channels ♦ Rhythm lead selection ECG archive View ♦ PC archive ♦ Print ♦ Delete PC archive Print list Empty Settings Use profile ♦ Patient data management Always prompt Data only None...
- Page 20 • None Deleting • Manual • Automatic ♦ Analisi HRV Duration: x Lead ♦ Autotimer Nr. intervals xxx Duration of intervals Print format • 12 leads • 3 leads • Leads selection ♦ Arrhythmia mode RR Advance RR Delay Print Advance Print Delay Arrhythmia Monitor General...
- Page 21 HRV analysis The twelve ECG leads are displayed in real time on your Computer screen where, thanks to the CARDIOLINE software, it is possible to perform all the PC ECG ECG recording operations.
- Page 22 Three-channel print of 2,5 sec duration for the 12 leads, plus 10 seconds continuous for the lead selected as cardiac rhythm reference. The rhythm lead is user-selectable. Print format available for automatic recordings only. To avoid any “overlapping” of leads, it is advisable to select automatic recording sensitivity.
- Page 23 “Measurements”: printout of complete ECG measurements table. “Representative cycles”: printout of representative cycles relative to the twelve leads, Using the PC archive function, in association with CARDIOLINE software, a trace recorded and stored in automatic mode can be transferred to a computer. The PC archive functionality of the copy key is adapted according to the selection.
- Page 24 The user can select the method of saving ECG traces and verifying the status of the memory. Archive management “Save” “Automatic”: the recording is saved automatically at the end of acquisition, with no action on the part of the operator. The progress of the operation is indicated by display messages: “Saving …”...
- Page 25 There are two self-test menus available: “User” and “Service”. Do not run the service Self-test self-test without a qualified technician in attendance. For details, see “Maintenance”.
- Page 26 CARDIOLINE ar600adv electrocardiograph. In particular, indications are given for “connecting the patient cable”, “preparing the patient”, “applying the electrodes”. Also illustrated are the necessary procedures for choosing the correct recording parameters, such as “speed, sensitivity and activation of filters”.
- Page 27 Apply a small amount of electrocardiograph conductive gel to the area of the skin that will be in contact with the electrode, spreading it carefully and evenly (this is not necessary when using disposable electrodes with built-in gel). The following figure shows the standard positioning of the electrodes. Standard positioning electrodes...
- Page 28 During printing, the active mode is printed on the information line of the printout. Print format Independently from the selected configuration operating the main menu (see "Settings"), it is possible to modify the active print format before every recording. to select the desired format; the corresponding choice is displayed on the screen.
- Page 29 The special isoelectric anti drift filter (ADF) remains permanently activated. During printing, the activated filters are indicated on the information line. Important: the filters of your ECG are very effective in attenuating disturbances and do not reduce the diagnostic content of the traces. Nonetheless, it is advisable to eliminate the cause of the interference and not only the visible effect on the trace (see “Troubleshooting”;...
- Page 30 5 Recording of an ECG at rest 5.1 Patient data entry At the beginning of each recording, in case you have choose to insert patient data, except in the case of “PC ECG” mode, the patient data management pages are displayed. Step 1: select type of patient New patient? ◄►...
- Page 31 to terminate the data entry step and proceed with recording. Warning: new data will be saved only when the final item entered is confirmed. 5.2 Recording in manual mode After having selected “manual” mode (see “Operating mode” or “Selection recording characteristics: operating mode,...
- Page 32 to start the recording. If the signal has not yet been initialized, the message “Wait …” will be displayed. The patient data entry procedure now starts, if predict (see “Patient data entry”). During recording, progress messages displayed: “Acquisition …”; 2. “Acquisition OK”. The patient can now be disconnected.
- Page 33 Warning:. The automatic interpretation program in case of missing patient data, considers for the analysis a person of 35 years old gender male. Warning: the computerised analysis must always be validated by the medical specialist responsible for the ECG examination. Warning: if it is not possible for the device to conduct the analysis due to the poor quality of the signal, the error message "Analysis na”...
- Page 34 Refer to § “Archive ECG” for function’s descriptions. Saving to Personal Computer archive Your electrocardiograph is capable of transferring stored ECG traces to a Personal Computer equipped with CARDIOLINE management software. For details on the use of the application software, consult the specific manual.
- Page 35 If the “Memory Option” is not installed: Position the electrocardiograph relative to the infrared adapter (connected previously to the PC) as illustrated in the following figure: 50 cm to start the transfer. to interrupt the transfer before the end. If the “Memory Option” is installed: The user can either proceed as described above, if the intention is to transfer the complete ECG archive.
- Page 36 (stop). 5.5 Recording in "PC ECG" mode Your ar600adv becomes a PC-based acquisition system. For details on the use of the application software, consult the specific manual. Having selected “PC ECG” mode (see “Operating mode”):...
-
Page 37: Recording In "Hrv Analysis Mode
After selecting “Paper Saving” mode (see “Operating mode” or “Selection of recording characteristics: operating mode, print format, speed, sensitivity, filters”): to start the recording. If the ECG signal has not yet been initialized, the message “Wait …” will be displayed. The patient data entry procedure now starts, if predict (see “Patient data entry”). -
Page 38: Recording In "Arrhythmia Mode
The display shows the time from the test start. The test is automatically terminated at the end of the scheduled time and the final report is printed out. to interrupt (stop). No report is printed and the recorded data are cancelled. to print copy of the report at the end of the test. -
Page 39: Defibrillation
5.9 Defibrillation! In the event of defibrillation, the symbol will be displayed Within 10 seconds of the discharge, the signal is restored automatically (if the paper reproduction of the signal was activated in manual mode). Remember always to avoid direct contact between the electrodes of the defibrillator and those of the electrocardiograph. -
Page 40: Management And Control Of Electrocardiograph Functionality's
6 Management and control of electrocardiograph functionality’s 6.1 Disconnected electrodes, potential defibrillation Saturation events are controlled and monitored by your electrocardiograph. The response of the electrocardiograph depends on the current phase of operation. Stop phase Symbol displayed: critical electrode contact. The user can proceed with the recording;... -
Page 41: Print System Control Out Of Paper
6.3 Print system control out of paper Dedicated circuits verify the correct closure of the paper compartment cover and indicate when the thermal paper is depleted. During a recording, printout is inhibited automatically and the messages “Out of paper” or “Printer!”... - Page 42 Voltage generator too close; presence of Interference from a.c. mains supply other clinical instruments (e.g. X-rays, etc.) Patient in contact with metallic parts or with other persons Patient not relaxed Muscle tremors Peripheral electrodes adhering too tightly End of paper roll Irregular paper transport Paper roll incorrectly positioned Use of non-original paper...
-
Page 43: Maintenance
The user can also print out identifying information relative to the individual device. ® In the event of error messages being displayed, contact the CARDIOLINE Authorized Assistance Centre, and a technician will investigate and eliminate the causes of the trouble. -
Page 44: Replacing The Thermal Paper
7.2 Replacing the thermal paper When the thermal paper is depleted, the device stops and any attempt to start recording is inhibited (see "Print system control. Out of paper”.) To replace the paper, proceed as indicated in the heading “Installation and initial preparation”. -
Page 45: Periodic Checks
6. Regulate date and hour in the corresponding menu. Attention: the non-respect of the batteries connection polarity may cause serious damages to the device as well as the warranty validity failure. Attention: do not dispose of spent batteries as ordinary refuse or litter. Use only original batteries provide from the manufacturer. -
Page 46: Technical Specifications
8 Technical specifications A.c. mains power supply A.C. mains with external power supply 230V±10% 50/60 Hz.; available also: 115V±10% 50/60 Hz; device with power supply specified class II (second) REF type: 6308 Maximum current 100 mA at 117 V ~ ±10% absorbed 50 mA at 230 V ~ ±10% Mains protection... -
Page 47: Basic Accessories Supplied
Operating modes manual: acquisition and printing in real time automatic : simultaneous acquisition timed: acquisition at user-defined intervals PC-ECG: real time acquisition with display at PC Paper Saving: Automatic acquisition archiving without printing Arrhythmia: analyse real time arrhythmic phenomenons with recording in continuous HRV: heart rate variability analysis Capacity Internal battery: 3 hours in 1 channel mode... - Page 48 - Page intentionally left blank -...
- Page 49 - Page intentionally left blank -...
- Page 50 - Page intentionally left blank -...
- Page 51 - Page intentionally left blank -...
- Page 52 Marketing & Sales Head Office Strada Nuova Rivoltana, 53 20060 Vignate (MI) ITALY tel. +39 02 95 05 181 fax +39 02 95 66 013 e-mail: etmed@etmed.biz www.cardioline.biz...
Need help?
Do you have a question about the ar600adv and is the answer not in the manual?
Questions and answers