Table of Contents
Advertisement
Advertisement
Table of Contents
Troubleshooting

Related Manuals for Cardioline ECG200L


Summary of Contents for Cardioline ECG200L
- Page 1 ECG100L - ECG200L User manual Rev.06 – 16.09.2019 1936...
- Page 2 ECG100L - ECG200L All rights reserved © Cardioline SpA. CARDIOLINE® is a registered trademark of Cardioline SpA. This publication may not be reproduced, in whole or in part, in any form or manner, without prior written authorisation Cardioline Spa Via Linz, 151...
-
Page 3: Table Of Contents
Guidance and Manufacturer's declaration - Electromagnetic immunity .........8 3.3. Guidance and Manufacturer's declaration - Electromagnetic immunity .........9 3.4. Recommended separation distances between portable and mobile RF communications equipment and the ECG100L/ECG200L ......................10 SYMBOLS AND LABEL ..........................12 4.1. Explanation of the symbols ......................12 4.2. - Page 4 ECG100L - ECG200L 7.2. Before acquisition ..........................28 7.2.1. Preparing the patient .......................28 7.2.2. Connecting the patient ......................29 7.3. Viewing the ECG ..........................31 7.3.1. Disconnection of the leads .......................32 7.4. Acquiring an ECG ..........................32 7.4.1. Automatic acquisition of an ECG (AUTO) .................32 7.4.2.
- Page 5 ECG100L - ECG200L 10.5. Battery maintenance ........................45 10.6. Cleaning the thermal printer ......................47 10.6.1. Cleaning the printer .........................47 10.6.2. Cleaning the thermal head of the printer ................47 10.7. Touchscreen calibration procedure ....................47 10.8. Troubleshooting table ........................48 10.9. Error notifications ..........................49 11.
- Page 6 ECG100L - ECG200L...
-
Page 7: General Information
Other important information This manual was written with the utmost care. Should you find any details which do not correspond to those contained in this manual, please inform Cardioline SpA who will correct such inconsistencies as soon as possible. The information contained in this manual is subject to change without notice. -
Page 8: Safety Information
SAFETY INFORMATION SAFETY INFORMATION Cardioline SpA will be held responsible for the safety, reliability and functionality of the devices only if: 1. the assembly operations, modifications or repairs are carried out by Cardioline SpA or by its Authorised Service Centre;... - Page 9 UL 60601-1, IEC 60601-1 and IEC 60601-2-25 standards. Only use spare parts and accessories supplied with the device and available from Cardioline SpA. Refer to section 11.2 for the list approved accessories. ...
- Page 10 The internal rechargeable battery is hermetically sealed NiMH and requires no maintenance. Should the battery be faulty, contact Cardioline technical assistance service. The low battery warning is designed for the recommended batteries only. Using other types of batteries may lead to a lack of indication resulting in device failure.
- Page 11 As defined by the IEC 60601-1 and IEC 60601-2-25 safety standards, the device is classified as follows: ECG100L: Internal Power equipment - class I on external AC/DC power supply. ECG200L: Internal Power equipment - class I. Defibrillation-proof Type CF applied parts. Ordinary equipment.
- Page 12 ECG100L - ECG200L SAFETY INFORMATION NOTE: From a safety view point, the power supply is declared “Class I” based on IEC 60601-1 standard. A three-pole plug is used to guarantee earthing together with the power lines. The earth terminal of the power cable is the only point where the unit is earthed. Exposed metal parts which are accessible during standard operation have a double insulation from the power lines.
-
Page 13: Electromagnetic Compatibility (Emc)
The use of accessories and cables other than those recommended by Cardioline may cause an increase in emissions or a lowering in the protection of the system. ... -
Page 14: Guidance And Manufacturer's Declaration - Electromagnetic Emissions
Guidance and Manufacturer's declaration - Electromagnetic emissions The ECG100L/ECG200L is intended to operate in the electromagnetic environment specified below. The customer or the user of the ECG100L/ECG200L must guarantee that it is used in this environment. Emission test Compliance Electromagnetic environment – guidance The ECG100L/ECG200L uses RF energy only for its internal function. -
Page 15: Guidance And Manufacturer's Declaration - Electromagnetic Immunity
Guidance and Manufacturer's declaration - Electromagnetic immunity The ECG100L/ECG200L is intended for use in the electromagnetic environment specified below. The customer or the user of the ECG100L/ECG200L should assure that it is used in such an environment. Emission test IEC 60601 test level... -
Page 16: Recommended Separation Distances Between Portable And Mobile Rf Communications Equipment And The Ecg100L/Ecg200L
Recommended separation distances between portable and mobile RF communications equipment and the ECG100L/ECG200L The ECG100L/ECG200L is intended for use in an electromagnetic environment in which radiated RF disturbances are controlled. The customer or the user of the ECG100L/ECG200L can help prevent... - Page 17 ECG100L - ECG200L ELECTROMAGNETIC COMPABILITY (EMC) 0.01 0.12 0.12 0.23 0.37 0.37 0.74 1.17 1.17 2.33 3.69 3.69 7.38 11.67 11.67 23.33 For transmitters rated at a maximum output power not listed above, the recommended separation distance d in metres (m) can be estimated using the equation applicable to the frequency of the transmitter, where P is the maximum output power rating of the transmitter in watts (W) according to the transmitter manufacturer.
-
Page 18: Symbols And Label
ECG100L - ECG200L SYMBOLS AND LABEL SYMBOLS AND LABEL 4.1. Explanation of the symbols Symbol Description Comply with the instructions in the use manual CE marking – compliance with the European Union directives Manufacturer Reference number (product code) Serial Number... -
Page 19: Device Label
ECG100L - ECG200L SYMBOLS AND LABEL 4.2. Device label ECG100L ECG200L... -
Page 20: Introduction
USB, print the 12 lead ECG in automatic or manual mode by means of its built-in thermal printer. ECG100L/ECG200L is intended for assessment and diagnosis of cardiac functions. In any case the results of analysis performed by the electrocardiograph must be validated by a Physician. -
Page 21: Description Of The Device
The device is battery or mains operated. It prints in the following formats: standard or Cabrera 3, 3+1, 3+3, 6 or 12 (ECG200L only) channels in automatic mode, and 3, 6 or 12 printout channels in continuous mode, as well as printout of the rhythm strip. -
Page 22: General Overview
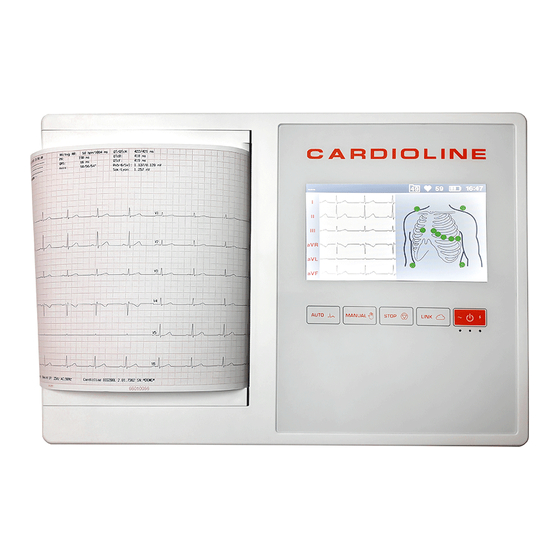
ECG100L - ECG200L INTRODUCTION 5.4.1. General overview Front view: ECG100L Display Thermal printer Keys ECG200L Display Thermal printer Keys... - Page 23 ECG100L - ECG200L INTRODUCTION Rear view: ECG100L Power supply ECG200L On/off Power supply switch...
- Page 24 ECG100L - ECG200L INTRODUCTION Side view: Patient cable input Display and keys: Display On/Off switch Keys...
-
Page 25: Keyboard
Keys Keys ECG100L/ECG200L has five keys that, depending on the duration of the pressure, will activate the primary function or the secondary feature, with the exception of the power button. The user shall keep the key pressed for more than 2s to trigger the secondary function. Below are the available functions: Description ECG100L: switches the device on/off. -
Page 26: Display
Russian. 5.4.3. Display ECG100L is provided with a 5” backlit LCD display with a resistive touch screen panel. ECG200L is provided with a 7” backlit LCD display with a capacitive touch screen panel.. When acquiring an ECG tracing, the display shows the following main information: ... - Page 27 ECG100L - ECG200L INTRODUCTION Main QWERTY Symbols QWERTY...
-
Page 28: Preparation For Use
Patient cable connection Connect the patient cable terminal plug to the connector on the side of the electrocardiograph. The connector is so designed that the patient cable can only be inserted one way, with the “Cardioline” logo on the plug facing upwards. -
Page 29: Loading The Paper
Loading the paper ECG100L works with roll paper. ECG200L can work with both roll paper and z-fold paper. The paper format to be used can be selected in the system settings, as described in par. Errore. L'origine riferimento non è stata trovata.. -
Page 30: Z-Fold Paper Format
ECG100L - ECG200L PREPARATION FOR USE 6.3.2. Z-fold paper format Load paper in the electrocardiograph as follows: 1. Remove the outer packaging of the ream of paper. 2. Open the printer compartment, lifting the panel and turning it anticlockwise around its pivot. -
Page 31: Switching The Device On/Off
To switch on ECG100L, press the On/Off button under the display (see par. 5.4.1). Instead, to switch on ECG200L, you must use the switch at the back of the device (see par. 5.4.1). To switch the device off completely, disconnect the power cable and keep the ON/OFF key pressed. Always perform this operation before proceeding with authorised repairs of the device. -
Page 32: Battery Operation
ECG100L - ECG200L PREPARATION FOR USE connected to the electrical mains. NOTE: There are specific settings which make it possible to extend the life of the battery (see Section 10.5). Appropriate use and maintenance also extend its life. NOTE: The device ECG100L should be connected to the mains using only the XP Power - AFM60US18 adaptor supplied. - Page 33 ECG100L - ECG200L PREPARATION FOR USE NOTE: When the electrocardiograph is not working, it should be plugged in to charge the battery. NOTE: if you use the device in battery mode, always remember to recharge the battery completely after use in order to be sure that the unit is ready for use.
-
Page 34: Execution Of An Exam
ECG100L - ECG200L EXECUTION OF AN EXAM EXECUTION OF AN EXAM 7.1. General procedure To acquire an ECG proceed as follows: 1. Prepare and connect the patient (as described in Par. 7.1); 2. Check the display to verify the quality of the tracings and to make sure there are no error messages (as described in Par. -
Page 35: Connecting The Patient
ECG100L - ECG200L EXECUTION OF AN EXAM Dry the skin vigorously with an abrasive pad, such as a 2x2 or 4x4 gauze, to remove dead skin cells and fat. NOTE: Pay attention not to cause abrasions, discomfort or bruises on the skin. - Page 36 ECG100L - ECG200L EXECUTION OF AN EXAM NOTE: It is important to locate the fourth intercostal space for an accurate positioning and monitoring of the precordial leads. It is possible to locate the fourth intercostal space starting from the first intercostal space.
-
Page 37: Viewing The Ecg
ECG100L - ECG200L EXECUTION OF AN EXAM 7.3. Viewing the ECG The electrocardiograph starting screen is the real time with torso screen and lead fail indications. Display in real time and display in real time with Torso screen Display The display shows ECG traces in real time, some basic information (name and surname of the patient, heart rate, speed, gain, filter and battery charge, as indicated in Par. -
Page 38: Disconnection Of The Leads
ECG100L - ECG200L EXECUTION OF AN EXAM (see Par. 7.4.4Errore. L'origine riferimento non è stata trovata.). MANUAL Short press: starts manual printing of the ECG (see Par.7.4.2); Long press: starts manual printing of the ECG with Rhythm printing (see Par. 7.4.3Errore. L'origine riferimento non è stata trovata.). - Page 39 Traces Touch on the traces area. Changes the display format of the tracings traces area format (12x1 (ECG200L only), 6x2, 6+6, 3x4, 3x4+1, 3x4+3). The label shows the current display format. Print Prints the ECG with the current settings.
-
Page 40: Manual Acquisition Of An Ecg (Manual)
ECG100L - ECG200L EXECUTION OF AN EXAM AUTO Jump to the Real-time Screen for a new acquisition prompting the user whether to keep the same patient data and. LINK Transfers the ECG (SCP file) to an inserted USB drive. -
Page 41: Manual Acquisition Of An Ecg With Rhythm Printing (Manual)
Heart rate parameters: minimum, maximum, Average and standard deviation. 7.4.4. Acquisition of an urgent ECG ECG100L/ECG200L provides a way to acquire urgent ECG, skipping the patient data entry proposed during the AUTO acquisition. Urgent (STAT) ECG can be acquired by keeping the AUTO key pressed for 2 seconds. -
Page 42: Automatic Printing Formats
ECG100L - ECG200L EXECUTION OF AN EXAM It is also possible to start manual printing by using the MANUAL key on the real time display screen (Par. 7.4.2). The printing format used is saved for subsequent printing. NOTE: the heart rate shown in print is that calculated as the average of the 10 s rhythm printed. It may therefore be different from that shown on the display before printing, which instead corresponds to the rate in real time. -
Page 43: Exporting To A Usb Flash Drive
ECG100L - ECG200L EXECUTION OF AN EXAM 7.7.1. Exporting to a USB flash drive After the system automatically analyses the ECG (AUTO or STAT), the ECG preview screen is displayed. This gives you the option to export all the ECG tests to a USB pen drive that was previously connected to the device’s USB port (see par. -
Page 44: Device Settings
ECG100L - ECG200L DEVICE SETTINGS DEVICE SETTINGS 8.1. Settings The settings menu consists of several pages that allow to change the device settings. To move between the pages and between the fields of each page, use the soft keys on the display. -
Page 45: System Settings
ECG100L - ECG200L DEVICE SETTINGS 8.3. System settings The system settings page allows the user to choose the following parameters: Field Description Possible values Date and time current date and time Language User interface language Note: by selecting Russian, the keyboard is automatically set in Russian. -
Page 46: Rhythm Leads Setting
ECG100L - ECG200L DEVICE SETTINGS 8.4. Rhythm Leads setting The Rhythm tracings page allows the user to define the rhythm derivations for AUTO print formats 3x4+1 and 3x4+3: Field Description Possible values LEAD 1 Default II I, II, III, aVR, aVL, aVF, V1, V2, V3, V4,... - Page 47 ECG100L - ECG200L DEVICE SETTINGS At any moment you can delete all the contents of the memory by accessing the Service settings pages and selecting Wipe memory.
-
Page 48: Upgrading Your Device Options
Activating new options on your device is simple. First of all, you have to contact Cardioline, or your distributor, to purchase the upgrades you need. Be sure you have the serial number of all the devices you need to upgrade, because they are required to finalize the purchase. -
Page 49: Maintenance And Troubleshooting
To switch the device off completely, disconnect the power cable and keep the ON/OFF key pressed. Always perform this operation before proceeding with authorised repairs of the device. 10.3. Regular maintenance Cardioline suggests to regularly check the device: Perform a functional and operation check daily ... -
Page 50: Patient Cable Cleaning
ECG100L - ECG200L MAINTENANCE AND TROUBLESHOOTING Check that the keys and controls work properly and have an appropriate aspect. Check battery works properly. If you notice anything needing a repair, contact an authorised assistance operator to perform it. -
Page 51: Operation Check
ECG100L - ECG200L MAINTENANCE AND TROUBLESHOOTING 10.3.4. Operation check After cleaning and checking the device, it is possible to verify the correct operation of the device using an ECG simulator to acquire and print a standard 12-lead ECG of known amplitude. Printing must be clear and uniform on the whole page. - Page 52 ECG100L - ECG200L MAINTENANCE AND TROUBLESHOOTING 1. Open the battery door with a screw driver. 2. Disconnect the battery connector. 3. Connect the new battery. 4. Place the battery in its compartment. It is recommended to plug the device in when possible to charge the battery to a maximum.
-
Page 53: Cleaning The Thermal Printer
ECG100L - ECG200L MAINTENANCE AND TROUBLESHOOTING 10.6. Cleaning the thermal printer Periodically, and anyhow whenever the tracing printing is faulty, the printer and thermal head of the device should be cleaned. 10.6.1. Cleaning the printer Unplug the electrocardiograph. ... -
Page 54: Troubleshooting Table
ECG100L - ECG200L MAINTENANCE AND TROUBLESHOOTING 3. Disconnect the battery and remove it from the compartment: 4. Leave the device with the battery disconnected for 60 minutes (the time required to reset the touchscreen calibration memory). 5. After 60 minutes, reconnect the battery and put the cover back on the battery compartment. -
Page 55: Error Notifications
10.9. Error notifications ECG100L/ECG200L will display on a popup message error/warning conditions requiring the intervention of the operator as described below. The popup message may appear in any screen, consistently with the function performed in the screen; the error reported in the popup message may be acknowledged by the operator and thus closed, or it may automatically close if the condition resolves. - Page 56 ECG100L - ECG200L MAINTENANCE AND TROUBLESHOOTING Message Cause Solution tests onto the USB pen drive correctly into the connector. Try disconnecting and reconnecting the USB pen drive. If the error persists, try using a different USB pen drive. The message closes if the user confirms the message (touching the popup) or removes the USB pen drive.
-
Page 57: Technical Specifications
Thermal printer ......... ECG100L: 8 dot/mm - 108mm; roll 100mm x 20m ECG200L: 8 dot/mm - 216mm; roll 200mm x 20m– z-fold A4 295 mm x 210 mm – z-fold Letter 280 mm x 216 mm Manual print ........3, 6, 12 channel, 5/10/25/50 mm/s... -
Page 58: Harmonised Standards Applied
ECG100L - ECG200L TECHNICAL SPECIFICATION Auto print .......... Standard or Cabrera; 3, 3+1, 6, 12 (ECG200L only) channels Patient Demographic, Global Measurements, Optional Interpretation (Glasgow University – Prof. MacFarlane) Adult, Paediatric, STEMI Keyboard ........... Touchscreen plus functional dedicated keys Connectivity ........USB device Patient cable ........ -
Page 59: Accessories
66030036C Disposable electrodes ECG neonatal, 25 pics 66030037C Disposable electrodes ECG banana, 60 pics 66020008 Set of 10 4mm plug/snap adaptors 66010055 Thermal paper roll 100x2000 mm ECG100L 66010052S Z-Fold paper A4 210x295mm (ECG200L) 66010053S Z-Fold paper Letter 210x295mm (ECG200L) -
Page 60: Warranty
Cardioline Spa declines all liability for any damage which may be caused, directly or indirectly, to persons or property as a consequence of non-compliance with all the prescriptions specified in the manual, especially warnings regarding installation, safety, use and maintenance of the equipment, as well as non-operation of the equipment. -
Page 61: Disposal
ECG100L - ECG200L DISPOSAL DISPOSAL Pursuant to Italian Legislative Decree no. 49 dated 14 March 2014 "Implementation of Directive 2012/19/EU on Waste Electrical and Electronic Equipment (WEEE)", the crossed-out "wheeled bin" symbol on the medical device indicates that, at the end of its service life, the product must be collected separately from other wastes. - Page 62 ECG100L - ECG200L...
- Page 63 ECG100L - ECG200L...
- Page 64 ECG100L - ECG200L...
- Page 65 Sales Office Via F.lli Bronzetti, 8 20129 Milan, Italy T. +39 02 94750470 F. +39 02 94750471 Factory Via Linz, 151 38121 Trento Italy T. +39 0463 850125 F. +39 0463 850088...
Need help?
Do you have a question about the ECG200L and is the answer not in the manual?
Questions and answers