Advertisement
Quick Links
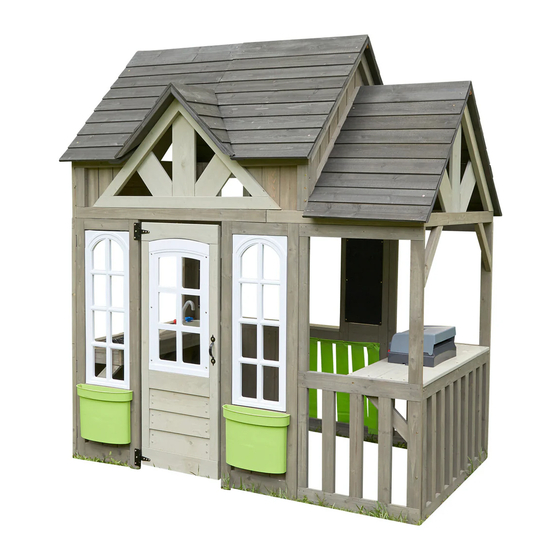
SCENIC VIEW
PLAYHOUSE
OBSTACLE FREE SAFETY ZONE - 224" x 202" (569 cm x 512 cm)
WARNING:
CAPACITY - 6 Users Maximum, Ages 2 to 10.
RESIDENTIAL HOME USE ONLY. Not intended for public areas such as schools, churches, nurseries, day cares or parks.
We recommend to place the activity toy on a level surface at least 2m from any structure or obstruction such as a fence,
garage, house, overhanging branches, laundry lines or electrical wires.
Activity toys shall not be installed over concrete, asphalt or any other hard surface.
Please retain this information for future reference.
INSTALLATION AND OPERATING INSTRUCTIONS
FOR 24/7 ONLINE PARTS REPLACEMENT
parts.kidkraft.com
KidKraft, Inc.
4630 Olin Road
Dallas, Texas 75244
USA
customerservice@kidkraft.com
1.800.933.0771
972.385.0100
parts.kidkraft.eu
KidKraft Netherlands BV
Olympisch Stadion 8
1076 DE Amsterdam
The Netherlands
europecustomerservice@kidkraft.com
+31 20 305 8620
M-F from 09:00 to 17:30 (GMT+1)
168.93 cm
512 cm
( 202")
BATCH
CODE
TWO-PERSON
ASSEMBLY TIME
ASSEMBLY
3 - 5 HOURS
WARNING
To reduce the risk of serious injury or death, please read and follow
these instructions. Keep and refer to instructions as needed and
pass along to any future owners of this item.
569cm
(224")
(66.51")
111.11cm
( 43.74")
187.64 cm
( 73.87")
REV 07/19/2021
WARNING. ONLY
FOR OUTDOOR
DOMESTIC USE
Advertisement

Related Manuals for KidKraft Scenic View Playhouse


Summary of Contents for KidKraft Scenic View Playhouse
- Page 1 ( 73.87") REV 07/19/2021 INSTALLATION AND OPERATING INSTRUCTIONS FOR 24/7 ONLINE PARTS REPLACEMENT BATCH CODE parts.kidkraft.com parts.kidkraft.eu KidKraft, Inc. KidKraft Netherlands BV 4630 Olin Road Olympisch Stadion 8 WARNING. ONLY TWO-PERSON ASSEMBLY TIME FOR OUTDOOR ASSEMBLY 3 - 5 HOURS...
- Page 2 Congratulations purchasing KidKraft product! Our items are made of high-quality, durable Cunninghamia Lanceolata wood from the cypress family. Lumber from these trees are known for their light weight and excellent strength. The porosity of this wood allows the moisture to absorb and evaporate in the fibers, resisting rot and bugs.
-
Page 3: Warnings And Safe Play Instructions
Instructions for Proper Maintenance Your KidKraft Play System is designed and constructed of quality materials with your child’s safety in mind. As with all outdoor products used by children, it will weather and wear. To maximize the enjoyment, safety and life of your Playhouse, it is important that you, the owner, properly maintain it. -
Page 4: Keys To Assembly Success
Keys to Assembly Success Tools Required • Carpenters Level • Standard or Cordless Drill • Safety Glasses • • Carpenters Square • Pencil • Adult Helpers • Part Identification Key On each page, you will find the parts and quantities required to complete the assembly step illustrated on that page. - Page 5 About Our Wood KidKraft Premium Play Systems uses only premium playset lumber, ensuring the safest product for your children’s use. Although we take great care in selecting the best quality lumber available, wood is still a product of nature and susceptible to weathering which can change the appearance of your set.
- Page 6 KidKraft Limited Warranty MISSING OR DAMAGED PARTS: KidKraft will replace any parts within 90 days from date of purchase found to be missing from or damaged in the original packaging. See Fig.1 Fig. 1 Product Age (All Parts) Consumer Pays...
- Page 7 INSTRUCTIONS D’INSTALLATION ET D’UTILISATION CODE POUR LE REMPLACEMENT 24/7 DES PIÈCES EN LIGNE DE LOT parts.kidkraft.com parts.kidkraft.eu KidKraft, Inc. KidKraft Netherlands BV DEUX PERSONNES 4630 Olin Road Olympisch Stadion 8 ATTENTION. UNIQUEMENT TEMPS DE MONTAGE REQUISES POUR POUR USAGE EXTÉRIEUR 3 à...
- Page 8 Félicitations pour votre achat d’un produit KidKraft! Nos produits sont fabriqués avec du bois durable de Cunninghamia Lanceolata de la famille du cyprès. Le bois de ces arbres est réputé pour sa légèreté et son excellente solidité. La porosité de ce bois permet à l’humidité d’être absorbée et de s’évaporer dans les fibres,...
- Page 9 Avertissements et instructions de jeu sécuri SUPERVISION CONTINUE D’UN ADULTE REQUISE. La plupart des blessures graves et des décès sur les équipements de terrain de jeu ont lieu lorsque les enfants sont laissés sans surveillance ! Nos produits sont conçus pour répondre aux normes de sécurité obligatoires et volontaires.
- Page 10 Trucs pour un assemblage réussi Outils requis • Niveau de menuisier • Lunettes de protection • Marteau à fourche • Perceuse régulière ou sans fil • Équerre de menuisier • Crayon • Adultes pour aider • Ruban à mesure Identification des pièces 2 X 1 Sur chaque page, vous trouverez les pièces et les quantités requises pour compléter...
- Page 11 À propos de notre bois Cedar Summit Premium Play Systems utilise uniquement du bois de qualité, vous assurant un produit des plus sécuritaire pour votre enfant. Bien que nous sélectionnions un bois d’œuvre de qualité supérieure, le bois est un produit naturel susceptible d’altérations atmosphériques qui peuvent modifier l’apparence de votre centre de jeu.
- Page 12 • Une légère torsion, un gauchissement, un fendillement ou toute autre propriété naturelle du bois qui n'affectent pas sa performance ou son intégrité. • Tout produit KidKraft acheté, y compris, mais sans s'y limiter, à un détaillant non agréé, une maison de vente aux enchères, les articles d'occasion et de liquidation vendus en l'état.
- Page 13 PARA SOLICITUDES ONLINE DE PIEZAS DE CÓDIGO REPUESTO DE MANERA ININTERRUMPIDA DE LOTE parts.kidkraft.com parts.kidkraft.eu KidKraft, Inc. KidKraft Netherlands BV 4630 Olin Road Olympisch Stadion 8 ADVERTENCIA. SOLO MONTAJE ENTRE TIEMPO DE MONTAJE PARA USO DOMÉSTICO DE 3 A 5 HORAS...
- Page 14 ¡Enhorabuena por haber adquirido un producto de KidKraft! Nuestros artículos están elaborados en madera duradera calidad superior Cunninghamia lanceolata, un árbol de la familia del cedro. La madera de estos árboles se caracteriza por su ligereza y su excelente resistencia. La porosidad de esta madera favorece la absorción y evaporación de la...
-
Page 15: Advertencias E Instrucciones De Seguridad
Advertencias e Instrucciones de Seguridad SE REQUIERE LA SUPERVISIÓN PERMANENTE DE UN ADULTO. ¡La mayoría de los accidentes graves y muertes que se producen en los juegos de jardín ocurren cuando los niños no son vigilados por un adulto! Nuestros productos están diseñados para cumplir con las normas de seguridad obligatorias y voluntarias. - Page 16 Claves para un montaje exitoso Herramientas necesarias • Nivel de carpintero • Martillo • Antiparras • Taladro estándar o • Escuadra de carpintero • Cinta métrica • Ayudantes adultos inalámbrico • Lápiz Claves para identificar las piezas 2 X 1 En cada página encontrará...
- Page 19 ( 43.74”) 187.64 cm ( 73.87") 組立・ 取扱説明書 オンライン部品交換 (年中無休24時間受付) バッチ コード parts.kidkraft.com parts.kidkraft.eu KidKraft, Inc. KidKraft Netherlands BV 組立に必要な 組立所要時間: 警告 : 一般家庭 4630 Olin Road Olympisch Stadion 8 人数: 2名 3~5時間 の屋外用 Dallas, Texas 75244 1076 DE Ámsterdam 警告...
- Page 20 KidKraft製品をお買い上げいただき、ありがと うございます。当社の製品には、高品質・高 耐久性に優れたヒノキ科のコウヨウザン材を 使用しています。この材木は軽さと別格の強 さで有名です。この材木は多孔質のため、湿 気を吸収し繊維内で蒸発し、虫害や腐食の害 を受けにくくなっています。最高のプレイタ イムをお届けできるよう設計された当社の製 品には、多岐にわたる安全検査が行われてい ます。さらに、組み立てをより簡単に、より 順序だてて実行できるよう、独自の方法をい くつも開発しました。組立の時間はより短く 、遊びの時間はより長く:これが当社のモッ トーです!組立の際、不明な点やご心配な点 がありましたら、ご遠慮なくお問い合わせく ださい。カスタマ サービスがパーツの不足 、組立の説明やメンテナンスの面でお手伝い いたします。...
- Page 22 2 X 1...
- Page 25 187.64 cm ( 73.87") 安裝與使用說明書 全 年 無休 24 小 時線 上 零件 更 換 批號 : parts.kidkraft.com parts.kidkraft.eu KidKraft, Inc. KidKraft Netherlands BV 組裝時間 警告。僅供 4630 Olin Road Olympisch Stadion 8 需 2 人組裝 3 - 5 小時 室外家庭使用 Dallas, Texas 75244 1076 DE Ámsterdam...
- Page 26 感謝您購買 KidKraft 產品! 我們的產品是由高品 質、耐用柏木種的杉木材料製成。這些樹的木材以 其重量輕和強度高而聞名。此種木材的孔隙率能在 纖維中吸收水份並蒸發,從而抗腐爛和防蟲。我們 的產品專為盡興遊玩而設計,並通過廣泛的安全測 試。此外,我們的團隊開發了一系列適當的方法, 以實現更簡單、更組織化的組裝。我們的座右銘就 是用更少組裝更多的遊玩!但在組裝過程中,如果 您有任何問題或疑慮,請與我們聯繫。我們的客服 可以協助解決缺少零件、說明或維護的相關問題。...
- Page 27 • • • Cedar Summit 16 CFR 1303...
- Page 28 • • • • • • • • 2 X 1 1/8” (3mm) 3/16” (5mm 5/16” (8mm 1/4” (6mm)
- Page 29 KidKraft 101 mm x 101 mm 25.4 mm x 101 mm...
- Page 30 KidKraft KidKra 0-90 $0 + KidKra $0 + $0 + $0 + • • • • • • • KidKra KidKra KidKra KidKra KidKra...
- Page 31 2 x 2 11 x 2 10 x 6 18 x 2 14 x 5 19 x 2 16 x 2 4463-BK 4453-DVGY 4812-WT 6095-GNGK 9207712 4454-BK 4459-BN 5283-STGY 4458-BK 4449-BK 5383-GNGK 6096 4451-SMGY 4452-SMGY 4450-SMGY 5177 Parts and Hardware Pièces et matériel Partes y Piezas Para Instalación 部品および金具...
- Page 32 If you need to order parts, please order below part# Si necesita pedir piezas, utilice el número de pieza indicado a continuación para realizar el pedido Si vous avez besoin de commander des pièces, veuillez utiliser le numéro de référence ci-dessous. 交換部品をご注文の際は、...
- Page 33 Step Étape Paso ステップ 步驟 Open frame all the way so all corners are at 90 degrees. Ouvrez le cadre jusqu'au bout pour que tous les coins soient à 90 degrés. Abra el marco por completo de modo que las esquinas queden a 90 grados. フレームを完全に開けて、全ての角が...
- Page 34 6 x D Step Étape Paso ステップ 步驟 Step Étape Paso 4 x D ステップ 步驟 Important! Inside View Important ! Vue intérieure ¡Importante! Vista interior 重要!内側から見た図 重要事項!內視圖 Centered Centré Centrado 中央を揃える 中心對準 Flush Aligné A ras 揃える 齊平...
- Page 35 Note Hole Orientation Step Notez l'orientation des trous Étape Tenga en cuenta la orientación Paso ステップ de los orificios 穴の向きに注意 步驟 注意孔位方向 4 x D Note Hole Orientation Notez l'orientation des trous Tenga en cuenta la orientación de los orificios 穴の向きに注意...
- Page 36 Step 2 x E Étape Paso ステップ 步驟 Flush Aligné A ras 揃える 齊平...
- Page 37 Step Flush Étape Aligné Paso A ras ステップ 揃える 16 x F 步驟 齊平 Note orientation of notch Noter l'orientation des entailles Tenga en cuenta la orientación de la muesca くぼみの向きに注意 注意凹口方向 Flush Aligné A ras 揃える 齊平 Flush Aligné A ras 揃える...
- Page 38 Step Étape Paso 4 x D ステップ 步驟 Step Étape Paso 4 x E ステップ 步驟...
- Page 39 Step Étape Paso 5 x D ステップ 步驟 Flush Aligné A ras 揃える 齊平 7-7/8” 20cm Step Étape Paso ステップ 5 x D 步驟 Flush / Aligné / A ras / 揃える / 齊平 12-7/8” 32cm...
- Page 40 Step Étape Paso ステップ 步驟 4 x B 4 x D Centered Centré Flush Centrado 中央を揃える Aligné 中心對準 A ras 揃える 齊平...
- Page 41 Step Étape Paso ステップ 步驟 10 x D 5/8” Note Hole Orientation 15.9mm Notez l'orientation des trous Tenga en cuenta la orientación de los orificios 穴の向きに注意 注意孔位方向 Note Hole Orientation Notez l'orientation des trous Flush Tenga en cuenta la orientación Aligné...
- Page 42 Step 4 x B Étape Paso ステップ 步驟 Flush Aligné A ras 揃える 齊平 Step 2 x D Étape 2 x E Paso ステップ 步驟...
- Page 43 Step Étape Paso ステップ 步驟 21 x H Tight Serré Ajustado ぴったり当てる 貼緊 Flush Flush Aligné Aligné A ras A ras 揃える 揃える 齊平 齊平...
- Page 44 Step 4453-DVGY Étape 4454-BK Paso 4453-DVGY-b ステップ 8 x I 步驟 10 x J 4453-DVGY-c 4453-DVGY-d 4453-DVGY-a 4454-BK...
- Page 45 Step Étape Paso 6 x D ステップ 步驟 Note The Board Orientation Noter l'orientation des planches. Flush Fíjese en la orientación de la tabla. 板の向きに注意します。 Aligné A ras 注意板面方向 揃える 齊平 Step Étape Paso ステップ 步驟 3 x D 4 x E Flush Aligné...
- Page 46 Step Note Hole Orientation Étape Notez l'orientation des trous Paso Tenga en cuenta la orientación ステップ de los orificios 穴の向きに注意 18 x H 步驟 注意孔位方向 Note Hole Orientation Notez l'orientation des trous Tenga en cuenta la orientación de los orificios Flush 穴の向きに注意...
- Page 47 Step 5283-STGY Étape Paso 4 x G ステップ 步驟 5283-STGY 12-13/32” 31.5cm 2-3/8”...
- Page 48 Step 1 x 23 Étape Paso 4458-BK ステップ 4459-BN-b 步驟 4 x G 20-15/32” 52cm 23-5/8” 60cm 1-3/8” 3.5cm 4458-BK 5/16” 0.8cm 4459-BN-b Step 4458-BK Étape Paso ステップ 2 x G 步驟 19-31/64” 49.5cm 25/32” 4458-BK...
- Page 49 Step 9207712 Flush Étape Aligné Paso 6 x G ステップ A ras 揃える 步驟 9207712 齊平 9207712 Flush Aligné A ras 揃える 齊平 9207712 Flush Aligné A ras 揃える 齊平 Step 6 x G Étape Paso ステップ 步驟 5/8” 1.6cm...
- Page 50 Step Étape Paso 4459-BN-a ステップ 步驟 2 x H 4459-BN-a Important: Use a hand held screw driver and DO NOT over tighten. Important : Utiliser un tournevis manuel et ne PAS TROP serrer. Importante: Use un destornillador de mano y no atornille en exceso. 重要...
- Page 51 Step 6095-GNGK Étape 1” Paso 4 x G ステップ 2.5cm 4 x L 步驟 5-5/16” 13.5cm 5-5/16” 13.5cm 1” 6-5/8” 2.5cm 16.8cm 6095-GNGK Step 4449-BK Étape Paso ステップ 12 x G 步驟 4449-BK 4449-BK 4449-BK...
- Page 52 Step Étape Paso ステップ 步驟 6 x A Note Hole Orientation Notez l'orientation des trous Tenga en cuenta la orientación de los orificios 穴の向きに注意 注意孔位方向 Step Étape Paso ステップ 4 x F 步驟...
- Page 53 Step 4812-WT Étape Paso 8 x G ステップ 步驟 Tight Serré Ajustado ぴったり当てる 貼緊 4812-WT Step 6 x A Étape 6 x G Paso ステップ 步驟...
- Page 54 Step Étape Paso 3 x F ステップ 步驟 3-3/4” 9.5cm Step Étape Paso 1 x E ステップ 步驟...
- Page 55 Step 2 x E Étape Paso ステップ 步驟 Flush Aligné A ras 揃える 齊平 Flush Aligné A ras 揃える 齊平 Step Note Hole Orientation Étape Notez l'orientation des trous Paso Tenga en cuenta la orientación ステップ de los orificios 穴の向きに注意 步驟...
- Page 56 Step 6 x A Étape 2 x E Paso ステップ 步驟 Step Étape Paso ステップ 4 x D 步驟 4 x F Flush Aligné A ras 揃える 齊平 Flush Aligné A ras 揃える 齊平...
- Page 57 Step Étape Paso ステップ 步驟 22 x A Flush Aligné A ras 揃える Flush 齊平 Aligné A ras 揃える 齊平...
- Page 58 Step Étape Paso ステップ 步驟 1 x E Step 4 x D Étape Paso ステップ 步驟 Flush Aligné A ras 揃える 齊平 Flush Aligné A ras 揃える 齊平...
- Page 59 Step 4463-BK Étape 4452-SMGY Paso ステップ 4451-SMGY 步驟 4450-SMGY 2 x G 4463-BK 4450-SMGY 4452-SMGY 4451-SMGY Step Étape Paso ステップ 1 x E 步驟...
- Page 60 4 x E Step Étape Paso ステップ 步驟 Flush Aligné A ras 揃える 齊平 Flush Aligné A ras 揃える 齊平 Step Étape Paso ステップ 步驟 10 x C Centered Centré Centrado 中央を揃える 中心對準 Flush / Aligné / A ras / 揃える / 齊平...
- Page 61 Step Étape Paso ステップ 步驟 10 x C Centered Centré Centrado 中央を揃える 中心對準 Flush / Aligné / A ras / 揃える / 齊平 Step Étape Paso ステップ 步驟 10 x C Centered Centré Centrado 中央を揃える 中心對準 Flush / Aligné / A ras / 揃える / 齊平...
- Page 62 Step Étape Paso 2 x C ステップ 步驟 Step Étape Paso ステップ 6096-a 步驟 4 x G Note Hole Orientation Notez l'orientation des trous Tenga en cuenta la orientación de los orificios 穴の向きに注意 注意孔位方向 6096-a Flush Aligné A ras Note Hole Orientation 揃える...
- Page 63 Step Étape Paso 6096-b ステップ 步驟 4 x G 6096-b 10-5/8” 27cm Step Étape Paso ステップ 6096-b 步驟 4 x G 7/8” 6096-b...
- Page 64 Step 6096-a Étape Paso 8 x G ステップ 步驟 Flush Aligné A ras 揃える 齊平 Flush Aligné A ras 揃える 齊平 6096-a 6096-a 6096-a Centered Centré Centrado 中央を揃える 中心對準...
- Page 65 Step 4 x D Étape Flush Paso Aligné ステップ A ras 揃える 步驟 齊平 4 x E Step Étape Paso ステップ 步驟...
- Page 66 8 x D Step Étape Paso ステップ 步驟 Step 2 x D Étape Paso ステップ 步驟 Important! Inside View Important ! Vue intérieure ¡Importante! Vista interior 重要!内側から見た図 重要事項!內視圖...
- Page 67 Step Étape Paso ステップ 步驟 6096-c 2 x K 6096-c 6096-c Flush Aligné A ras 揃える 齊平 2 x D Step Étape Paso ステップ Tight Serré 步驟 Ajustado ぴったり当てる 貼緊...
- Page 68 Step 1 x K Étape Paso ステップ 步驟 6096-c Important! Inside View Important ! Vue intérieure ¡Importante! Vista interior 重要!内側から見た図 重要事項!內視圖 2 x D Step Étape Paso ステップ Tight 步驟 Serré Ajustado ぴったり当てる 貼緊...
- Page 69 Step 1 x K Étape Paso ステップ 步驟 6096-c Important! Inside View Important ! Vue intérieure ¡Importante! Vista interior 重要!内側から見た図 重要事項!內視圖 4 x G Step Étape Paso ステップ 步驟 5-13/16” 14.8cm 1-3/16”...
- Page 70 Step 5383-GNGK Étape Paso ステップ 步驟 5383-GNGK 5383-GNGK Step 5177 Étape Paso 2 x G ステップ 步驟 5177...
Need help?
Do you have a question about the Scenic View Playhouse and is the answer not in the manual?
Questions and answers