
Related Manuals for Brother NQ3700D


Summary of Contents for Brother NQ3700D
- Page 1 Operation Manual Embroidery and Sewing Machine Product Code: 888-G26/G30/G32/G34 Be sure to read this document before using the machine. We recommend that you keep this document nearby for future reference.
- Page 3 Return the machine to the nearest authorized Please read these safety instructions before attempting to Brother dealer for examination, repair, electrical or use the machine. mechanical adjustment. • While the machine is stored or in use if you notice...
- Page 4 Operation Manual to inspect and adjust maintenance shall not be made by the machine yourself. If the problem persists, please consult your local authorized Brother dealer. children without supervision. Use this machine only for its intended use as described in the manual.
- Page 5 ASTA to BS 1362, i.e. carrying the connected. mark, rating as marked on plug. • Consult the authorized Brother dealer or an • Always replace the fuse cover. Never use plugs with experienced radio/TV technician for help. the fuse cover omitted.
- Page 6 (SAR). (Great Britain only) For Users in Mexico We, Brother Industries Ltd. 15-1 Naeshiro-cho, Mizuho-ku, The operation of this equipment is subject to the following Nagoya 467-8561 Japan declare that these products are in two conditions: conformity with the relevant UK legislation.
- Page 7 This Terms of Use (“Agreement”) is a legal agreement programs; between Brother Industries, Ltd. (“Company”) and you that 2.1.6 to include Company’s copyright notice governs your use of any Software, installed on or made and this Agreement on all entire and available by Company for use with sewing or craft products partial copies of the Software;...
- Page 8 Termination This Agreement is governed by the laws of Japan and Japanese Courts shall have exclusive Company shall have the right to terminate this jurisdiction with respect to this Agreement Agreement at any time by providing a written except with regard to enforcement in which notice to you if you commit a material breach case the jurisdiction of the Japanese Courts of any terms of this Agreement and fail to...
- Page 9 TRADEMARKS WPA™ and WPA2™ are trademarks of Wi-Fi Alliance®. Any trade names and product names of companies appearing on Brother products, related documents and any other materials are all trademarks or registered trademarks of those respective companies. COPYRIGHT AND LICENSE...
-
Page 10: Table Of Contents
CONTENTS CONTENTS Chapter 1 GETTING READY Chapter 4 EMBROIDERY Names of Machine Parts........9 Embroidering Preparation ........79 Included accessories ............11 Attaching the embroidery foot............ 79 Turning the Machine On/Off......12 Attaching the embroidery unit ..........80 Embroidering attractive finishes ........... 81 LCD Operation ........... -
Page 11: Chapter 1 Getting Ready
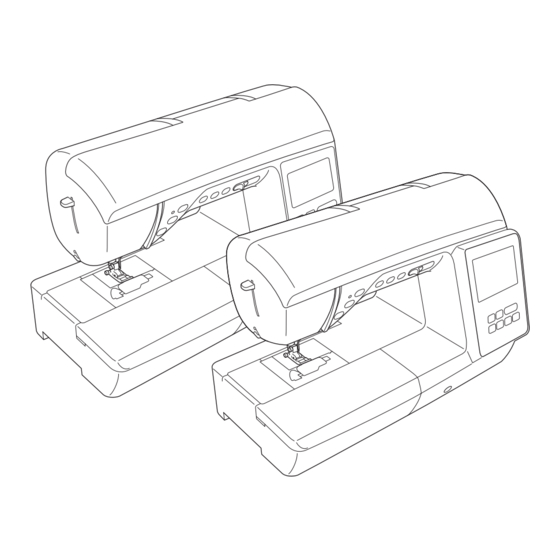
Names of Machine Parts GETTING READY Chapter 9 Operation panel (page 11) Note 0 Knee lifter mounting slot (page 43) A Knee lifter (page 43) • Be sure to install the latest software. B Operation buttons and sewing speed controller Refer to “Updating Your Machine’s Software”... - Page 12 Names of Machine Parts Embroidery unit Operation buttons d e f 1 “Start/Stop” button Press the “Start/Stop” button to start or stop sewing. The button changes color according to the machine’s operation mode. Green: The machine is ready to sew or is sewing. 1 Embroidery frame holder (page 84) Red: The machine cannot sew.
-
Page 13: Included Accessories
Names of Machine Parts Operation panel and operation keys Included accessories For included accessories of your machine, refer to the additional sheet “Included Accessories”. Pull the top of the flat bed attachment to open the accessory compartments. 1 LCD (liquid crystal display) (touch panel) Selected pattern settings and messages are displayed. -
Page 14: Turning The Machine On/Off
These things may damage the cord, or cause fire or electric shock. If the cord or plug is damaged, take the machine to your authorized Brother dealer for repairs before continuing use. • Unplug the power cord if the machine is not to be used for a long period of time. -
Page 15: Lcd Operation
LCD Operation LCD Operation Viewing the LCD Press a key with your finger to select the stitch pattern, to select a machine function, or to select an operation indicated on the key. The screen below appears when you press on the operation panel. 1 Utility stitch 2 Character/Decorative stitch Utility stitch screen... - Page 16 LCD Operation No. Display Key Name Explanation Page Needle position setting Shows single or twin needle mode setting, and the needle stop position. : Single needle/down position : Twin needle/down position : Single needle/up position : Twin needle/up position Stitch width Shows the stitch width of the currently selected stitch pattern.
-
Page 17: Settings Screen
Check with your local authorized Brother presser foot is raised to the height specified for [Presser Foot Height] on page 2 of the settings screen. dealer or at “ http://s.brother/cpham/ ” for available When the pivot setting is selected, the presser foot is updates. - Page 18 (Contact your 9 Display the latest version of the software. authorized Brother dealer for details.) 0 Displays a message if [New update on server] is 8 Display the total number of stitches sewn on this available for this machine.
-
Page 19: Adjusting Input Sensitivity For Operation Keys
The application can be downloaded from the following URL. • The higher the setting, the more sensitive the keys http://s.brother/cahka/ will be. The default setting is [3]. * Settings must be specified in Design Database • We recommend selecting the highest setting if an Transfer. -
Page 20: Enabling A Wireless Network Connection
Wireless Network Connection Functions Press beside [Wireless LAN Setup Wizard]. Enabling a wireless network connection The machine can be connected to your wireless network. Press to display the settings screen. Display page 12 by pressing A list of available SSIDs appears. Select the SSID that was noted. - Page 21 Wireless Network Connection Functions When the following message appears, press Setting the wireless LAN connection from the [Others] menu The [Others] menu on page 13 of the settings screen contains the following items. When a connection is established, the following message appears.
-
Page 22: Winding/Installing The Bobbin
Winding/Installing the Bobbin Memo Winding/Installing the Bobbin • By placing the bobbin into the bobbin case in the same orientation that it was on the bobbin winder shaft, the bobbin can be installed with the correct CAUTION winding direction of the bobbin thread. The “b”... - Page 23 Winding/Installing the Bobbin Pass the thread under the hook on the bobbin winding Memo thread guide, and then wind it counterclockwise under • When using the spool as shown below, use the the pretension disk. thread spool insert (mini king thread spool). Make sure that the thread spool insert is firmly inserted.
-
Page 24: Installing The Bobbin
Winding/Installing the Bobbin Press the “Start/Stop” button to start winding the Installing the bobbin bobbin. When the foot controller is plugged in, press down on the foot controller. Install the bobbin wound with thread. You can begin sewing immediately without pulling up the bobbin thread by simply inserting the bobbin in the bobbin case and guiding the thread through the slit in the needle plate cover. - Page 25 Winding/Installing the Bobbin Slide the bobbin cover latch to the right and remove While lightly holding down the bobbin with your right the bobbin cover. hand (1), guide the thread through the slit in the needle plate cover (2) and lightly pull it with your left hand (3).
-
Page 26: Upper Threading
Upper Threading Raise the presser foot lever to raise the presser foot. Upper Threading CAUTION • When threading the upper thread, carefully follow the instructions. If the upper threading is not correct, the thread may become tangled or the needle may bend or break. Memo •... - Page 27 Upper Threading While holding the thread near the spool, pass the Check that the needle and thread are compatible with thread through the thread guide cover. And then, pass the needle threader. If they are compatible, continue the thread under the thread guide plate, and pull it up. with the next step.
-
Page 28: Pulling Up The Bobbin Thread
Upper Threading Lower the needle threader lever on the left side of the Pulling up the bobbin thread machine until it clicks, and then slowly return the lever to its original position. If the threads will be pulled to create gathers or the thread at the beginning of sewing will be finished, for example, when free motion quilting, first pull up the bobbin thread. -
Page 29: Fabric/Thread/Needle Combinations
Fabric/Thread/Needle Combinations Fabric/Thread/Needle Combinations • Needles that can be used with this machine: Home sewing machine needles (size 65/9 - 100/16) * The larger the number, the larger the needle. As the numbers decrease, the needles get finer. • Thread that can be used with this machine: 30 - 90 weight * Never use thread of 20 weight or lower. -
Page 30: Replacing The Needle
Replacing the Needle The screen changes, and all keys and operation Replacing the Needle buttons are locked (except CAUTION • Only use recommended home sewing machine needles. Use of any other needle may bend the needle or damage the machine. CAUTION •... -
Page 31: Replacing The Presser Foot
Replacing the Presser Foot Raise the presser foot lever. Replacing the Presser Foot Press the black button at the back of the presser foot holder in order to remove the presser foot. CAUTION 1 Black button 2 Presser foot holder •... -
Page 32: Removing And Attaching The Presser Foot Holder
Replacing the Presser Foot Raise the presser foot lever. Removing and attaching the presser foot holder Align the notch in the presser foot holder with the screw. Remove the presser foot holder when cleaning the machine or when installing a presser foot that does not use the presser 1 Screw foot holder, such as the walking foot and Free motion open 2 Notch in presser foot... -
Page 33: Chapter 2 Sewing Basics
Sewing SEWING BASICS Chapter Basic sewing Sewing Note CAUTION • First, perform a trial sewing, using a piece of fabric and thread that are the same as those used for • While the machine is in operation, pay special your project. attention to the needle location. - Page 34 Sewing Set the fabric under the presser foot. Hold the fabric and thread with your left hand, and rotate the CAUTION handwheel counterclockwise or press (Needle position button) to set the needle in the sewing start • Do not press (Thread cutter button) after position.
-
Page 35: Combining Stitch Patterns
Sewing Insert the foot controller plug into the foot controller Press jack on the machine. The display returns to the stitch selection screen. 1 Foot controller jack Press Select a font. Turn on the machine. Slowly depress the foot controller to start sewing. Press a tab to change the selection screens and enter a character. -
Page 36: Sewing Reverse/Reinforcement Stitches
Sewing Sewing reverse/reinforcement stitches Automatic reverse/reinforcement stitching Reverse/reinforcement stitches are generally necessary at the After selecting a stitch pattern, turn on the automatic reverse/ beginning and end of sewing. reinforcement stitching function before sewing, and the machine will automatically sew reinforcement stitches (or With reinforcement stitches, 3 to 5 stitches are sewn at the reverse stitches, depending on the stitch pattern) at the same place. -
Page 37: Automatic Thread Cutting
Sewing The operation performed when either of these buttons is Reverse stitch Reinforcement pressed differs depending on the selected stitch pattern. Refer stitch button button to the following table for details on the operation that is performed when the button is pressed. When the automatic Machine sews 3 - 5 Machine sews 3 - 5... -
Page 38: Automatic Presser Foot Lowering Function
Sewing Press on the screen. Automatic fabric sensor system (Automatic presser foot pressure) The thickness of the fabric is automatically detected and the presser foot pressure is automatically adjusted with an internal sensor while sewing, to insure that your fabric is fed smoothly. The fabric sensor system works continuously while sewing. -
Page 39: Pivoting
Sewing Select a stitch. Pivoting Press to select the pivot function. If the pivot key is selected, the machine stops with the needle lowered (in the fabric) and the presser foot is automatically raised to an appropriate height when the “Start/Stop” button is pressed. -
Page 40: Setting The Stitch Width/Stitch Length/"L/R Shift
Adjusting the Thread Tension Setting the stitch width Setting the stitch width/stitch length/“L/R The stitch width (zigzag width) can be adjusted to make Shift” the stitch wider or narrower. This machine is preset with the default settings for the stitch width, stitch length and “L/R Shift” for each stitch. However, you can change any of the settings by pressing in the utility stitch screen. -
Page 41: Useful Sewing Tips
Useful Sewing Tips Upper thread is too tight Useful Sewing Tips If the bobbin thread is visible from the right side of the fabric, the upper thread is too tight. Loosen the thread tension. Sewing tips Note • If the bobbin thread was incorrectly threaded, the Trial sewing upper thread may be too tight. -
Page 42: Sewing An Even Seam Allowance
Useful Sewing Tips Sewing cylindrical pieces Sewing an even seam allowance Removing the flat bed attachment allows for free-arm sewing, making it easier to sew cylindrical pieces such as To sew an even seam, start sewing so that the seam allowance sleeve cuffs and pant legs. -
Page 43: Sewing Various Fabric
Useful Sewing Tips Aligning the fabric with a needle plate marking If the fabric does not feed When sewing thick fabric such as denim or quilting, the The markings on the needle plate show the distance from fabric may not feed at the start of sewing if the presser foot the needle position of a seam sewn with the straight stitch is not level, as shown below. - Page 44 * Items sold separately with some models, please contact sewn or if the fabric is pushed with too much your authorized Brother dealer. force, the needle may bend or break. 1 Leather...
-
Page 45: Hands-Free Raising And Lifting Of The Presser Foot
Useful Sewing Tips Sewing hook-and-loop fastener tape Hands-free raising and lifting of the presser foot CAUTION Using the knee lifter, you can raise and lower the presser foot • Use only the adhesive-free hook-and-loop with your knee, leaving both hands free to handle the fabric. fastener tape which is designed for sewing. - Page 46 Useful Sewing Tips Release the knee lifter. The presser foot is lowered. CAUTION • While sewing, keep your knee away from the knee lifter. If the knee lifter is pressed while the machine is operating, the needle may break or the machine may be damaged.
-
Page 47: Chapter 3 Various Stitches
Stitch Chart VARIOUS STITCHES Chapter Stitch Chart Stitch Stitch Stitch width length Stitch name/ (Presser (mm (inch)) (mm (inch)) Applications Utility stitches foot) Auto. Auto. Applications, stitch lengths and widths and whether the Manual Manual twin needle can be used, are listed for utility stitches in the Straight stitch (Left) 0.0 (0) 2.5 (3/32) - Page 48 Stitch Chart Stitch Stitch Stitch Stitch Stitch width length Stitch width length Stitch name/ Stitch name/ (Presser (mm (inch)) (mm (inch)) (Presser (mm (inch)) (mm (inch)) Applications Applications foot) Auto. Auto. foot) Auto. Auto. Manual Manual Manual Manual Single diamond Zigzag stitch 3.5 (1/8) 1.4 (1/16)
- Page 49 Stitch Chart Stitch Stitch Stitch Stitch Stitch width length Stitch width length Stitch name/ Stitch name/ (Presser (mm (inch)) (mm (inch)) (Presser (mm (inch)) (mm (inch)) Applications Applications foot) Auto. Auto. foot) Auto. Auto. Manual Manual Manual Manual Quilting stippling stitch Decorative stitch 7.0 (1/4) 1.6 (1/16)
- Page 50 Stitch Chart Stitch Stitch Stitch Stitch Stitch width length Stitch width length Stitch name/ Stitch name/ (Presser (mm (inch)) (mm (inch)) (Presser (mm (inch)) (mm (inch)) Applications Applications foot) Auto. Auto. foot) Auto. Auto. Manual Manual Manual Manual Keyhole buttonhole Hemstitching 6.0 (15/64) 1.6 (1/16)
- Page 51 Stitch Chart Decorative stitches Stitch Stitch Use monogramming foot “N”. Stitch width length Stitch name/ (Presser (mm (inch)) (mm (inch)) The twin needle can only be used with satin stitch Applications foot) Auto. Auto. Be sure to attach zigzag foot “J” when using the twin Manual Manual needle.
- Page 52 Stitch Chart Character stitches Satin stitches Use monogramming foot “N”. 7-01 7-02 7-03 7-04 7-05 7-06 7-07 The twin needle cannot be used. Character stitches (Gothic font) 7-08 7-09 7-10 7-11 7-12 7-13 7-14 7-15 7-16 7-17 7-18 7 mm satin stitches 8-01 8-02 8-03...
- Page 53 Stitch Chart Character stitches (Outline) Character stitches (Japanese font) Character stitches (Cyrillic font)
-
Page 54: Utility Stitches
Utility Stitches Rotate the handwheel toward you (counterclockwise). Utility Stitches Check that the needle does not touch the presser foot. 1 The needle should not touch the center bar CAUTION • Before replacing the presser foot, be sure that Sew with the edge of the fabric against the presser foot you have pressed (Presser foot/Needle guide. - Page 55 Utility Stitches Sewing overcasting stitches using the side Position the side cutter so that side cutter pin is aligned with the notch in the presser foot holder, and then cutter (sold separately with some models) slowly lower the presser foot lever. Using the side cutter, seam allowances can be finished while the edge of the fabric is cut off.
-
Page 56: Blind Hem Stitching
Utility Stitches Lower the presser foot lever, and then start sewing. Using tailor's chalk, mark the fabric about 5 mm (3/16 inch) from the edge of the fabric, and then baste it. 1 Wrong side of fabric 2 Right side of fabric 3 Lower edge of fabric 4 Desired length for hem 5 5 mm (3/16 inch) - Page 57 Utility Stitches Remove the flat bed attachment to use the free arm. Press the “Start/Stop” button to stop sewing when you are finished, and raise the presser foot and needle to pull the fabric under the presser foot towards the back Slide the item that you wish to sew onto the free arm, of the machine.
-
Page 58: Buttonhole Sewing
Utility Stitches Use chalk to mark on the fabric the position and length Buttonhole sewing of the buttonhole. 1 Marks on fabric The maximum buttonhole length is about 28 mm (1-1/8 2 Buttonhole sewing inches) (diameter + thickness of the button). Buttonholes are sewn from the front of the presser foot to the back, as shown below. - Page 59 Utility Stitches Position the fabric with the front end of the buttonhole Press (Thread cutter button) once. mark aligned with the red marks on the sides of the Raise the presser foot, and then remove the fabric. buttonhole foot, and then lower the presser foot lever. Memo 1 Mark on fabric •...
-
Page 60: Button Sewing
Utility Stitches Sewing buttonholes on stretch fabrics Button sewing When sewing buttonholes on stretch fabrics, use a gimp thread. Buttons can be sewn on with the machine. Buttons with two Hook the gimp thread onto the part of buttonhole foot or with four holes can be attached. -
Page 61: Zipper Insertion
Utility Stitches Turn the handwheel toward you (counterclockwise) to Attaching a shank to a button check that the needle correctly goes into the two holes To sew the button with a shank, attach the button with of the button. space between it and the fabric, and then wind the thread by hand. - Page 62 Utility Stitches Using a basting stitch, continue sewing to the edge of the fabric. CAUTION 1 Basting stitching • When using zipper foot “I”, be sure to select 2 Wrong side of fabric the straight stitch (middle (center) needle position), and slowly turn the handwheel toward you (counterclockwise) to check that the needle does not touch the presser foot.
-
Page 63: Zipper/Piping Insertion
Utility Stitches Slide the presser foot over either the left or right feed Zipper/piping insertion dog. A zipper and piping can be sewn in place. Use adjustable zipper/piping foot (sold separately with some models) Inserting a centered zipper Refer to step –... -
Page 64: Appliqué, Patchwork And Quilt Stitching
Utility Stitches Inserting a piping Turn the handwheel toward you (counterclockwise), and then begin sewing around the edge of the Place the piping between two fabrics inside out, as appliqué, making sure that the needle drops just shown below. outside of the appliqué. 1 Fabric 2 Piping 3 Fabric... - Page 65 Utility Stitches Select a stitch. Align the mark at the upper edge of the 1/4" piecing foot with the upper edge of the fabric. 1-29 1-31 Align the right edge of the fabric with the right edge of the narrow part of the 1/4" piecing foot. Stitch 1 Mark on 1/4"...
- Page 66 * Items sold separately, please contact your authorized Stitch Brother dealer. • For details, refer to “Stitch Chart” on page 45. Note Place one hand on each side of the presser foot, and •...
- Page 67 Utility Stitches Using free motion open toe quilting foot “O” Attach the quilting foot by positioning the pin of the quilting foot above the needle clamp screw and The free motion open toe quilting foot “O” is used for free aligning the lower-left of the quilting foot and the motion quilting with zigzag or decorative stitches or for presser bar.
-
Page 68: Other Stitching Applications
Utility Stitches Satin stitching using the sewing speed Other stitching applications controller A decorative stitch can be sewn by changing the stitch width of a satin stitch. If the machine is set so that the Elastic attaching stitch width can be adjusted using the sewing speed When elastic tape is attached to the cuff or waist of a controller, the stitch width can quickly and easily be piece of clothing, the finished dimensions will be that of... - Page 69 Utility Stitches Determine the desired length of the bar tack. Darning Set the button guide plate on buttonhole foot “A” to the desired length. (The distance between the markings on the presser foot scale is 5 mm (3/16 inch).) 1 Presser foot scale 2 Length of bar tack 3 5 mm (3/16 inch) •...
- Page 70 Utility Stitches Pull down the buttonhole lever as far as possible. After removing the fabric, use the eyelet punch to cut a hole in the center of the eyelet. Gently hold the end of the upper thread in your left hand, and then start sewing.
- Page 71 Utility Stitches Scallop stitching Select a stitch. The wave-shaped repeated stitch pattern that looks like shells is called “scalloping”. It is used on the collars of 2-10 2-11 2-12 blouses and to decorate the edges of projects. Stitch Attach monogramming foot “N”. •...
- Page 72 Utility Stitches Joining Lower the needle into the fabric at the beginning of the stitching, and then start sewing. Decorative bridging stitches can be sewn over the seam allowance of joined fabrics. This is used when making a Lower the needle at the upper-right corner. crazy quilt.
- Page 73 Utility Stitches Using the twin needle Swing the spool pin toward the left so that it is horizontal. With the twin needle, you can sew two parallel lines of the same stitch with two different threads. Both upper threads should have the same thickness and quality. CAUTION •...
-
Page 74: Making Step Stitch Patterns
Utility Stitches Press and set [Twin Needle] (page 1 of the Select a stitch. settings screen) to [ON]. 3-04 3-06 3-10 Stitch 3-12 3-18 3-20 3-21 CAUTION Stitch • When using the twin needle, be sure to select the twin needle setting, otherwise the needle 3-22 may break or the machine may be damaged. -
Page 75: Making Adjustments
Making Adjustments Press Making Adjustments Select a stitch. Your stitch pattern may sometimes turn out poorly, depending on the type or thickness of fabric, the stabilizer material used, sewing speed, etc. If your sewing does not turn out well, sew trial stitches using the same conditions as the real sewing, and adjust the stitch pattern as explained below. -
Page 76: Using The Memory Function
USB flash drive USB flash drive is commercially available, but some USB flash drives may not be usable with this machine. Please visit our website “ http://s.brother/cpham/ ” for more details. If the stitch pattern is skewed to the right:... -
Page 77: Saving Stitch Patterns
Using the Memory Function Saving stitch patterns Retrieving stitch patterns You can save stitch patterns that you have customized in the Retrieve stitch patterns saved in the machine's memory or machine's memory or USB flash drive. USB flash drive. When retrieving stitch patterns from a USB flash drive, Note insert the USB flash drive into the USB port on the •... -
Page 78: My Custom Stitch
MY CUSTOM STITCH MY CUSTOM STITCH screen MY CUSTOM STITCH Designing a stitch By using the MY CUSTOM STITCH function, you can register stitches you have created yourself. You can also sew designs combining MY CUSTOM STITCH creations with built-in characters (page 31). Memo 0 9 8 7 •... - Page 79 MY CUSTOM STITCH Entering points Press to move the section and press Press The section will be moved. Inserting new points to move to the coordinates of the first Press to move to a place on the design point on the grid sheet. where you want to add a new point.
- Page 80 MY CUSTOM STITCH...
-
Page 81: Chapter 4 Embroidery
Embroidering Preparation EMBROIDERY Chapter Attaching the embroidery foot Embroidering Preparation Follow the steps below to prepare the machine for embroidery. CAUTION Step 9 • Be sure to use embroidery foot when doing embroidery. Using another presser foot may cause the needle to strike the presser foot, causing the needle to bend or break and possibly cause injury. -
Page 82: Attaching The Embroidery Unit
Embroidering Preparation Hold the embroidery foot in place with your right Slide the tab on the cover of the connection port in the hand, and then use the included screwdriver to direction of the arrow to open the cover. securely tighten the presser foot holder screw. Note CAUTION •... -
Page 83: Embroidering Attractive Finishes
Embroidering Preparation Be sure that no objects or hands are near the Embroidering attractive finishes embroidery unit and press There are many factors that go into beautiful embroidery. Using the appropriate stabilizer (page 82) and hooping the fabric in the frame (page 82) are two important factors mentioned earlier. -
Page 84: Hooping The Fabric In The Embroidery Frame
1.5 mm setting is used your authorized Brother dealer for the correct for most embroidery. stabilizer to use. - Page 85 Embroidering Preparation Inserting the fabric Gently stretch the fabric taut, and tighten the frame adjustment screw to keep the fabric from loosening after stretching. CAUTION • After stretching the fabric, make sure the fabric is taut. • If you use a frame that is too small, the presser foot may strike the frame during embroidering and cause injury or may damage your machine.
-
Page 86: Attaching The Embroidery Frame
Embroidering Preparation Place the embroidery sheet on the inner frame. Align the embroidery frame guide with the right edge of the embroidery frame holder. Line the mark on the fabric up with the base line on the embroidery sheet. 1 Embroidery frame holder 2 Embroidery frame guide Slide the embroidery frame into the holder, making sure to align the embroidery frame’s arrow mark with... -
Page 87: Embroidering
Embroidery pattern types Pull the embroidery frame toward you. 1 Embroidery patterns 2 Brother “Exclusives” 3 Floral alphabet patterns 4 Character patterns 5 Frame patterns 6 Press this key to position the embroidery unit for storage... - Page 88 Embroidering Select a desired embroidery pattern, and then press Memo • If [Embroidery Frame Identification View] in the settings screen is set to [ON], the pattern can be • Available frame options are displayed on the screen. edited in the screen as if that embroidery frame is attached.
- Page 89 Embroidering Selecting character patterns Press Press • For details on editing the pattern, refer to “Editing Patterns (Pattern Editing Screen)” on page 96. Press the key of the font you want to embroider. Combining patterns Select the pattern and then press Press a tab to display the desired selection screen, and then type in the text.
- Page 90 Embroidering Edit the pattern position. Checking the pattern position The embroidery frame moves and shows the pattern • The pattern can be selected with your finger and then position. Watch the frame closely to make sure the pattern moved by dragging it. Use to select patterns that will be embroidered in the right place.
-
Page 91: Embroidering A Pattern
Embroidering Lower the presser foot, then press the “Start/Stop” Embroidering a pattern button to start embroidering. After 5-6 stitches, press the “Start/Stop” button again Embroidery patterns are embroidered with a change of thread to stop the machine. after each color. Prepare embroidery thread colors as shown on the screen. - Page 92 Embroidering Changing the thread color display Press You can display the name of the thread colors or embroidery thread number. Memo • Colors on the screen may vary slightly from actual spool colors. • [Original], imported data remains the brand thread ...
-
Page 93: Embroidery Foot Auto Down
Embroidering If the thread breaks during sewing Embroidery foot auto down Press the “Start/Stop” button to stop the machine. You can choose a setting to automatically lower the embroidery foot at the beginning of embroidering. If the upper thread is broken, redo the upper Press to display the settings screen, and then threading. -
Page 94: Adjusting The Bobbin Case (With No Color On The Screw)
Embroidering Upper thread is too tight Adjusting the bobbin case (with no color on The bobbin thread will be visible on the right side (top) of the screw) the fabric. In this instance, decrease the upper thread tension. The bobbin case (with no color on the screw) can be adjusted 1 Right side (top) of when bobbin tension changes are required to accommodate fabric... -
Page 95: Using The Automatic Thread Cutting Function (End Color Trim)
Embroidering Using the thread trimming function (Jump CAUTION Stitch Trim) • When adjusting the bobbin case, be sure to The thread trimming function will automatically trim any remove the bobbin from the bobbin case. excess thread jumps within the color. Embroidery frame •... -
Page 96: Embroidering The Appliqué Patterns
Embroidering 2. Sewing the appliqué position on the base Embroidering the appliqué patterns fabric When the color embroidering order display shows Sew the appliqué position. (APPLIQUE MATERIAL)], (APPLIQUE POSITION)] or (APPLIQUE)], follow the procedure below. 1 Position of appliqué 2 Base material Required materials •... -
Page 97: Using A Frame Pattern To Make An Appliqué
Embroidering Finish embroidering the remainder of the pattern. Method 2 Select a straight stitch frame pattern, and embroider Using a frame pattern to make an appliqué the pattern onto the base fabric. You can use frame patterns of the same size and shape to create an appliqué. -
Page 98: Split Embroidery Patterns
Editing Patterns (Pattern Editing Screen) Split embroidery patterns Editing Patterns (Pattern Editing Screen) Split embroidery patterns created with PE-DESIGN Ver.7 or later, or PE-DESIGN NEXT can be embroidered. With split When a pattern is selected in the pattern selection screen embroidery patterns, embroidery designs larger than the embroidery hoop are divided into multiple sections, which is pressed, the pattern editing screen appears. - Page 99 Editing Patterns (Pattern Editing Screen) Display Display Explanation Explanation Key Name Key Name Press this key to rotate the pattern. Press this key to change the size of the pattern. Press to return the pattern to its Rotate key Size key : Enlarges the pattern proportionately.
-
Page 100: Editing Patterns (Embroidery Settings Screen)
Editing Patterns (Embroidery Settings Screen) Display Editing Patterns (Embroidery Settings Explanation Key Name Screen) Press this key to edit each character separately. Edit character key When is pressed in the editing screen, the embroidery settings screen appears. After editing the pattern, press to continue to the embroidering screen. -
Page 101: Aligning The Pattern And The Needle Position
Editing Patterns (Embroidery Settings Screen) Aligning the pattern and the needle position Embroidering linked characters Example: Aligning the lower left side of a pattern and the Follow the procedure described below to embroider linked needle position characters in a single row when the entire pattern extends beyond the embroidery frame. -
Page 102: Thread Color Sorting
Editing Patterns (Embroidery Settings Screen) Press to cancel the current character patterns. Thread color sorting This function allows you to embroider while replacing the Select the character patterns for “DEF”, and then press thread spool a minimal number of times. Before starting to embroider, press in the embroidery Press... -
Page 103: Using The Memory Function
6-1/4 inches). USB flash drive Some USB flash drives may not be usable with this machine. Please visit our website “ http://s.brother/cpham/ ” for more details. Precautions on using the computer to create and save Select the destination to start saving. -
Page 104: Retrieving Embroidery Patterns
Using the Memory Function Press Retrieving embroidery patterns Retrieve embroidery patterns saved in the machine's memory, or on a USB flash drive, or transferred via wireless network. When retrieving the embroidery patterns from a USB flash drive, insert the USB flash drive into the USB port on the machine. -
Page 105: Chapter 5 Appendix
If problems occur, such as difficulty turning the handwheel or an unusual noise, immediately stop using the machine, and contact your authorized Brother dealer or the nearest Brother authorized service center. Precautions on storing the machine 2 Grasp both sides of the needle plate cover, and then slide it toward you. -
Page 106: Touch Panel Is Malfunctioning
Otherwise the upper thread may become tangled, the needle may break or sewing performance may suffer. For a new bobbin case, contact your nearest Brother authorized service center. Use the cleaning brush or a vacuum cleaner to remove •... -
Page 107: Troubleshooting
FAQs and troubleshooting tips. Visit us at “ http://s.brother/ cpham/ ”. • The thread becomes tangled on the wrong side of the If the problem persists, contact your Brother dealer or the fabric. nearest Brother authorized service center. Frequent troubleshooting topics Detailed causes and remedies for common troubleshooting topics are described below. -
Page 108: Incorrect Thread Tension
“Installing the bobbin” on page 22 to according to this procedure, instead of attempting to remove it correct the threading. forcefully, contact your nearest Brother authorized service center. <With symptoms 3 and 5 described above> The upper threading is incorrect. - Page 109 • Refer to “Cleaning the race” on page 103. Cut out the tangled threads, and then remove the bobbin. If the fabric cannot be removed, even after completing these steps, contact your nearest Brother authorized service center. Remove any threads in the race and around the feed dogs.
-
Page 110: If The Thread Becomes Tangled Under The Bobbin Winder Seat
If the needle or feed dogs make contact the needle seat with your right hand as shown below. plate, the machine may be malfunctioning; therefore, contact your nearest Brother authorized service center. Turn off the machine, and then install the bobbin and presser foot. -
Page 111: List Of Symptoms
If the reference page is “*”, contact your authorized A glove is worn when the keys are pressed. 13, 17 Brother dealer or the nearest Brother authorized service The keys are pressed with a fingernail. center. A non-electrostatic touch pen is being used. - Page 112 Troubleshooting Symptom, Cause/solution Reference Symptom, Cause/solution Reference A bobbin designed specifically for this machine is Fabric puckers. not used. There is a mistake in the upper or bobbin 20, 24 Upper threading is incorrect. threading. Bobbin is set incorrectly. Spool of thread is set incorrectly. Presser foot is attached incorrectly.
- Page 113 • If embroidery is done with the fabric hanging off removed, consult your authorized Brother dealer the table, the embroidery unit movement will be or the nearest Brother authorized service center. impaired. Support the fabric while embroidering. The handwheel does not turn smoothly.
-
Page 114: Error Messages
This message is displayed if a malfunction occurs. on again. Turn the machine off, then back on again. If this message continues to appear, please contact your authorized Brother dealer or the nearest Brother authorized service center. Cannot change the configuration of the characters. - Page 115 Troubleshooting Error messages Cause/solution Raise the buttonhole lever. This message is displayed when the buttonhole lever is down, a stitch other than a buttonhole is selected, and the “Start/Stop” button, etc. is pressed. The authentication and encryption methods used by The authentication/encryption methods used by the selected wireless access the selected wireless LAN access point/router are point/router are not supported by your machine.
- Page 116 Control] to [OFF] in the settings screen (page 15), or use the foot controller to operate the machine. If error message [F**] appears in the LCD while the machine is being used, the machine may be malfunctioning. Contact your authorized Brother dealer or the nearest Brother authorized service center.
-
Page 117: How Can I Find The Wireless Security Information (Ssid And Network Key)
Troubleshooting How can I find the wireless security information (SSID and network key) 1) You should see the documentation provided with your wireless access point/router. 2) The default SSID (wireless network name) could be the manufacturer’s name or the model name. 3) If you do not know the security information, please consult the router manufacturer, your system administrator, or internet provider. -
Page 118: Specifications
Specification drive. Dimensions of Approx. 480 mm (W) × 250 mm (D) × 300 When an update program is available on the Brother machine mm (H) support website at “ http://s.brother/cpham/ ”, please (Approx. 18-7/8 inches (W) × 9-7/8 inches download the file(s) following the instructions on the (D) ×... -
Page 119: Index
Index Index Numerics Inserting a piping ................. 62 1/4" piecing foot ................63 Joining ..................70 Jump Stitch Trim ................93 Adjustable zipper/piping foot ............61 Aligning the position ..............99 Appliqué ..............62 Automatic fabric sensor system ............ 36 Knee lifter .................. - Page 120 Index Scallop stitching ................69 Sewing speed controller ............... 10 Shell tuck stitch ................69 Size ..................14 Smocking ..................69 Speed ................... 21 Split embroidery patterns ............. 96 Spool cap ..................20 Spool net ..................21 Stabilizer ..................82 Step stitch patterns ...............
- Page 124 Google Play™ App Store This machine is approved for use in the country of purchase only. Local Brother companies or their dealers will only support machines purchased in their own countries. Design Database Transfer is a dedicated Windows application for wirelessly transferring embroidery data from a computer to the machine.
Need help?
Do you have a question about the NQ3700D and is the answer not in the manual?
Questions and answers