Sign In
Upload
Download
Table of Contents
Contents
Add to my manuals
Delete from my manuals
Share
URL of this page:
HTML Link:
Bookmark this page
Add
Manual will be automatically added to "My Manuals"
Print this page
×
Bookmark added
×
Added to my manuals
Manuals
Brands
Brother Manuals
Sewing Machine
888-G60
Operation manual
Brother 888-G60 Operation Manual
Hide thumbs
1
2
3
4
5
6
7
8
9
Table Of Contents
10
11
12
13
14
15
16
17
18
19
20
21
22
23
24
25
26
27
28
29
30
31
32
33
34
35
36
37
38
39
40
41
42
43
44
45
46
47
48
49
50
51
52
53
54
55
56
57
58
59
60
61
62
63
64
65
66
67
68
page
of
68
Go
/
68
Contents
Table of Contents
Troubleshooting
Bookmarks
Table of Contents
Table of Contents
Chapter 1 GETTING READY
Names of Machine Parts
Included Accessories
Turning the Machine On/Off
LCD Operation
Settings Screen
Adjusting Input Sensitivity for Operation Keys
Wireless Network Connection Functions
Operations Available with a Wireless Network Connection
Enabling a Wireless Network Connection
Using the Wizard to Set up the Wireless Network Connection
Winding/Installing the Bobbin
Winding the Bobbin
Installing the Bobbin
Upper Threading
Threading the Upper Thread
Replacing the Needle
Checking the Needle
Chapter 2 EMBROIDERY
Embroidering Preparation
Attaching the Embroidery Unit
Embroidering Attractive Finishes
Hooping the Fabric in the Embroidery Frame
Attaching the Embroidery Frame
Embroidering
Selecting an Embroidery Pattern
Embroidering a Pattern
Embroidery Foot Auto down
Adjusting Thread Tension
Adjusting the Bobbin Case (with no Color on the Screw)
Using the Automatic Thread Cutting Function (End Color Trim)
Using the Thread Trimming Function (Jump Stitch Trim)
Embroidering the Appliqué Patterns
Using a Frame Pattern to Make an Appliqué
Split Embroidery Patterns
Editing Patterns (Pattern Editing Screen)
Editing Patterns (Embroidery Settings Screen)
Aligning the Pattern and the Needle Position
Embroidering Linked Characters
Thread Color Sorting
Using the Memory Function
Saving Embroidery Patterns
Retrieving Embroidery Patterns
Chapter 3 APPENDIX
Care and Maintenance
Cleaning the LCD
Cleaning the Machine Surface
Restrictions on Oiling
Precautions on Storing the Machine
Cleaning the Race
Touch Panel Is Malfunctioning
Replacing the Embroidery Foot
Troubleshooting
List of Symptoms
Error Messages
How Can I Find the Wireless Security Information (SSID and Network Key)
Operation Beeps
Specifications
Updating Your Machine's Software
Advertisement
Quick Links
1
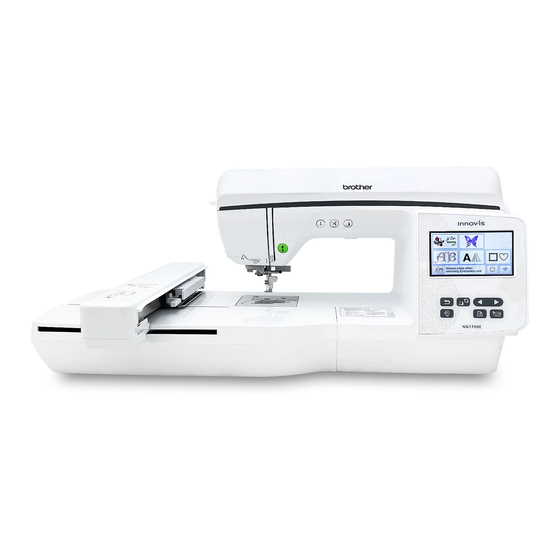
Names of Machine Parts
Download this manual
Operation Manual
Embroidery Machine
Product Code: 888-G60/G70/G72
Be sure to read this document before using the machine.
We recommend that you keep this document nearby for future reference.
Table of
Contents
Previous
Page
Next
Page
1
2
3
4
5
Advertisement
Table of Contents
Need help?
Do you have a question about the 888-G60 and is the answer not in the manual?
Ask a question
Questions and answers
Related Manuals for Brother 888-G60
Sewing Machine Brother NQ3500D Operation Manual
Embroidery and sewing machine (208 pages)
Sewing Machine Brother BP3500D Operation Manual
Embroidery and sewing machine (207 pages)
Sewing Machine Brother 888-G00 Operation Manual
Embroidery and sewing machine (208 pages)
Sewing Machine Brother Innov-Is NV2600 Operation Manual
Embroidery and sewing machine (208 pages)
Sewing Machine Brother 888-g80 Operation Manual
Embroidery machine (100 pages)
Sewing Machine Brother 888-G80 Quick Reference Manual
(20 pages)
Sewing Machine Brother NV870SE Operation Manual
(101 pages)
Sewing Machine Brother NV800E Operation Manual
(100 pages)
Sewing Machine Brother 888-G30 Operation Manual
Embroidery and sewing machine (124 pages)
Sewing Machine Brother NQ3700D Operation Manual
Embroidery and sewing machine (124 pages)
Sewing Machine Brother 888-G90 Operation Manual
(100 pages)
Sewing Machine Brother 888-G10 Operation Manual
Embroidery and sewing machine (212 pages)
Sewing Machine Brother NQ3600D Operation Manual
Embroidery and sewing machine (212 pages)
Sewing Machine Brother XM2701 Operation Manual
(108 pages)
Sewing Machine Brother ST371HD Operation Manual
(52 pages)
Sewing Machine Brother LB5000S Operation Manual
Embroidery and sewing machine (100 pages)
This manual is also suitable for:
888-g70
888-g72
Nq1700e
Table of Contents
Print
Rename the bookmark
Delete bookmark?
Delete from my manuals?
Login
Sign In
OR
Sign in with Facebook
Sign in with Google
Upload manual
Upload from disk
Upload from URL


Need help?
Do you have a question about the 888-G60 and is the answer not in the manual?
Questions and answers