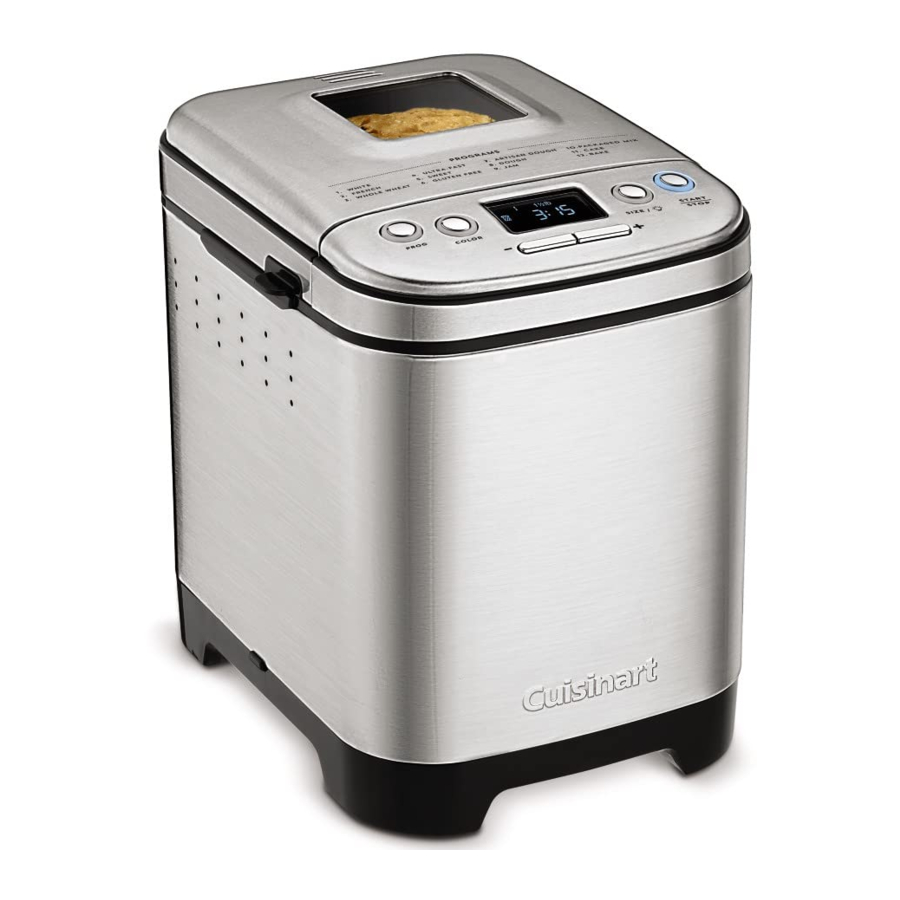
Cuisinart CBK-110C - Compact Automatic Bread Maker Manual & Recipes
- Instruction/recipe booklet (19 pages)
Advertisement
- 1 IMPORTANT SAFEGUARDS
- 2 BEFORE FIRST USE
- 3 PARTS AND FEATURES
- 4 CONTROL PANEL
- 5 OPERATING INSTRUCTIONS
- 6 POWER FAILURE BACKUP
- 7 TYPES OF BREADS AND PROGRAMS
- 8 PROGRAMS AND TIMING
- 9 MEASURING INGREDIENTS
- 10 LOADING INGREDIENTS INTO THE BREAD PAN
- 11 MEASUREMENT/CONVERSION CHART
- 12 INGREDIENT CONVERSION CHART
- 13 CLEANING AND CARE
- 14 TIPS AND HINTS
- 15 DEVICE PANTRY
- 16 GLUTEN-FREE INGREDIENTS
- 17 TROUBLESHOOTING
- 18 Documents / Resources
IMPORTANT SAFEGUARDS
When using electrical appliances, especially when children are present, basic safety precautions should always be taken, including the following:
- READ ALL INSTRUCTIONS, PRODUCT LABELS AND WARNINGS BEFORE USING THIS BREAD MAKER.
- Do not touch hot surfaces; carry the unit by plastic base. Always use oven mitts when handling hot material, and allow metal parts to cool before cleaning. Allow the bread maker to cool thoroughly before putting on or taking off parts.
- When unit is not in use and before cleaning, unplug the bread maker from wall outlet. Let the bread maker cool down completely before assembling or disassembling it.
- To protect against risk of electric shock, do not immerse the appliance or plugs in water or other liquids.
- Close supervision is always necessary when this or any appliance is used near children or incapacitated persons.
- Do not allow anything to rest on the power cord. Do not plug in cord where people may walk or trip on it. Unplug this bread maker from the wall outlet when not in use, before you leave for a trip, or go out for a long period of time.
- Do not operate this or any appliance with a frayed or damaged cord or plug, or after the appliance malfunctions or is dropped or has been damaged in any manner. Take appliance to the nearest authorized service facility for examination, repair, or electric or mechanical adjustment.
- Do not let the cord dangle over the edge of a table or counter or touch hot surfaces. Do not place on an unsteady or cloth-covered surface.
- Avoid contact with moving parts.
![shock hazard]()
![burn hazard]()
Do not use attachments not recommended by the manufacturer. They may cause fire, electric shock or injury or may damage the unit and void the warranty.- Do not use outdoors or for commercial purposes.
- Do not place the appliance near a hot gas or electric burner, or in a heated oven.
- Keep power cord away from the hot surface of this bread maker. Do not put any flammable objects on the hot surface of this bread maker.
- Place this bread maker a minimum of 2 inches away from any wall or other object.
- Do not use this bread maker for other than its intended use.
- When plugging or unplugging this bread maker, be sure not to touch the plug blades with your fingers.
- Before unplugging, press and hold the START/STOP button for 1 to 3 seconds to cancel any programs, then grip plug and pull from wall outlet. Never pull on the cord.
- Use of extension cords: A short power-supply cord has been provided to reduce the risk of injury resulting from becoming entangled in or tripping over a longer cord. Extension cords may be used with care. The marked electrical rating of the extension cord should be at least as great as the electrical rating of the appliance. The cord should be arranged so that it will not drape over the counter or tabletop where it can be pulled by children or tripped over accidentally. If the appliance is of the grounded type, the extension cord should be a grounding-type 3-wire cord.
- If electric circuit is overloaded with other appliances, your bread maker may not operate properly. This bread maker should be operated on a separate electrical circuit from other operating appliances.
![burn hazard]() Do not operate your appliance in an appliance garage or under a wall cabinet. When storing in an appliance garage, always unplug the unit from the electrical outlet. Not doing so could create a risk of fire, especially if the appliance touches the walls of the garage or the door touches the unit as it closes.
Do not operate your appliance in an appliance garage or under a wall cabinet. When storing in an appliance garage, always unplug the unit from the electrical outlet. Not doing so could create a risk of fire, especially if the appliance touches the walls of the garage or the door touches the unit as it closes.- Preheating of the appliance is necessary.
- For household use only.
- This appliance is not intended for use by persons (including children) with reduced physical, sensory or mental capabilities, or lack of experience and knowledge, unless they have been given supervision or instruction concerning use of the appliance by a person responsible for their safety.
- Children should be supervised to ensure that they do not play with the appliance.
- Appliances are not intended to be operated by means of an external timer or separate remote-control system.


SAVE THESE INSTRUCTIONS
FOR HOUSEHOLD USE ONLY
SPECIAL CORD SET INSTRUCTIONS
NOTICE
This appliance has a polarized plug (one blade is wider than the other). To reduce the risk of electric shock, this plug will fit in a polarized outlet only one way. If the plug does not fit fully in the outlet, reverse the plug. If it still does not fit, contact a qualified electrician. Do not modify the plug in any way.
BEFORE FIRST USE
Remove all packing material and any promotional labels or stickers from your bread maker. Be sure that all parts of your new bread maker have been unpacked before discarding any packing materials. You may want to keep the box and packing materials for use at a later date.
Wipe housing with a damp cloth to remove any dust from the warehouse or shipping. Wash inside of lid with sponge or damp cloth. Wash kneading paddle and bread pan with warm, soapy water and dry completely.
PARTS AND FEATURES

- Lid
With viewing window - Control panel with LCD display See details on next page
- Baking chamber
- Removable bread pan with handle
Vertical loaf, nonstick coating - Kneading paddle
Removable, nonstick paddle - Heating element (not shown)
- Removable bread pan with handle
- Power cord (not shown)
- Pan hook
Helpful tool for lifting bread pan handle - BPA Free
All parts that come into contact with food are BPA free.
CONTROL PANEL

- LCD Display – Displays program, crust colour and loaf size selections. Also view cycle and delay start timing.
- PROG Button – Selects program; refer to the program list above display panel for options.
- COLOUR Button – Selects a light, medium or dark crust.
Light:![]() Medium:
Medium: ![]() Dark:
Dark: ![]()
- SIZE /
![]() –
– - Select a 1-lb. (454 g), 1½-lb. (680 g) or 2-lb. loaf.
- Enables internal chamber light.
- START/STOP Button – Starts and stops the bread-making process. Also controls Pause function.
- –/+ Buttons – Adjust time for bake program and delay start timer.
NOTE: Some program selections are limited to certain crust colours and loaf sizes. The LCD will display accordingly. Please see Programs and Timing for all available combinations.
OPERATING INSTRUCTIONS
- Remove bread pan from baking chamber by grasping the handle, turning the pan counterclockwise and lifting up. It may be helpful to first lift the handle of the bread pan by using the pan hook (see figure 1a). To properly attach the kneading paddle, insert onto shaft with wide base facing down (see figure 1b).
![]()
- Properly measure all ingredients and put into the bread pan in the exact order they are listed. Always put the liquids in first, the dry ingredients in next, and the yeast last. Yeast should not touch wet ingredients. Please refer to the Measuring and Loading Ingredients sections for instructions.
- Insert the bread pan back into the baking chamber, turning clockwise to lock in place.
- Close the lid and connect power cord to a standard electrical outlet.
- Select your program by pressing the PROG button.
- Select your crust colour (light, medium or dark) by pressing the COLOUR button. If no crust colour is selected, the unit will automatically default to dark crust.
- Select your loaf size (1-lb. [454 g]., 1½-lb. [680 g] or 2-lb.) by pressing the SIZE/
![]() button. If no loaf size is selected, the unit will automatically default to a 1½-lb. [680 g] loaf size.
button. If no loaf size is selected, the unit will automatically default to a 1½-lb. [680 g] loaf size. - If you would like the bread-making process to start immediately, press the START/STOP button now, the indicator will light to show that the bread maker is on.
- To cancel the process at any time, press and hold the START/STOP button for 3 seconds.

Delay Start Timer
The Cuisinart® Compact Automatic Bread Maker can be programmed up to 13 hours in advance. For example, you can program your bread maker at 8 p.m. to finish baking at 9 a.m. Be sure to set your timer based on when you would like your bread to be complete.
NOTE: Do not use perishable ingredients such as milk, eggs, cheese and yogurt with the Delay Start function.
To set the Delay Start Timer:
- Add ingredients.
- Select program, crust colour and loaf size.
- Set the number of hours ahead that you want the loaf to finish.
By pressing the + or – buttons you can set time for completion up to 13 hours later. Press to increase or decrease by 10-minute increments or hold button down to scroll faster. - Press the START/STOP button to begin the delay start countdown.
During Bread Making
The Process
Once you start a program, the unit will automatically take care of each step of the process until the loaf is done. An indicator on the LCD will show the current function: Knead, Rise, Bake, or Keep Warm.
Knead – Most bread types use 2 Knead cycles. The first Knead cycle quickly mixes the main ingredients. The second Knead cycle is longer, and continues the mixing process. The dough is "punched down" before the longer cycle begins, prior to removing the kneading paddle.
Rise – Rise cycles help to ensure the perfect consistency of all yeast breads.
During the Rise cycles, your bread maker will appear to be inactive. The display will show it is actually in Rise mode.
Bake – This bread maker will consistently regulate both baking time and temperature according to the recipe you select.
Keep Warm – Allows you to leave the finished bread in the machine to serve warm for up to 60 minutes. It also helps to keep the crust from becoming soggy if bread is not removed from the machine immediately after baking. Some crusts will darken slightly in Keep Warm.
Options:
- Light: Press and hold SIZE/
![]() for 3 seconds to turn on the internal chamber light at any time. The light will automatically turn off after 30 seconds, or press and hold again to turn off.
for 3 seconds to turn on the internal chamber light at any time. The light will automatically turn off after 30 seconds, or press and hold again to turn off. - Pause: You can pause the process for up to 10 minutes at any time by pressing the START/STOP button while the unit is on. The time and power light will flash while the program is paused. Press START/STOP to resume the program.
- Add-ins: An audible signal of 4 sets of 5 long beeps each will sound to remind you to add any additional ingredients your recipe requires. To do so, open the lid and add additional ingredients. Be sure to close the lid, once finished. This typically occurs during the second knead. The display will show "add-in" for a few minutes during the Knead cycle in case you miss the initial beeps.
- Removing kneading paddle: After mixing/kneading is complete, there will be an audible signal of 10 short beeps before the last Rise cycle, indicating the point at which the mixing/kneading is complete (the display will show "paddle" for one minute in case you miss the initial beeps). At this point in the bread-making process, you have the option of removing the kneading paddle, and/or re-shaping the dough, though neither is necessary. To do so:
- Press START/STOP to pause the program.
- Open the lid and remove the bread pan by the handle.
- Take the dough from the pan and remove the kneading paddle.
- Form the dough into a neat ball and place in the center of the bread pan.
- Replace the bread pan into the machine and turn clockwise to lock the bread pan into the unit. Close the lid.
- Press START/STOP to resume the program.
NOTE: If you plan to remove the dough and reshape it in another pan for baking in your conventional oven, this is the time to do so. Be sure to press and hold the START/STOP button to reset the machine, so it does not automatically resume the bread-making process after 10 minutes.
After Bread Making
There will be 10 beeps to signal the end of the Baking cycle; the LCD display window will read 00:00. Your bread will be kept warm for 60 minutes in the keep warm cycle. There will be one long beep at the end of the Keep Warm cycle and then unit will shut off. For optimal results, we recommend removing the loaf as soon as the Baking cycle is complete and letting it cool on a wire rack.
To remove bread from the pan:
- Open the lid and use pan hook to lift the bread pan handle. Using oven mitts, remove the bread pan by turning counterclockwise.
![]()
- Still using the oven mitts, hold the bottom of the bread pan, move the handle aside, and shake until the bread is released.
![]()
- For best results, allow the loaf to cool on a wire rack for 20 to 30 minutes prior to slicing.


NOTE: If you have not removed the kneading paddle before baking, be sure to remove the kneading paddle from the finished loaf. Use caution; the kneading paddle will be extremely hot.
POWER FAILURE BACKUP
This unit is equipped with a power failure backup system. In case of any disruption of the power supply, the unit will store in memory the stage of breadmaking cycle and resume once power is restored. The power backup feature can maintain memory for a power failure up to 15 minutes.
TYPES OF BREADS AND PROGRAMS
- White – The White program uses primarily all-purpose or bread flour.
- French – French breads require special timing and temperatures to achieve move the handle aside, and shake until the bread is released. that wonderful, crispy crust. Because they traditionally lack sugars or large amounts of fat, they tend to be lighter in colour.
- Whole Wheat – Whole-wheat bread is a yeast bread that is made with a significant portion of whole-wheat flour (50% or more), rather than with 100% all-purpose or white bread flour. Breads made from wholewheat flour are more nutritious because the flour is milled from the entire wheat berry (including the bran and the germ). Using whole-wheat flour produces a bread that is brown to dark brown in colour, and the breads are more flavourful and healthful than breads made with refined white flours (even though "lost" nutrients are added back into white flours). Many times they are denser than 100% white breads.
- Ultra-Fast – The Ultra-Fast program must be used with a recipe using rapid rise yeast, or the bread will not rise and bake properly. Almost any recipe can be modified by replacing standard yeast with an equal or larger amount of rapid rise yeast. NOTE: This program cannot be used with the gluten-free recipes.
- Sweet – The Sweet bread program is specifically designed to bake breads with high amounts of sugar, fats and proteins. These added ingredients tend to increase the height and browning of the finished loaves.
- Gluten-Free – Since gluten is found in most flours used in traditional bread baking, the ingredients to create gluten-free breads are unique. While they are "yeast breads," the doughs are generally wet and often have a batter-like consistency. It is also important not to over-mix or over-knead gluten-free doughs.
- Artisan Dough – This program allows the preparation of artisan doughs. There are several long, slow, cool rises that will enhance the development of texture, taste and crust in the final shaped and baked bread. This is a dough ONLY program. The dough can be baked using the Bake program, or shaped and baked in a conventional oven.
- Dough – There are two ways to prepare dough in the bread maker if you wish to bake it in a conventional oven. One way is by using our Dough program. It mixes ingredients, kneads and takes the dough through the two rises. It is appropriate for almost any dough recipe (except gluten free) and ideal for pizza dough. It is intended that the dough will be removed and shaped by hand and allowed to rise 1 or 2 more times out of the bread maker. Alternatively, you can choose a specific bread program from the menu options, and remove the dough when the Remove Paddle signal tones. This will take you through two rise cycles. This method is suitable for any alternative loaf shape, dinner rolls, braided challah bread, and so on. Last rise will take place outside the bread maker.
- Jam – The bread maker is a great cooking environment for homemade jams and compotes. The paddle automatically keeps the ingredients stirring through the process. The heating element is placed in a way that the contents will not get burned. The program starts in a heating phase so it will appear to be inactive. It will start mixing about 10 minutes into the program. We provide recipes to get you started. They make a wonderful complement to freshly baked bread!
- Packaged Mix – This program is meant for prepackaged yeast bread mixes intended for the bread machines. Mixes for 1½ and 2 lbs.
(680 and 907 g) work best. - Cake – Cake-like in texture, and often referred to as "quick breads," recipes for this program are usually baked in a shaped pan such as a loaf pan or muffin tin. They are a batter-type bread rather than a yeast dough, and get their leavening from baking powder, baking soda and eggs.
Add-ins must be added at the very beginning of the cycle with other basic ingredients. If the finished bread is a little moist on top when baking is complete (moisture will depend on ingredients of the cake), leave it in the bread maker on Keep Warm for 10 to 15 minutes, and it will continue baking – this is called "after cooking." - Bake – This program activates the bread maker for Bake function only. You can use this setting if you want the finished loaf to have a darker crust colour (this will only require a few extra minutes, so keep your eye on the loaf). Only the Bake function should be used to bake storepurchased doughs.
PROGRAMS AND TIMING
For each program, there are two times listed under ADD-INS and under REMOVE PADDLE. The Displayed Time is what you will see in the countdown timer window. The Elapsed Time under ADD-INS and REMOVE PADDLE is the number of minutes that have passed since you pressed start. Elapsed Times are listed to let you know when you should return.
| |||||
| Size: | Total Time: | Add-Ins | Remove Paddle | ||
| Displayed Time | Elapsed Time | Displayed Time | Elapsed Time | ||
| 1-lb. (454 g) | 3:18 | 2:40 | 38 mins | 2:05 | 1 hr 13 mins |
| 1½-lb. (680 g) | 3:25 | 2:45 | 40 mins | 2:10 | 1 hr 15 mins |
| 2-lb. (907 g) | 3:30 | 2:50 | 40 mins | 2:15 | 1 hr 15 mins |
| |||||
| Size: | Total Time: | Add-Ins | Remove Paddle | ||
| Displayed Time | Elapsed Time | Displayed Time | Elapsed Time | ||
| 1-lb. (454 g) | 4:05 | 2:55 | 1 hr 10 mins | 2:15 | 1 hr 50 mins |
| 1½-lb. (680 g) | 4:15 | 3:00 | 1 hr 15 mins | 2:20 | 1 hr 55 mins |
| 2-lb. (907 g) | 4:20 | 3:05 | 1 hr 15 mins | 2:25 | 1 hr 55 mins |
| |||||
| Size | Total Time: | Add-Ins | Remove Paddle | ||
| Displayed Time | Elapsed Time | Displayed Time | Elapsed Time | ||
| 1-lb. (454 g) | 3:57 | 3:10 | 47 mins | 2:25 | 1 hr 32 mins |
| 1½-lb. (680 g) | 4:05 | 3:15 | 50 mins | 2:30 | 1 hr 35 mins |
| 2-lb. (907 g) | 4:10 | 3:20 | 50 mins | 2:35 | 1 hr 35 mins |
| |||||
| Size | Total Time: | Add-Ins | Remove Paddle | ||
| Displayed Time | Elapsed Time | Displayed Time | Elapsed Time | ||
| 1-lb. (454 g) | 1:53 | 1:40 | 13 mins | 1:35 | 18 mins |
| 1½-lb. (680 g) | 2:03 | 1:50 | 13 mins | 1:45 | 18 mins |
| |||||
| Size: | Total Time: | Add-Ins | Remove Paddle | ||
| Displayed Time | Elapsed Time | Displayed Time | Elapsed Time | ||
| 1-lb. (454g) | 3:15 | 2:45 | 30 mins | 2:05 | 1 hr 10 mins |
| 1½-lb. (680g) | 3:20 | 2:50 | 30 mins | 2:10 | 1 hr 10 mins |
| |||||
| Size: | Total Time: | Add-Ins | Remove Paddle | ||
| Displayed Time | Elapsed Time | Displayed Time | Elapsed Time | ||
| 1½-lb. (680g) | 2:15 | 1:55 | 20 mins | 1:40 | 35 mins |
| |||||
| Total Time: | |||||
| 5:05 | |||||
| |||||
| Total Time: | |||||
| 1:30 | |||||
| |||||
| Total Time: | |||||
| 1:20 | |||||
| |||||
| Total Time: | Add-Ins | Remove Paddle | |||
| Displayed Time | Elapsed Time | Displayed Time | Elapsed Time | ||
| 2:34 | 2:14 | 20 mins | 1:04 | 1 hr 30 mins | |
| |||||
| Total Time: | |||||
| 1:52 | |||||
| |||||
| Total Time: | |||||
| 1:40 | |||||


NOTE: Removing the kneeding paddle is an optional step.
MEASURING INGREDIENTS

The MOST important rule of making bread:
Use exact measurements. This is the key to successful bread baking.
When measuring wet ingredients, use only liquid measuring cups with the cups/ ounces marked clearly on the side. After filling the measuring cup, place it on a flat surface and view it at eye level to make sure the amount of liquid is exact. Most recipes require liquids to be at room temperature.
When measuring dry ingredients, fill a dry measuring cup with a spoon and then level off the measurement with the back of a knife or a spatula to make sure the measurement is exact. Never use the cup to scoop the ingredients directly from container (for example, flour). By scooping, you could add up to one tablespoon (15 ml) of extra ingredients. Do not pack down, unless otherwise noted.
LOADING INGREDIENTS INTO THE BREAD PAN
The SECOND MOST important rule of making bread: Put the ingredients into the bread maker in the EXACT order given in the recipe. This means, in most cases:
- FIRST, liquid ingredients
- SECOND, dry ingredients
- LAST, yeast – Yeast must be separate from wet ingredients and salt. Create a small crater in dry ingredients using your finger or a spoon, and place yeast within the crater. Make sure yeast is fresh.
![]()

Also, make sure ALL ingredients are at room temperature, unless otherwise noted (that is, between 75˚F–90˚F [23°C-32°C]). Temperatures too cool or too warm can affect the way the bread rises and bakes. NOTE: Water should not be hot, or it will affect rising.
Last, it is a good idea to start with fresh ingredients. Fresh flour and fresh yeast are critical.
See Troubleshooting section to learn more.
MEASUREMENT/CONVERSION CHART
| 1½ teaspoons (7.5 ml) = ½ tablespoon | 8 tablespoons (120 ml) = ½ cup |
| 3 teaspoons (15 ml) = 1 tablespoon | 12 tablespoons (2.8 L) = ¾ cup |
| 1½ teaspoons (7.5 ml) = 1½ teaspoons | 16 tablespoons (3.7 L) = 1 cup |
| 2 tablespoons (30 ml) = ¹⁄ 8 cup | ³⁄ 8 cup (88 ml) = ¼ cup + 2 tablespoons |
| 4 tablespoons (60 ml) = ¼ cup | 5 ⁄ 8 cup (147 ml) = ½ cup + 2 tablespoons |
| 5 tablespoons + 1 teaspoon = ¹⁄3 cup (75 ml) = ¹⁄3 cup | ¹⁄2 cup cup (207 ml) = ¾ cup + 2 tablespoon |
INGREDIENT CONVERSION CHART
| INGREDIENT | VOLUME | WEIGHT IN GRAMS | WEIGHT IN OUNCES |
| Egg (out of shell) | 1 large | 50 grams | 1¾ ounce |
| Flour (All-Purpose, Bread or Whole Wheat) | 1 cup (237 ml) | 126 grams | 4½ ounces |
| Granulated Sugar | 1 tablespoon (15 ml) | 14 grams | ½ ounce |
| Kosher Salt | 1 teaspoon (5 ml) | 6 grams | 1 / 8 ounce |
| Unsalted Butter | 1 tablespoon (15 ml) | 14 grams | ½ ounce |
| Water | 1 cup (250 ml) | 237 grams | 8 ounces |
| Yeast, active dry | 1 teaspoon (5 ml) | 4 grams | 1 / 8 ounce |
CLEANING AND CARE

Unplug machine before cleaning. Do not put the bread maker in water or in a dishwasher. Do not use scrubbing brushes or chemical cleansers, as these will damage the machine. Use only a mild, nonabrasive cleanser to clean the outside of the bread maker.
Bread pan and kneading paddle – Pan and kneading paddle should be handwashed with warm water and soap. Do not use metal utensils as they will damage the nonstick surface.
Baking chamber – Remove all bread crumbs by wiping them away with a slightly damp cloth or clean pastry brush. DO NOT bend the heating element, which is located on the inside of the bread maker.
Lid – Wipe inside of lid with sponge or damp cloth. Lid should not be immersed in water.
Outer housing – Use only a mild, nonabrasive cleanser to clean the outside of the bread maker.
Control panel – Wipe with a slightly damp cloth as necessary. Take care not to allow water or cleaning fluids under buttons of control panel.
Maintenance – Any other servicing should be performed by an authorized service representative.
Keep your bread maker clean at all times.
Don't worry if the colour of the exterior of the baking pan changes over time.
The colour change is a result of steam and other moisture and does not affect the machine's performance.
If you have trouble removing the kneading paddle from bread pan, put warm, soapy water in the bread pan for 10 to 15 minutes – this will loosen the paddle.
TIPS AND HINTS
Use top-quality ingredients to make your bread-maker breads
Temperature of ingredients is important in bread-machine baking. Ideal temperatures are between 75°F–90°F (23°- 32°C). Use an instant-read thermometer to check the temperatures. Cold ingredients should be allowed to come to room temperature.
Measure all ingredients accurately and have them ready before adding to bread pan. This helps to ensure that you measure each ingredient correctly, and do not find that you get down to the last (or nearly last) ingredient and discover that it is not available in your pantry.
When measuring ingredients, use liquid measuring cups for liquids, and dry measures for dry ingredients. Stir all flours first, spoon into dry measure and level off using the flat side of a knife or spatula – do not pack down.
Add ingredients to the pan in this order – liquids, melted or softened butter, salt and sugars (including honey, molasses, syrup), herbs, flours, dried milk, vital wheat gluten (if using), yeast. Do not allow the yeast to touch the wet ingredients.
Giving the kneading paddle a light coating with a nonstick cooking spray or vegetable oil may make it easier to remove if it bakes into a loaf.
Bread-maker baking is affected by the temperature and humidity of the day – this is often the cause of varied dough consistency and results. On a humid day, you may need additional flour. Pay attention to the dough during the kneading process and if sticky, add flour 1 teaspoon (5 ml) at a time. Alternately, if it is especially dry, you may need to add additional liquid. In most cases, dough should be smooth and not cling to fingers when touched. Additional amounts of flour or liquid should be added 1 teaspoon (5 ml) at a time.
Scrape down sides of pan if ingredients are sticking to the sides.
If using perishable, fresh ingredients such as dairy products, eggs, chopped fruits or vegetables, do not use the Delay Start Timer feature. Some dairy products and eggs may be substituted by using dried ingredients, such as dried egg powders, dried buttermilk, or dry milk. Add the water to the machine first, then add the dried substitution after the flour to keep them separate. If you substitute these dried ingredients and have no other fresh, perishable ingredients in your bread recipe, you may then use the Delay Start Timer feature.
It is also important to keep yeast separate from salt if using Delay Start Timer feature – add salt with the liquids and the yeast last, on top of the flour and other dry ingredients.
Nuts and seeds, raisins and other dried fruits, shredded cheeses, chocolate morsels, and any other additions to the dough should be added when the AddIn signal sounds, except for the Cake program.
For a more uniform loaf of bread, remove the dough when you hear the Remove Paddle signal, then remove the kneading paddle and reshape the dough into a neat loaf. This will ensure a more uniformly shaped loaf of bread, particularly with the smaller 1- and 1½-pound (454 and 680 g) loaves.
Use the Whole Wheat program when baking breads containing not only wholewheat flour, but other heavy flours that will require a longer knead and rise – for example, pumpernickel bread.
All breads slice best when allowed to cool for a minimum of 30 minutes (preferably longer) before slicing.
For cake/quick breads, spray the bottom and halfway up the sides of the bread pan with cooking spray before adding ingredients, to assist in release. Loosen the loaf with a heatproof plastic spatula before turning out.
If bread bakes over the bread pan handle, let it cool, then remove bread from pan in unit.
Amounts/Sizes/Ingredients
For white breads and any recipe calling for a white flour, the best flour to use is unbleached, all-purpose flour. Doughs made using the Artisan program should use bread flour, which has a higher protein makeup.
A general formula for a 1½-pound (680 g) bread machine loaf is: 3 cups (750 ml) flour, 1 to 1¼ cups (250 to 300 ml) liquid, 1 to 1½ teaspoons (5 to 7.5 ml) salt, 1 to 2 teaspoons (5 ml to 10 ml) sugar, 1 to 1½ teaspoons (5 to 7.5 ml) yeast. Use this as your basic formula and make adjustments from there.
In general, a 2-cup (500 ml) flour recipe will produce a loaf that is about
1 pound (454 g), a 3-cup (750 ml) flour recipe will produce a loaf that is about 1½ pounds (680 g), and a 4-cup (1 L) flour recipe will produce a loaf that is about 2 pounds (907 g). Some recipes will have slightly larger or smaller amounts of flour for each size, and with mix-ins, they may weigh more than their specified weight.
You should not use more than 4½ cups (1.06 L) flour total in the bread machine. If you are adapting a recipe, and your mathematical measurements become something odd, such as half of an egg, whisk your egg well and then measure out half. A large egg is generally equal to about ¼ cup (60 ml).
It is important to measure ingredients accurately – do not be tempted to omit small amounts such as 1/8 teaspoon (0.5 ml). Baking is chemistry, and changing the formula by even this small amount can change the final product significantly.
For Higher Altitudes
Flour is drier at higher altitude levels and will absorb more liquid, so use less flour in the recipe. Pay attention to the dough as it mixes and kneads – if it appears dry, add more of the same liquid used in the recipe.
Doughs prepared and baked at higher altitude levels will tend to rise faster – use about 1/3 less yeast to help counteract this phenomenon.
Adding less sugar (where applicable) also helps in producing the proper dough and bread. Reduce sugar or sweetner by about ¼.
Also, adding a little more salt will retard the yeast action and promote slower, more even rising. Add no more than ¼ teaspoon (1 ml) of additional salt. Start with one of these changes to determine the best results.
DEVICE PANTRY
To be able to prepare breads quickly and easily in your Cuisinart®
Compact Automatic Bread Maker, we suggest keeping some basics on hand. Depending on the types of breads you and your family prefer, you may also want to have some of the other items readily available. Not all the ingredients listed are in the recipes, but can be added to improve taste and texture.
Storing Ingredients
Flours and other bread-making ingredients are prone to rancidity and should be stored properly. It is best to buy them in smaller quantities and purchase as needed. Many flours can be stored at room temperature, but more whole-grain and gluten-free flours are best kept in the freezer (in airtight bags/ containers). Always mark the date on the bag/container so you can keep track. Freezers can often impart flavours onto what is frozen in there, so be sure it is well sealed.
White Flours (all-purpose, bread and cake): These should be stored in a dark, cool place for up to 1 year (but best to go by the use-by date on the bag). These can also be put in the freezer for a year as well, but be sure to wrap well so they do not pick up any flavours or odours from the freezer. Whole-Grain and most Gluten-Free Flours: In a cool, dark place for up to 3 months, or in the freezer for up to 6 months.
Nut Flours: These are very prone to spoiling, so store in the refrigerator for up to 3 months or in the freezer for up to 6 months.
Starches and Gums: More stable than flours, these can be stored in a cool, dark place for at least a year.
Yeast: Always store in the refrigerator and check the expiration date prior to using.
All-Purpose Flour – Can be bleached or unbleached – we prefer unbleached. For the bread machine, all-purpose flour is used for most yeast and cake quick breads.
Baking Powder – Baking powder is a combination of baking soda and acid, so this leavener can be used in baked goods where there is no existing acid. Be sure to read the label because some baking powders use starches to keep the compound dry, which may affect those with gluten allergies.
Baking Soda – Baking soda is a chemical leavener that requires an acidic ingredient to activate. Examples include brown sugar, buttermilk, yogurt, etc. Not only does baking soda provide lift to your baked product, but it also improves browning.
Bread Flour – An unbleached flour high in protein and gluten. This is best for artisan-style breads. This flour can be used as a substitute for all-purpose flour and will give the baked bread more volume.
Cake Flour – A very soft flour with low protein. Do not use cake flour for yeast breads unless a recipe specifically requires it. It is most often used to make very tender cakes and pastries.
Eggs – Add taste, richness and colour to breads. They act as emulsifiers and aid in keeping breads fresh and moist. They also work as a leavener and help with the volume of the bread. Do not ever use with Delay Start feature unless using powdered egg or powdered egg white and adding with flour. Egg washes (egg beaten with water or milk) are used with some Dough Only recipes to brush on shaped dough after rising, before baking, to add colour and shine to finished baked goods. All recipes included use large eggs.
Fats (assorted) – Add flavour, nutrition and texture to breads. May be added to just about any bread recipe where such flavours are appropriate.
Nonfat Dry Milk – When loading ingredients, add powdered milk along with flour. Using dry milk instead of fresh milk enables you to use the Delay Start feature. Dry milk is also added to breads (often along with fresh milk/milk products) to produce a softer crumb.
Nuts, Seeds, Raisins – Add flavour, nutrition and texture to breads. May be added to just about any bread recipe where such flavours are appropriate.
Powdered Buttermilk – A shelf staple, this is essence of buttermilk without the milk solids. Acts as a preservative and retards the growth of bacteria and mold.
Salt – Salt is a necessary part of a yeast bread recipe – it not only adds or enhances flavour, but it controls the yeast and aids in the rising of the dough. We use non-iodized kosher salt in all of the recipes.
Sweeteners – Granulated sugar, brown sugar, honey, molasses, maple syrup, golden syrup and others, stimulate yeast growth and development.
Vital Wheat Gluten – A very high-protein flour made from hard wheat and treated to remove most of the starch. For regular yeast bread baking, vital wheat gluten is used primarily as an additive to enhance doughs made with low glutens, such as whole-wheat and other grains. When making Ultra-Fast breads, vital wheat gluten can provide a better rise in a shorter rising time.
Whole-Wheat Flour – Contains the wheat germ of the flour, giving it a higher fiber, nutritional, and fat content. Once thought of as "health food," breads that were heavy and dense, breads made with all or part whole- wheat flour are the most nutritious and can be light textured and appealing. Purchase good quality whole-wheat flour, and store in a refrigerator or freezer to prevent from turning rancid. Bring to room temperature before using for bread machine recipes.
Yeast – For most bread machine recipes, we recommend active dry, instant or bread machine yeast. The "Instant" type yeast is milled slightly finer and produced at lower temperatures, resulting in fewer "dead" cells. It gives very good results in the bread machine. Rapid rise yeast or quick rise yeast is specifically for the shorter/rapid/last-minute cycles, as it helps to shorten the rising cycle – adding vital wheat gluten as well, will aid in its rise.
GLUTEN-FREE INGREDIENTS
If you thought regular baking was a science, gluten-free baking has its own rules! To make gluten-free bread, a variety of flours and ingredients is necessary to develop a stable and desirable bread that can be used for slicing, toasting, and making sandwiches. We developed recipes that have a good balance of protein, fat and starch to create a delicious end result.
All of the following ingredients can be found either in the baking or gluten-free section of your local grocery store or in your local natural food market. They can also be easily found and ordered online. There are several commercial brands of gluten-free, all-purpose flour blends that can be used successfully.
Almond Flour – Almond flour adds a lot of protein to your bread, but is better left for savoury and sweet cakes rather than yeast breads. You can use either almond flour or almond meal, as long as it is finely ground.
Baking Powder – Baking powder is a combination of baking soda and acid, so this leavener can be used in baked goods where there is no existing acid. Be sure to read the label because some baking powders use starches to keep the compound dry, which may affect those with gluten allergies.
Baking Soda – Baking soda is a chemical leavener that requires an acidic ingredient to activate. Examples include brown sugar, buttermilk, yogurt, etc. Not only does baking soda provide lift to your baked product, but it also improves browning.
Buckwheat Flour – Buckwheat is not actually wheat at all. Buckwheat flour has a high protein content and a pleasant nutty flavour. It does need to be combined with other flours to produce a baked item with good structure.
Cornstarch – Cornstarch is a way to add structure and stability to a gluten-free bread that is otherwise provided by gluten. Be sure not to go overboard, or your finished bread will have a very starchy and unpleasant flavour.
Flax Seeds (ground) – When ground, flax seeds are even more nutritious and act as a binder to produce a stable structure in baked goods.
Garbanzo Bean Flour – Milled from garbanzo beans (chickpeas) and high in protein, garbanzo bean flour imparts a rich and sweet flavor in baked goods. Some find it to be overpowering, so it is better to use this flour with more savoury breads.
Guar Gum – Similar to xantham gum and interchangeable, is another thickening agent that helps with the structure of the bread. It should be used sparingly because it does impart a starchier flavour to baked goods than other gums or thickeners do.
Gluten-Free, All-Purpose Flour Blend – There are a number of these blends on the market now and they all work well. We have found in our testing that the ones with the higher percentage of rice flours tend to be the most neutral in flavour.
Nonfat Milk Powder – Nonfat milk powder adds structure to breads by acting as an emulsifier by linking gluten-free flours to fats. The milk proteins also increase browning.
Powdered Psyllium Husk – Full of fiber, powdered psyllium husk (or psyllium husk powder) works similarly to a gum. We have found it to be the best way to add structure and bind ingredients together in gluten-free recipes.
Oat Flour – Oat flour is very high in protein and is inexpensive to purchase prepared, or you can make your own (process rolled oats in a blender, food processor, or spice grinder until finely ground). This flour will add a slight nuttiness to baked breads.
Potato Starch – Another starch option for gluten-free breads to contribute to the structure of the loaf. It is also a good tenderizer and is best used with doughs that are higher in moisture.
Brown Rice Flour – Milled from the whole rice kernel (still contains the bran), brown rice flour is high in fiber and has a nuttier flavour than white rice flour. You want to use a flour that is as finely ground as possible – it should have a smooth, sandy texture. This flour is high in protein, 7.5%, so it is a good base for gluten-free baking.
White Rice Flour – Milled from polished white rice (where the bran and germ have been removed), white rice flour is considered to be very versatile in gluten-free baking because it has a rather mild, undetectable flavour. It is a bit lower in protein than brown rice flour, closer to 5%, but it blends well with other flours.
Sweet White Rice Flour – A starchier version of white rice flour (not actually sweet), it is ground from glutinous rice and is a better binder than brown or white rice flours. Only a small amount is needed and is a great addition when making your own gluten-free flour blend.
Sorghum Flour – This is a flour that is high in protein and fiber and is a good substitution for oat flour. Look for "sweet" white sorghum flour when purchasing.
Teff Flour – Very high in protein, it is a great addition to gluten-free breads. It has an earthy flavour, similar to whole-wheat flour.
Tapioca Starch (Flour) – This starch is a great binder for gluten-free breads and gives the finished breads good structure. Do not use too much of it or the bread will be too elastic.
Xantham Gum – Similar to guar gum, and interchangeable, xantham gum is a thickening agent and helps stabilize gluten-free breads. You only need a small amount to see the effects.
Yeast – Crucial to most breads, yeast is what brings your bread to life. There are many types, and in most cases we call for active, dry yeast or bread machine yeast, but when using the Ultra-Fast program, it is necessary to use rapid rise yeast. Always store yeast in the refrigerator and check the expiration date prior to using.
TROUBLESHOOTING
| Question | Answer |
| Why did my dough/bread not rise well? | There are a number of factors that could result in a short rise. Be sure that the yeast is fresh and that all ingredients are room temperature (75ºF to 90°F [23°C to 32°C]). If the liquids are too warm or too cold, they will not activate the yeast properly. Be sure the ingredients are put into the baking pan in the correct order. The salt should be as far away from the yeast as possible. Note that not all breads rise as much as others. Whole-wheat or whole-grain breads tend to be shorter than white breads. Also, breads with more sugar or sweeteners, and ones that are enriched with eggs, will be taller than regular white breads. |
| Why is my bread sunken/ uneven on the top? | Humidity and room temperature can greatly affect the results of baked yeast breads. Keep the bread maker away from direct sunlight. If the humidity is especially high, add an additional teaspoon per cup of flour used in the recipe. |
| Why does my yeast bread have an under-baked/gummy texture? | The dough was too wet, or possibly does not have enough white flour (for gluten development). Add a bit more flour, 1 tablespoon (15 ml) (15 ml) per cup, or reduce the amount of whole-wheat/grain flours in the recipe and substitute white flour. |
| Why does the interior of my yeast bread have excessive holes? | This would happen if either the bread is too wet or if too much yeast was used. Double-check the recipe and, if necessary, make changes by either adding a small amount of flour or reducing the yeast slightly. |
| Why is my yeast bread heavy and dense? | This could be one of a few different issues. The mixture may be too dry as a result of not enough liquid or because lower fat substitutes were used. Another reason may be not using enough yeast. If this is occurring in whole-wheat/grain bread, you may need to use vital wheat gluten to help with the structure of the finished bread. |
| Why are the corners/edges of the bread full of extra flour/ not evenly mixed? | Sometimes ingredients will stick to the corners of the pan, most commonly in the cake/quick bread or gluten-free bread (both have more batter-like consistencies than a dough). Check the bread about 10 minutes into the kneading/mixing time and pause to scrape down if necessary. Lightly coating the bread pan with nonstick cooking spray will help to prevent this from happening as well. |
| How do I get the kneading paddle out of the loaf? | There are two options. In most programs you can remove the paddle after you hear the Remove Paddle signal (prior to the final rise). If this is not an option, or you were not present to remove it, wait until the bread is cooled and then, carefully take out the paddle (use caution because it may be hot). |
| Why is the unit smoking/ producing a burning smell? | Most likely this is from ingredients that fell into the bottom of the bread machine or onto the heating element. If it is excessive, unplug the unit and once cool, clean the interior of the unit. Plug the unit back in and resume the program (the program will be stored in memory for a maximum of 15 minutes). In most cases, the smoke/odour will be minimal and it will dissipate. |
| What do the error codes mean? | The display shows "HHH" (accompanied by beeps): The unit's internal temperature is too high. This usually occurs when trying to make two successive loaves. Open the lid and allow the unit to cool 10–20 minutes. The display shows "LLL" (accompanied by beeps): The unit's internal temperature is too low to bake bread. Stop the beeps by pressing the START/STOP button. The display shows "EEO" or "EEI" (accompanied by beeps): Unplug the unit and contact your nearby service center. |

Documents / ResourcesDownload manual
Here you can download full pdf version of manual, it may contain additional safety instructions, warranty information, FCC rules, etc.
Download Cuisinart CBK-110C - Compact Automatic Bread Maker Manual & Recipes
Advertisement


Need help?
Do you have a question about the CBK-110C and is the answer not in the manual?
Questions and answers