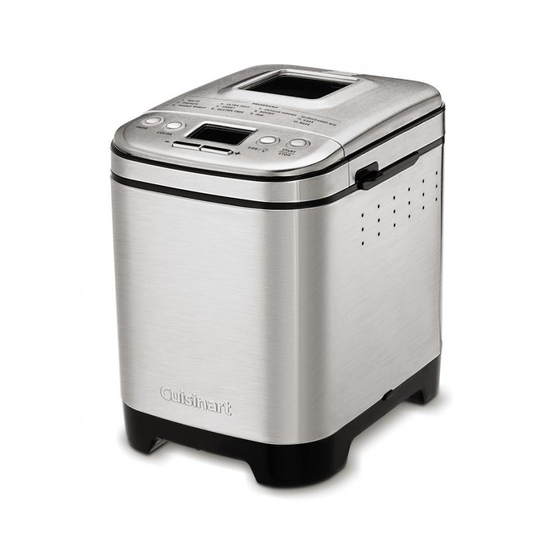
Cuisinart CBK-110 Instruction Booklet
Compact automatic bread maker
Hide thumbs
Also See for CBK-110:
- Quick reference manual (2 pages) ,
- Instruction and recipe booklet (41 pages)

Related Manuals for Cuisinart CBK-110


Summary of Contents for Cuisinart CBK-110
- Page 1 INSTRUCTION BOOKLET BOOK Compact Automatic Bread Maker atic Bread Maker CBK-110 For your safety and continued enjoyment of this product, always read the instruction book carefully before using.
-
Page 2: Important Safeguards
IMPORTANT SAFEGUARDS 10. Do not use attachments not recommended by the manufacturer. They may cause fire, electric shock or injury or may damage the unit and void the warranty. When using electrical appliances, especially when children are present, basic safety precautions should always be taken, 11. -
Page 3: Table Of Contents
CONTENTS 20. Do not operate your appliance in an appliance garage or under a wall cabinet. When storing in an appliance garage, always Important Safeguards ........2 unplug the unit from the electrical outlet. -
Page 4: Parts And Features
PARTS AND FEATURES 4. Power cord (not shown) 1. Lid 5. Pan hook With viewing window Helpful tool for lifting bread 2. Control panel with LCD display pan handle See details on next page 3. Baking chamber a. Removable bread pan with handle Vertical loaf, nonstick coating b. -
Page 5: Operating Instructions
3 seconds. Delay Start Timer ® The Cuisinart Compact Automatic Bread Maker can be programmed up to 13 hours in advance. For example, you can program your bread maker at 8 p.m. to finish baking at 9 a.m. Be sure to set your timer based on when you would like your bread to be complete. - Page 6 During Bread Making 4. Removing kneading paddle: After mixing/kneading is complete, there will be an audible signal of 10 short beeps before the last Rise The Process cycle, indicating the point at which the mixing/kneading is complete Once you start a program, the unit will automatically take care of each step (the display will show “paddle”...
-
Page 7: Power Failure Backup
To remove bread from the pan: c. For best results, allow the loaf to cool on a wire rack for 20 to 30 minutes prior to slicing. a. Open the lid and use pan hook to lift the bread pan handle. Using oven mitts, remove the bread pan by turning counterclockwise. -
Page 8: Types Of Breads And Programs
TYPES OF BREADS AND PROGRAMS 8. Dough – There are two ways to prepare dough in the bread maker if you wish to bake it in a conventional oven. One way is by using our 1. White – The White program uses primarily all-purpose or bread flour. Dough program. -
Page 9: Programs And Timing
PROGRAMS AND TIMING For each program, there are two times listed under ADD-INS and under REMOVE PADDLE. The Displayed Time is what you will see in the countdown timer window. The Elapsed Time under ADD-INS and REMOVE PADDLE is the number of minutes that have passed since you pressed start. Elapsed Times are listed to let you know when you should return. - Page 10 5. SWEET Color: 9. JAM Size: Total Add-Ins Remove Paddle Total Time: Time: Displayed Time Elapsed Time Displayed Time Elapsed Time 1:20 1-lb. 3:15 2:45 30 mins 2:05 1 hr 10 mins 1½-lb. 3:20 2:50 30 mins 2:10 1 hr 10 mins 10.
-
Page 11: Measuring Ingredients
MEASURING INGREDIENTS Important Note: The MOST important rule of making bread: Yeast/Baking Powder or Baking Soda Use exact measurements. This is the key to successful bread baking. Dry Ingredients When measuring wet ingredients, use only liquid measuring cups with the Water or Liquids cups/ounces marked clearly on the side. -
Page 12: Cleaning And Care
CLEANING AND CARE TIPS AND HINTS Caution: Unplug machine before cleaning. Do not put the bread maker Important: Use top-quality ingredients to make your bread-maker breads. in water or in a dishwasher. Do not use scrubbing brushes or chemical Temperature of ingredients is important in bread-machine baking. Ideal cleansers, as these will damage the machine. -
Page 13: Bread Maker Pantry/Gluten-Free Ingredients
BREAD MAKER PANTRY Amounts/Sizes/Ingredients To be able to prepare breads quickly and easily in your Cuisinart ® For white breads and any recipe calling for a white flour, the best flour to use Compact Automatic Bread Maker, we suggest keeping some basics on hand. - Page 14 more whole-grain and gluten-free flours are best kept in the freezer (in airtight Eggs – Add taste, richness and color to breads. They act as emulsifiers bags/containers). Always mark the date on the bag/container so you can and aid in keeping breads fresh and moist. They also work as a leavener keep track.
- Page 15 to prevent from turning rancid. Bring to room temperature before using for Cornstarch – Cornstarch is a way to add structure and stability to a gluten- bread machine recipes. free bread that is otherwise provided by gluten. Be sure not to go overboard, or your finished bread will have a very starchy and unpleasant flavor.
- Page 16 smooth, sandy texture. This flour is high in protein, 7.5%, so it is a good base for gluten-free baking. White Rice Flour – Milled from polished white rice (where the bran and germ have been removed), white rice flour is considered to be very versatile in gluten-free baking because it has a rather mild, undetectable flavor.
-
Page 17: Troubleshooting
TROUBLESHOOTING Question Answer Why did my dough/bread not There are a number of factors that could result in a short rise. Be sure that the yeast is fresh and that all ingredients are room rise well? temperature (75ºF to 90°F). If the liquids are too warm or too cold, they will not activate the yeast properly. Be sure the ingredients are put into the baking pan in the correct order. -
Page 18: Warranty
Please Bread Maker will be free of defects in materials and workmanship under normal pay by check or money order made payable to Cuisinart. NOTE: For added home use for 3 years from the date of original purchase.
Need help?
Do you have a question about the CBK-110 and is the answer not in the manual?
Questions and answers
how come I can not change the bread size, it just stays at 1 and 1/2?
You can't change the bread size on the Cuisinart CBK-110 for certain programs like dough, jam, or cake because these programs do not have a weight setting. Only specific programs like the regular white bread cycle allow size selection. If the program doesn't support changing the loaf size, the machine will not let you adjust it.
This answer is automatically generated
Bought our first cuisinart compact bread maker. Husband out in bleached flour instead of unleashed and it sunk? Is that the reason it didn’t work or is something else wrong?